My Polish Collection

IMG_7212
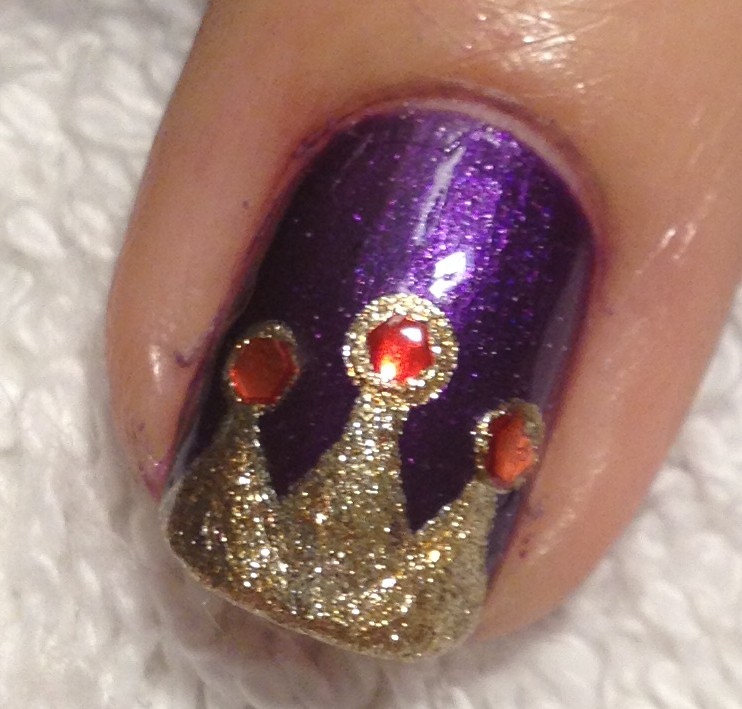
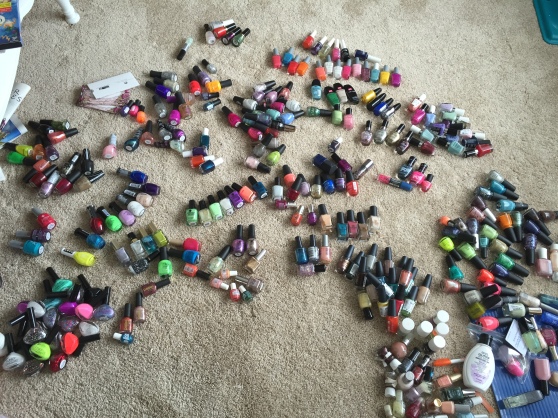
For the past few years I’ve had my polishes arranged by color.  I have some dupes (and near dupes) and it just made sense to me to keep them next to each other on my nail polish rack.  Recently, though, I started to think that it would look nice if the were organized by brand.  Then all of the like bottles would be next to each other.  Of course the first logical step in my reorganization was to dump all of my polishes onto my living room floor.  And that’s what you see here in the above picture.

As I started to sort them, I decided to snap a picture of each brand, and here’s what I found…

IMG_7216

I have a huge pile of Wet n Wild polishes. This was probably the first brand of polish I started to accumulate back in my youth. The bottles in the upper left with the white caps are OLD! I’ve got a good mix of permanent and limited edition polishes. They’re all between $1-$3, so it’s kind of a no-brainer to grab an awesome Wet n Wild polish when I see it.


IMG_7226

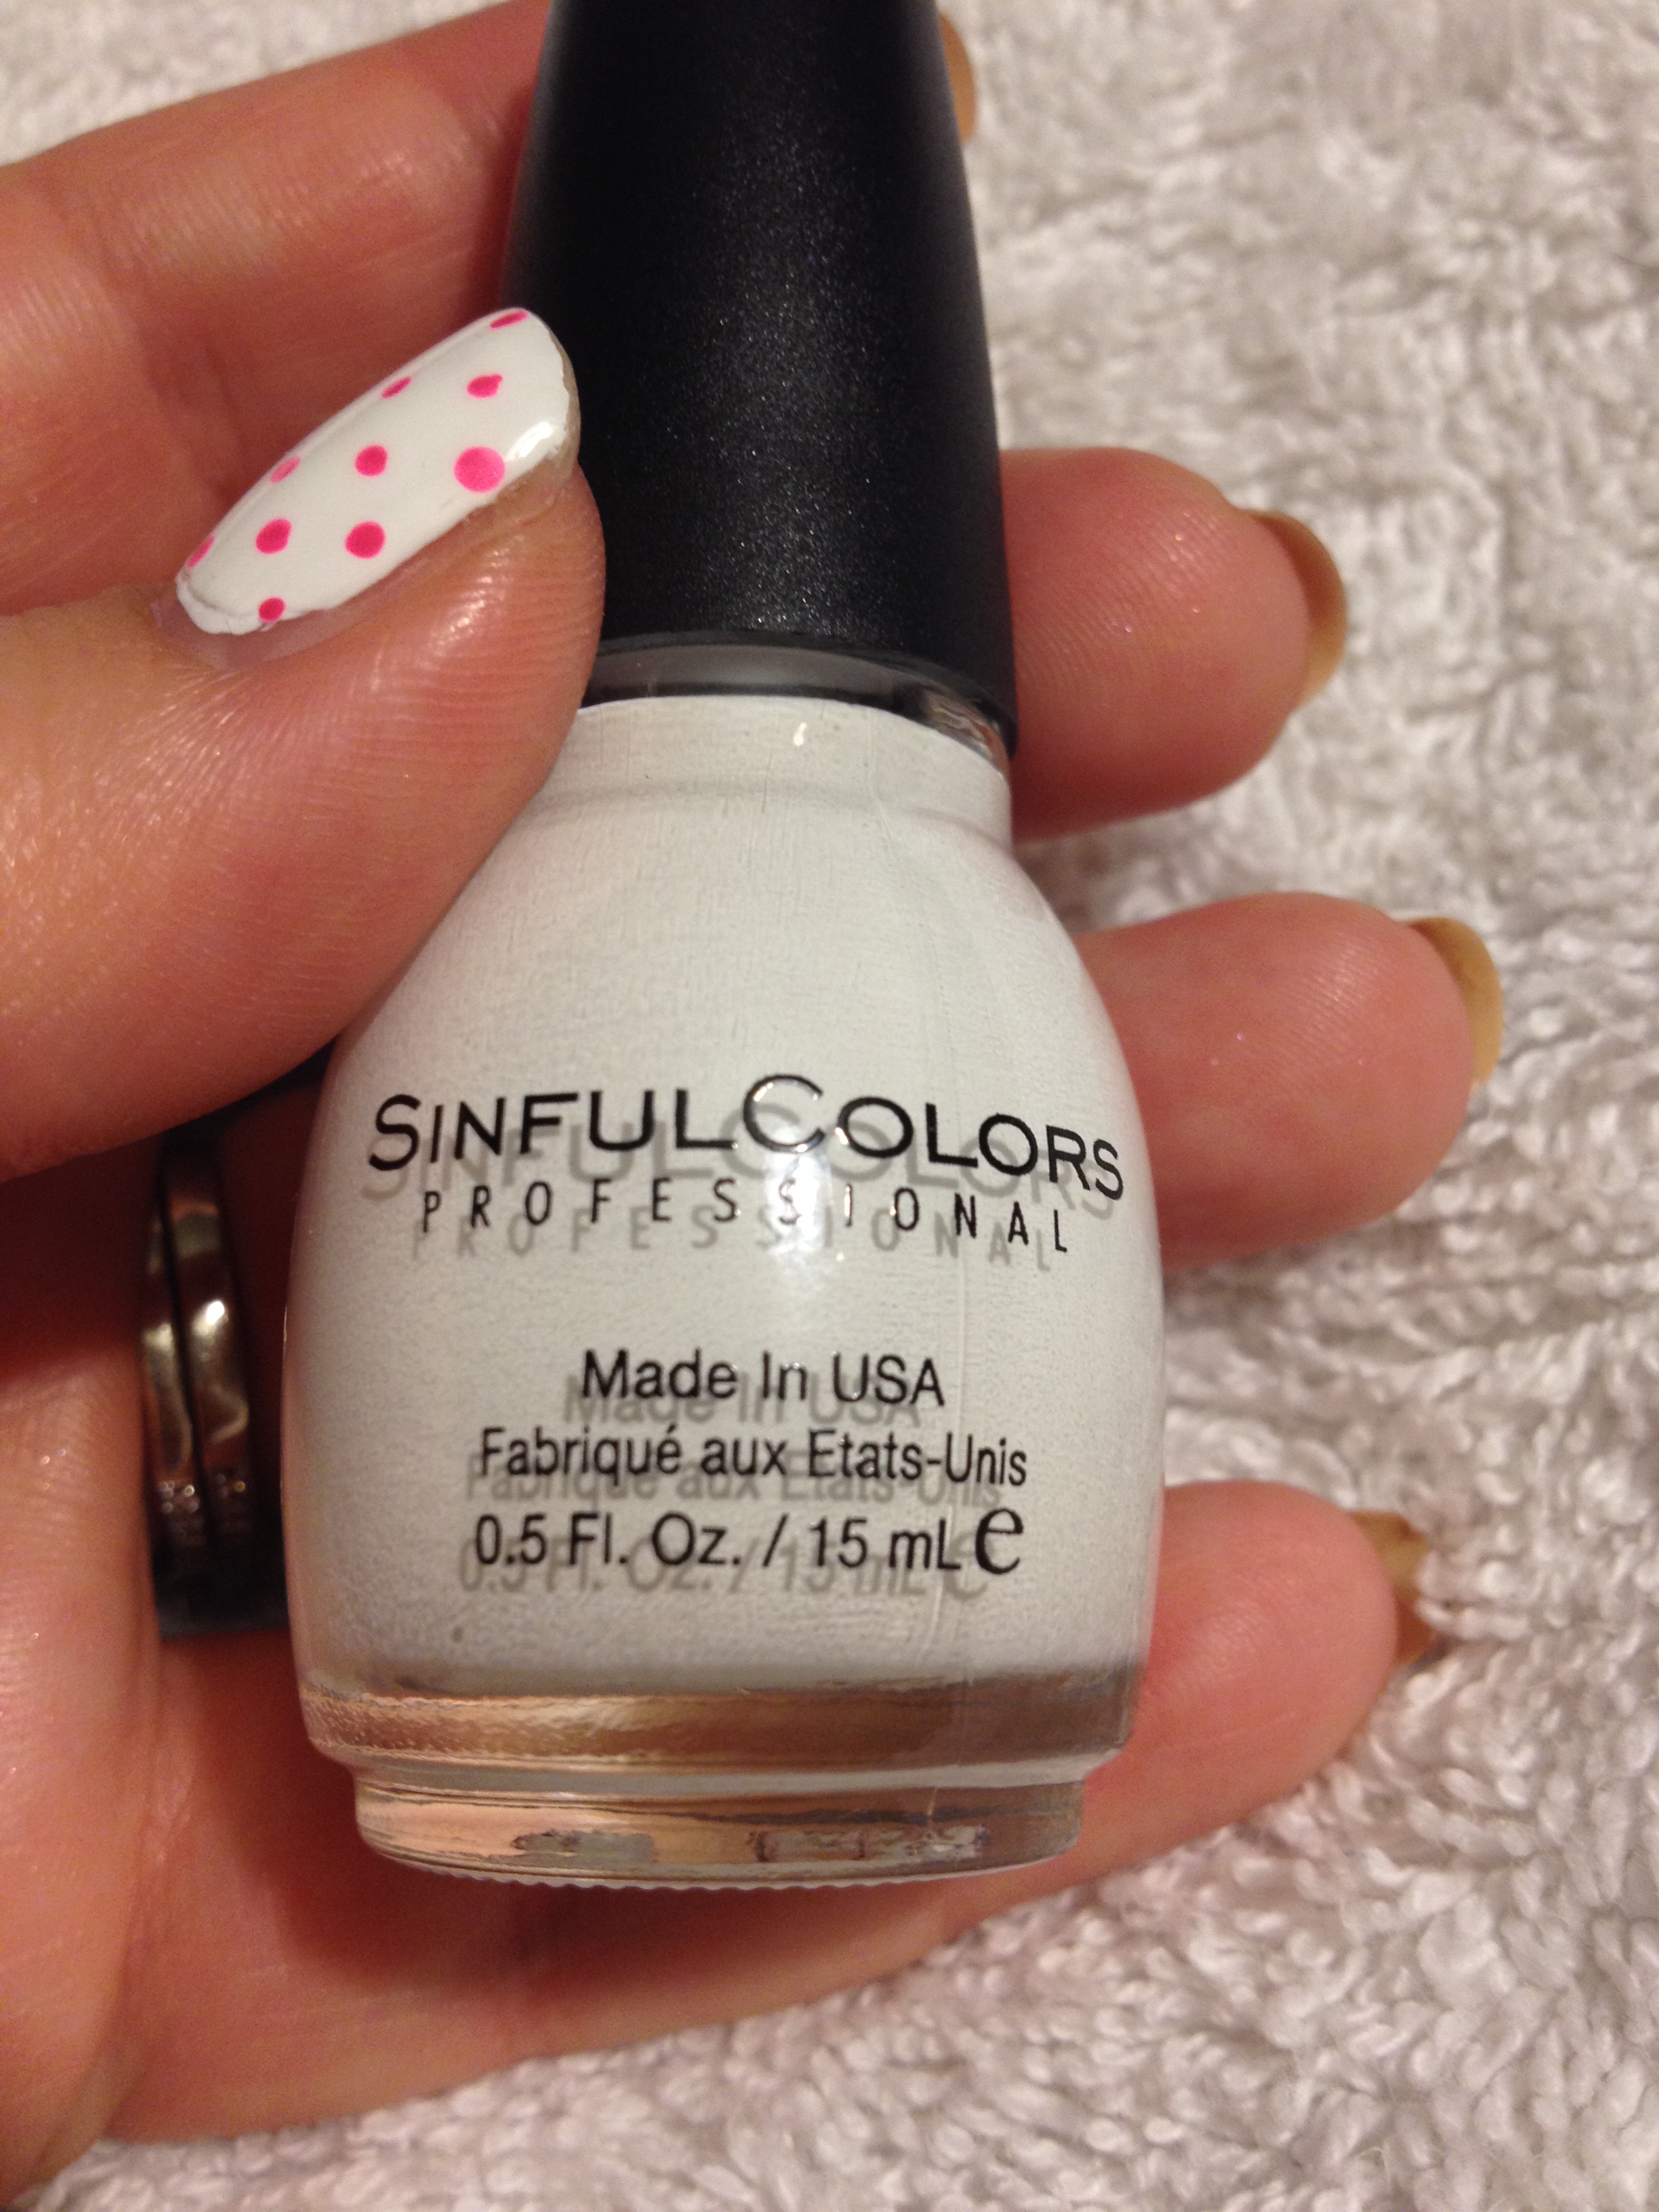
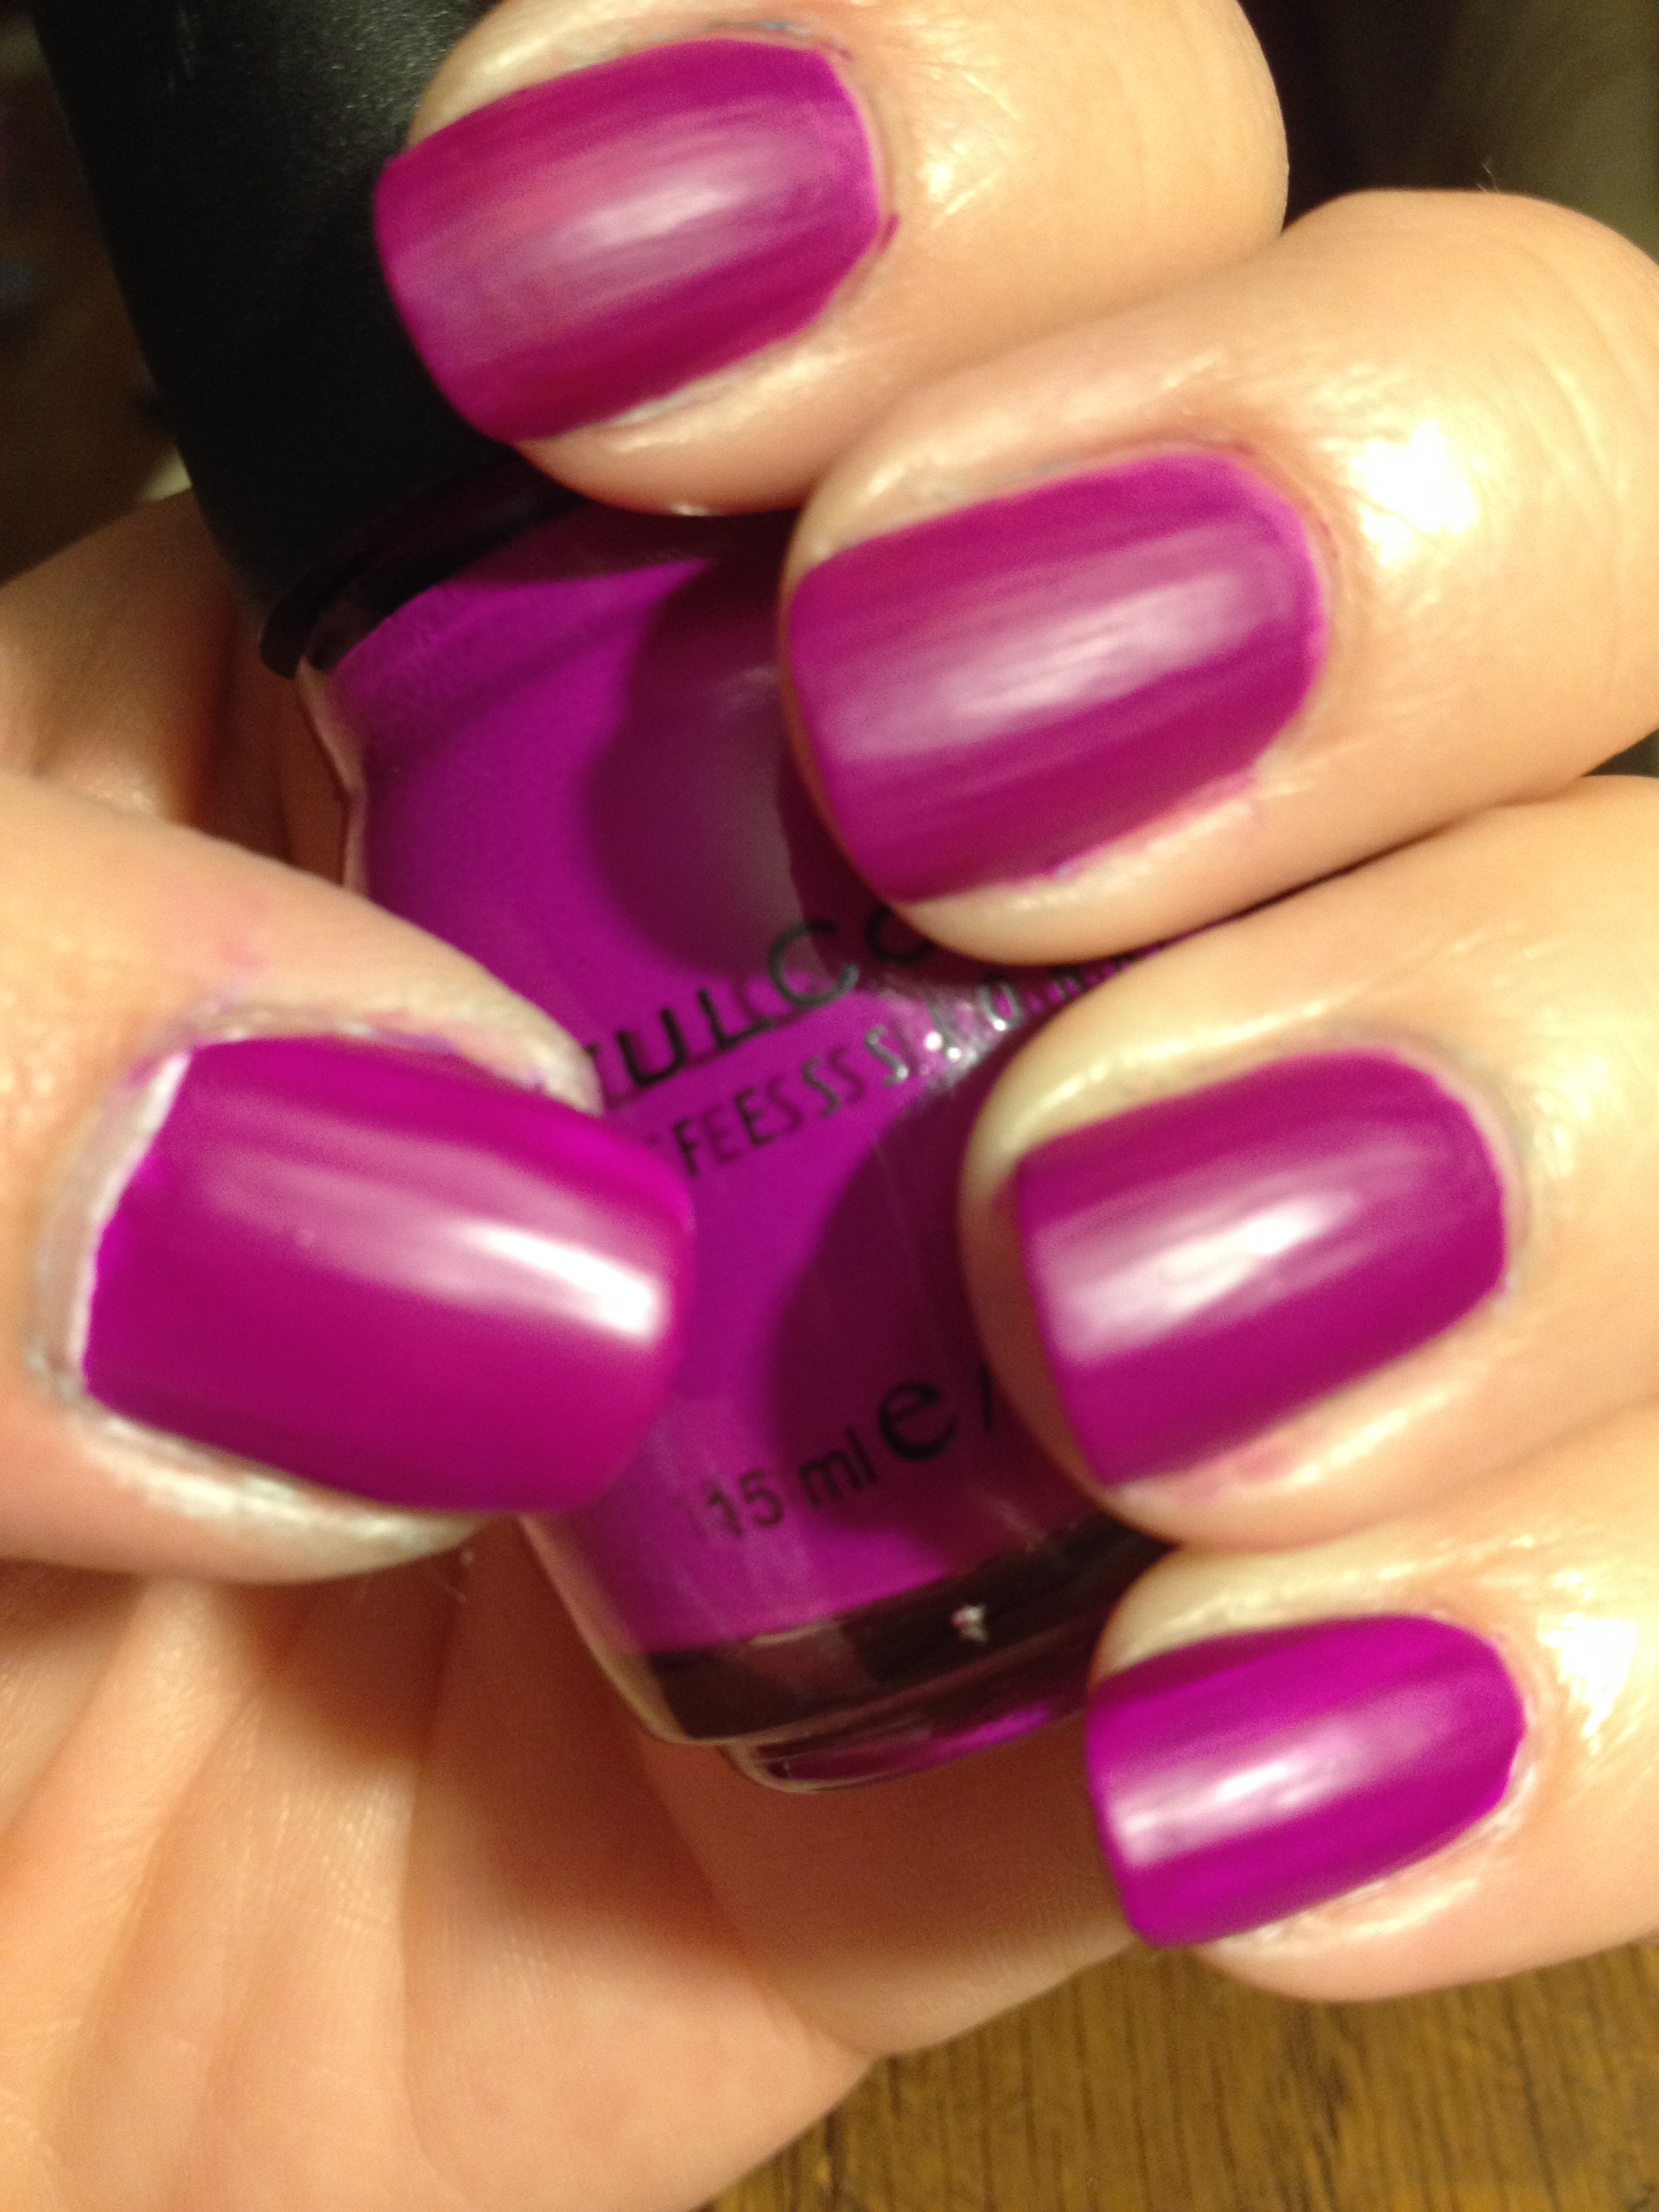
I have a lot of Sinful Colors. I mean, they’re so readily available and there’s only $1.99. They are always on top of color trends. Really, what’s not to love?

IMG_7214

Here’s my little Revlon pile. My favorite is on the left: Matte Pearl Glaze. It’s an awesome transformative topcoat for pretty much any polish.

IMG_7230

My L’Oreals. Yes, that’s Masked Affair on the left.

IMG_7224

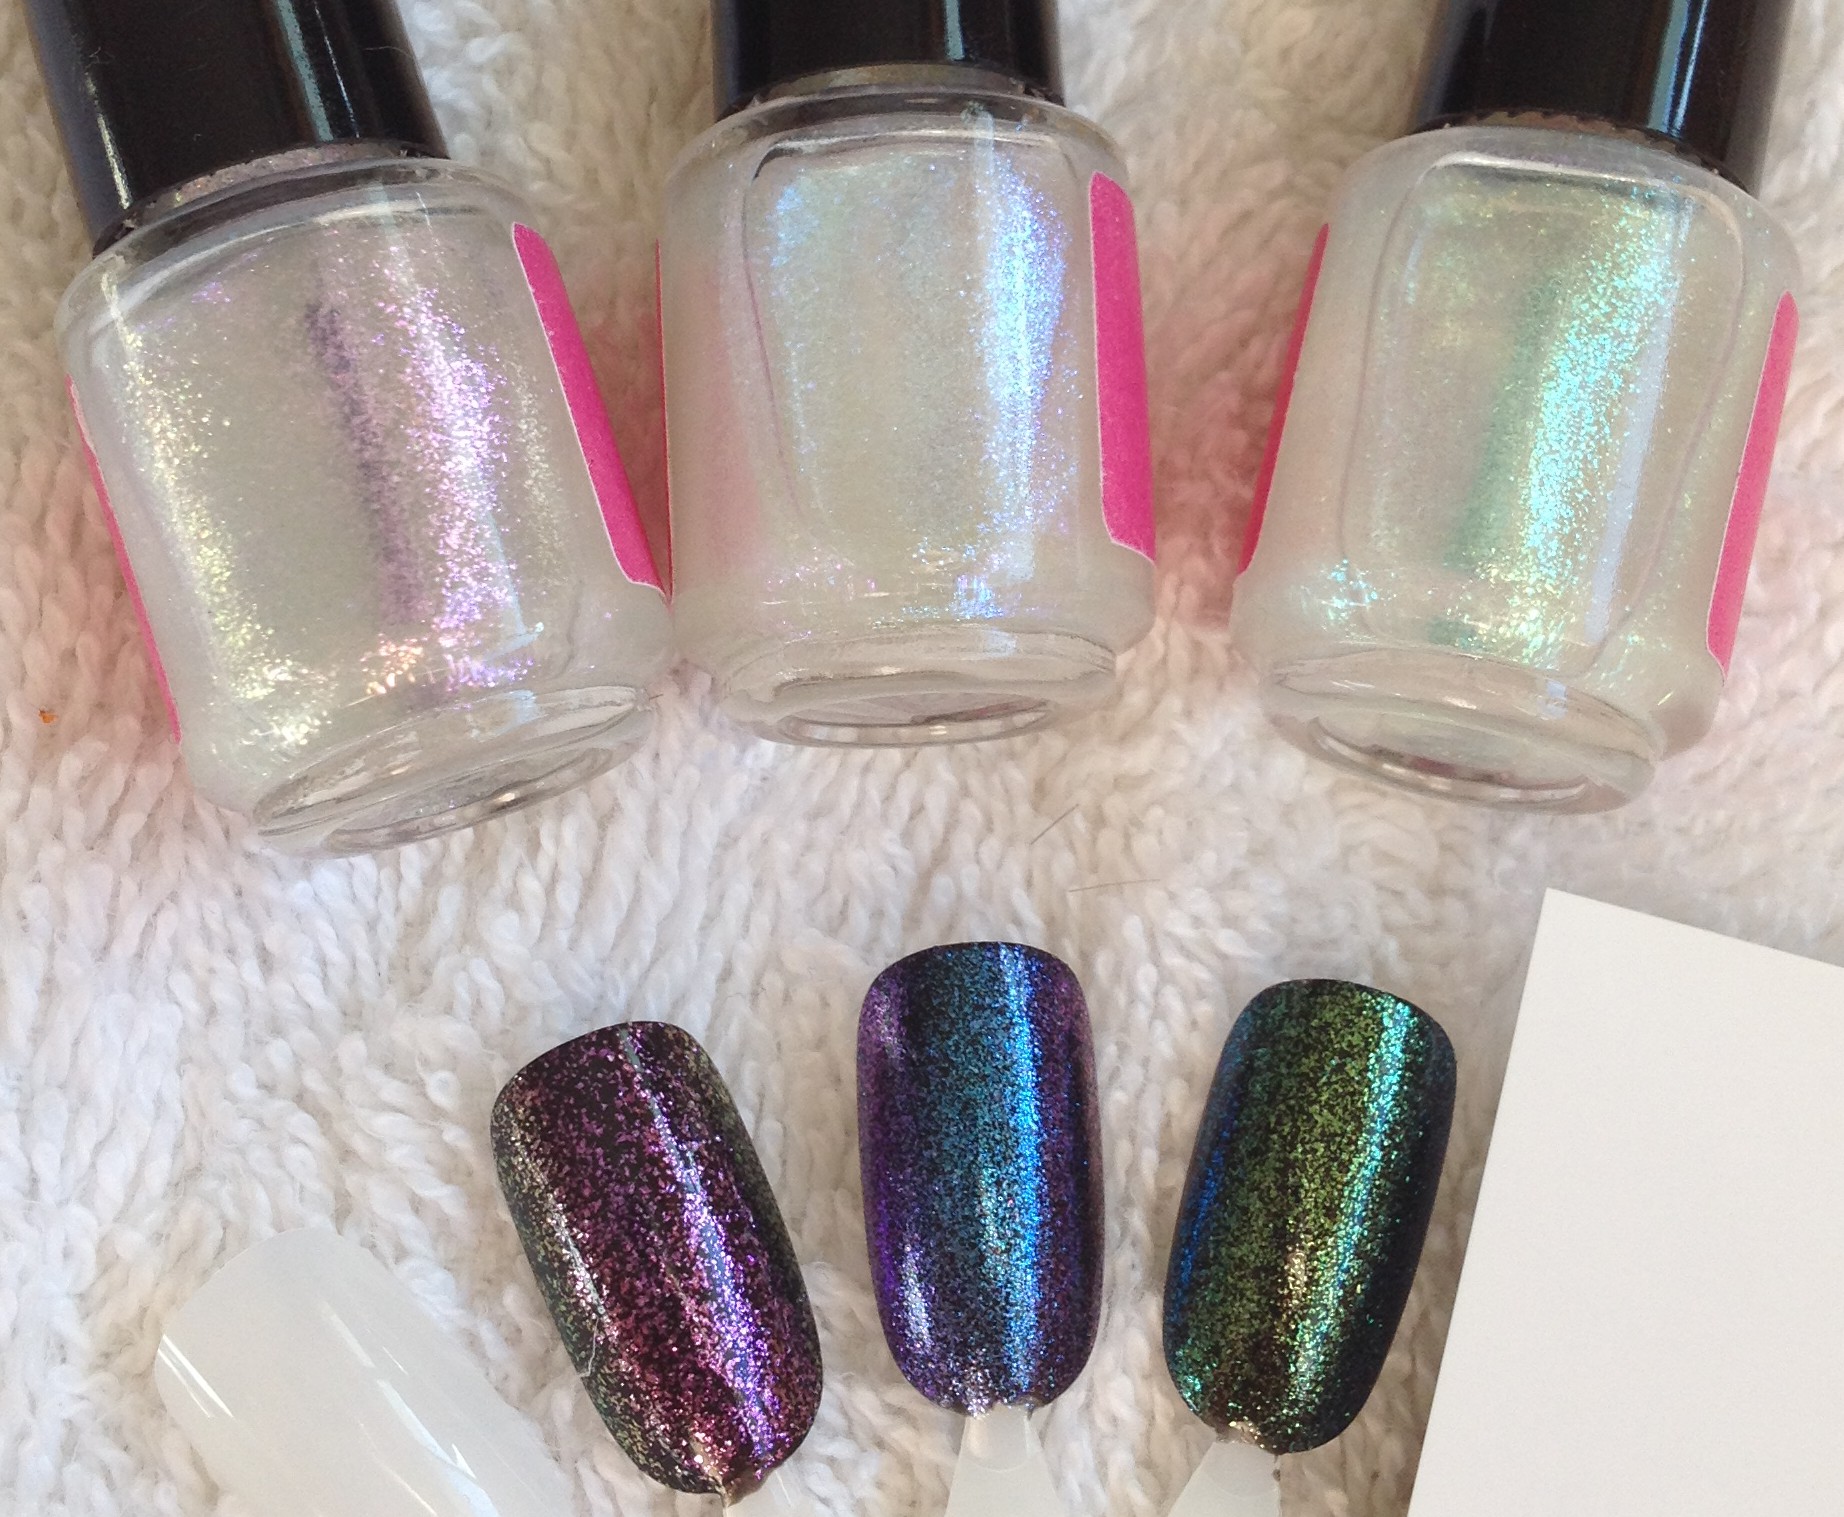
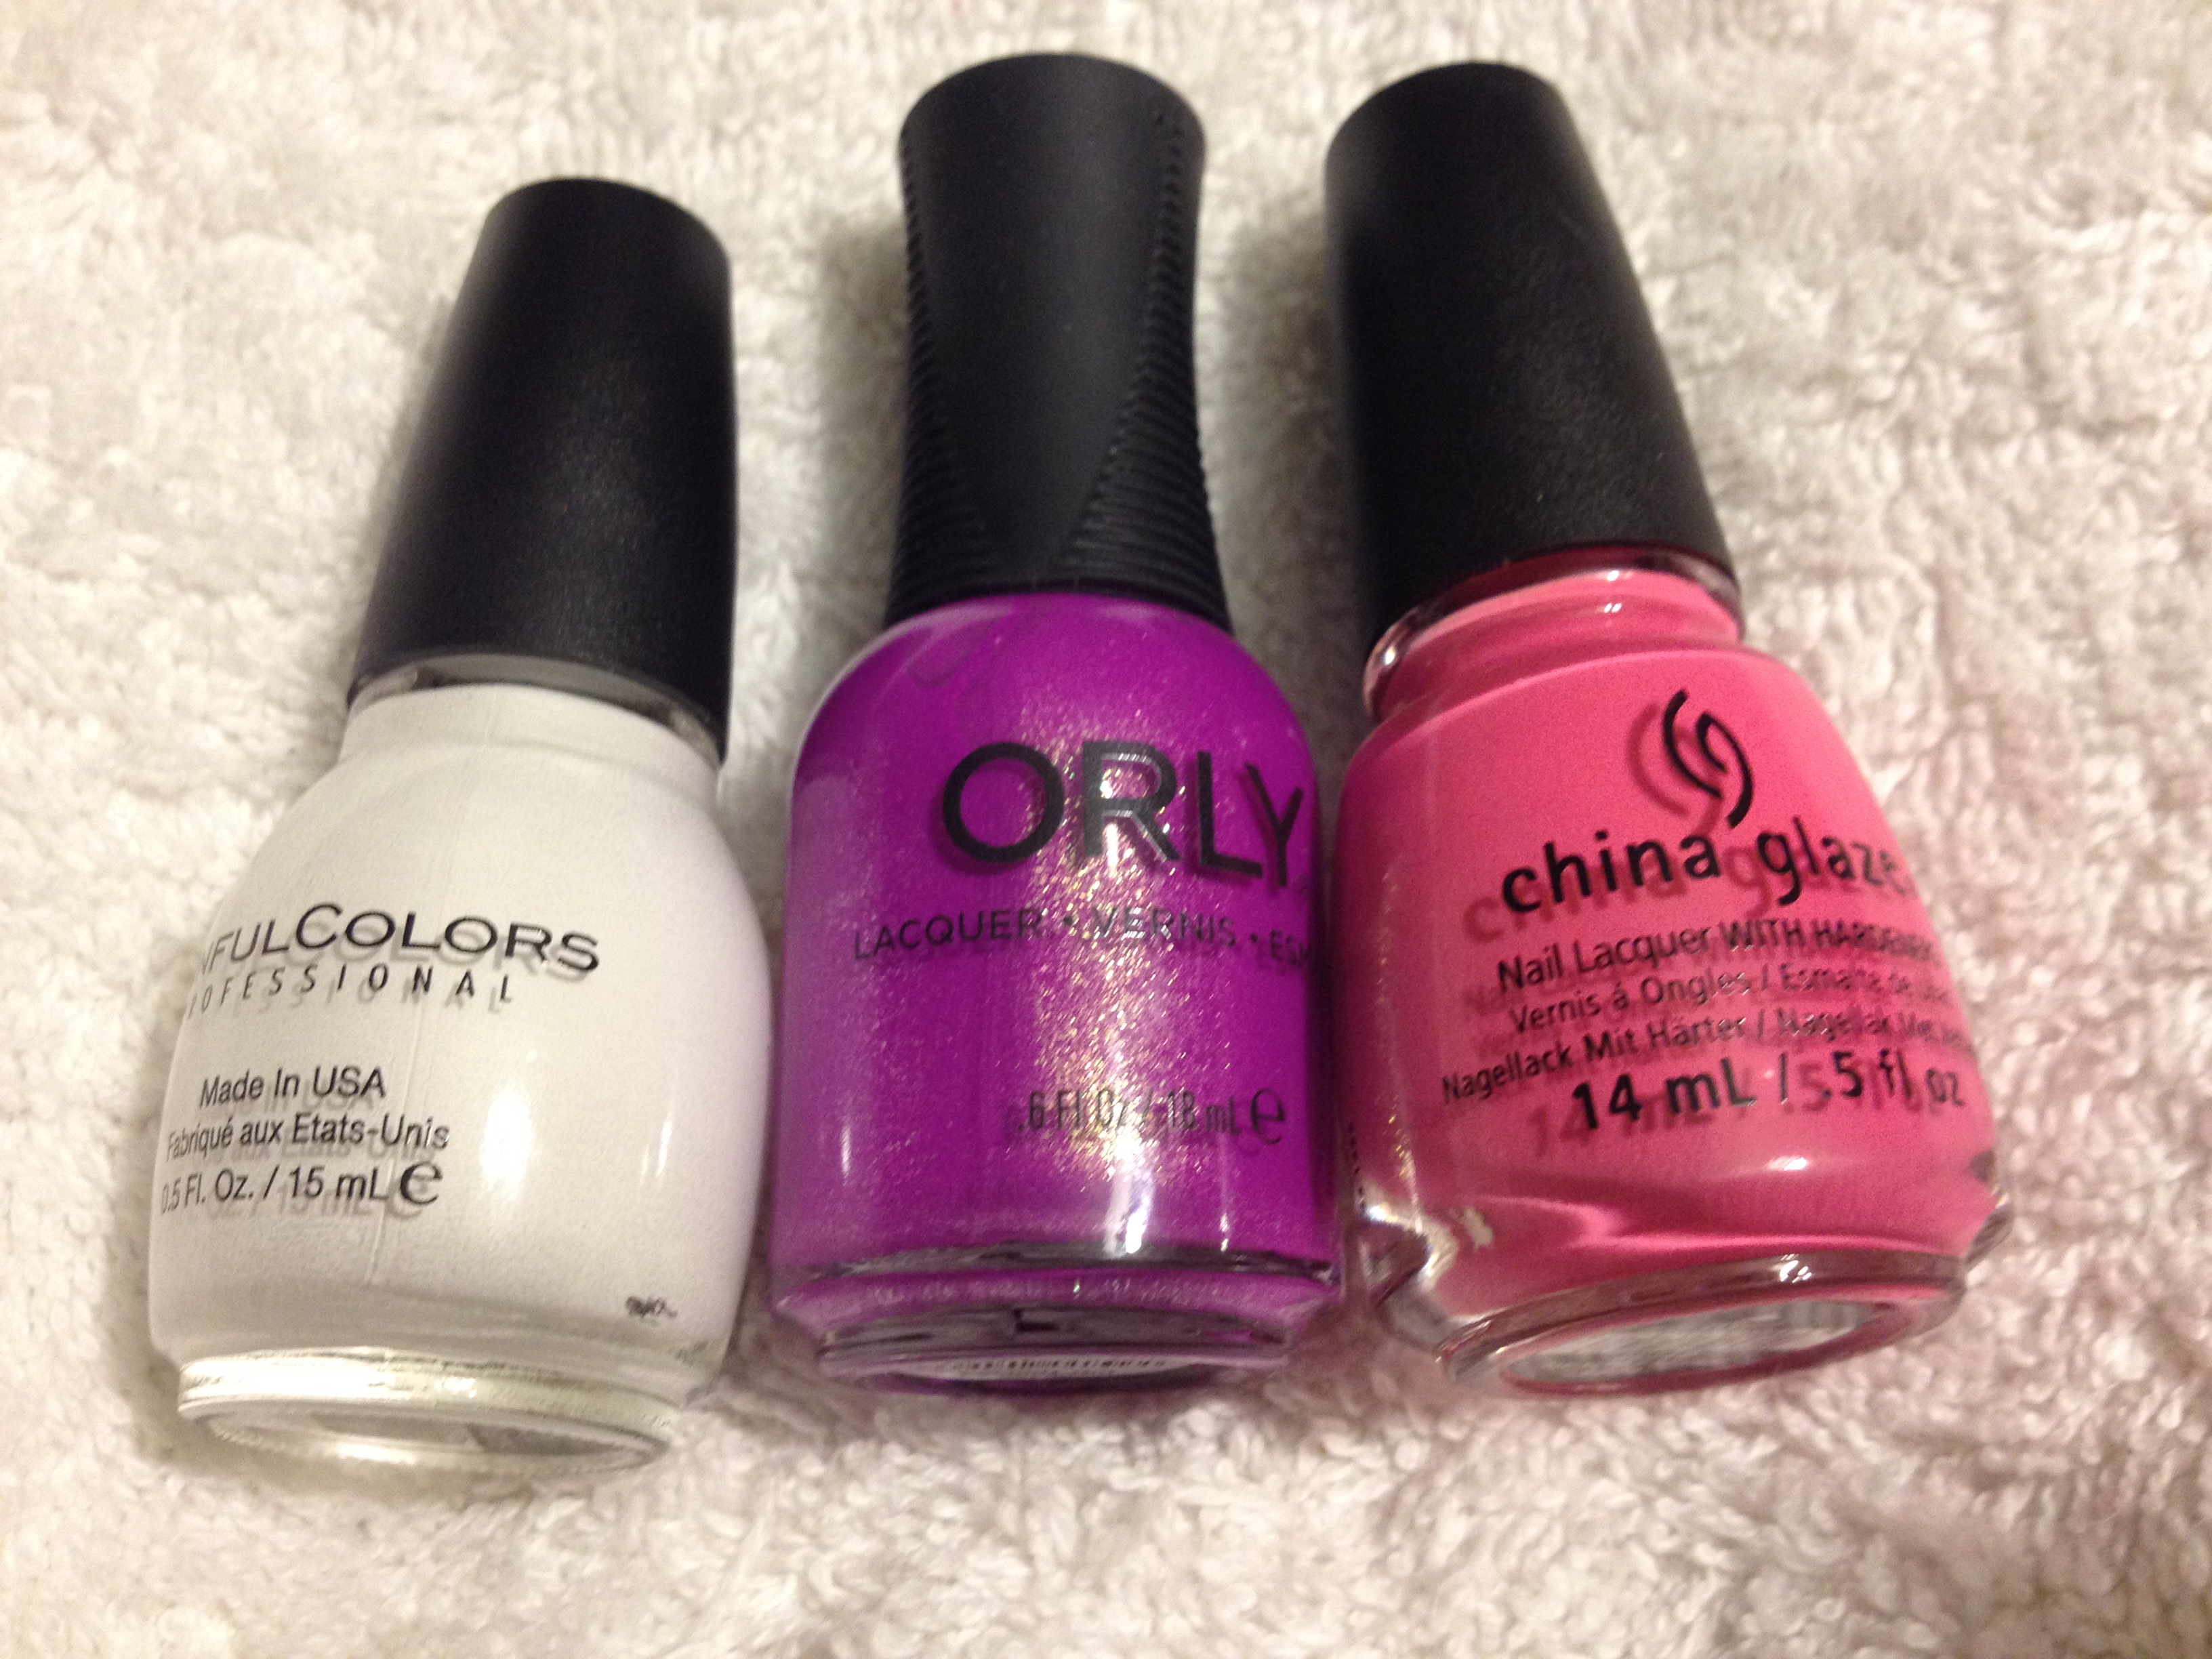
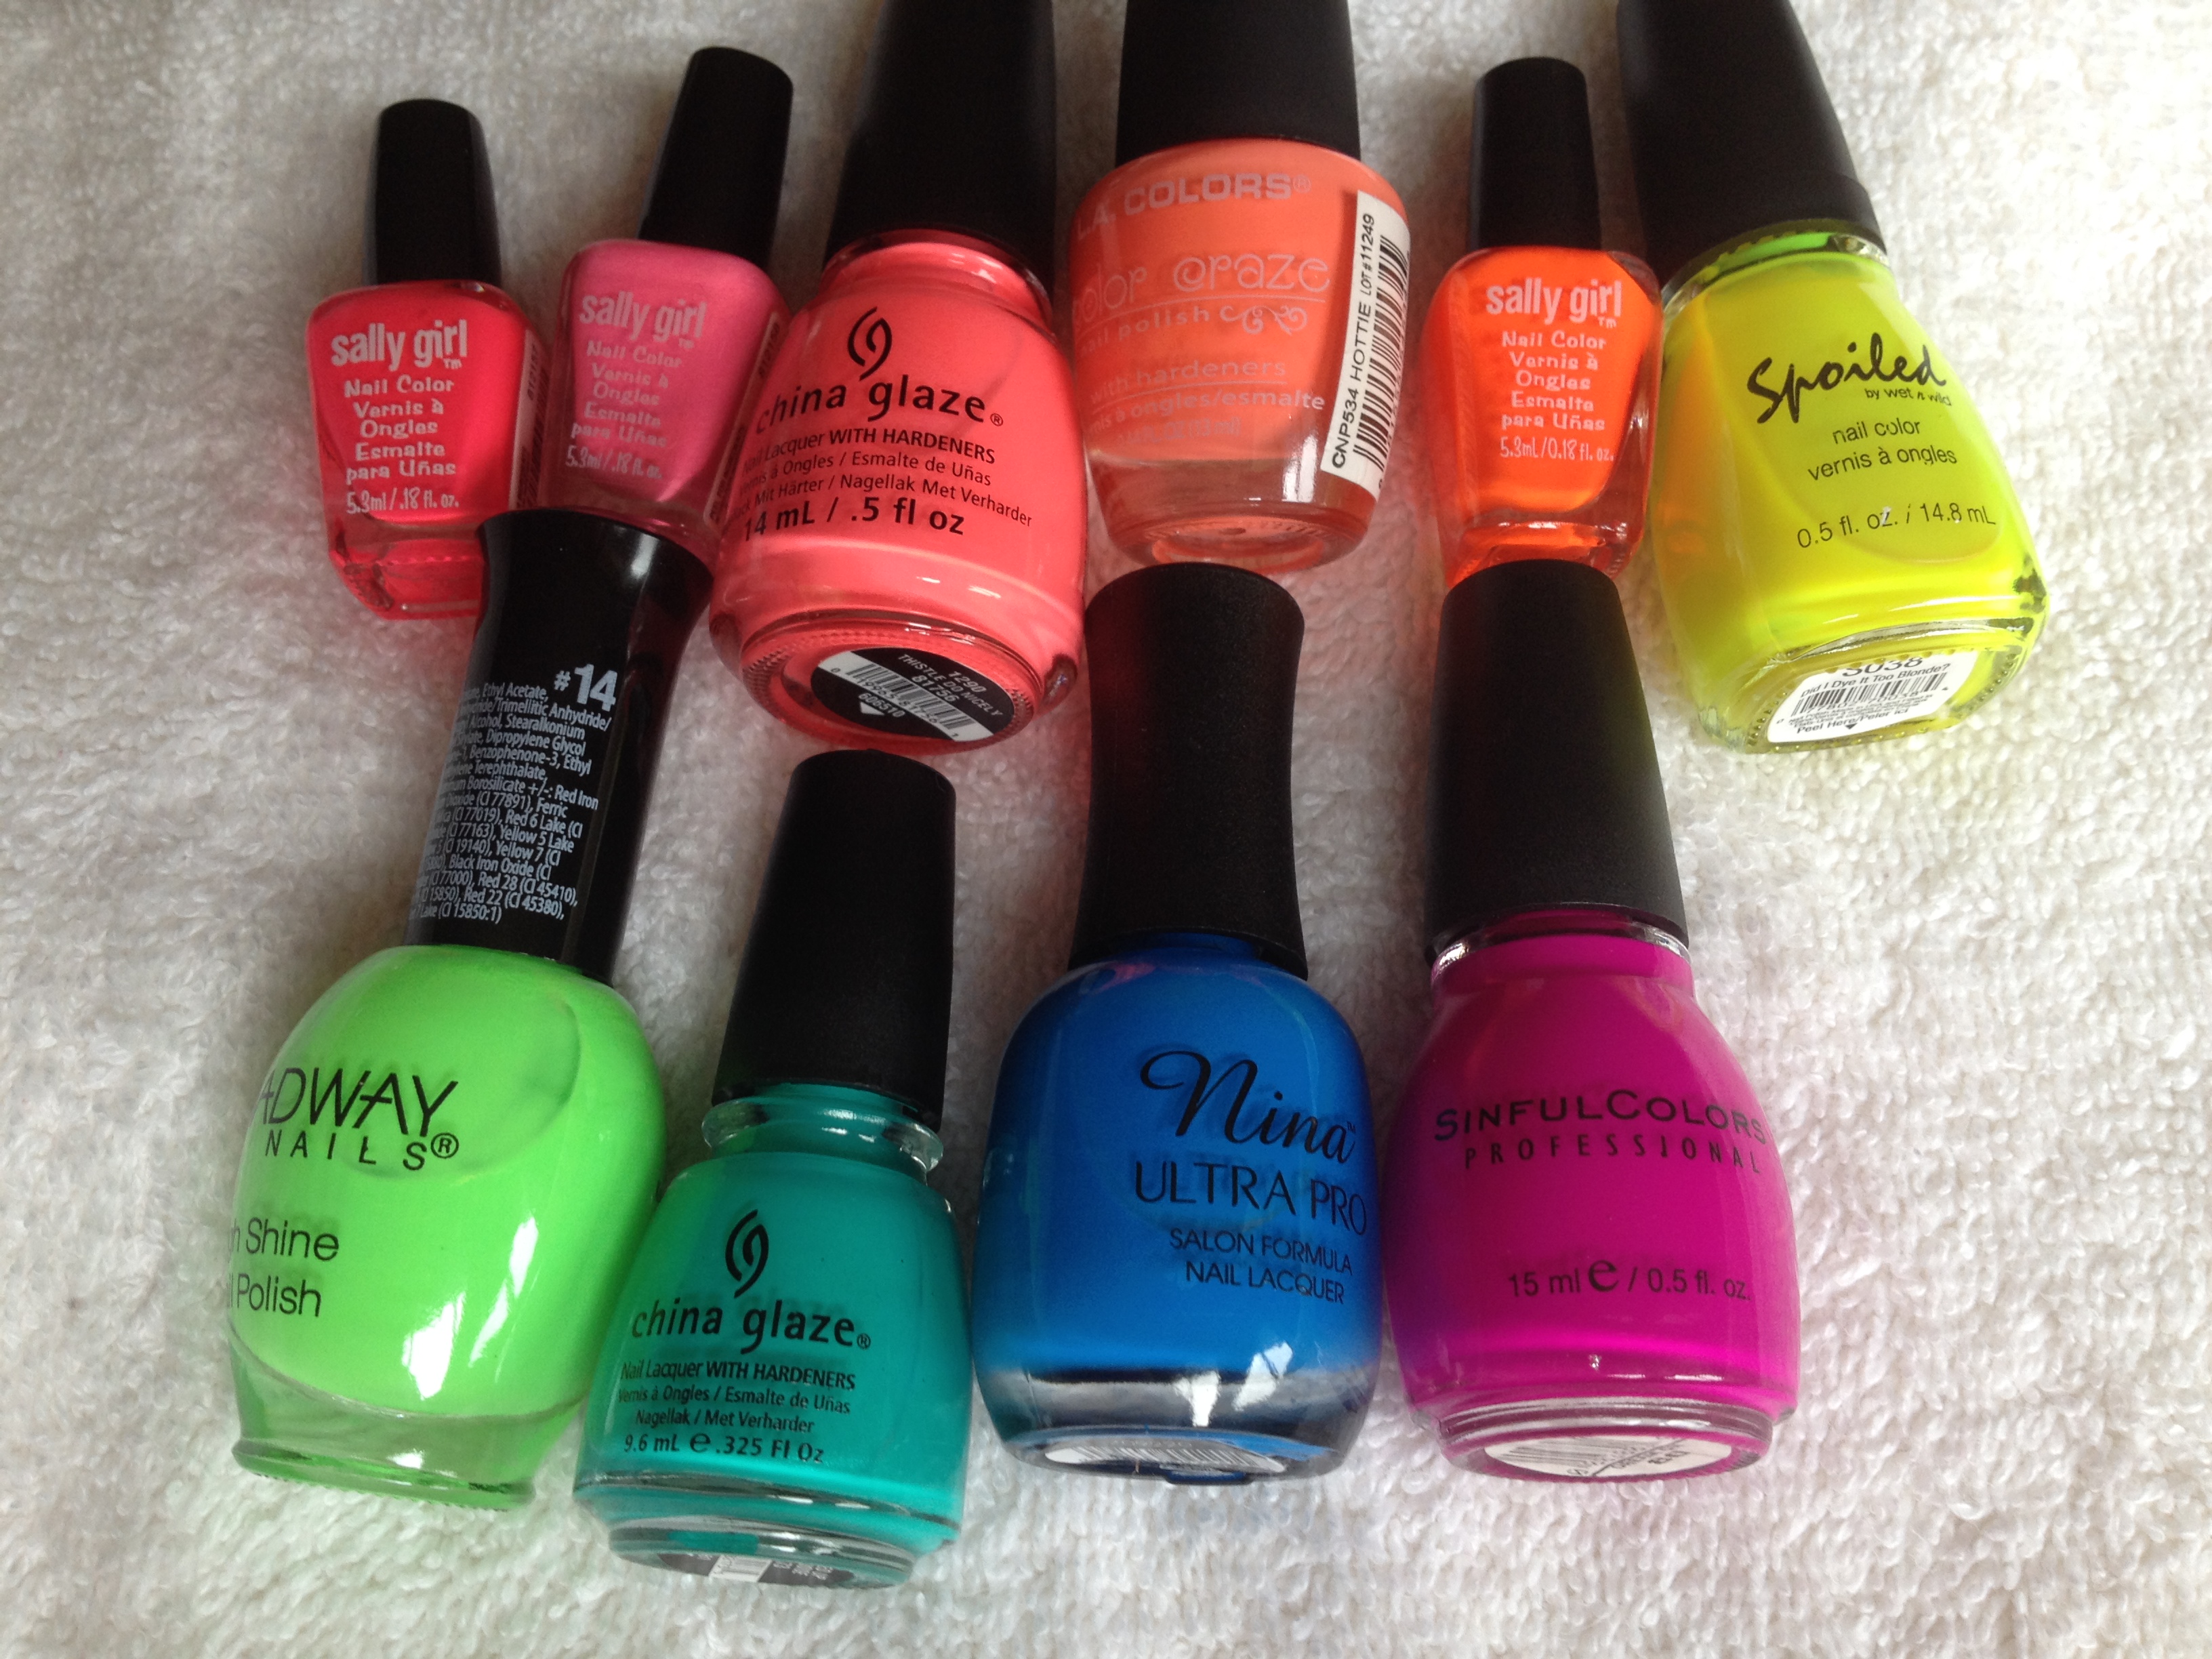
My Orly polishes. I really like Orly a lot! Most of the polishes I have are neons or crazy toppers. I think of them as summer polishes.

IMG_7227

Look at my sad little Essie collection! Three Silk Watercolors and one other one. I just tend not to splurge on Essie because I hear too many bad things about the formulas. If I can get a great formula in a $2 Wet n Wild, I just don’t want to risk getting a bad formula from a $7 Essie.

IMG_7279

And these are my OPI polishes. The only one that I have ever paid full price for was Charmy & Sugar (third polish in the top row). The rest were either given to me or found on clearance. It just pains me to pay $9 for a polish, and they are always exempt from sales and coupons it seems. That makes me grumpy.

IMG_7228

Nicole by OPI: OPI’s less snobby sister. The two Modern Family polishes are really stunners!

IMG_7229

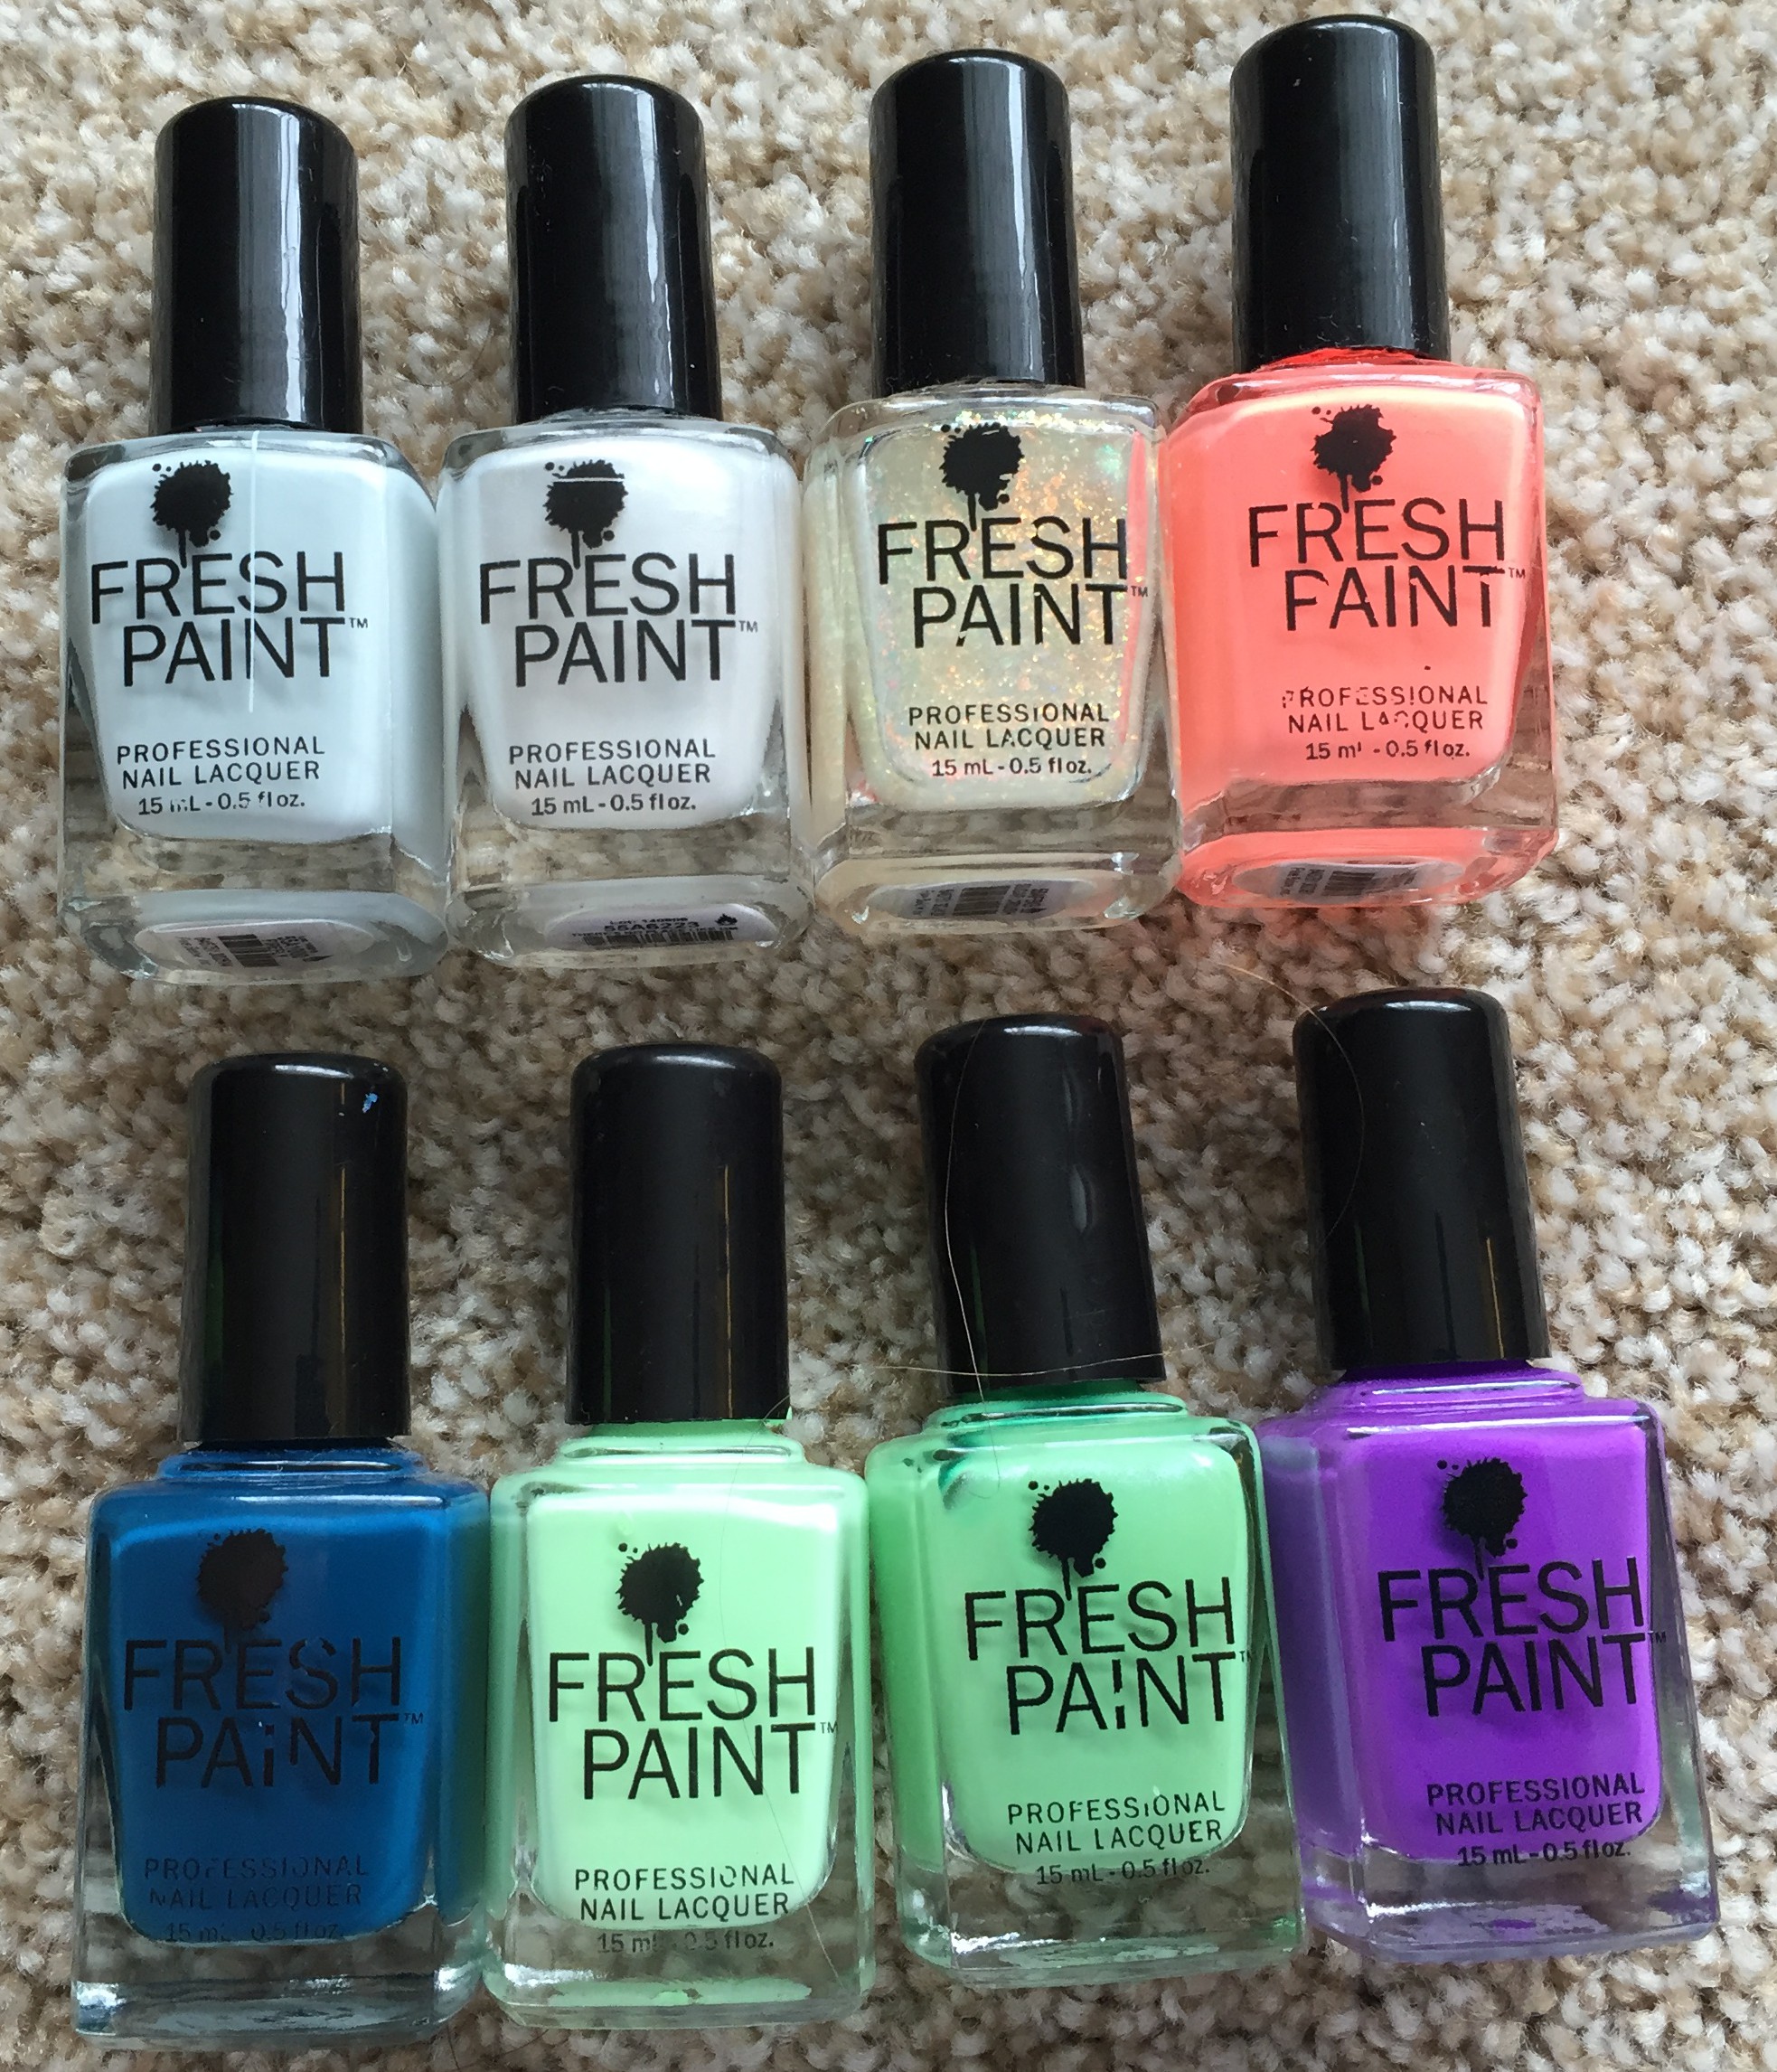
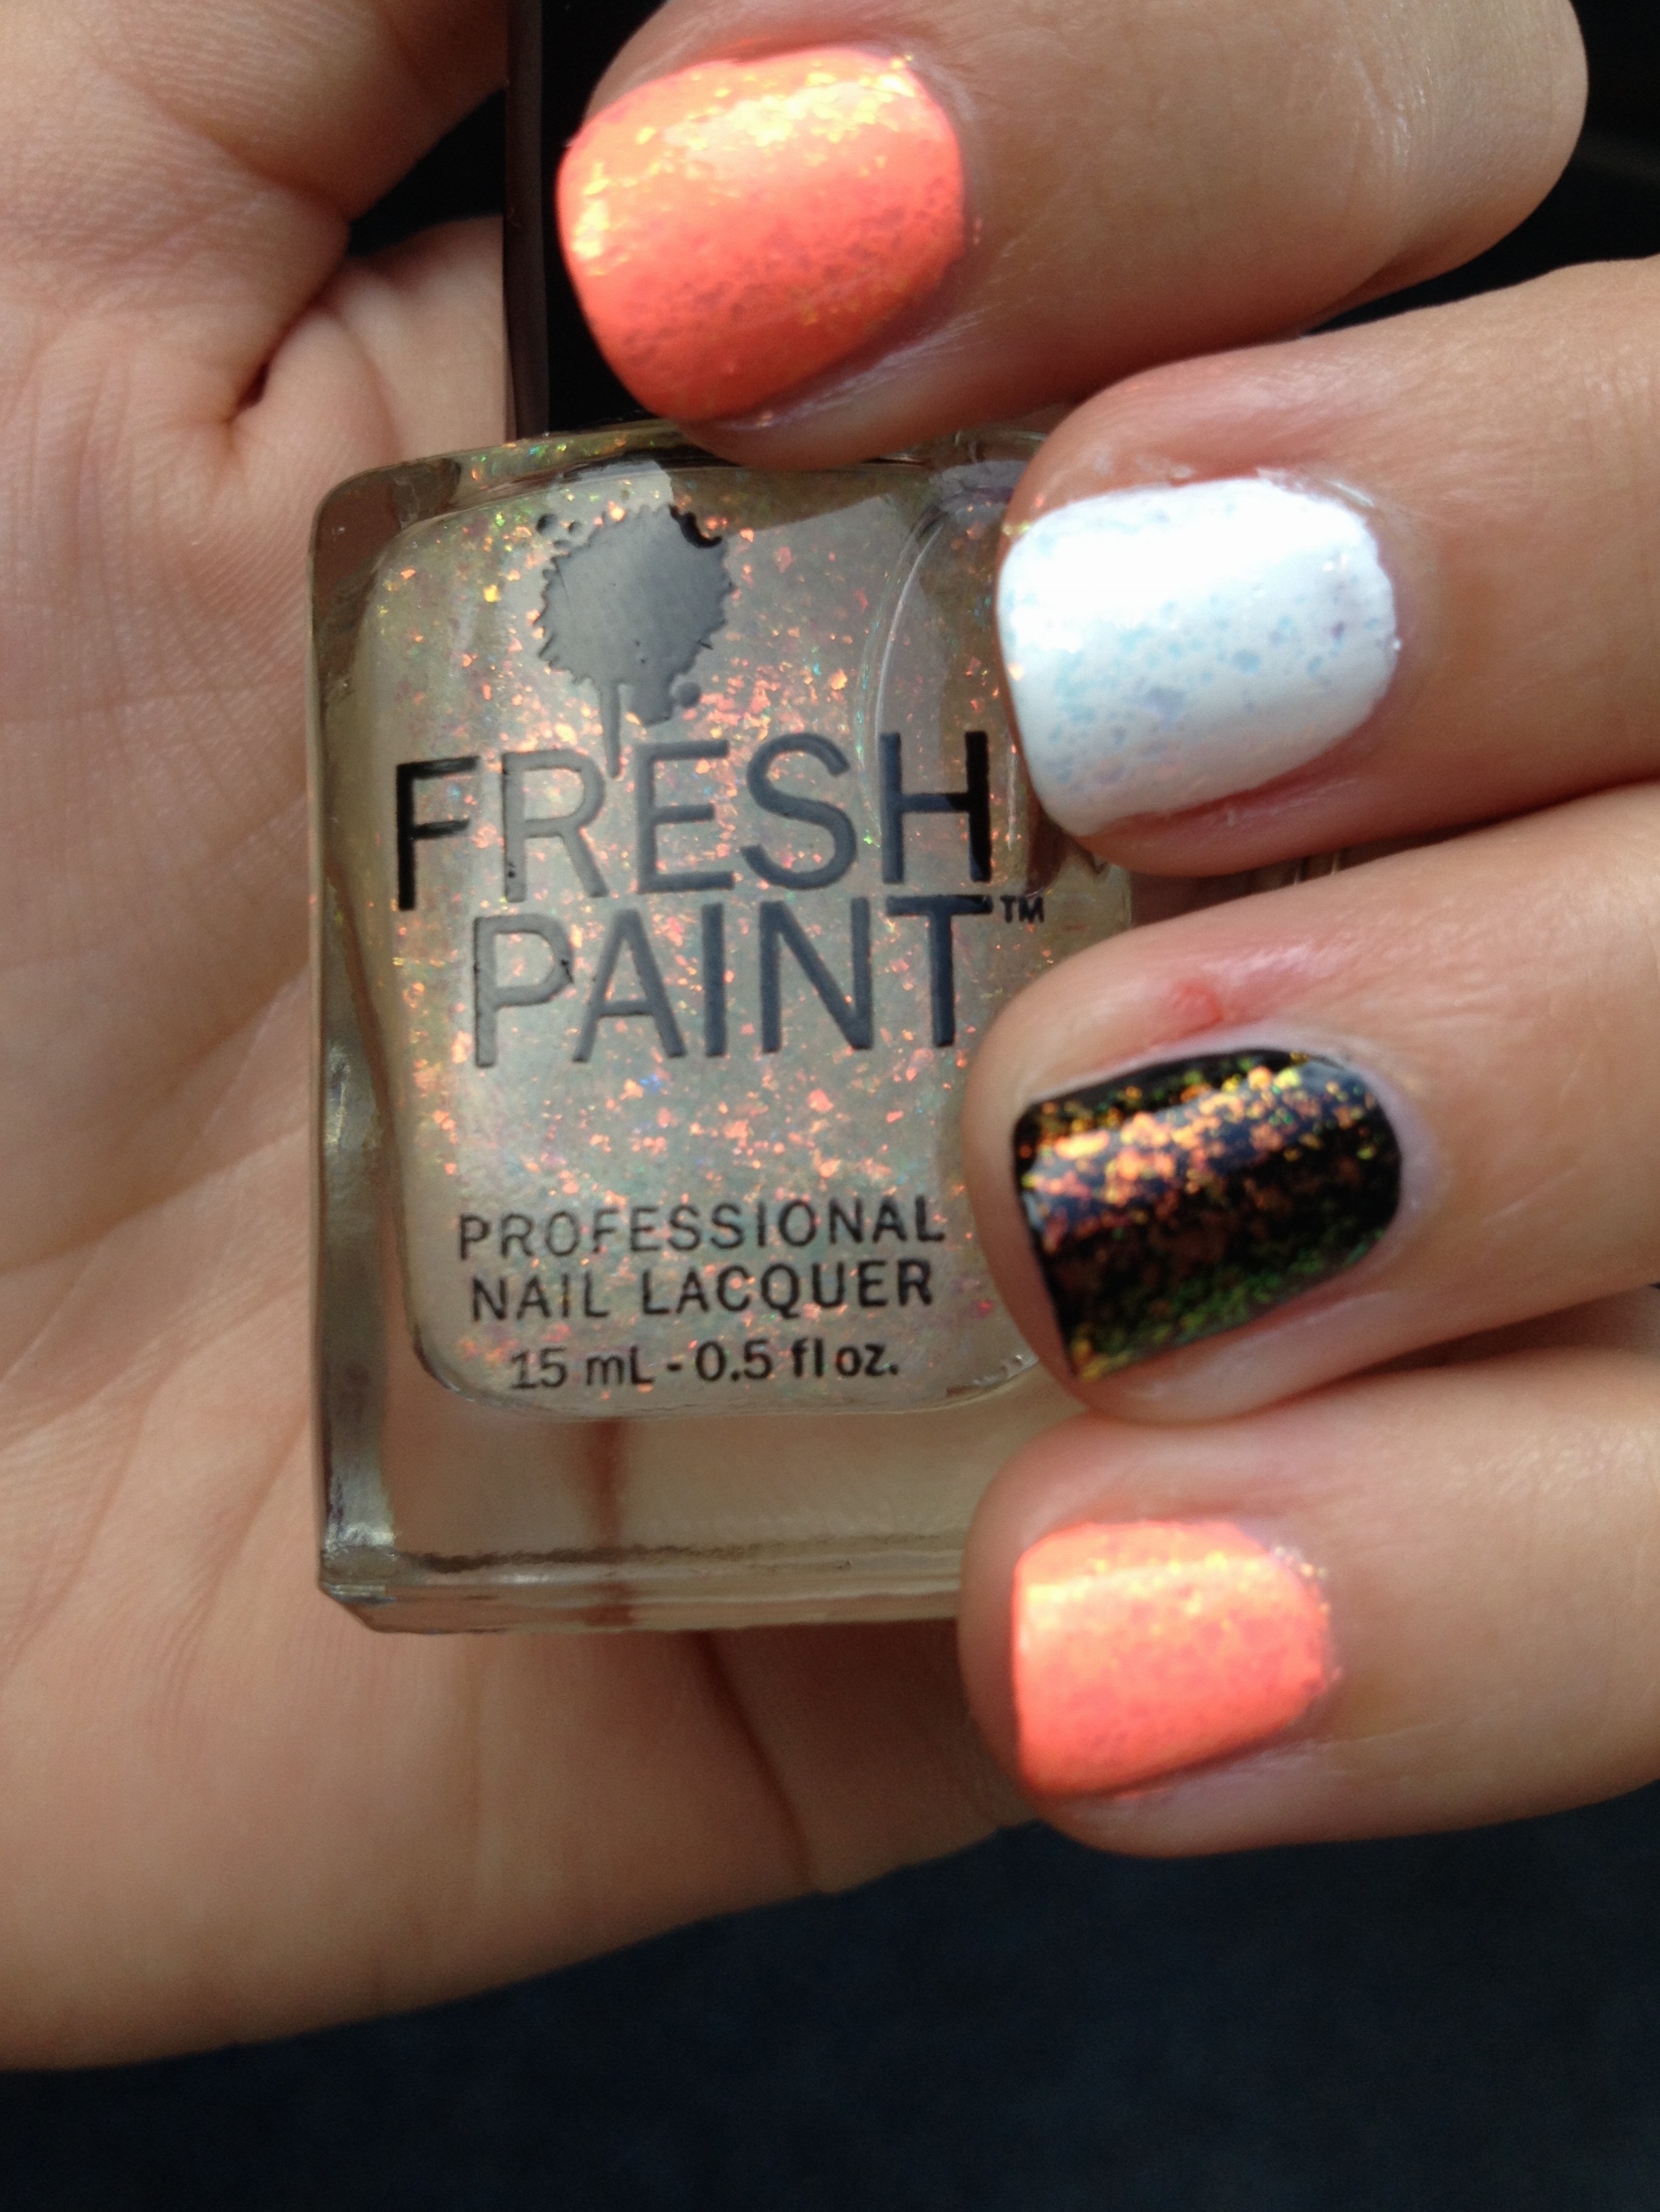
Fresh paint is available exclusively at Five Below. They tend to be thicker in formula and they’re great for water marbling and stamping. They have such awesome colors! The third polish in the top row is Sugar Crush and it’s a dupe for Essie – Shine of the Times. If I ever see this polish again in a five Below, I am buying a BUNCH of bottles.

IMG_7250

Speaking of Five Below, that’s where you also find Funky Fingers. Okay, these polishes are sort of juvenile, but they have such fun bright colors and crazy glitter mixes! Plus, they’re only $2 or 3 for $5!

IMG_7231

LA Colors polishes tend to be disappointing. If you’re going to spend $1 on polish, just get a Wet n Wild or a NYC. The only exception is the one in the upper left which is a lilac crelly with a bunch of glitter. It’s tough to find those in mainstream polishes.

IMG_7232

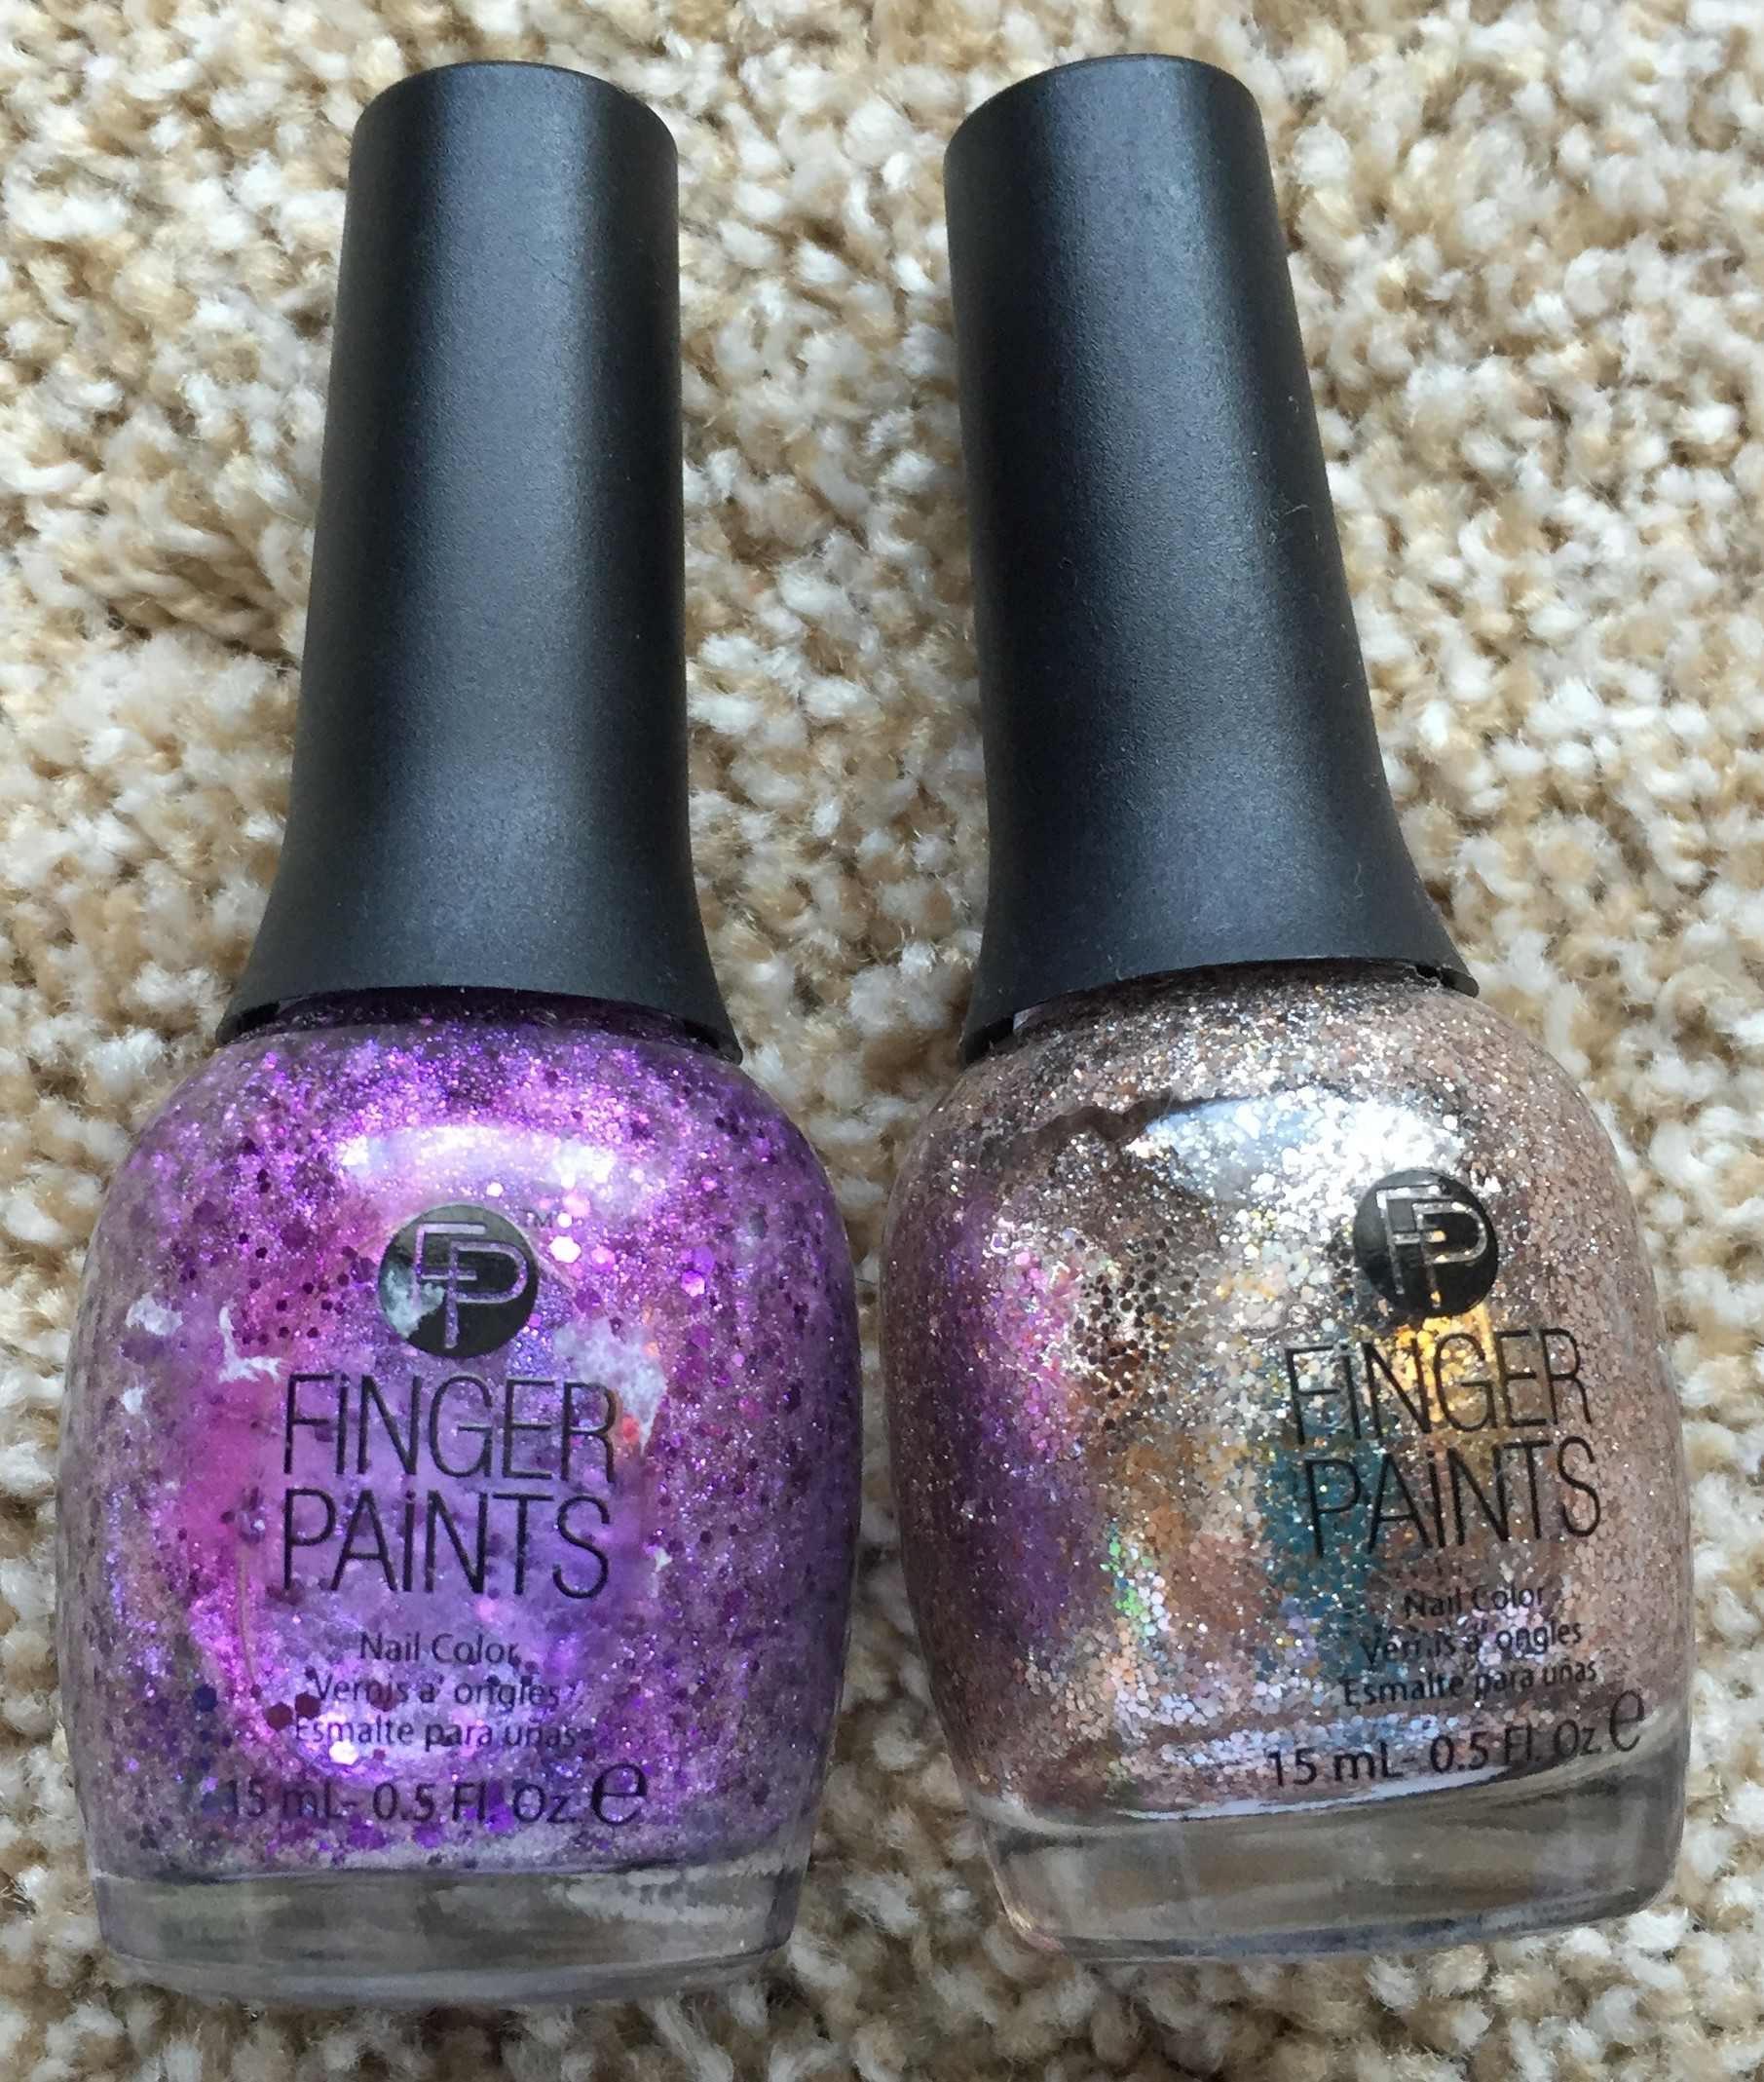
I picked up these Finger Paints at Sally Beauty Supply. So sparkly!

IMG_7233

The only place that sells Pure Ice that I know of, is Walmart, and I just don’t end up in Walmart that often. If I did, I would probably own more of these.

IMG_7235

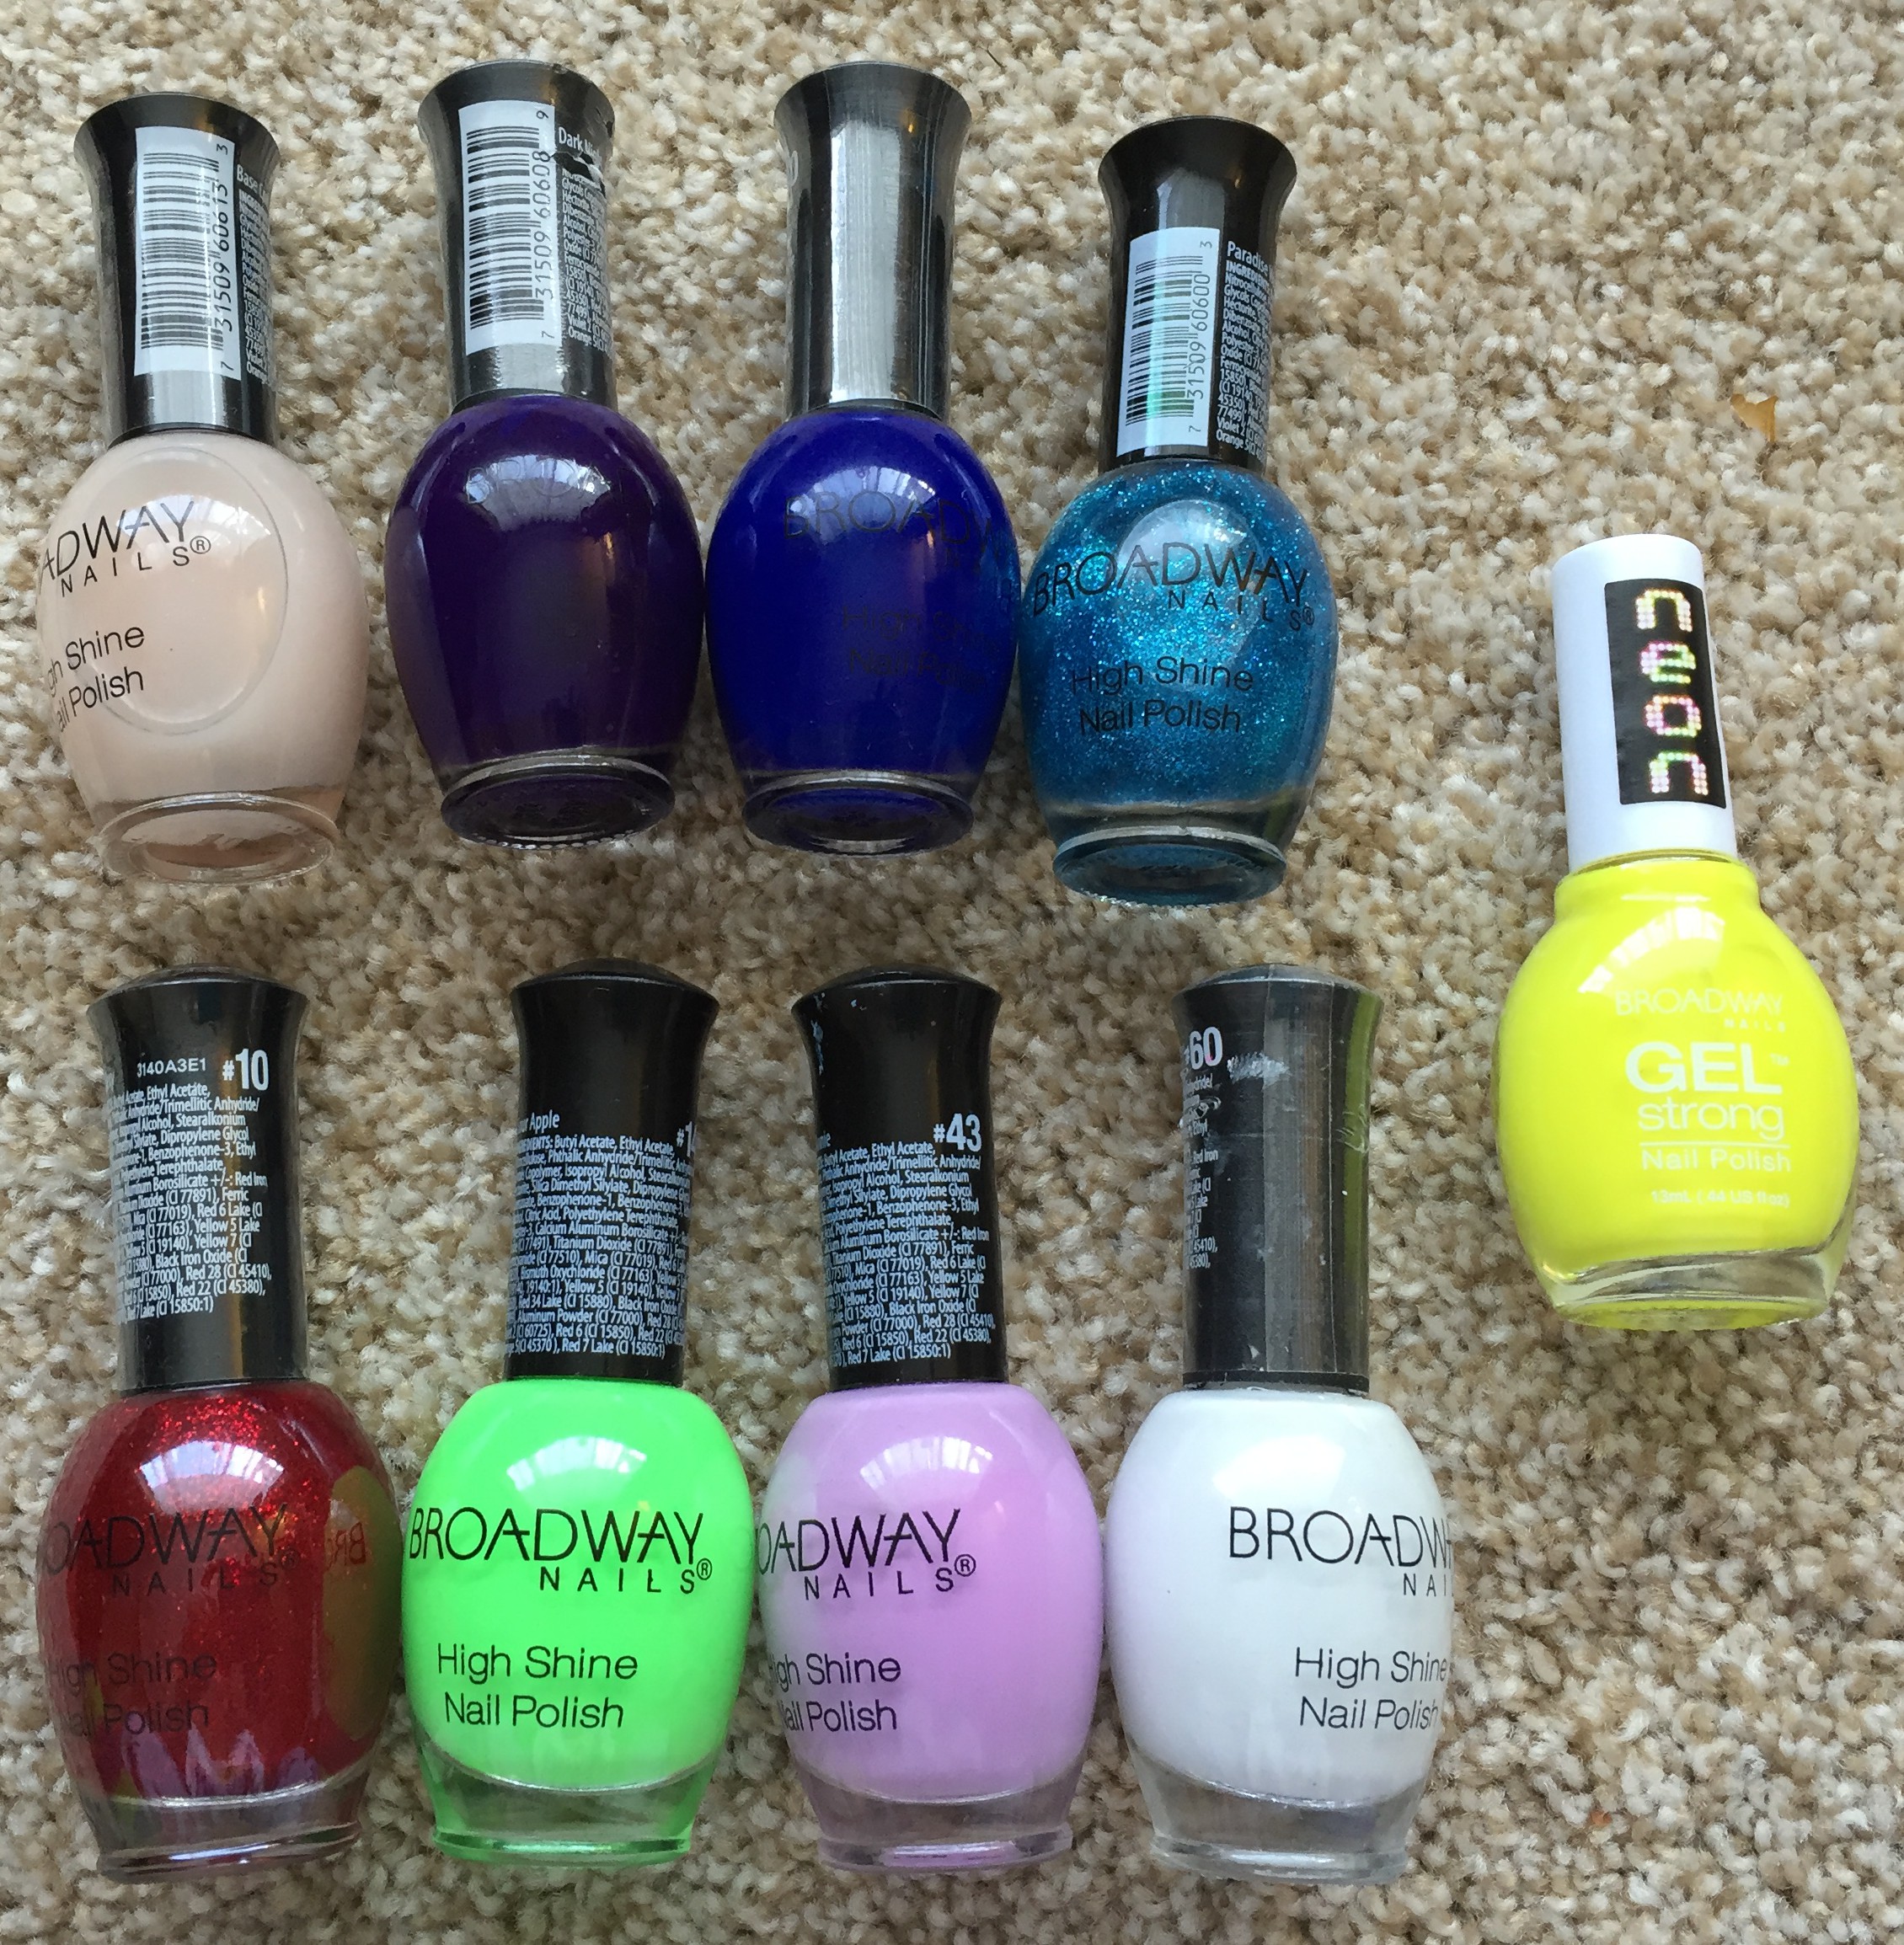
Broadway Nails are found in either Dollar General or Family Dollar. I swear I can never remember. My favorites are Space Flight (third polish in the top row), an deep blue jelly, and Hot n Sexy (bottom left), which is a dupe for China Glaze – Ruby Pumps.

IMG_7236

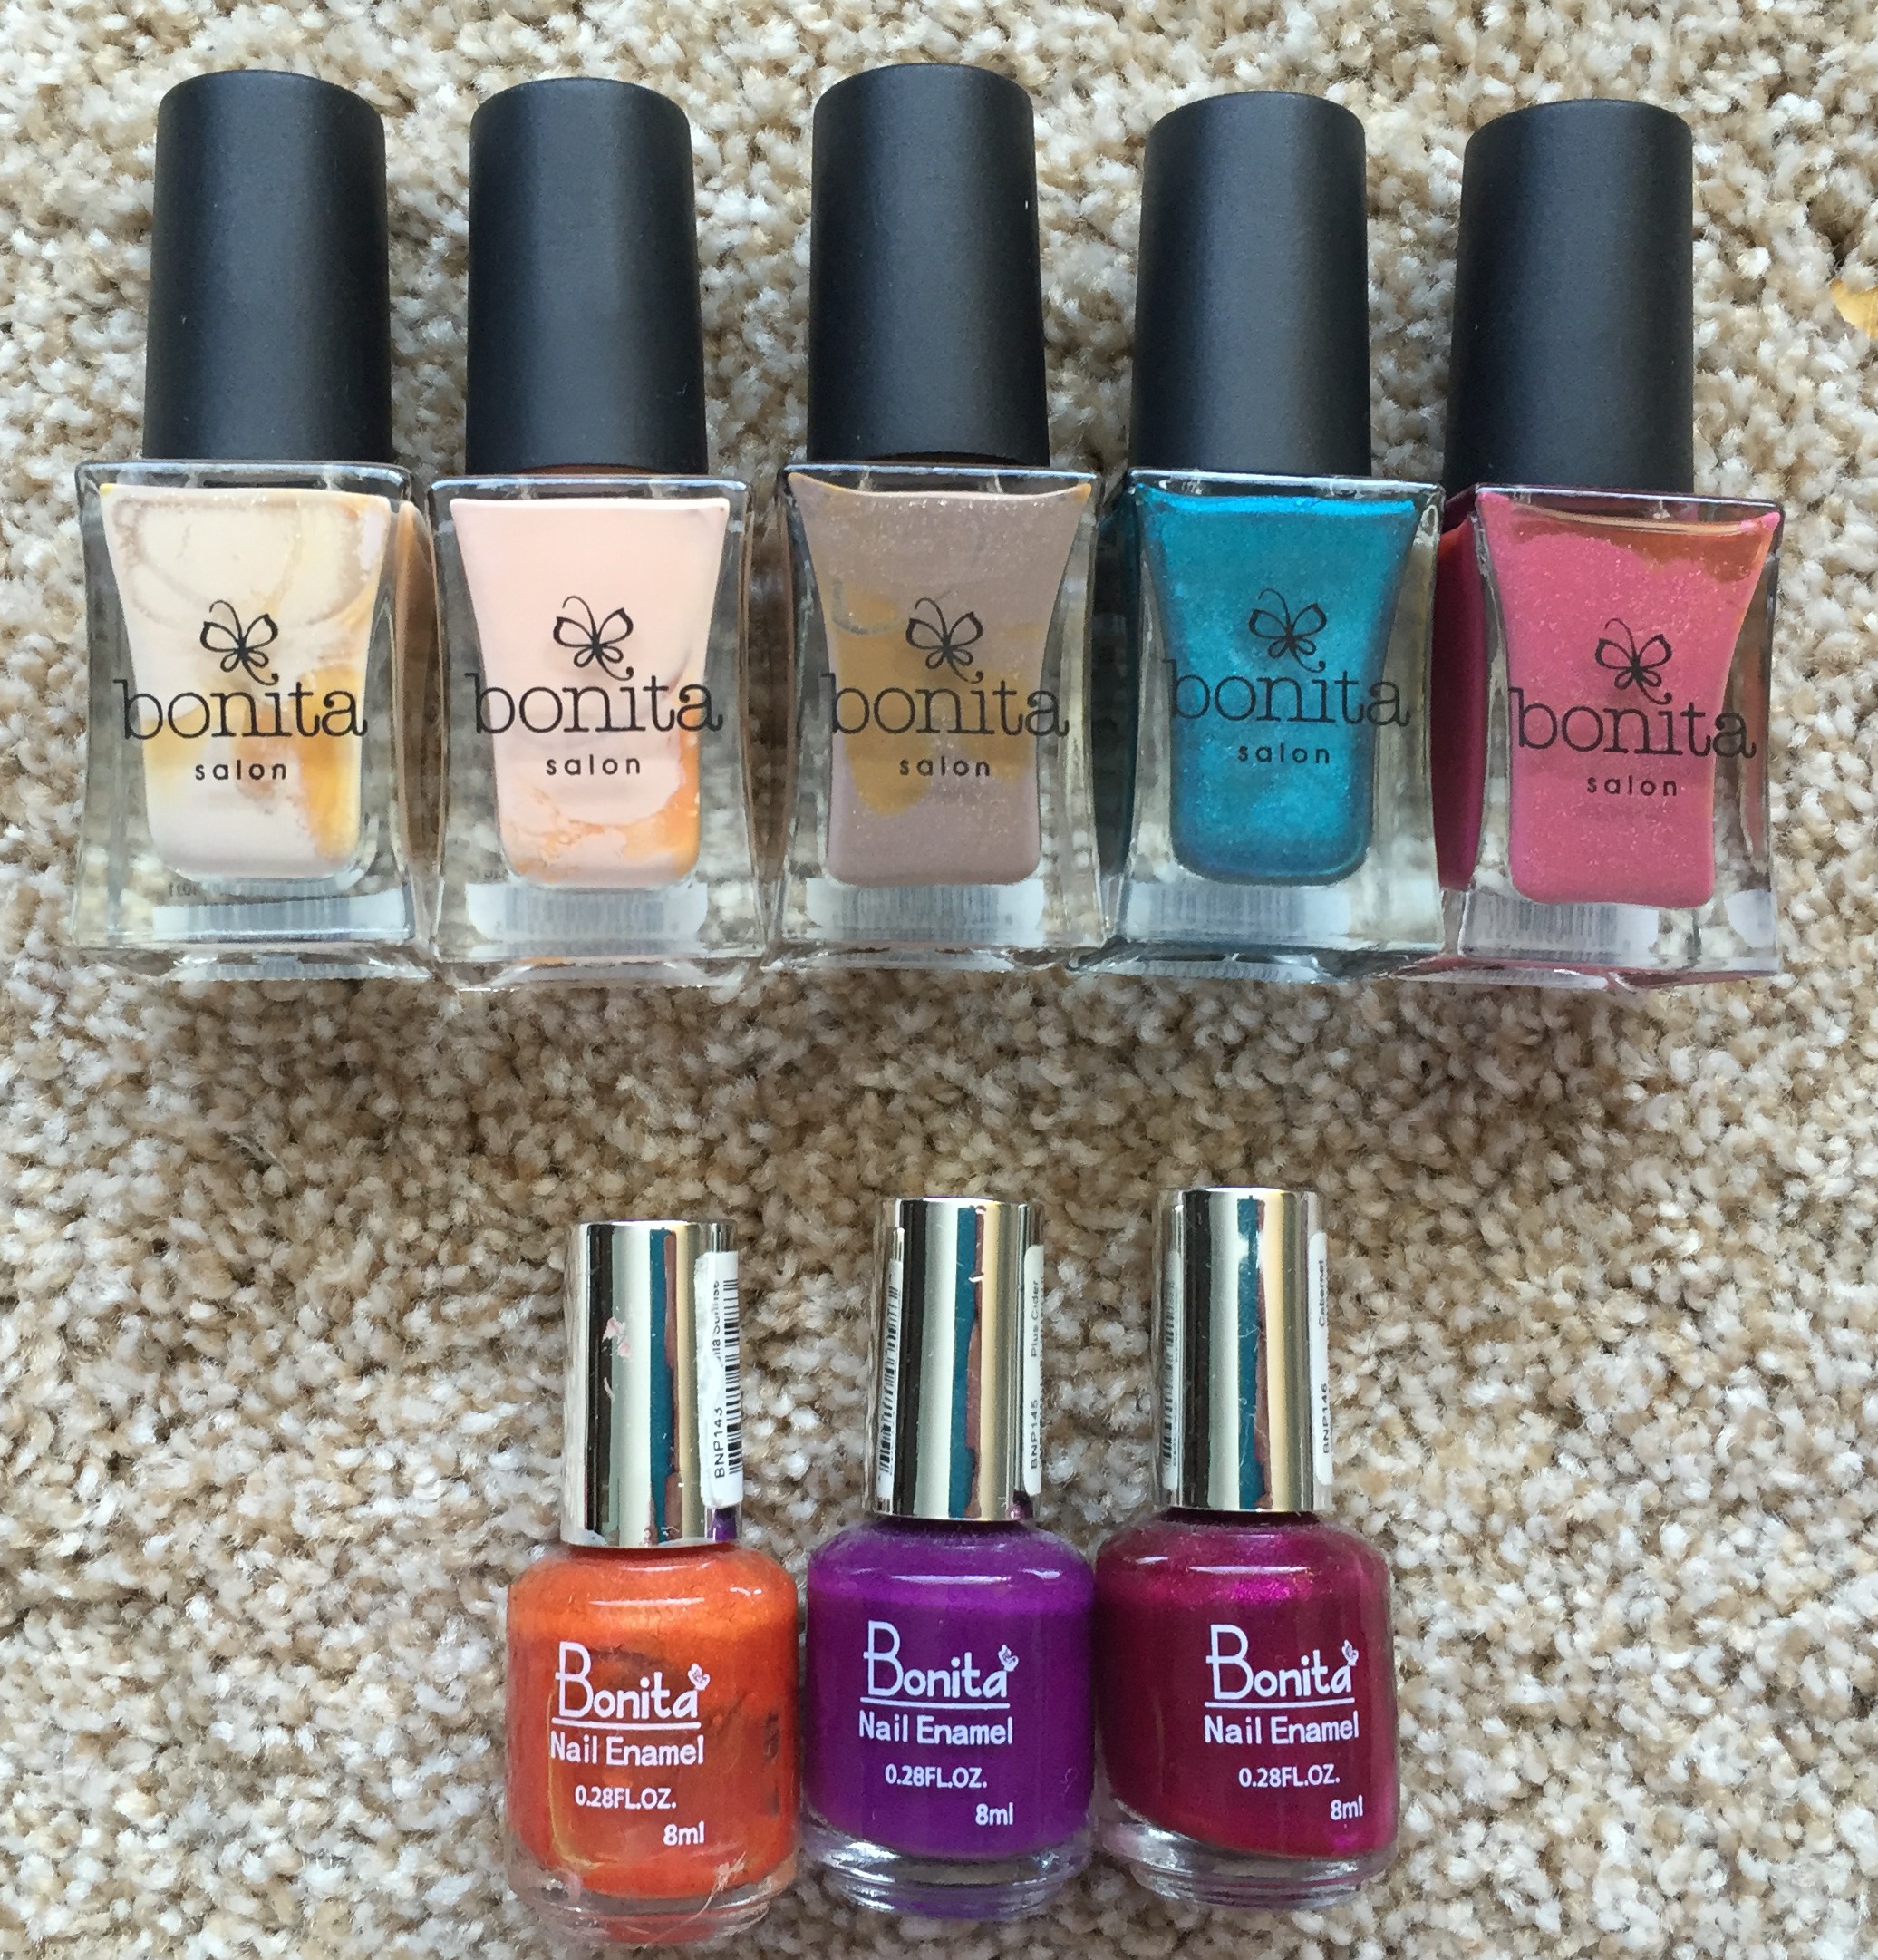
I first discovered Bonita polish in Francesca’s about 5 years ago when I bought the little bottles. I now usually find them in Rite Aid or Kmart. So affordable and so beautiful! (I’ve actually bought 3 more since I took this picture.)

IMG_7237

Yes, I only have two Zoya, both found on clearance at Ulta. They’re both great, though, and I definitely want to add to these!

IMG_7238

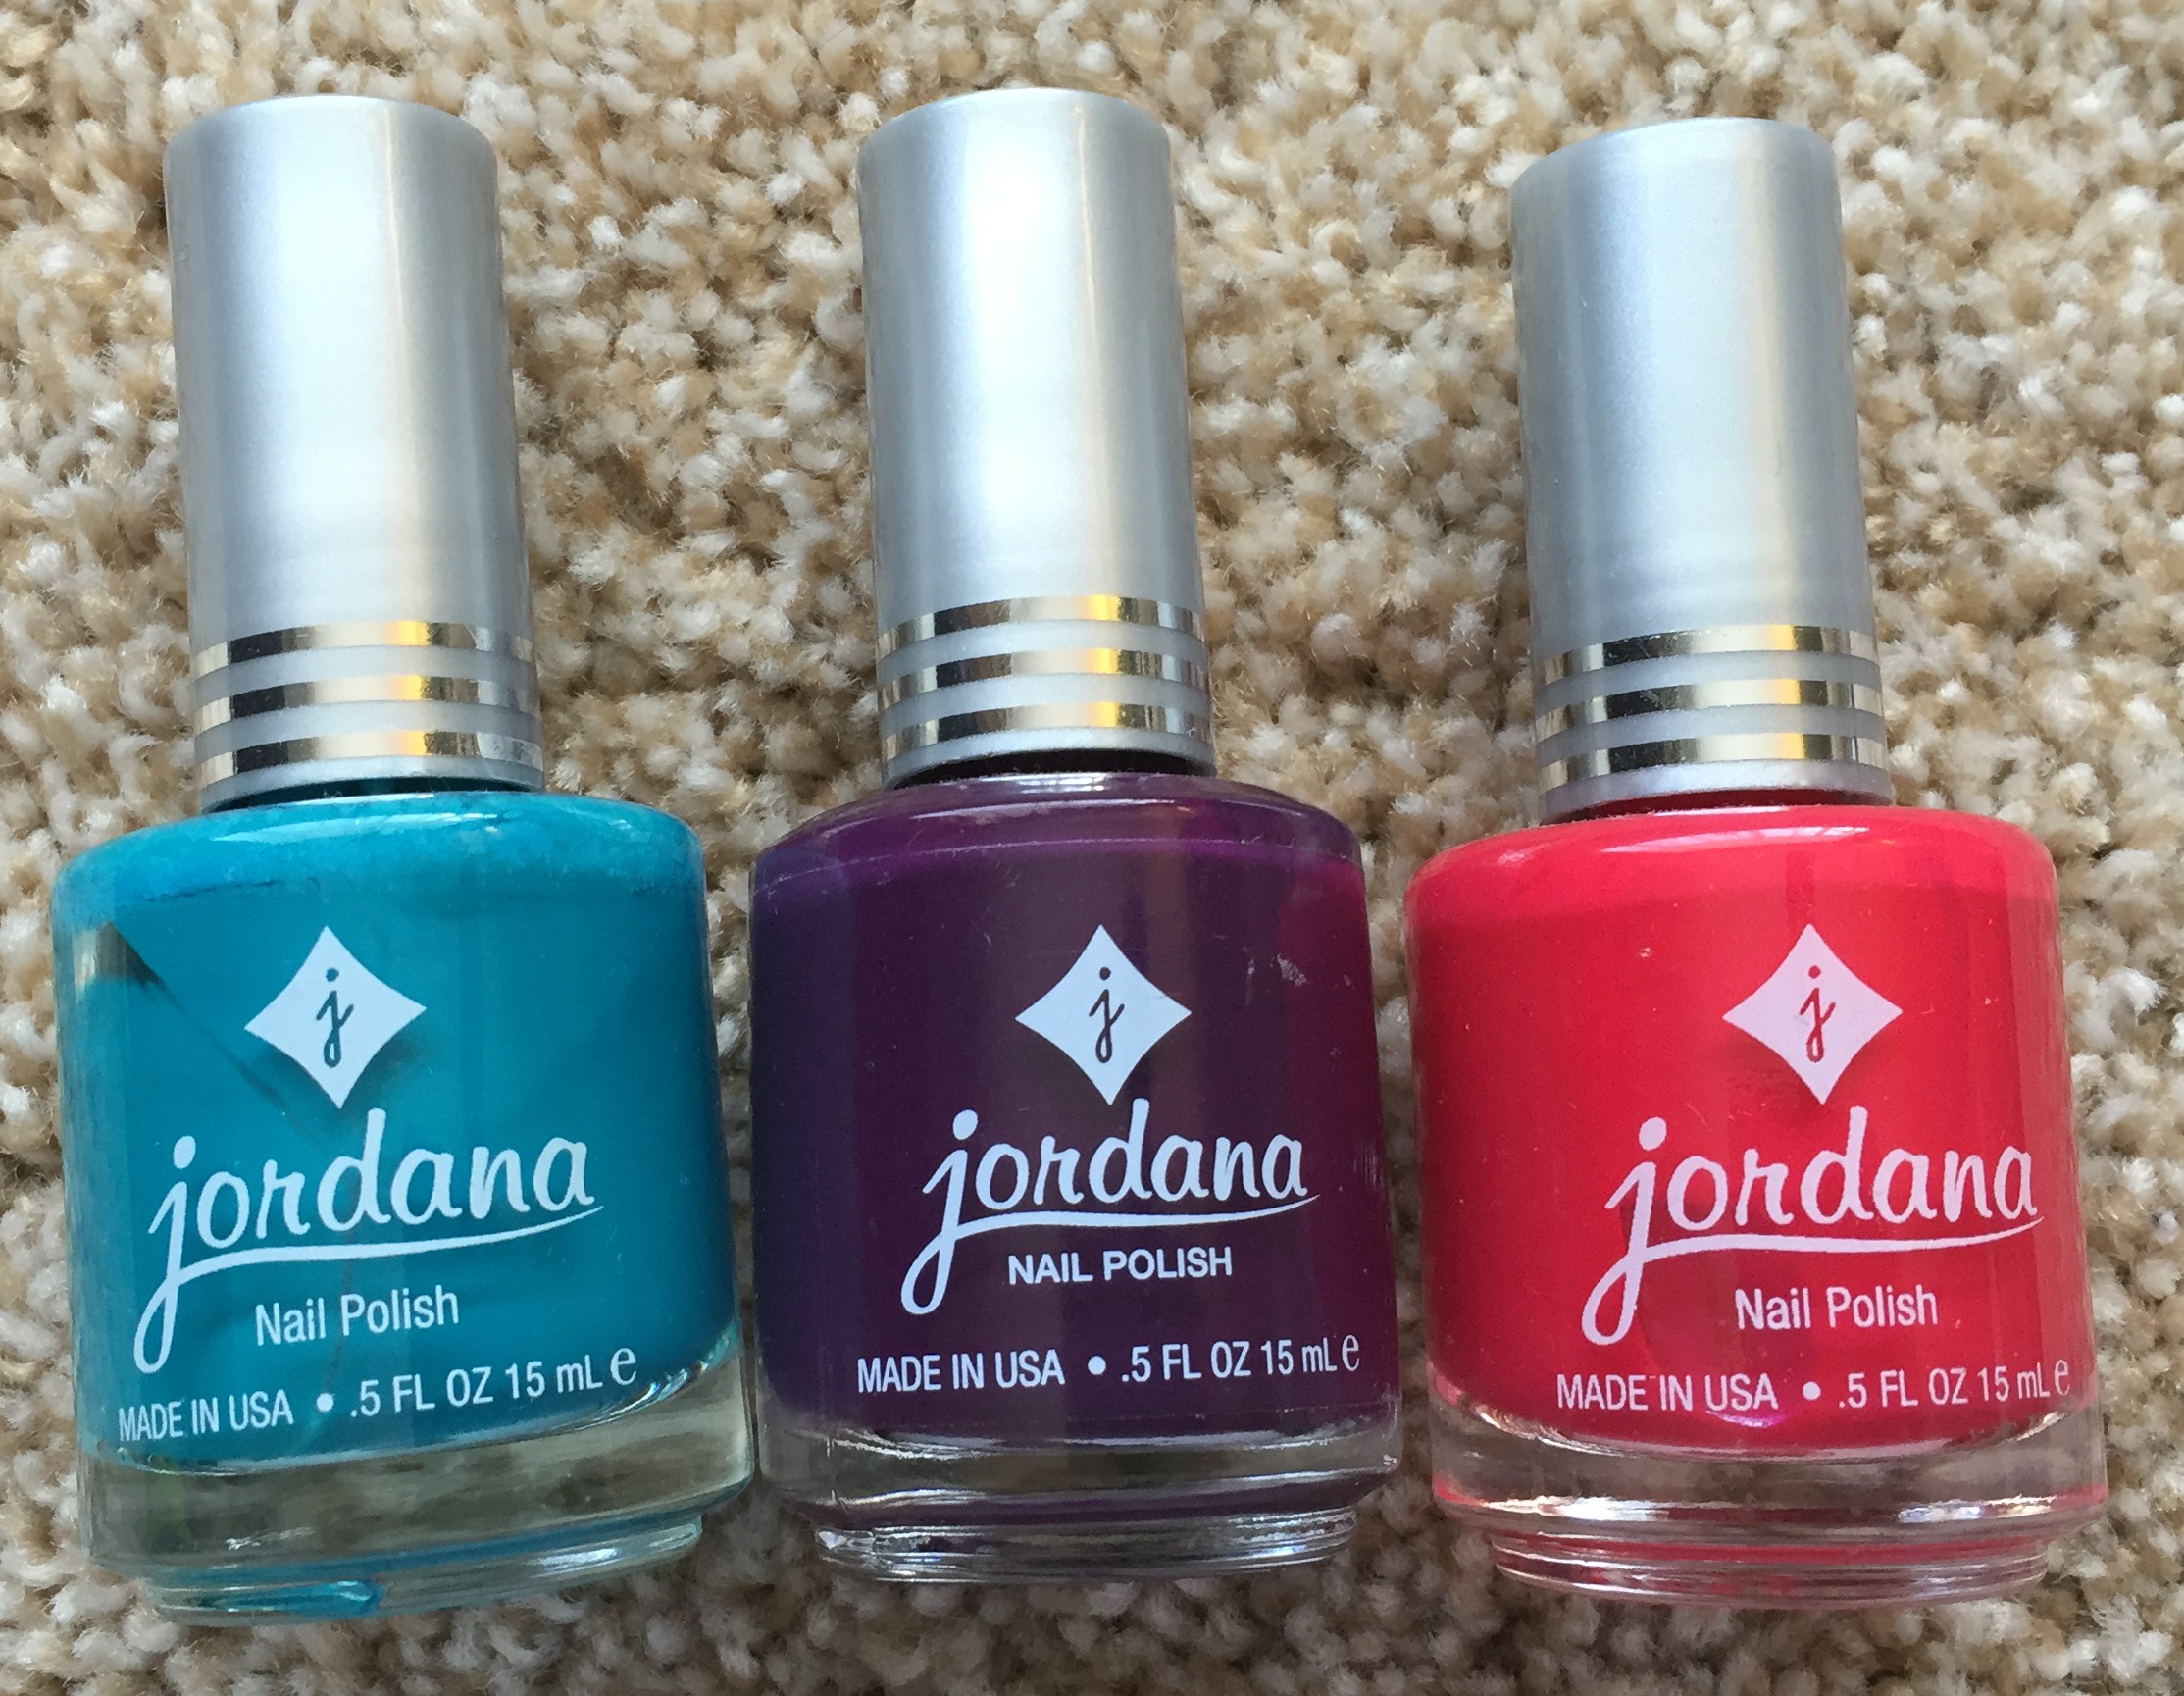
I’m not sure why I don’t own more Jordana. They have such vibrant colors, and great formulas, and they’re only $2. I need more of these.

IMG_7242

I’m a sucker for NYC polishes. Good formula, good colors, really good price. The pink on the bottom right is OLD.

IMG_7244

I only own two Milani. The one on the right is a good 10 years old, but I still love it! The one on the left was the first black and white matte glitter polish that I ever saw, and the first time I saw it, my brain almost exploded.

IMG_7245

I picked this Nina polish up at Sally awhile ago. The green is less awesome than I thought it was going to be. I bought the blue while I was on the hunt for the most pure and pigmented blue that I could find.

IMG_7246

I own three Ulta polishes and they are all in different bottles. What’s up with that? The blue is really beautiful, though.

IMG_7247

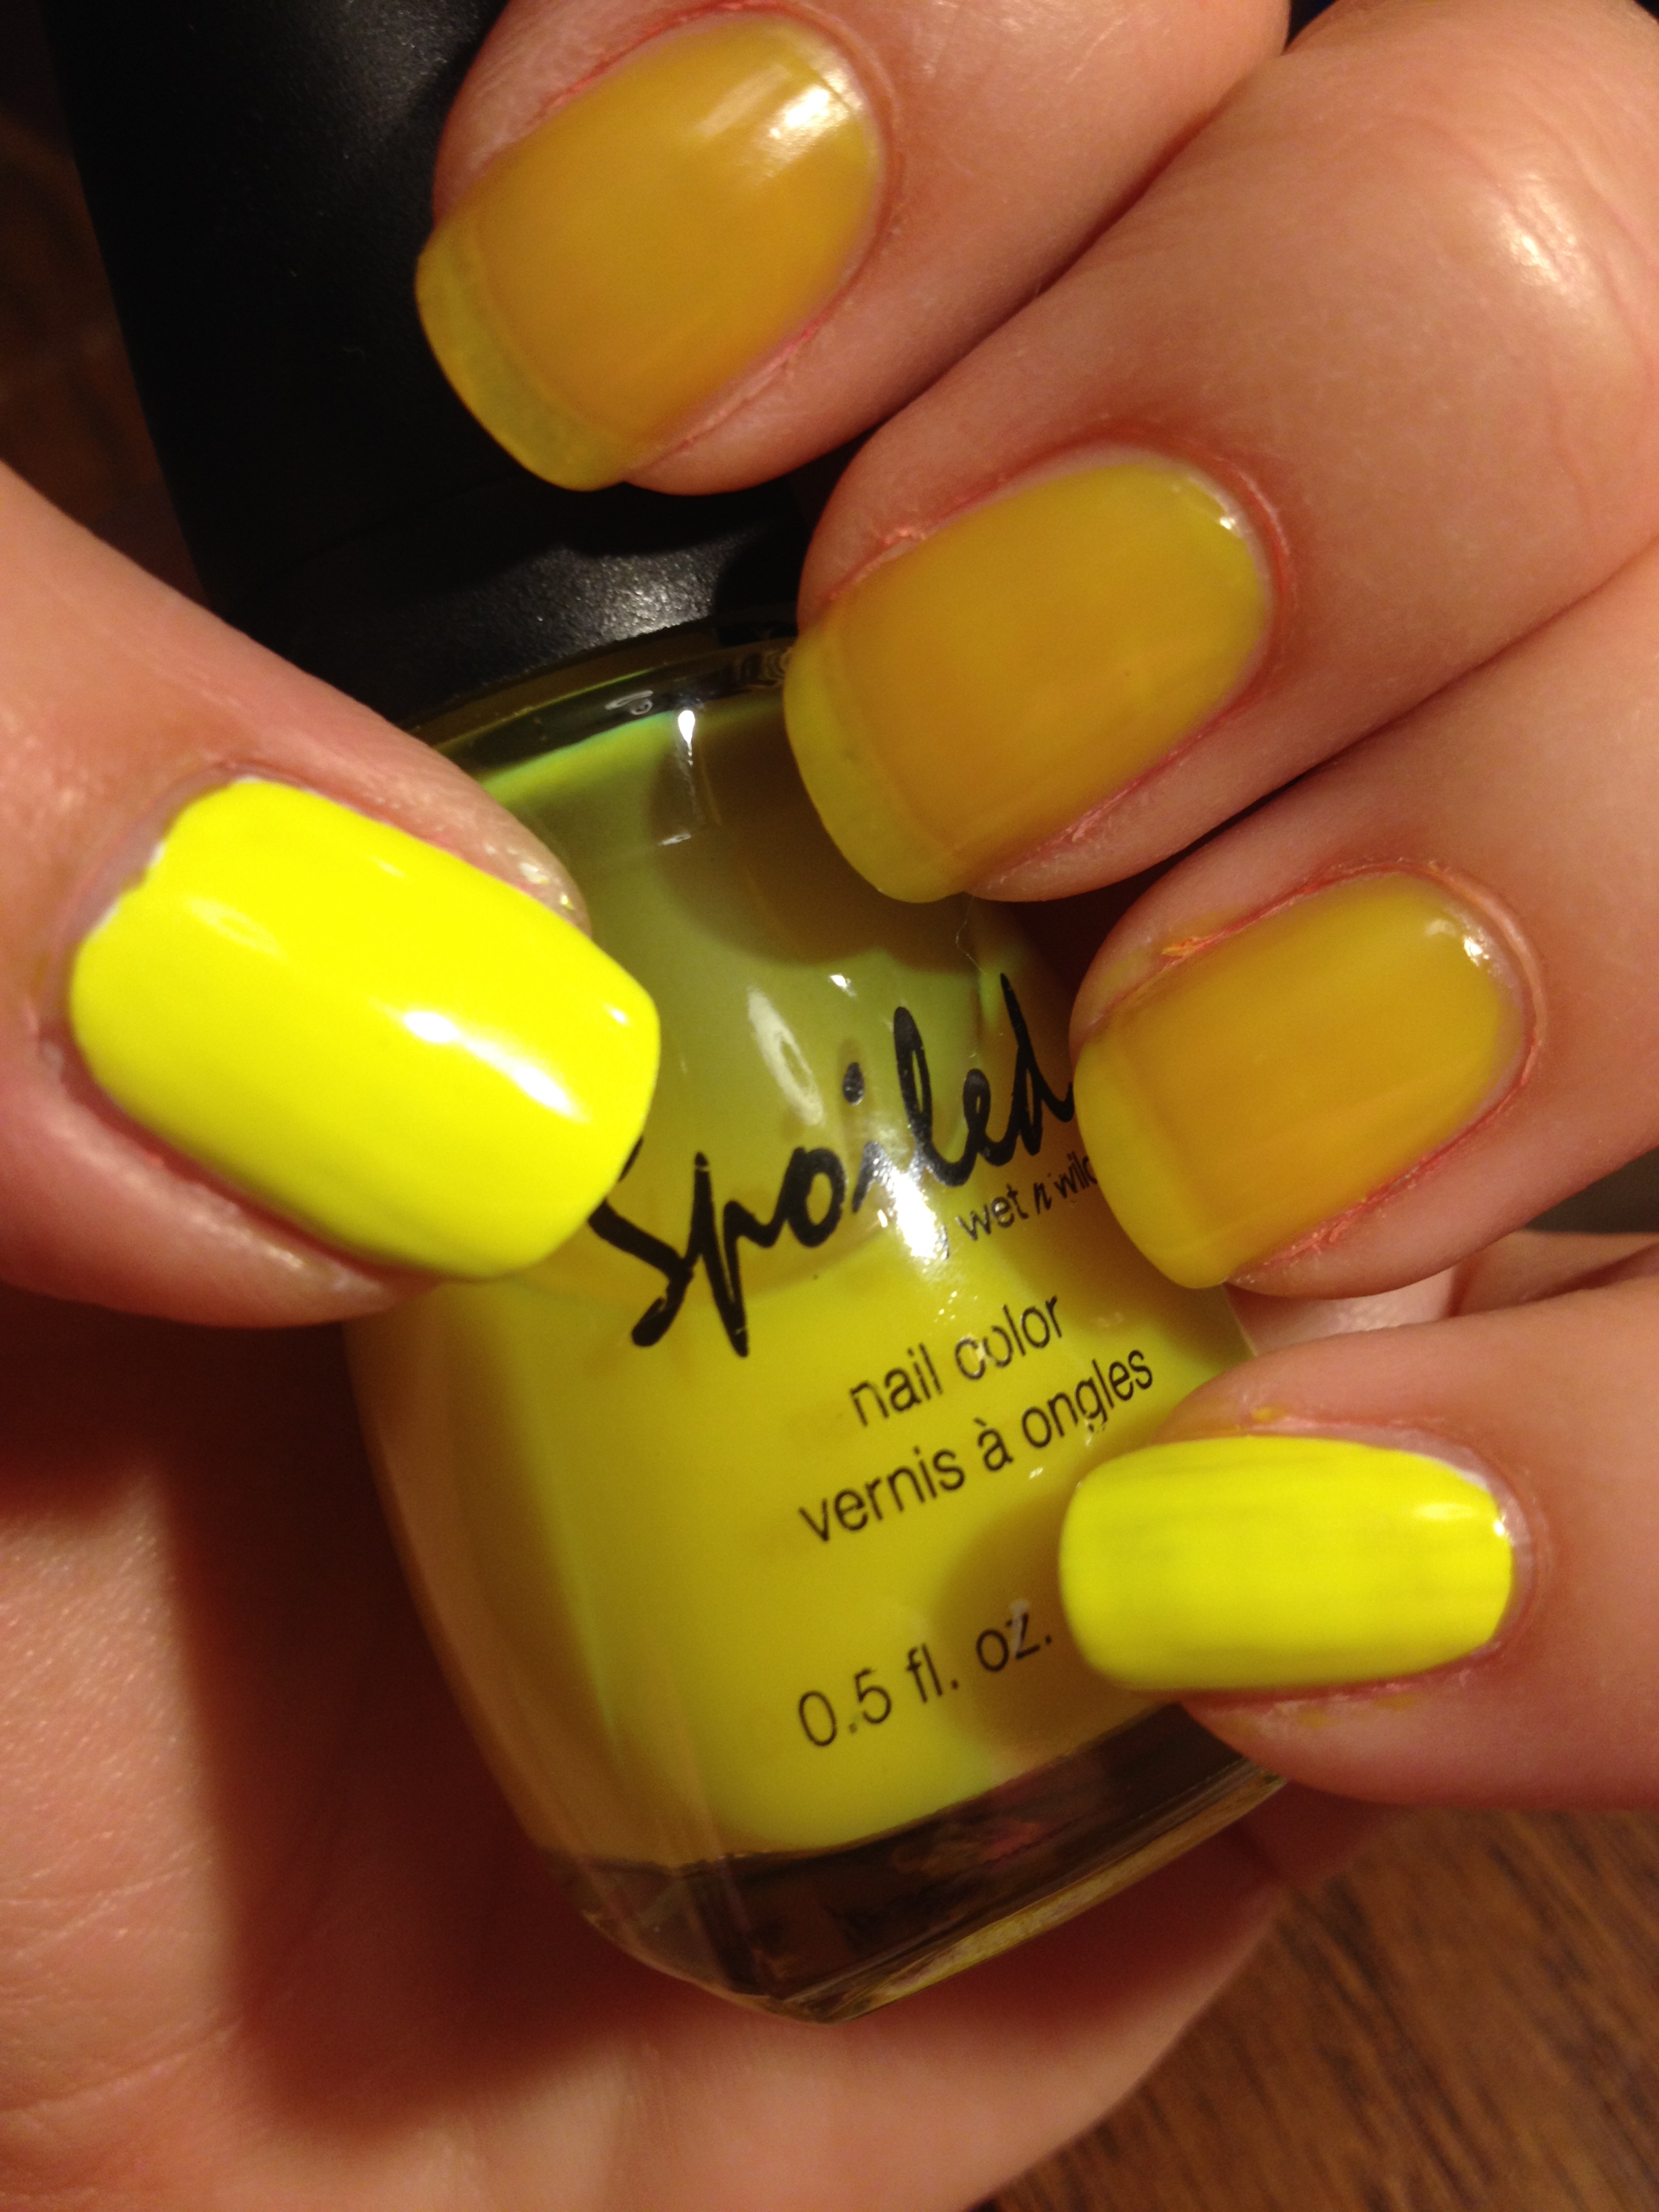
Spoiled by Wet n Wild used to be available exclusively at CVS. They’ve been discontinued, but most (if not all) of these colors are in the Wet n Wild Megalast bottles and are sold exclusively at Dollar General/Family Dollar. I was sad to see this line of polishes leave CVS, though.

IMG_7248

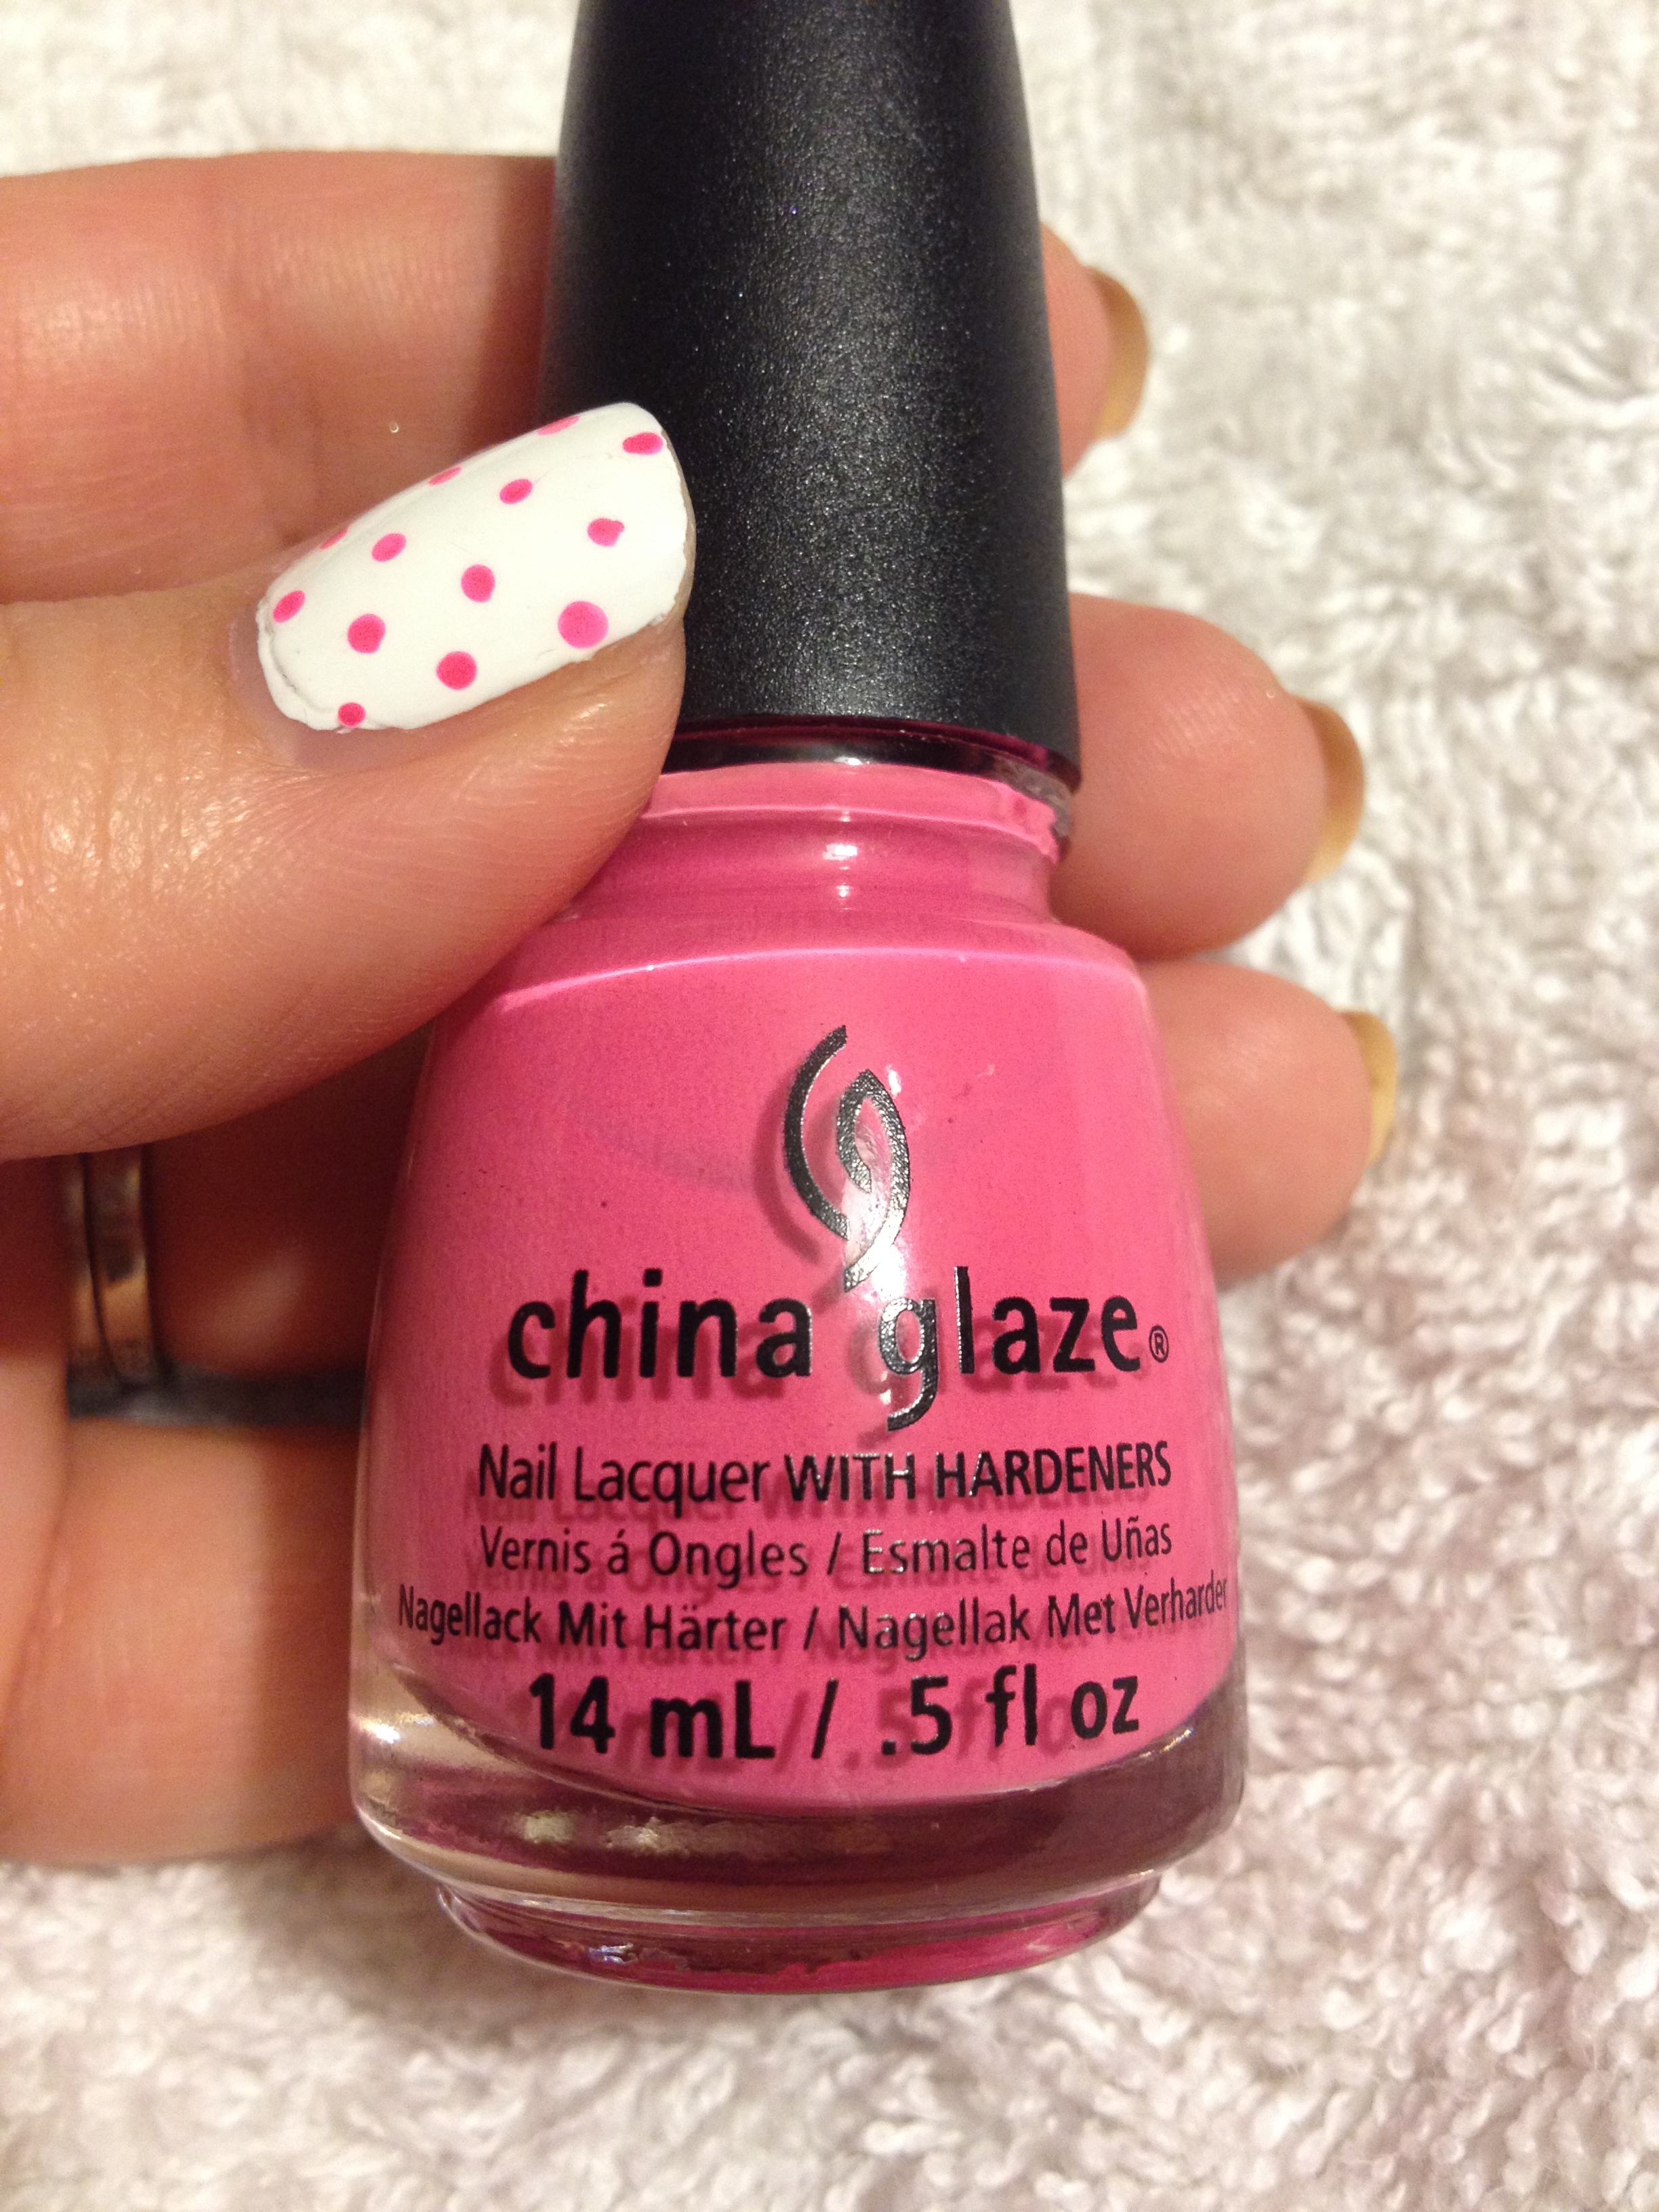
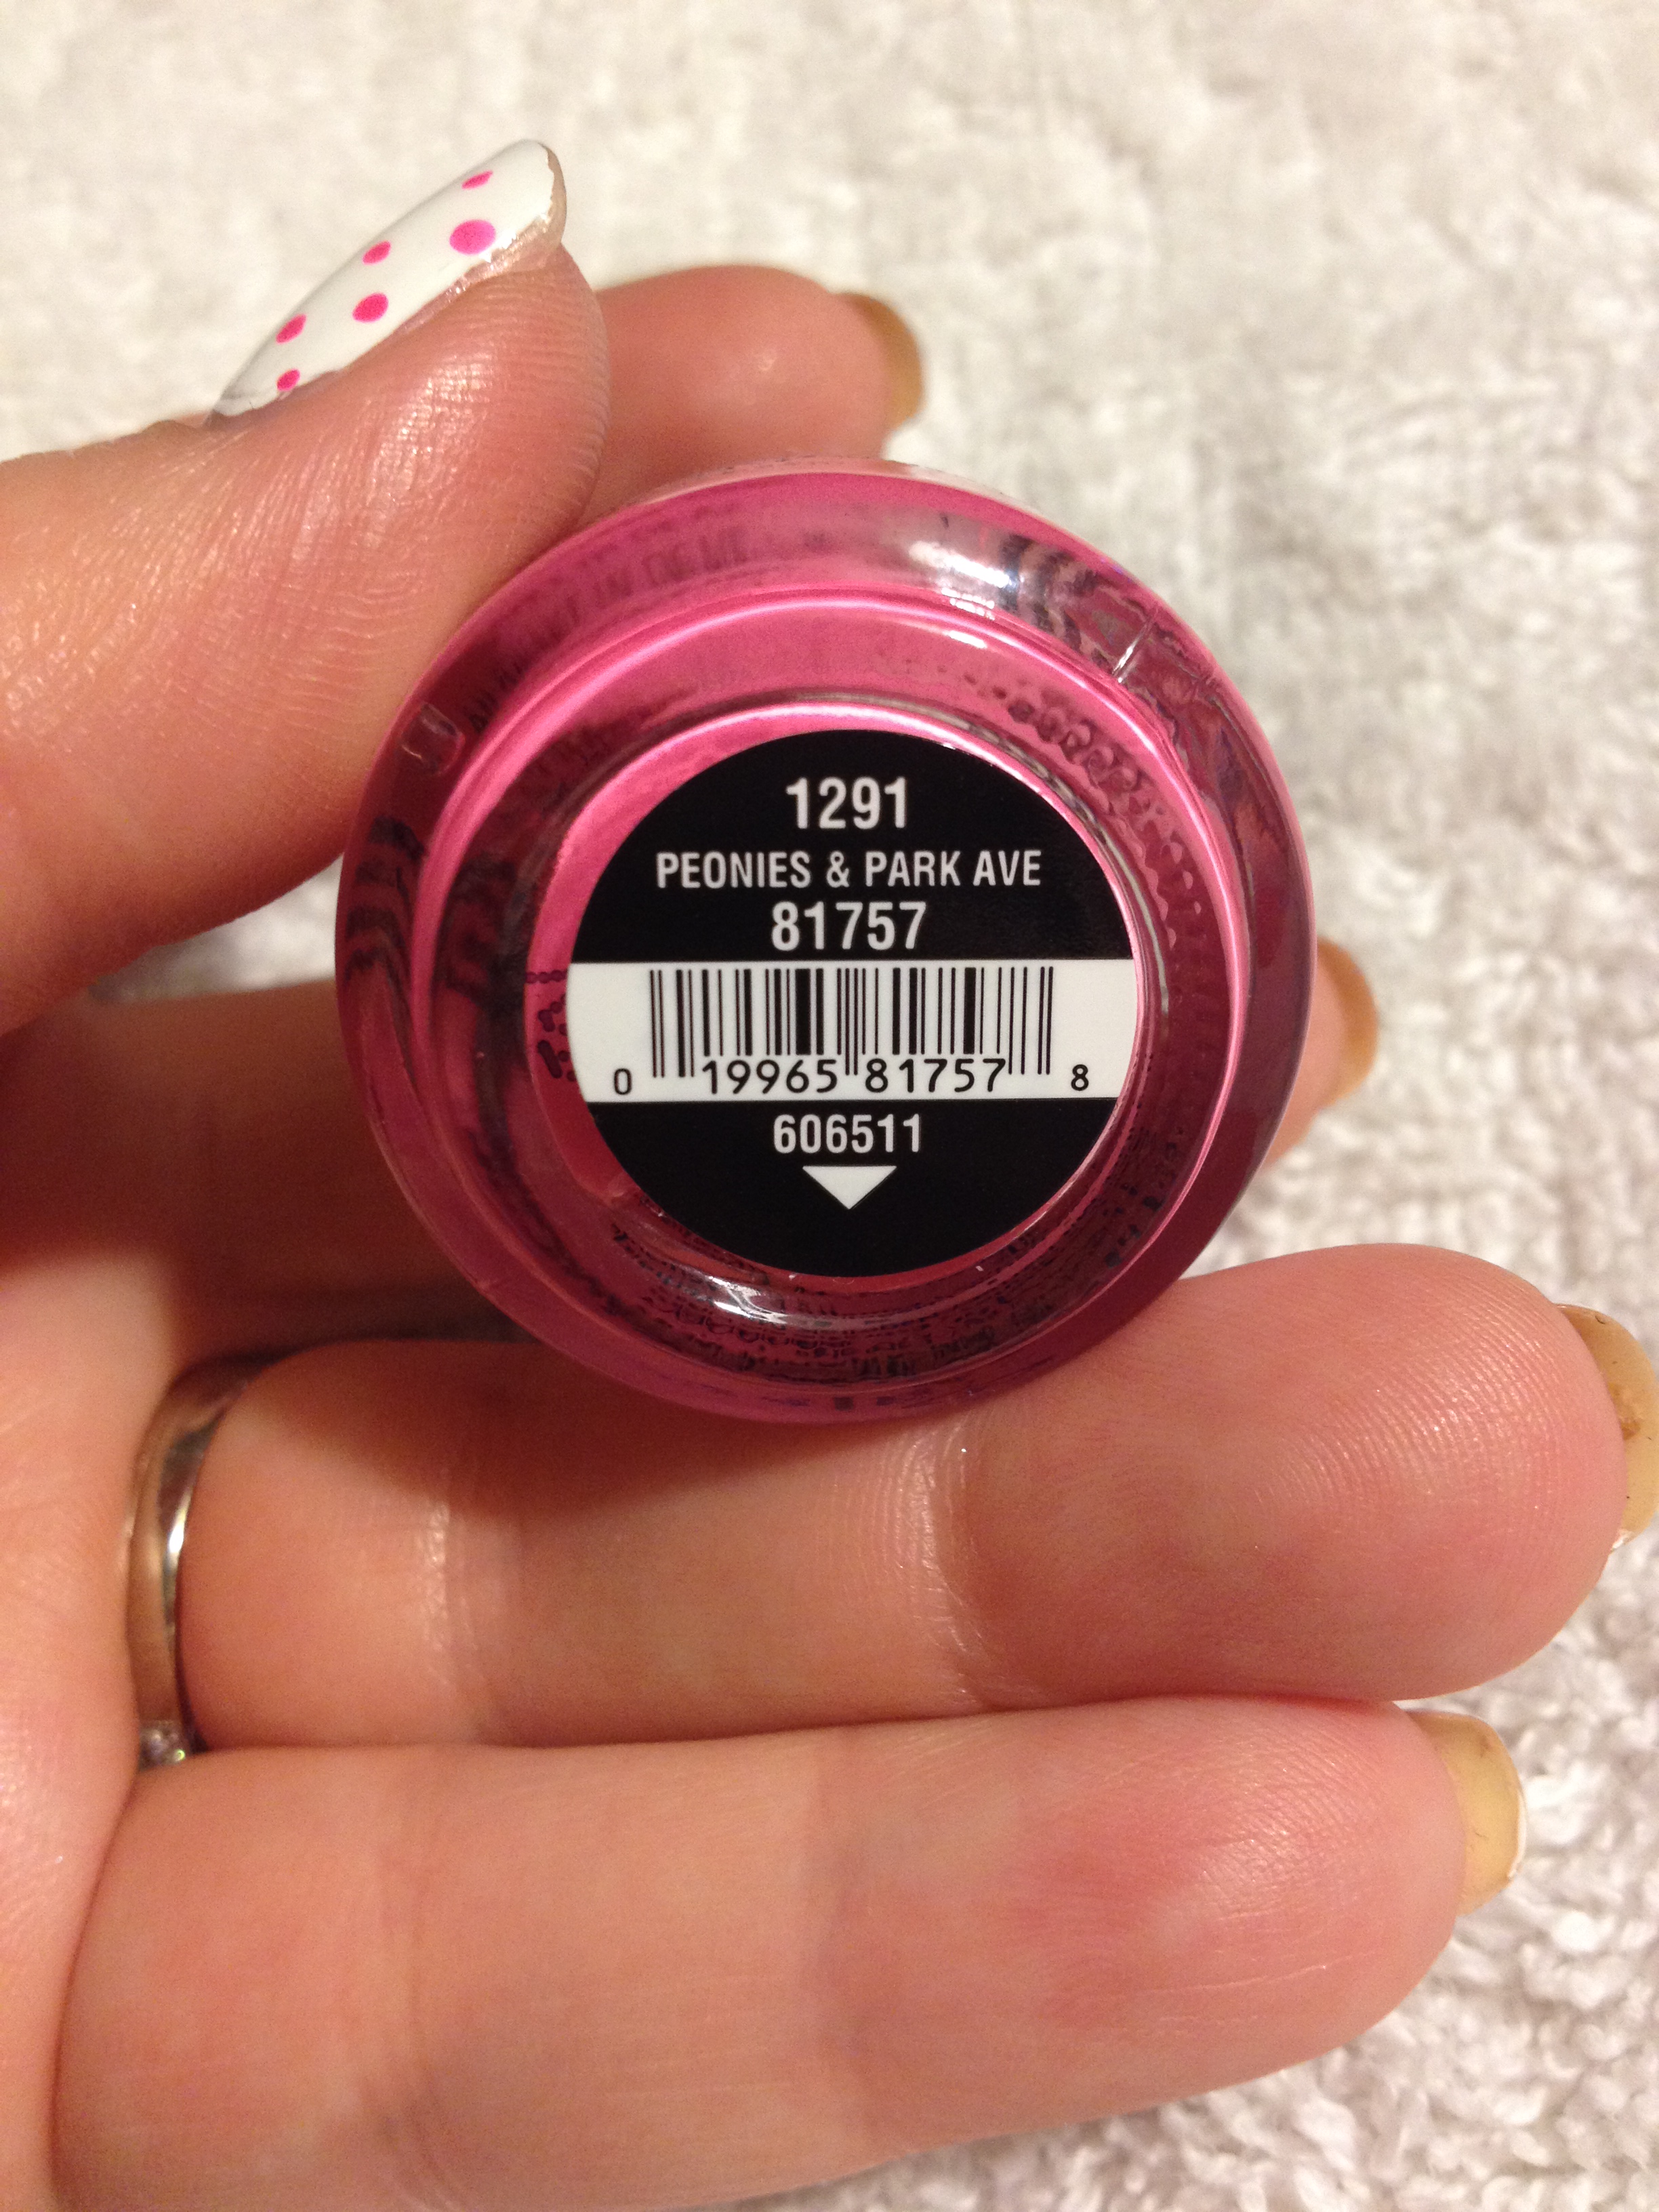
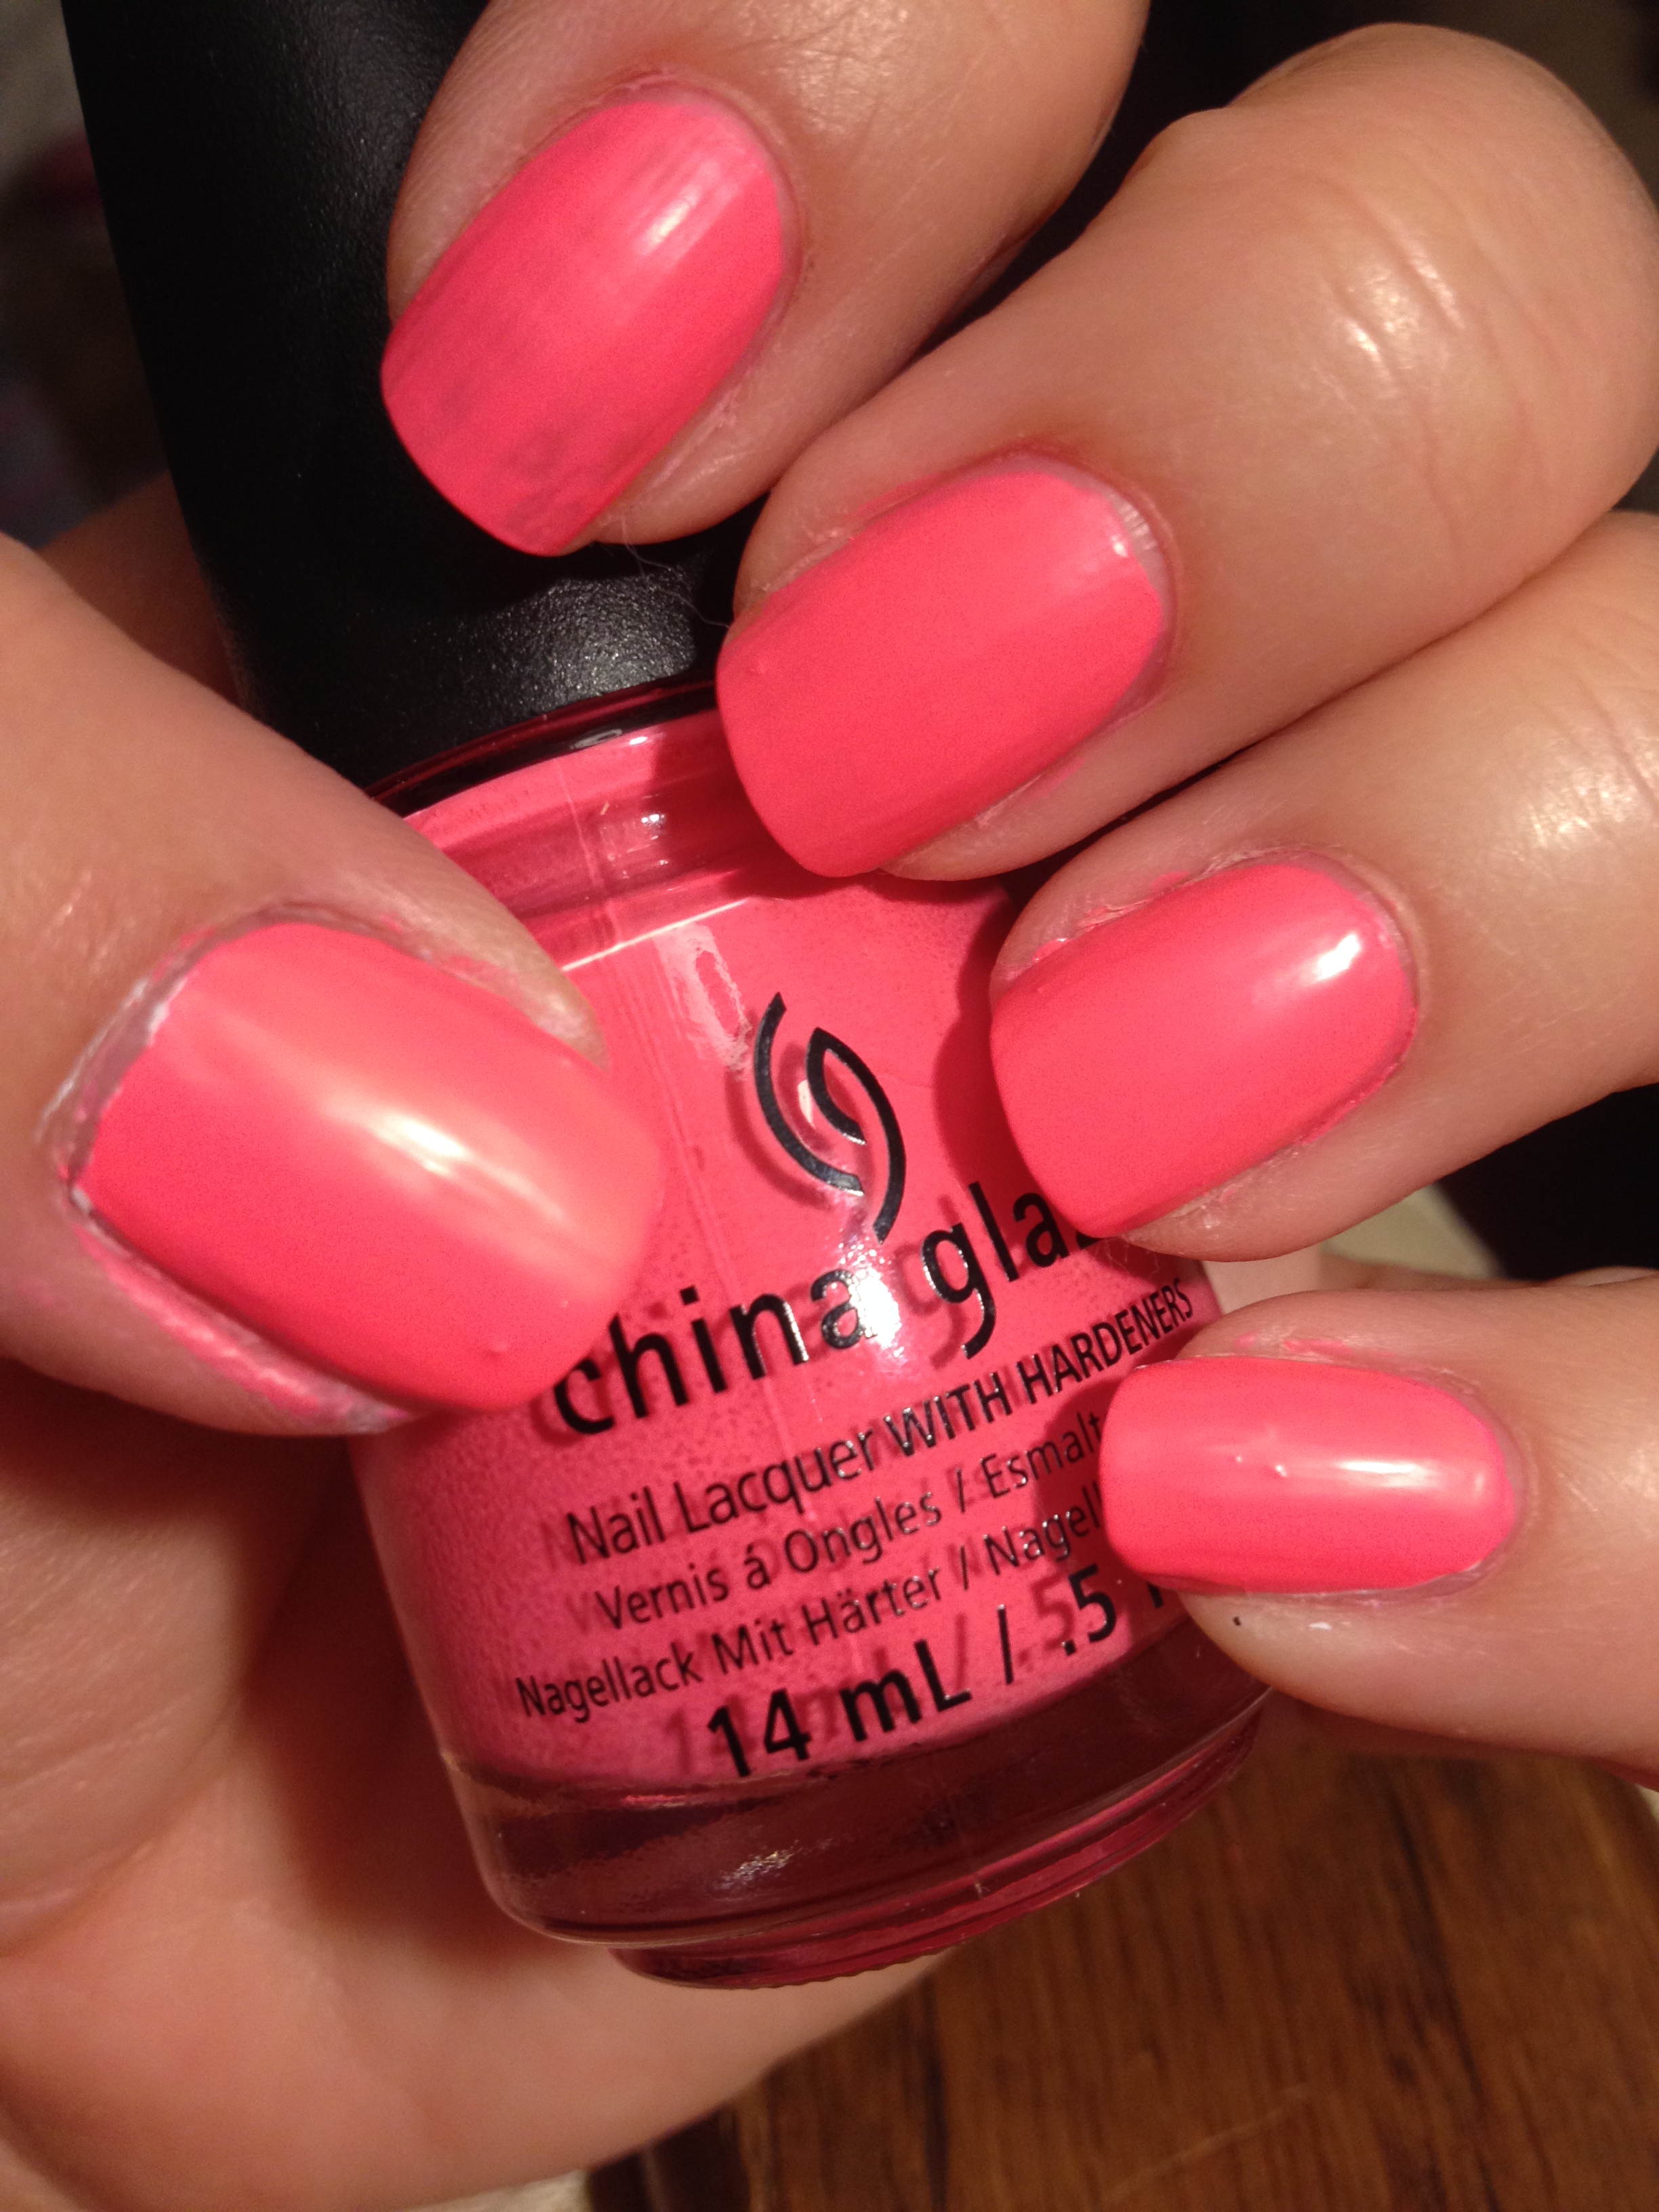
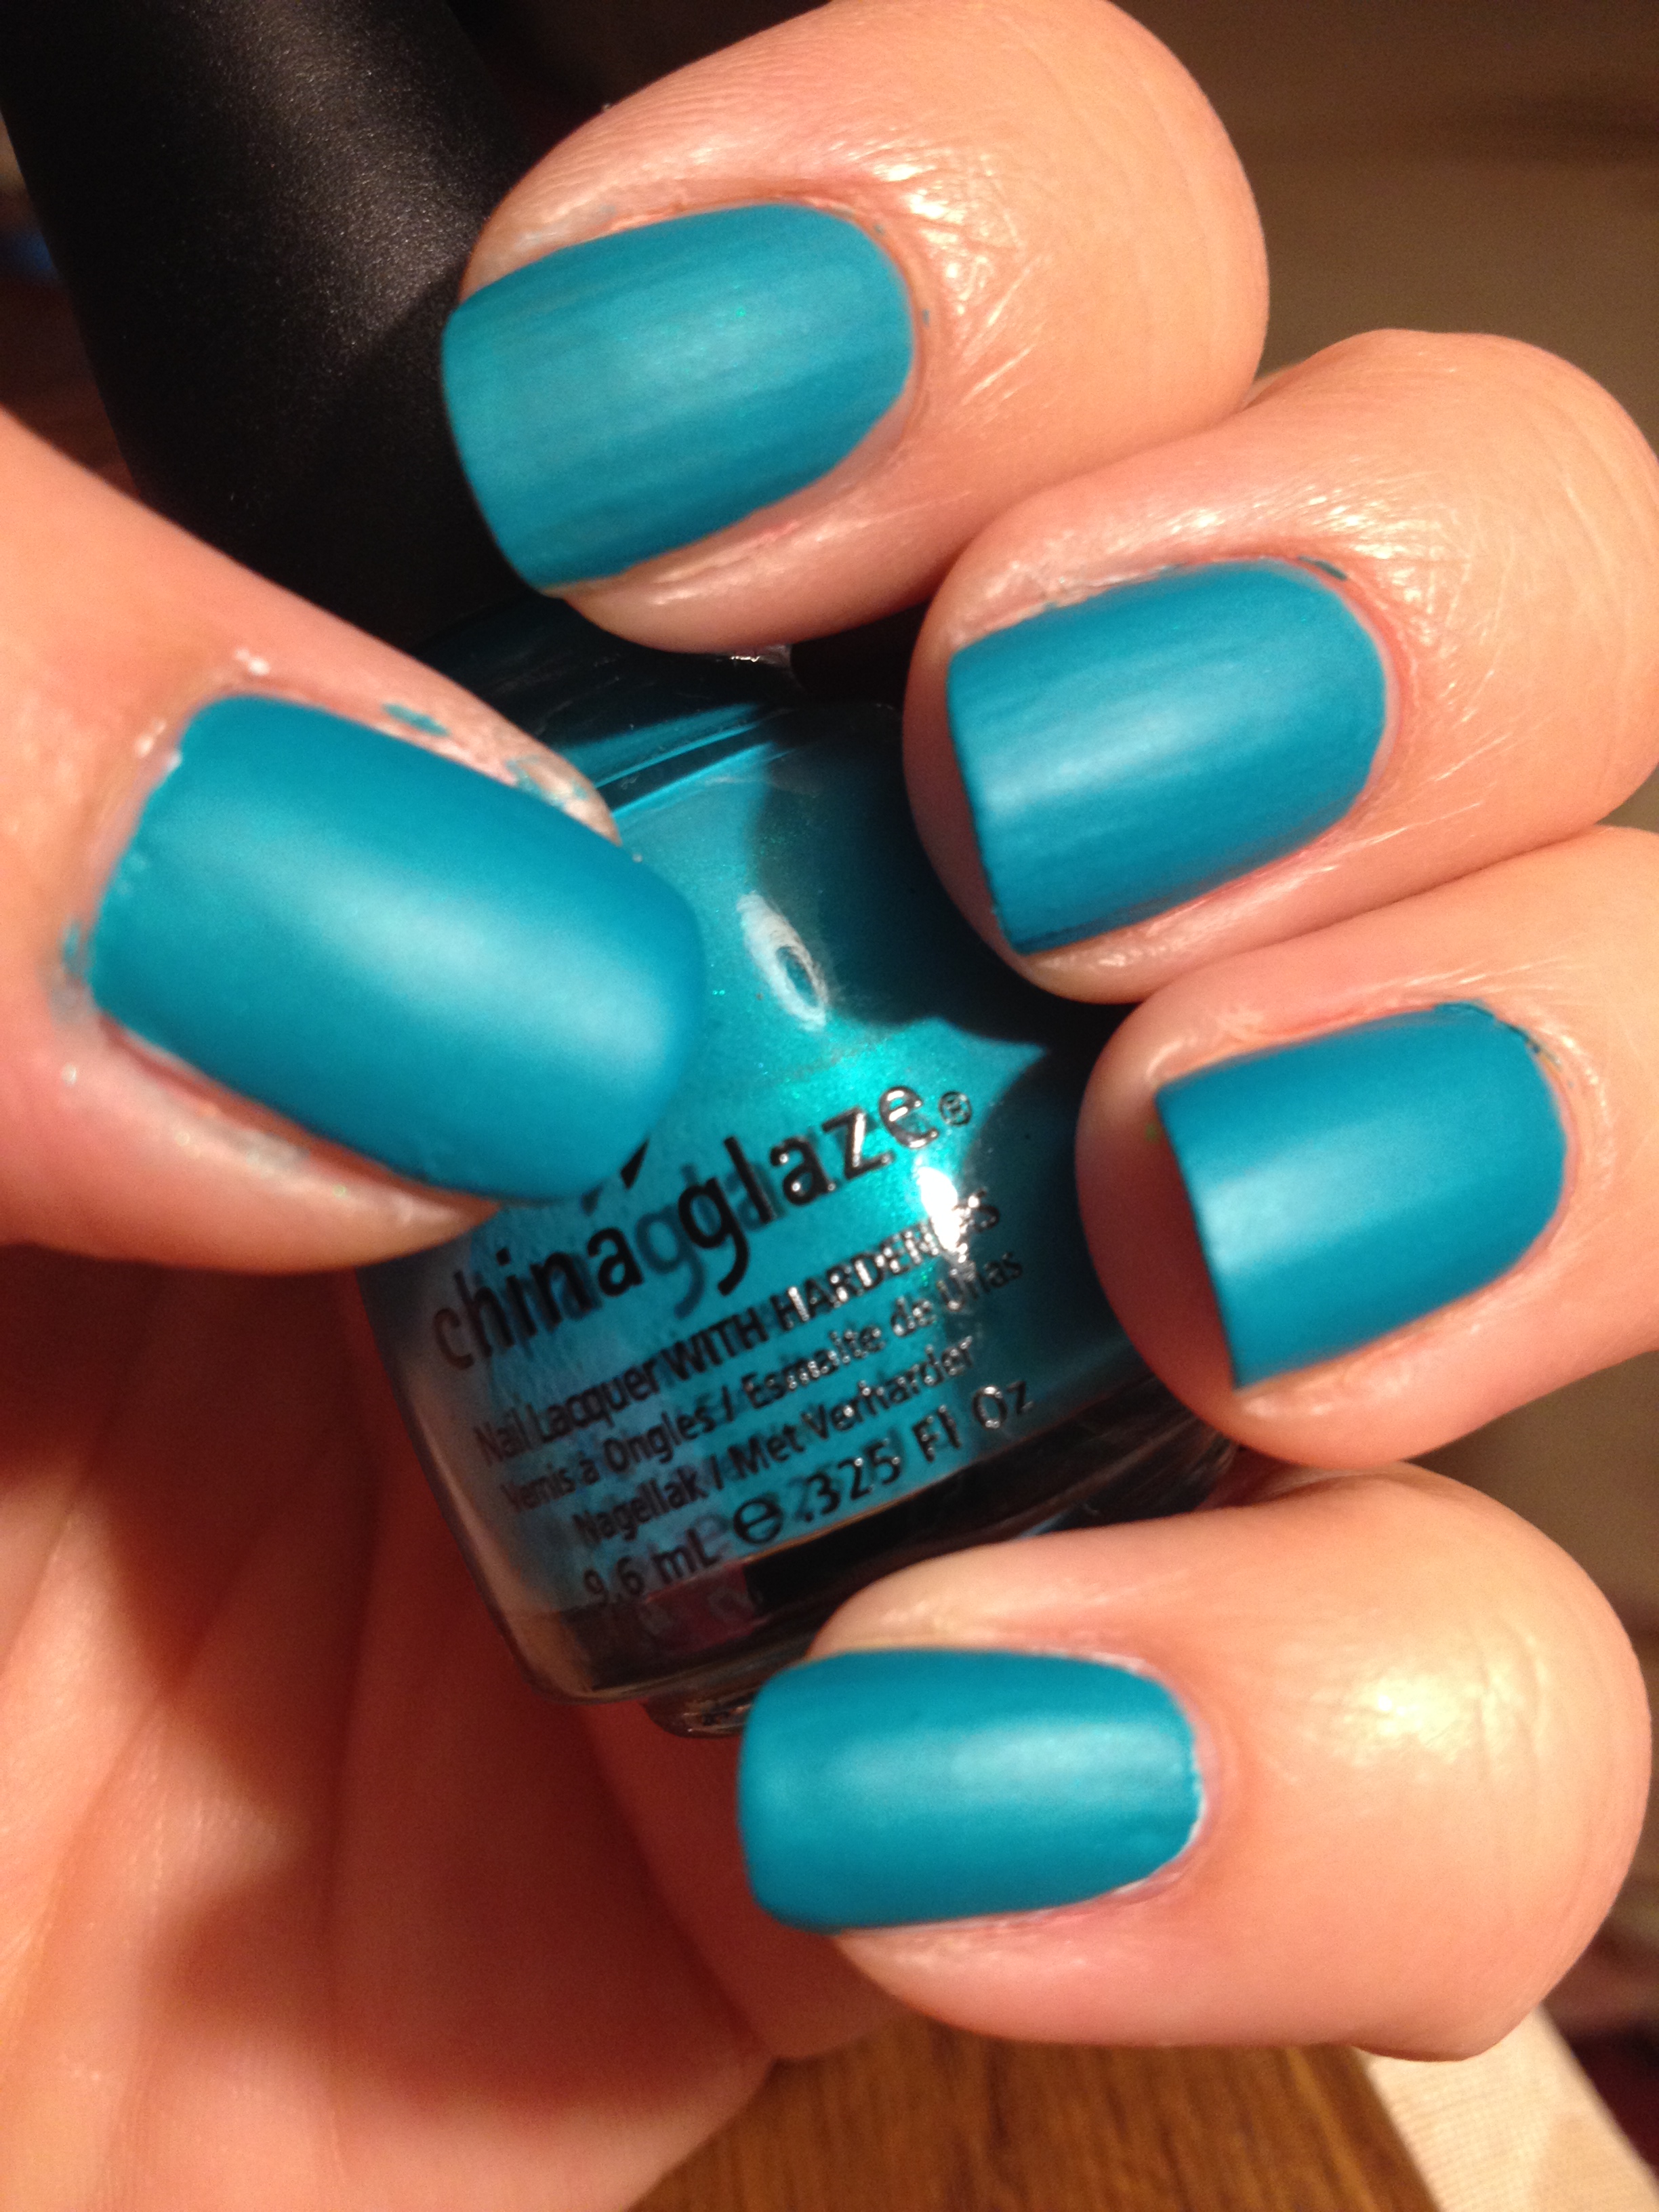
I have a good pile of China Glaze. Most of these were purchased on clearance or on really good sales at either Sally or Ulta. Man, I love so many of these!

IMG_7251

Does anyone remember Petites? These polishes are a solid 10 years old. I went through a phase where I loved each of these polishes.

IMG_7252

Anyone remember Bon Bons either? Are these still around? Seriously, each bottle has like, four drops of polish in it.

IMG_7253

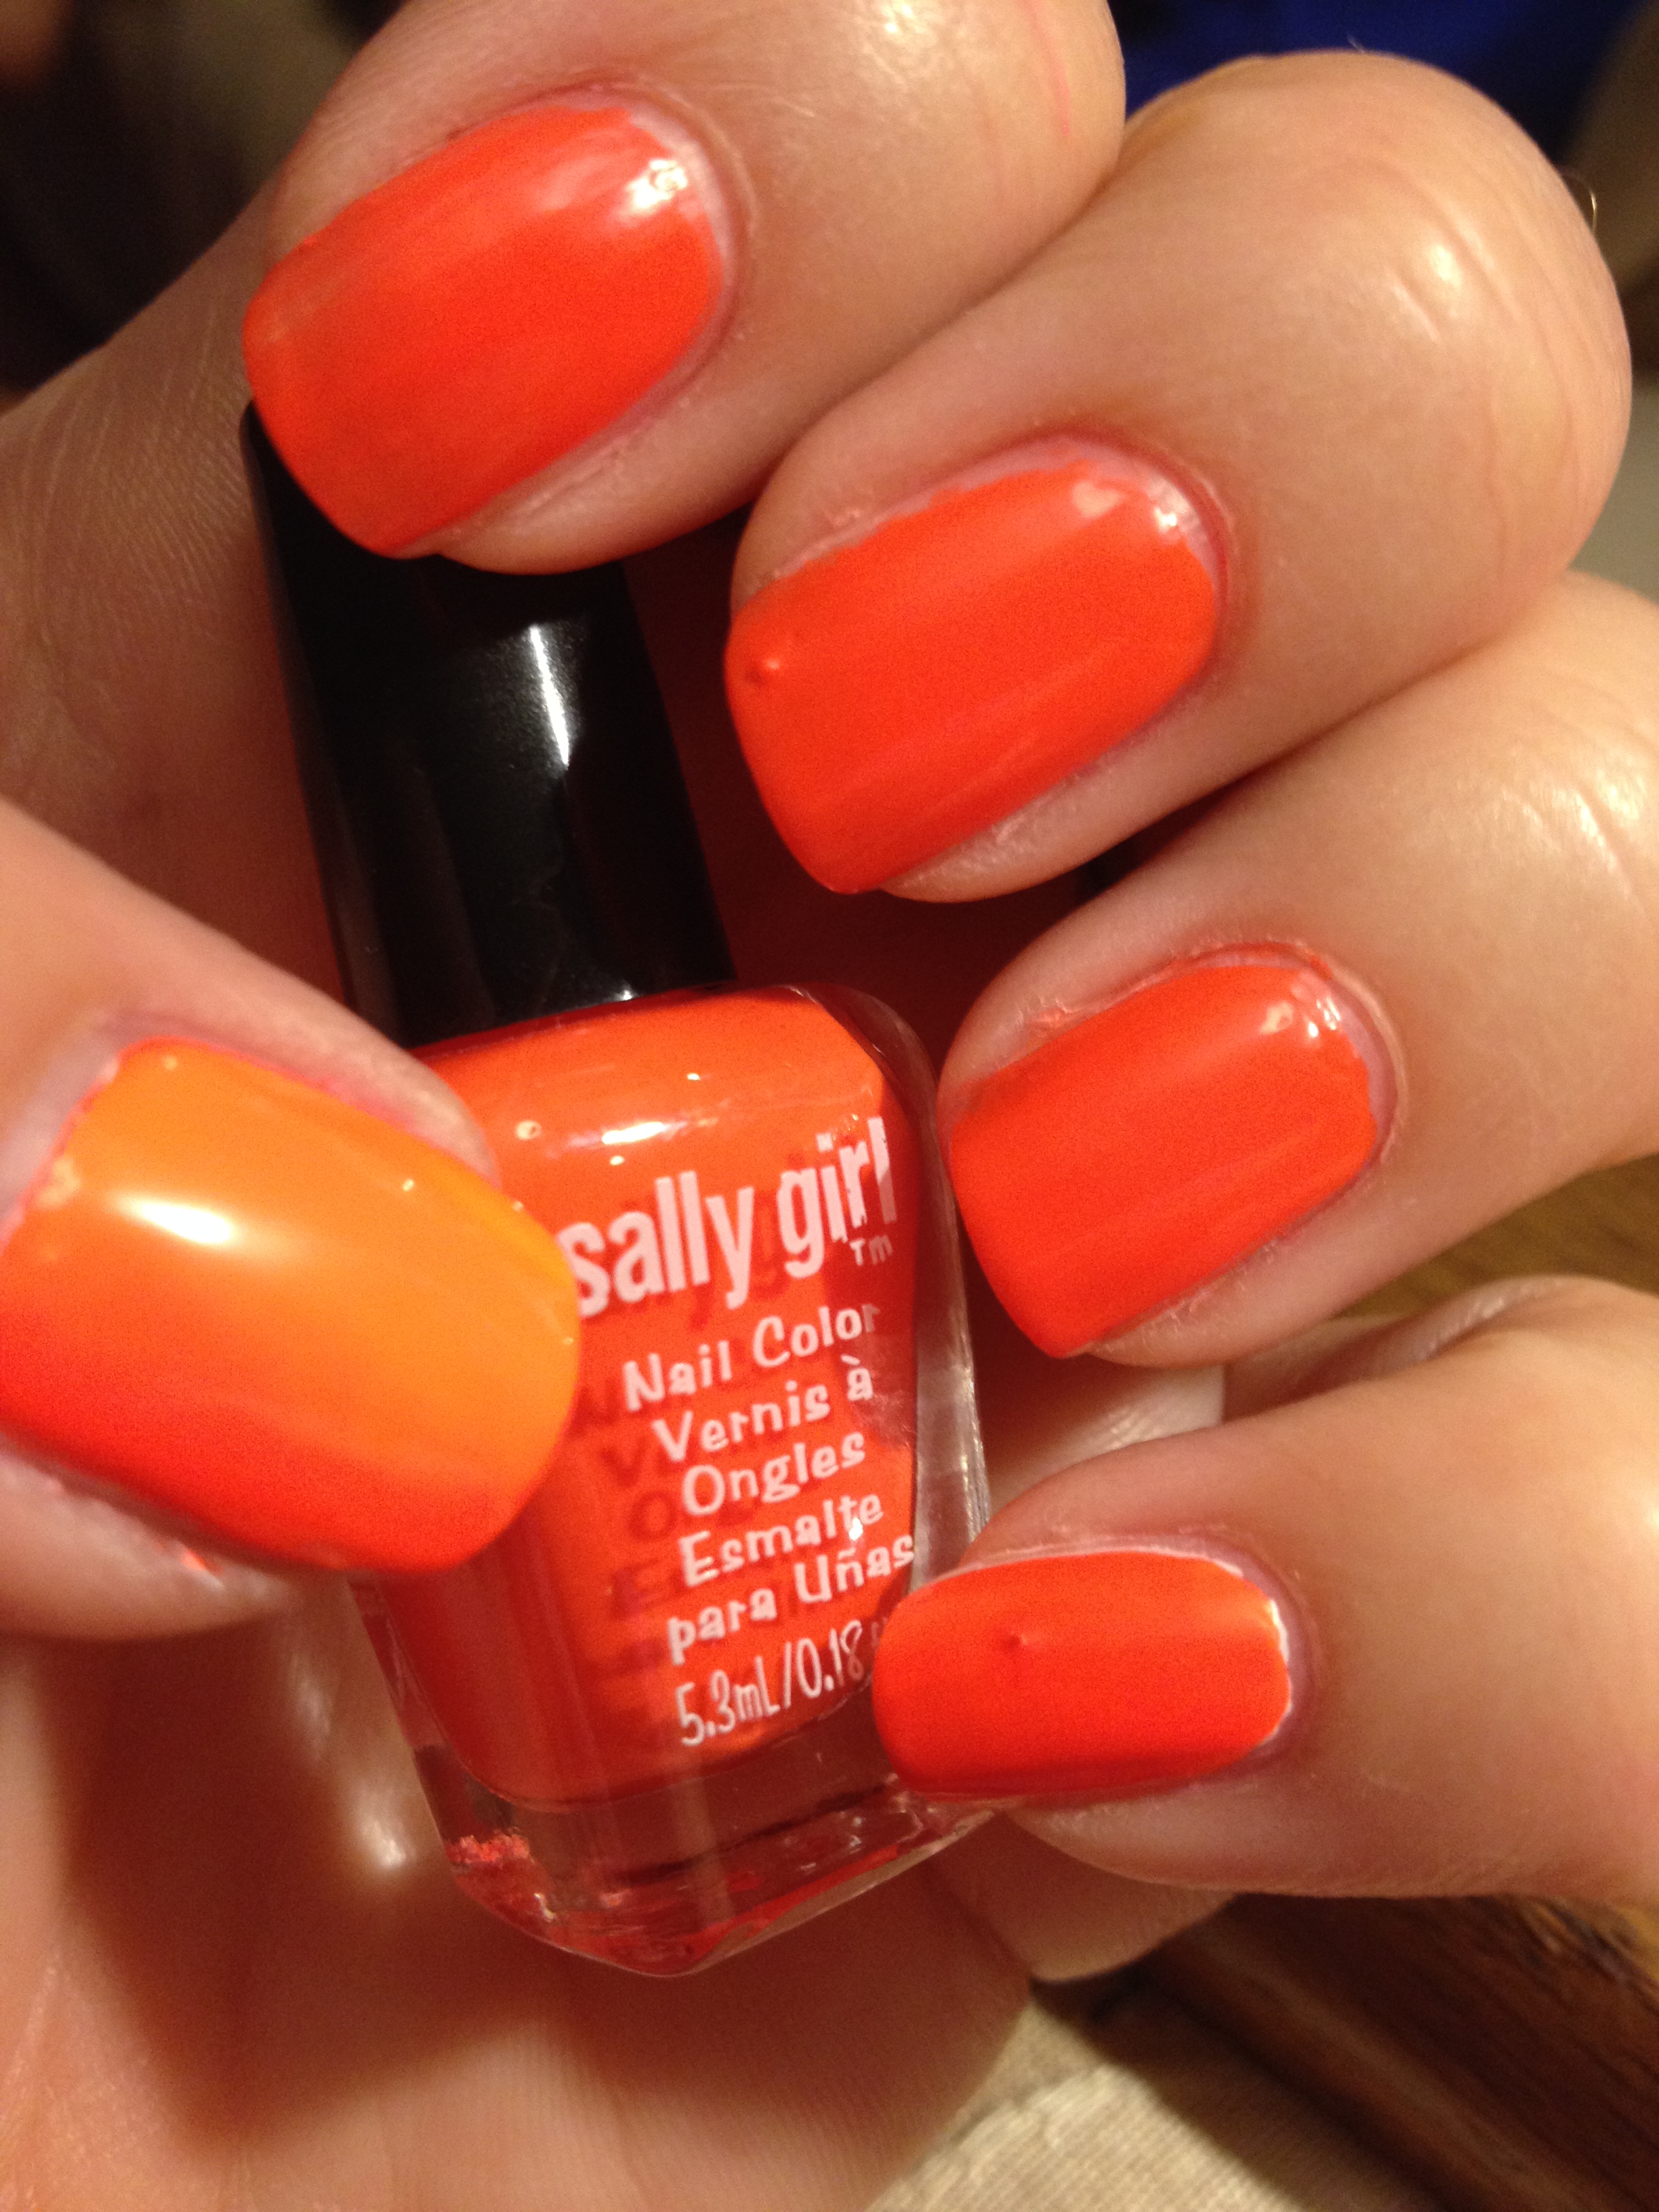
Speaking of teeny tiny bottles, these are Sally Beauty Supply’s brand called Sally Girl. Pretty nice little polishes, actually.

IMG_7254

We here in ‘Murica can’t get Joe Fresh polishes, so I picked these up a year or so ago when I was in Canada. Great little polishes! I’m definitely picking up more then next time I visit our neighbors to the north, assuming that they don’t build a wall to keep us out if Trump is elected.

IMG_7259

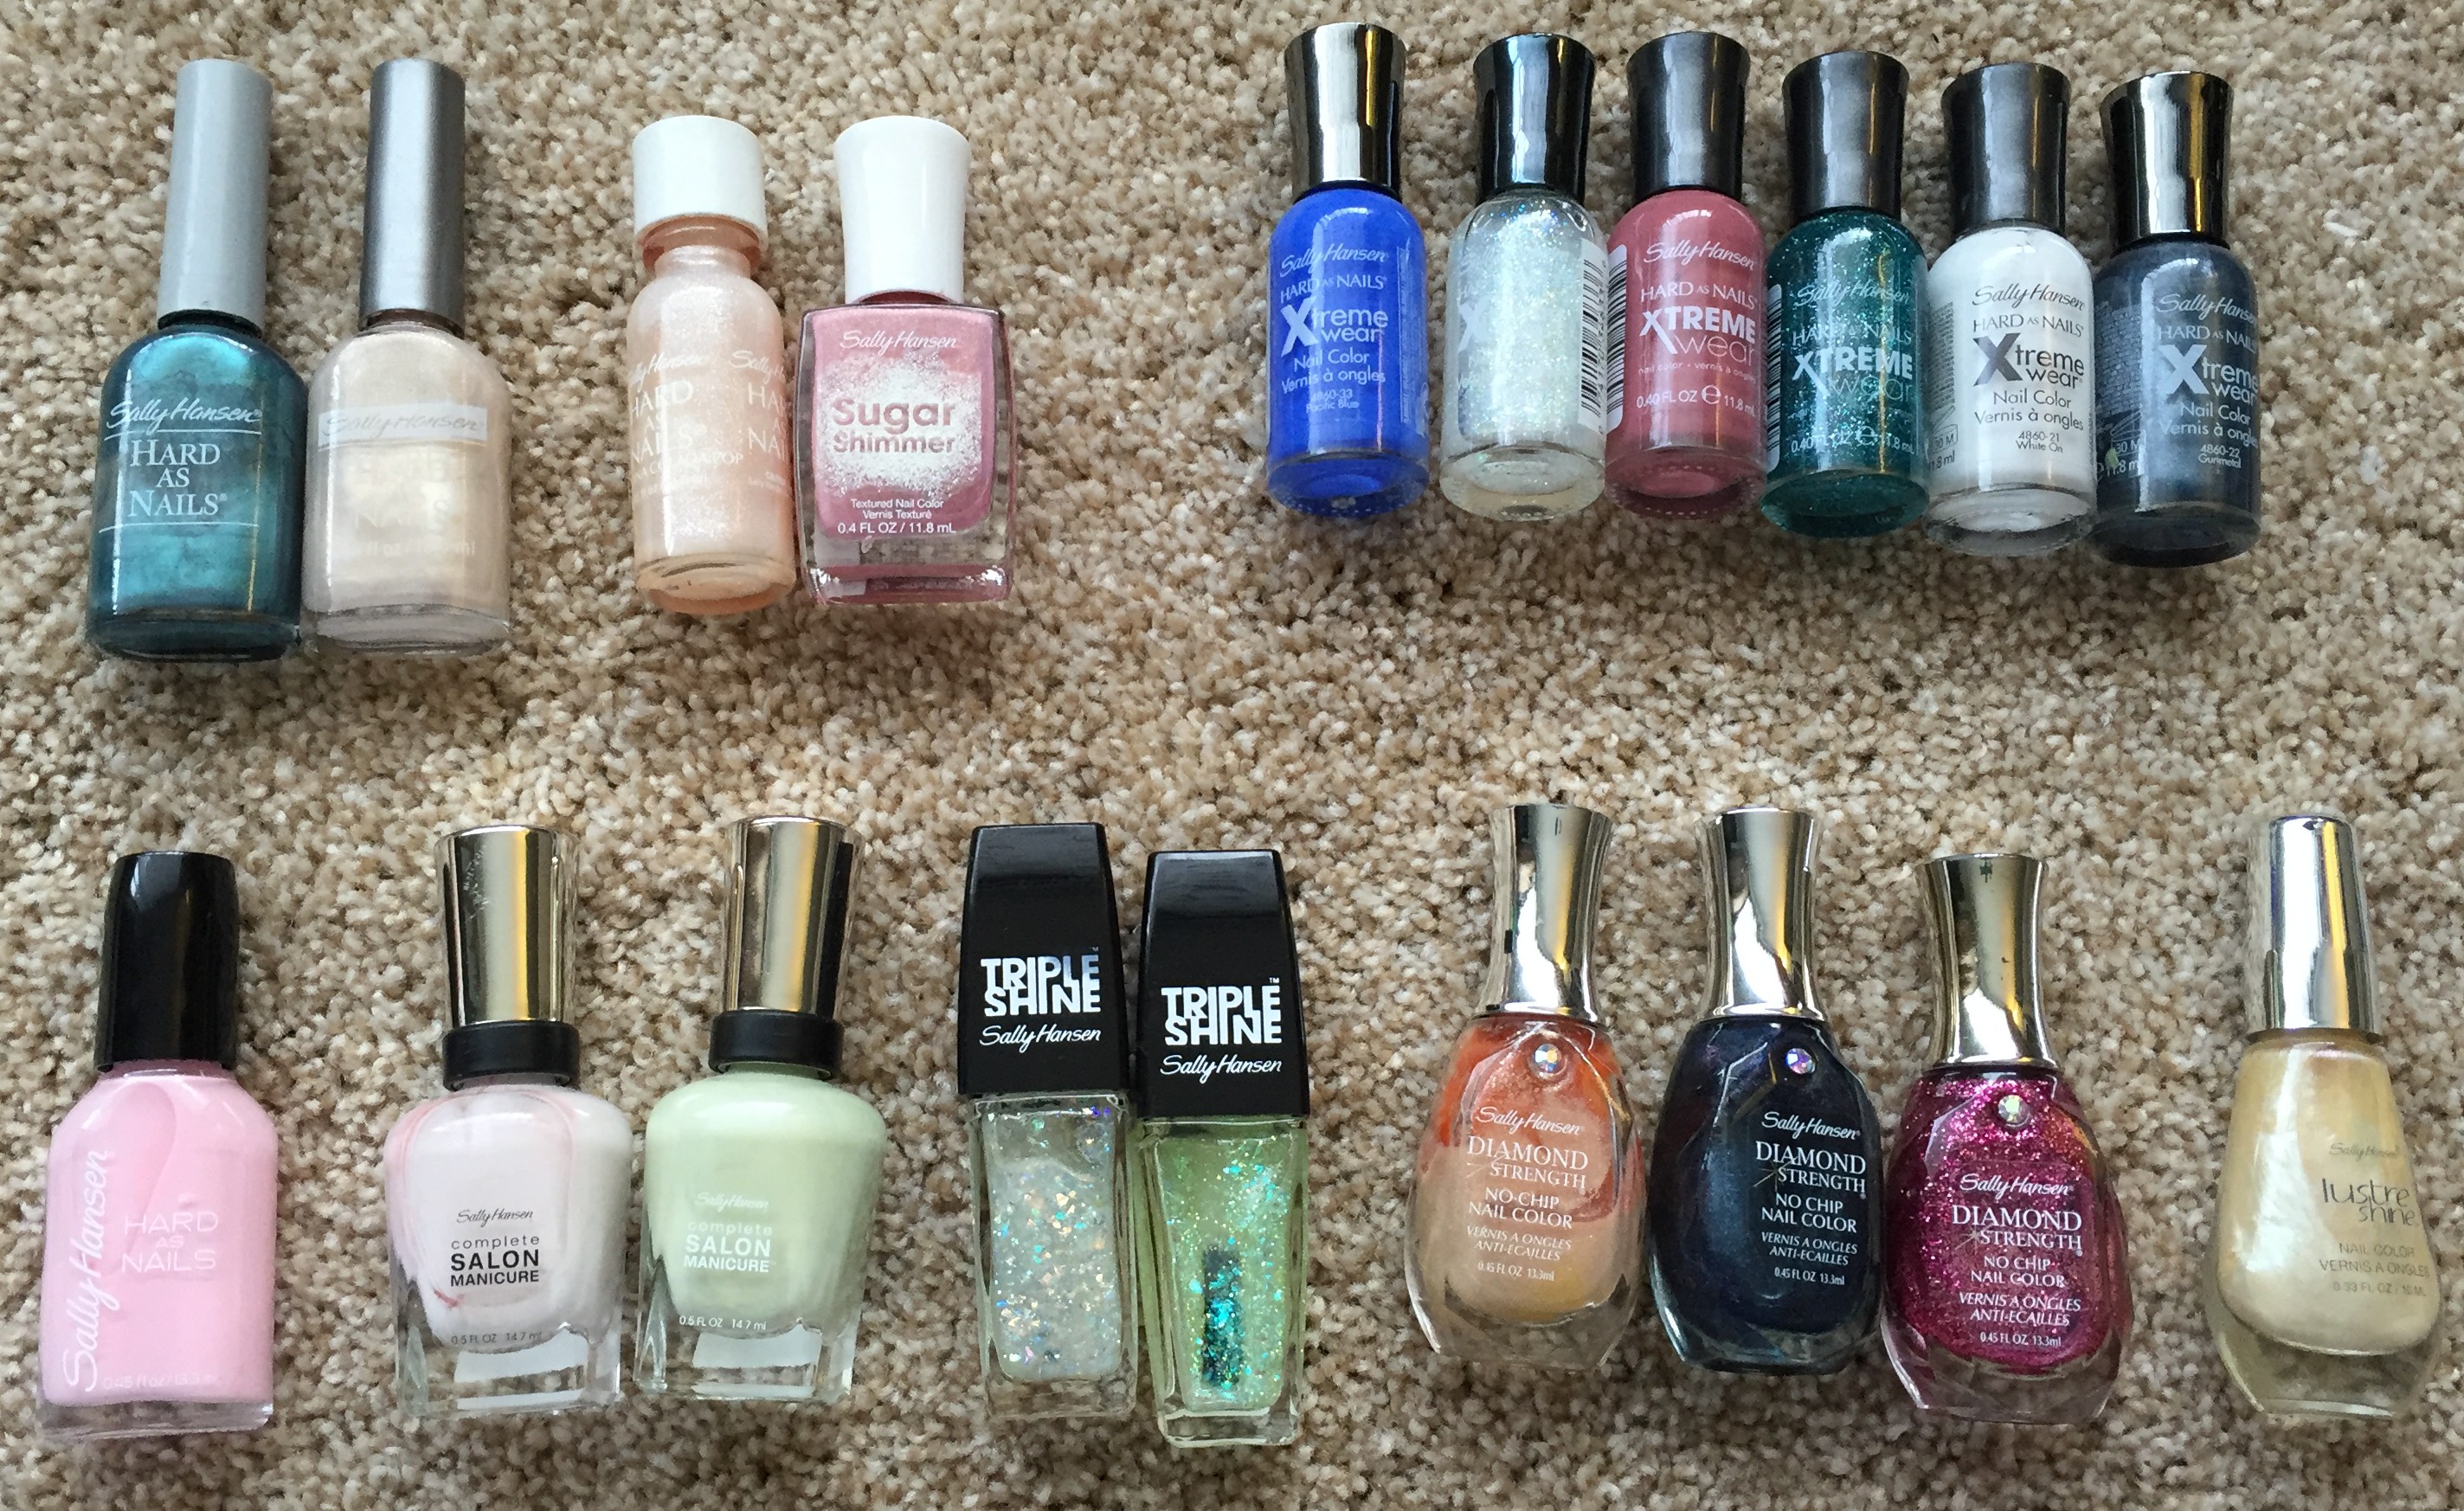
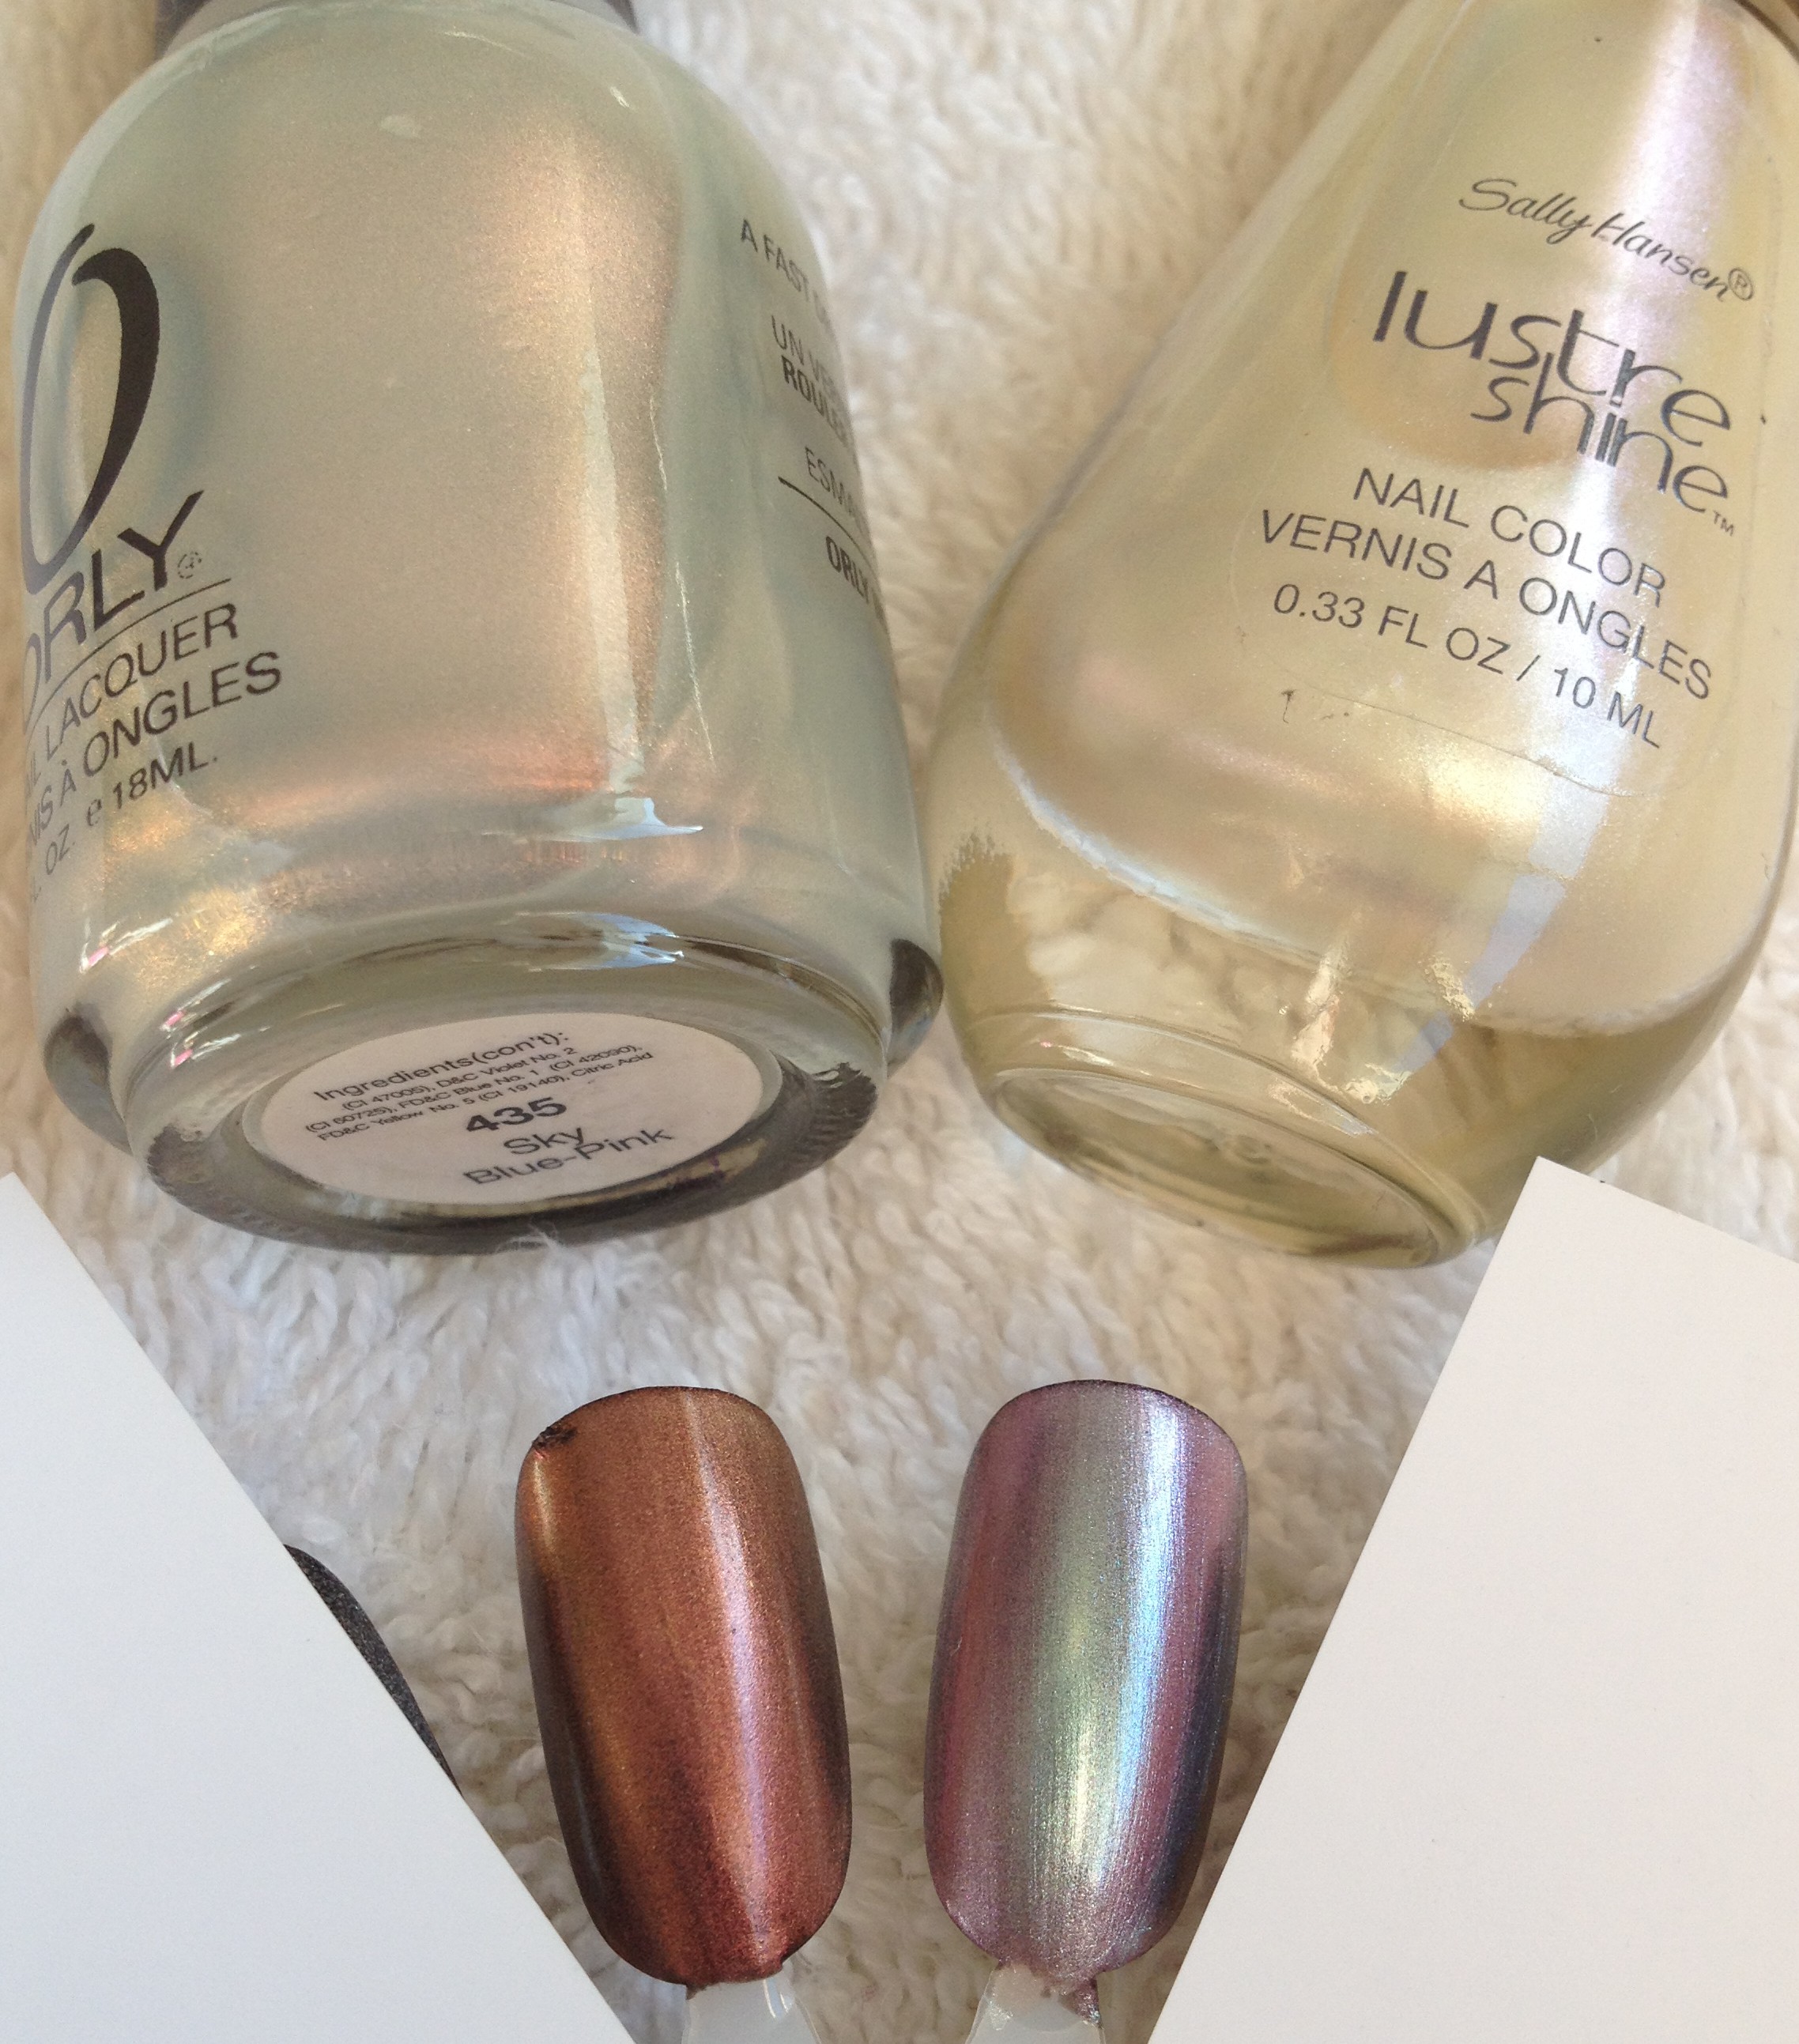
Sally Hansen sure likes their different bottle shapes and various lines, huh? The first three polishes in the top row are OLD. I know for sure I got the teal one in the top left corner when I was in college. I graduated 16 years ago.

IMG_7262

I picked up this little pile of polishes when I was in London last year. The one on the left is Seventeen, the next two are Barry M, and the two on the right are Rimmel. I like them all, but I love the Barry M polishes. If/when I get back over there, I’m nabbing more of these!

IMG_7263

These polishes are from Old Navy. “Why would anyone buy polish at Old Navy,” you ask? I don’t know either. The metallic pink and gold are both pretty good, though.

IMG_7264

These polishes are from Gap. Obviously I’m a sucker for polish, if I bought some from the Gap.

IMG_7265

I got these LA Girl Color Pop polishes at Rite Aid. The neon pink on the right is my favorite neon pick of all time.

IMG_7266

CQ2 polishes? Yeah, I don’t know either. They’re old.

IMG_7267

Mary Kay polish. The one on the left is good as a base for French manicures or negative space manis.

IMG_7268

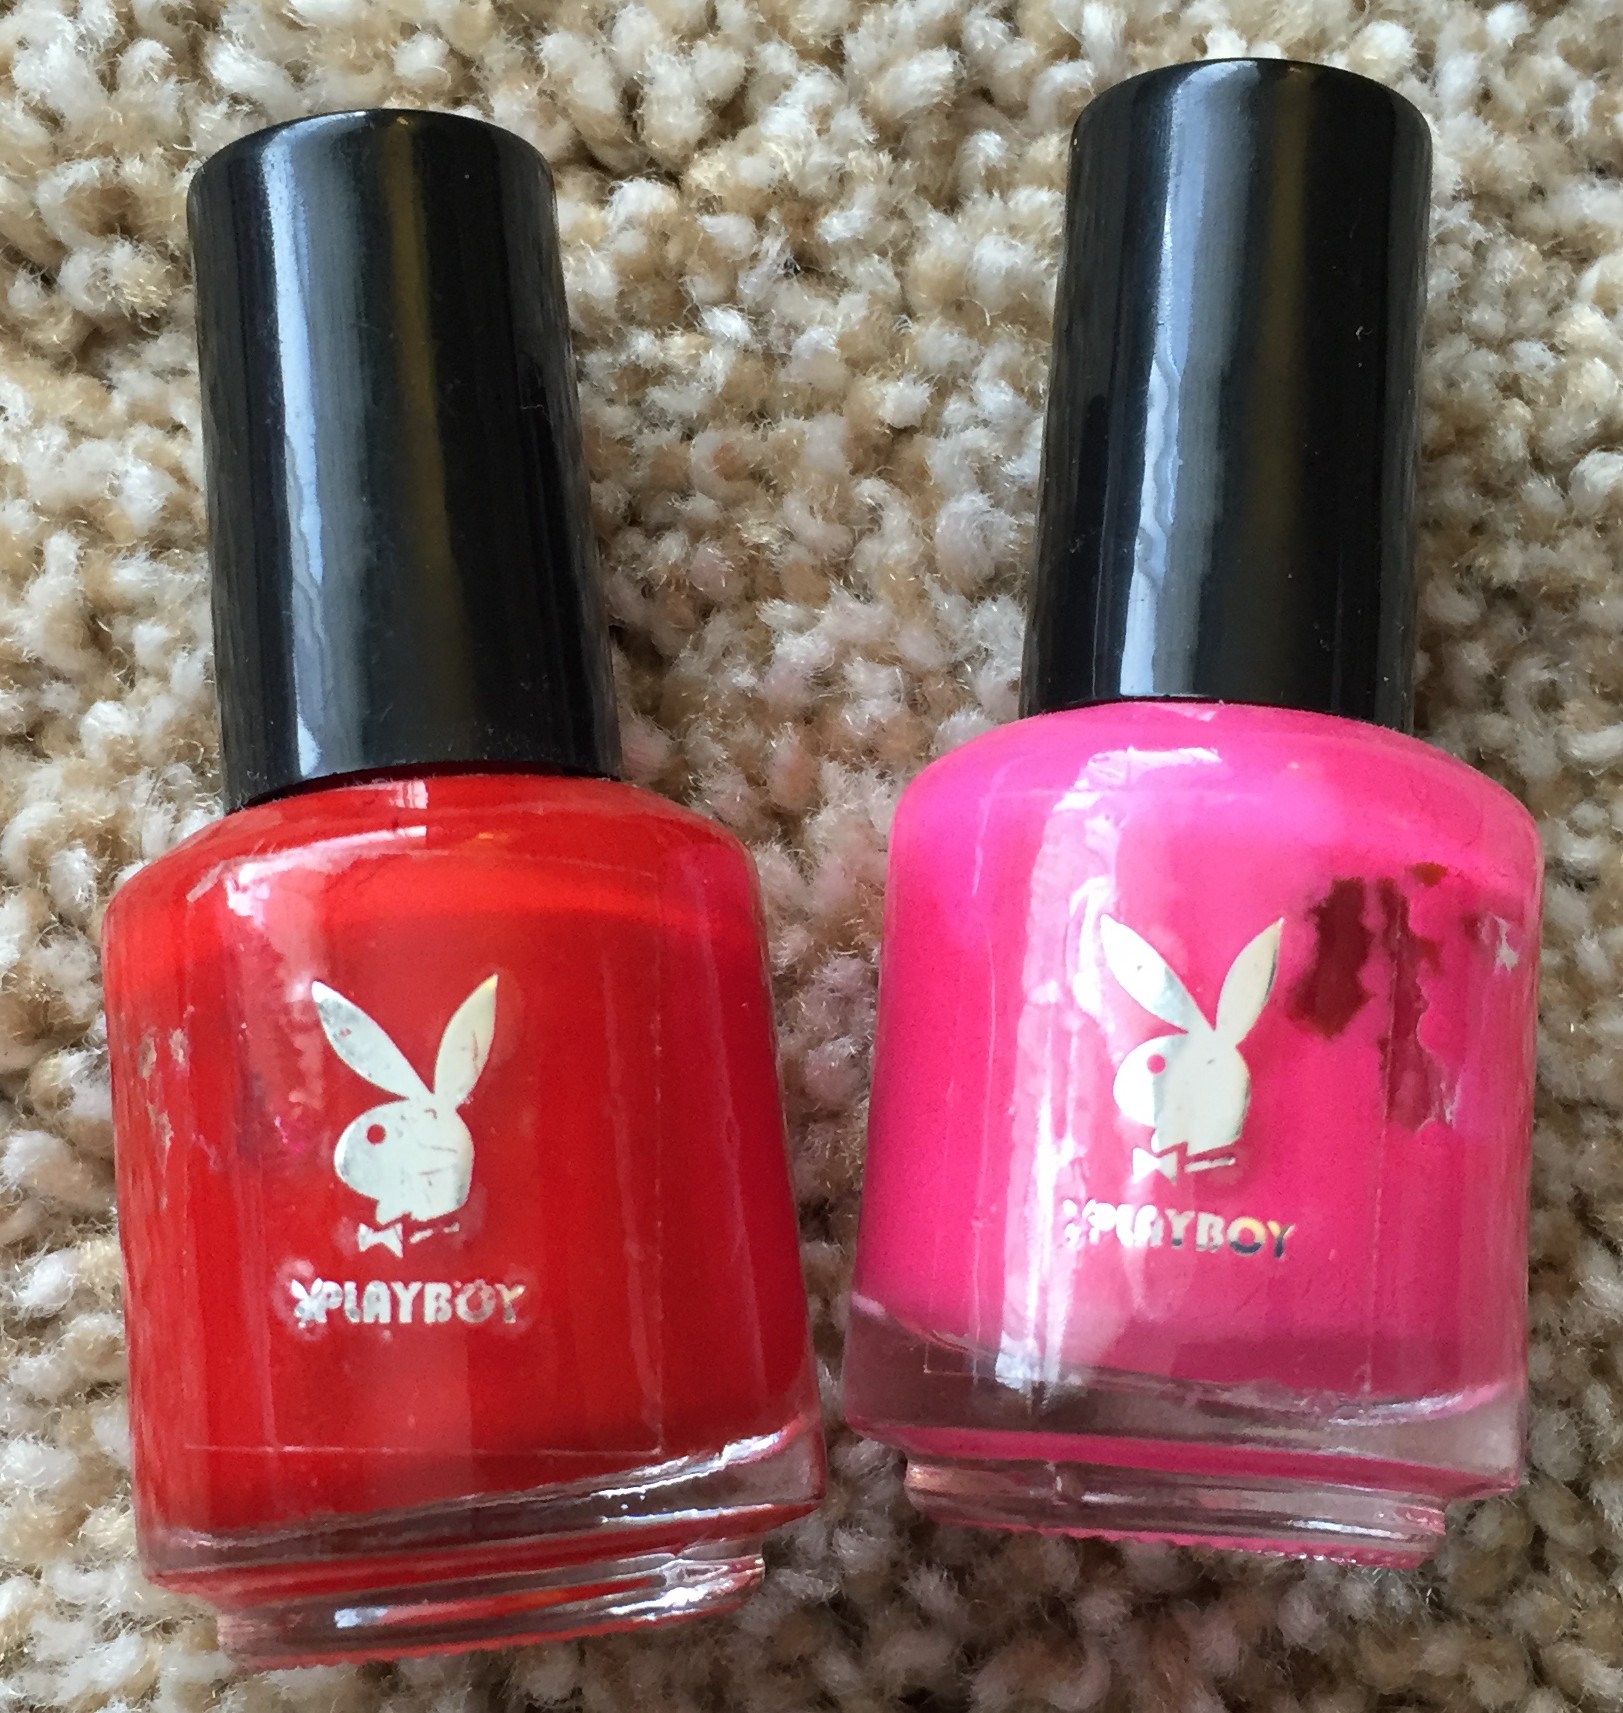
Playboy Polishes…. How and why? It’s a long weird story.

IMG_7269

I have two Color Club stripers, but only one color club regular polish! I know, that’s sad! I’m gonna fix that.

IMG_7270

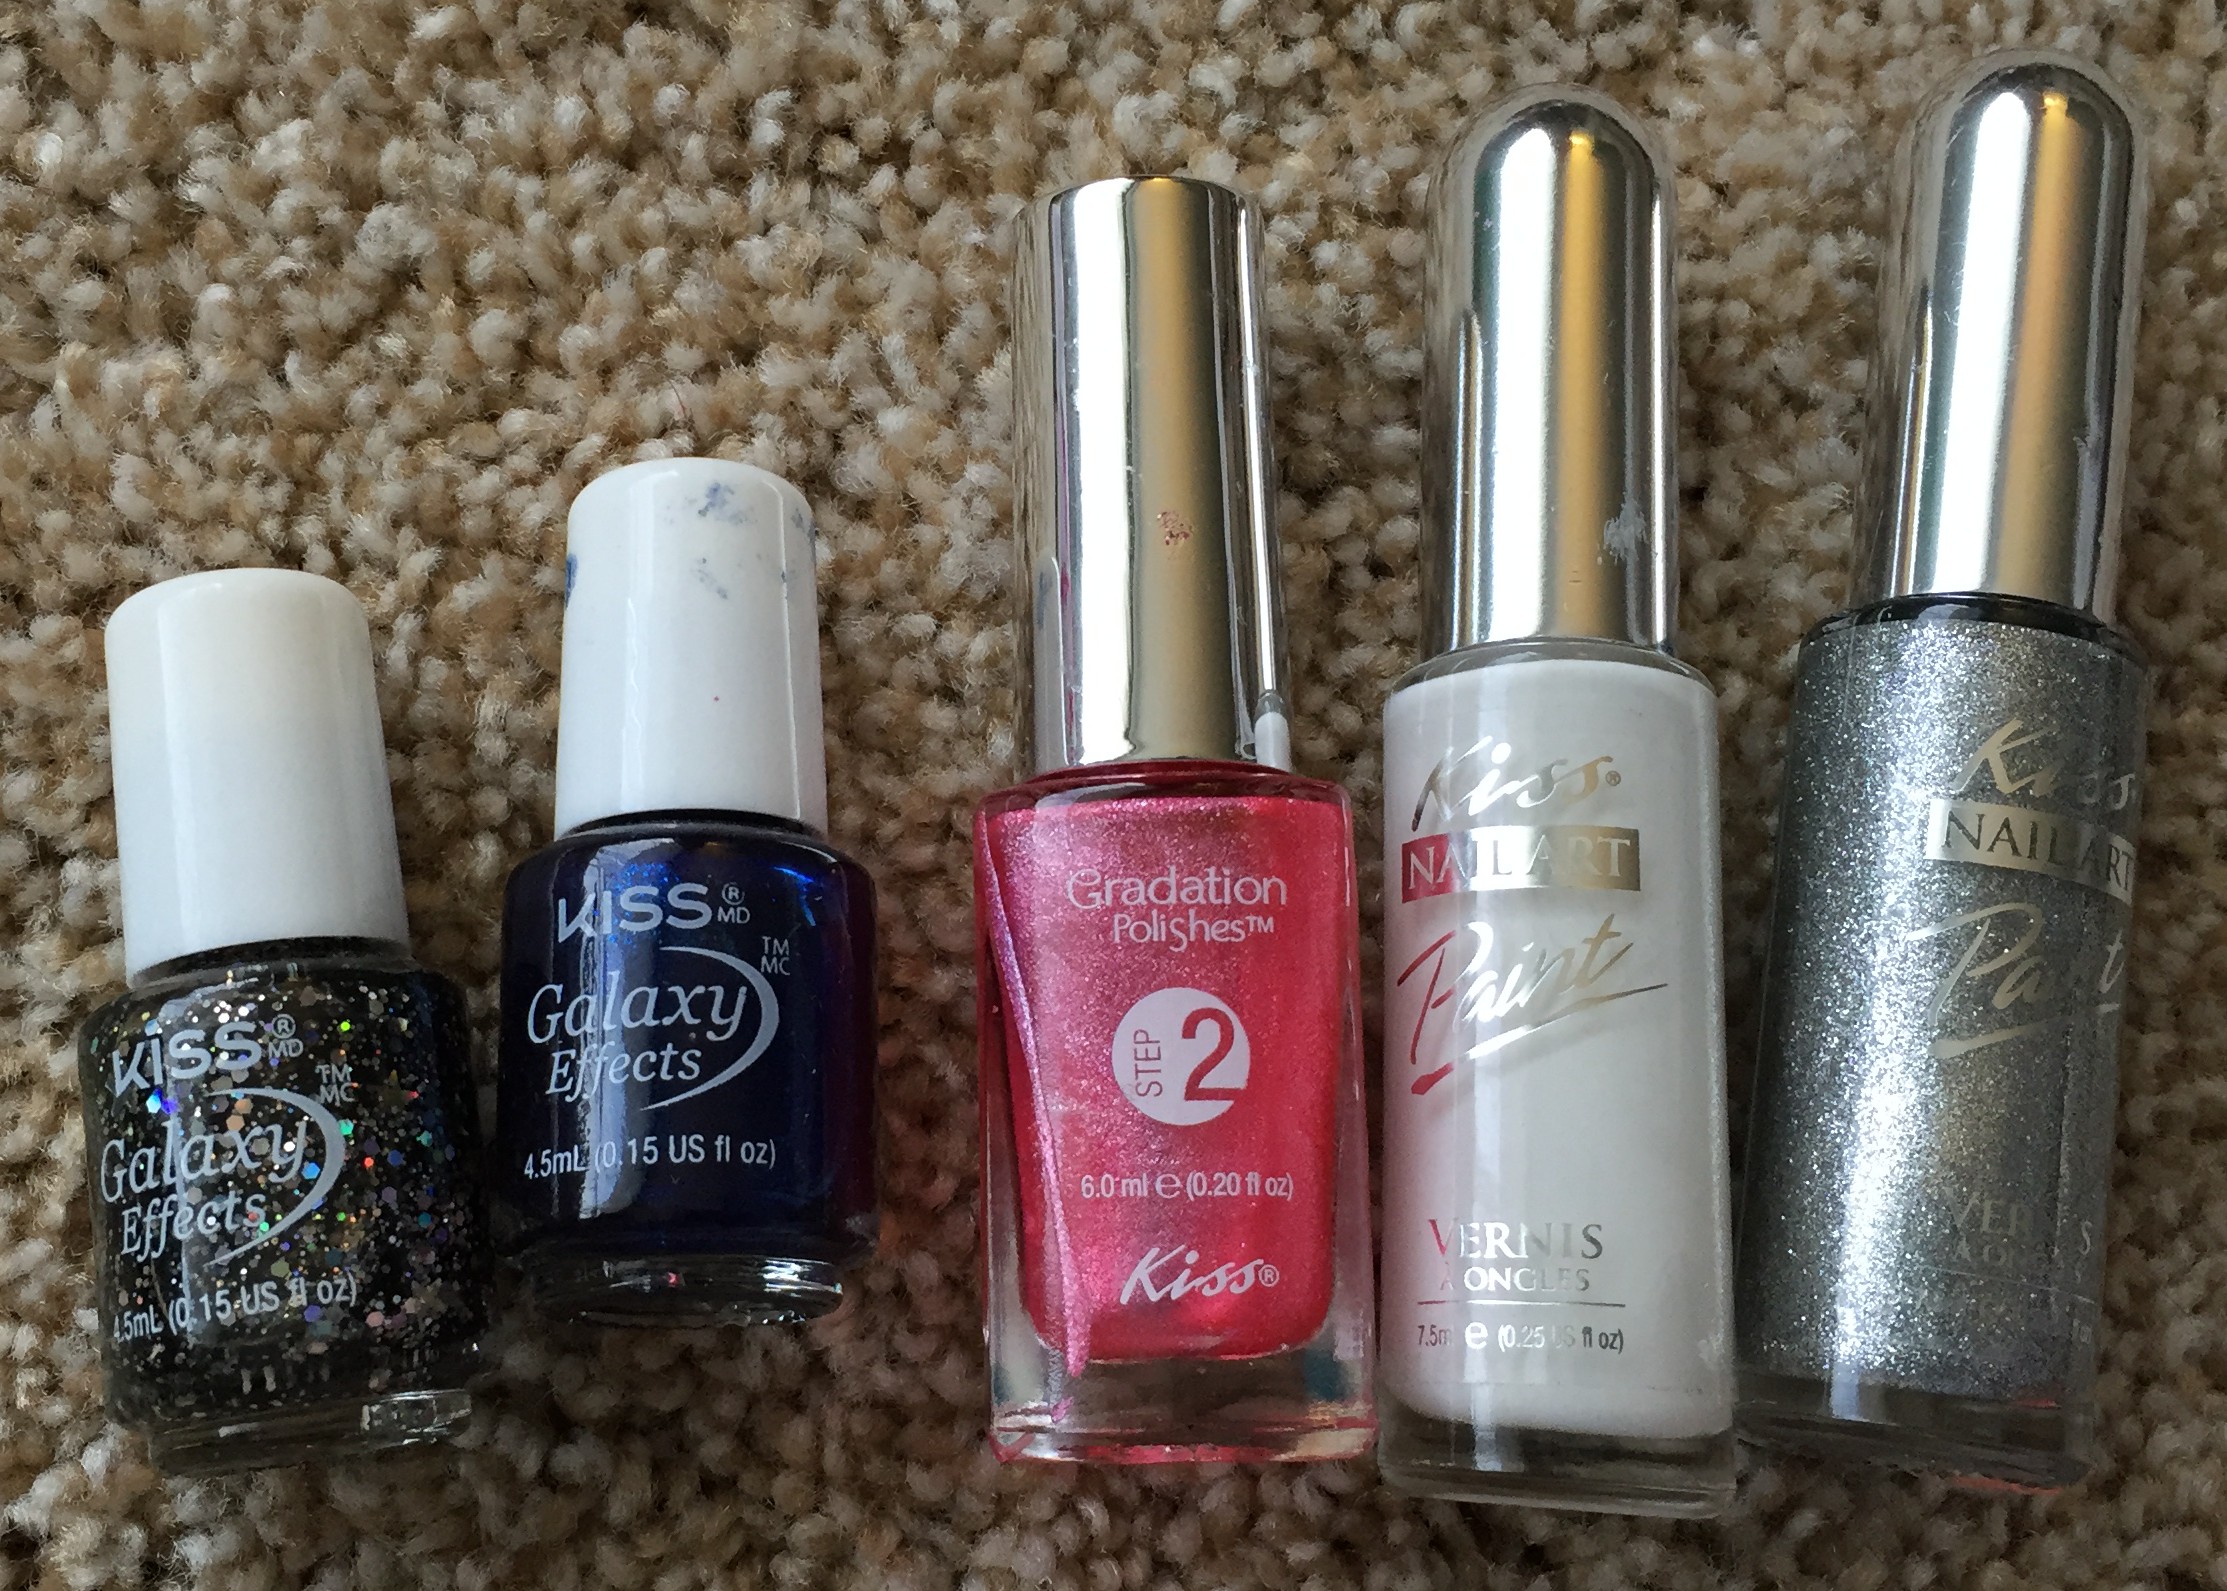
This pile of Kiss stuff was given to me. It’s okay, I guess.

IMG_7271

Bath and Body Works polishes. I know, it’s just as weird as Old Navy and Gap. Aren’t the little bottles on the right so cute though? These are actually nice polishes, albeit old.

IMG_7272

My only two Nails Inc polishes are magnetic and were found in a clearance bin at Marshalls/TJ Maxx/Ross. Those stores are all the same to me.

IMG_7283

These Del Sol Polishes change color in the sun, or at least they used to. They are about 5 years old and only about half of them change color anymore. Oh well, it was fun while it lasted.

IMG_7273

This tiny pile is all the indie polishes that I own! I know, it’s sad! I will definitely be adding to this pile over the next year.

IMG_7274

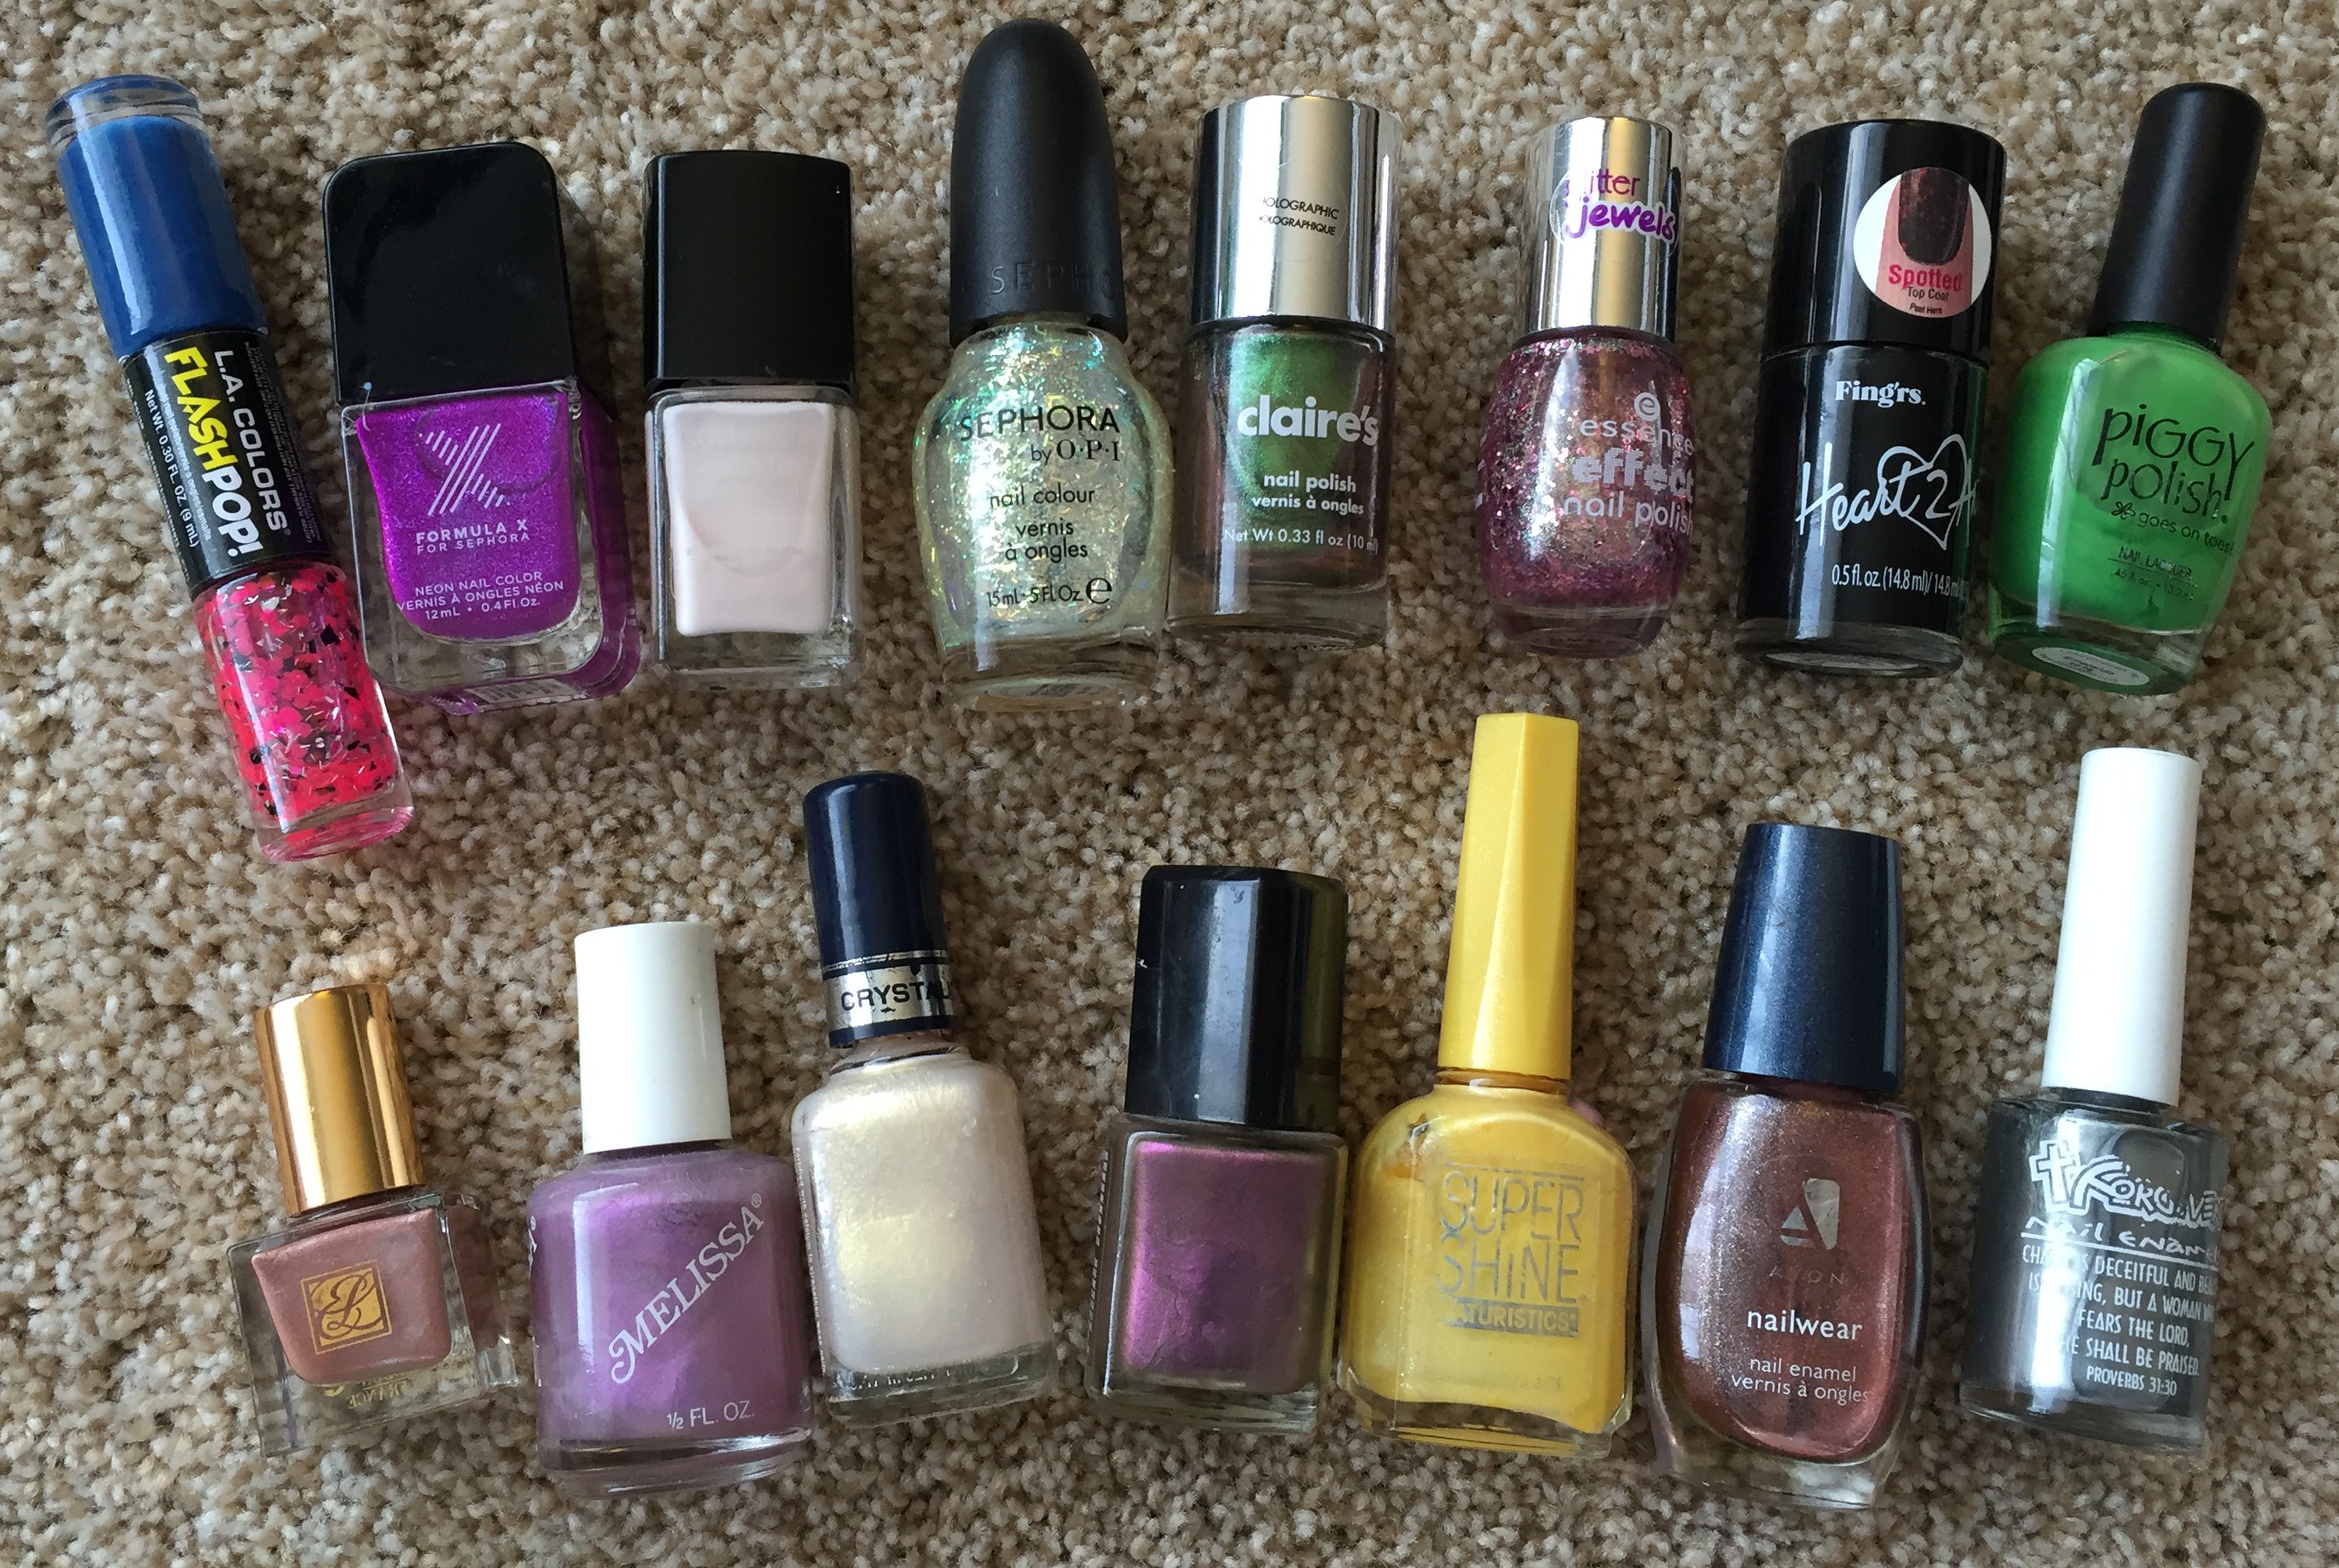
These are all of my one-of-a-kind or weirdo polishes. I just threw them all into their own pile.

IMG_7276

These are all of my Frankenpolishes. In other words, I mixed up these polish colors on my own…. Mwahahaha!

IMG_7278

Here is my pile of empty bottles waiting for some Frankenpolish to happen to them.

IMG_7277

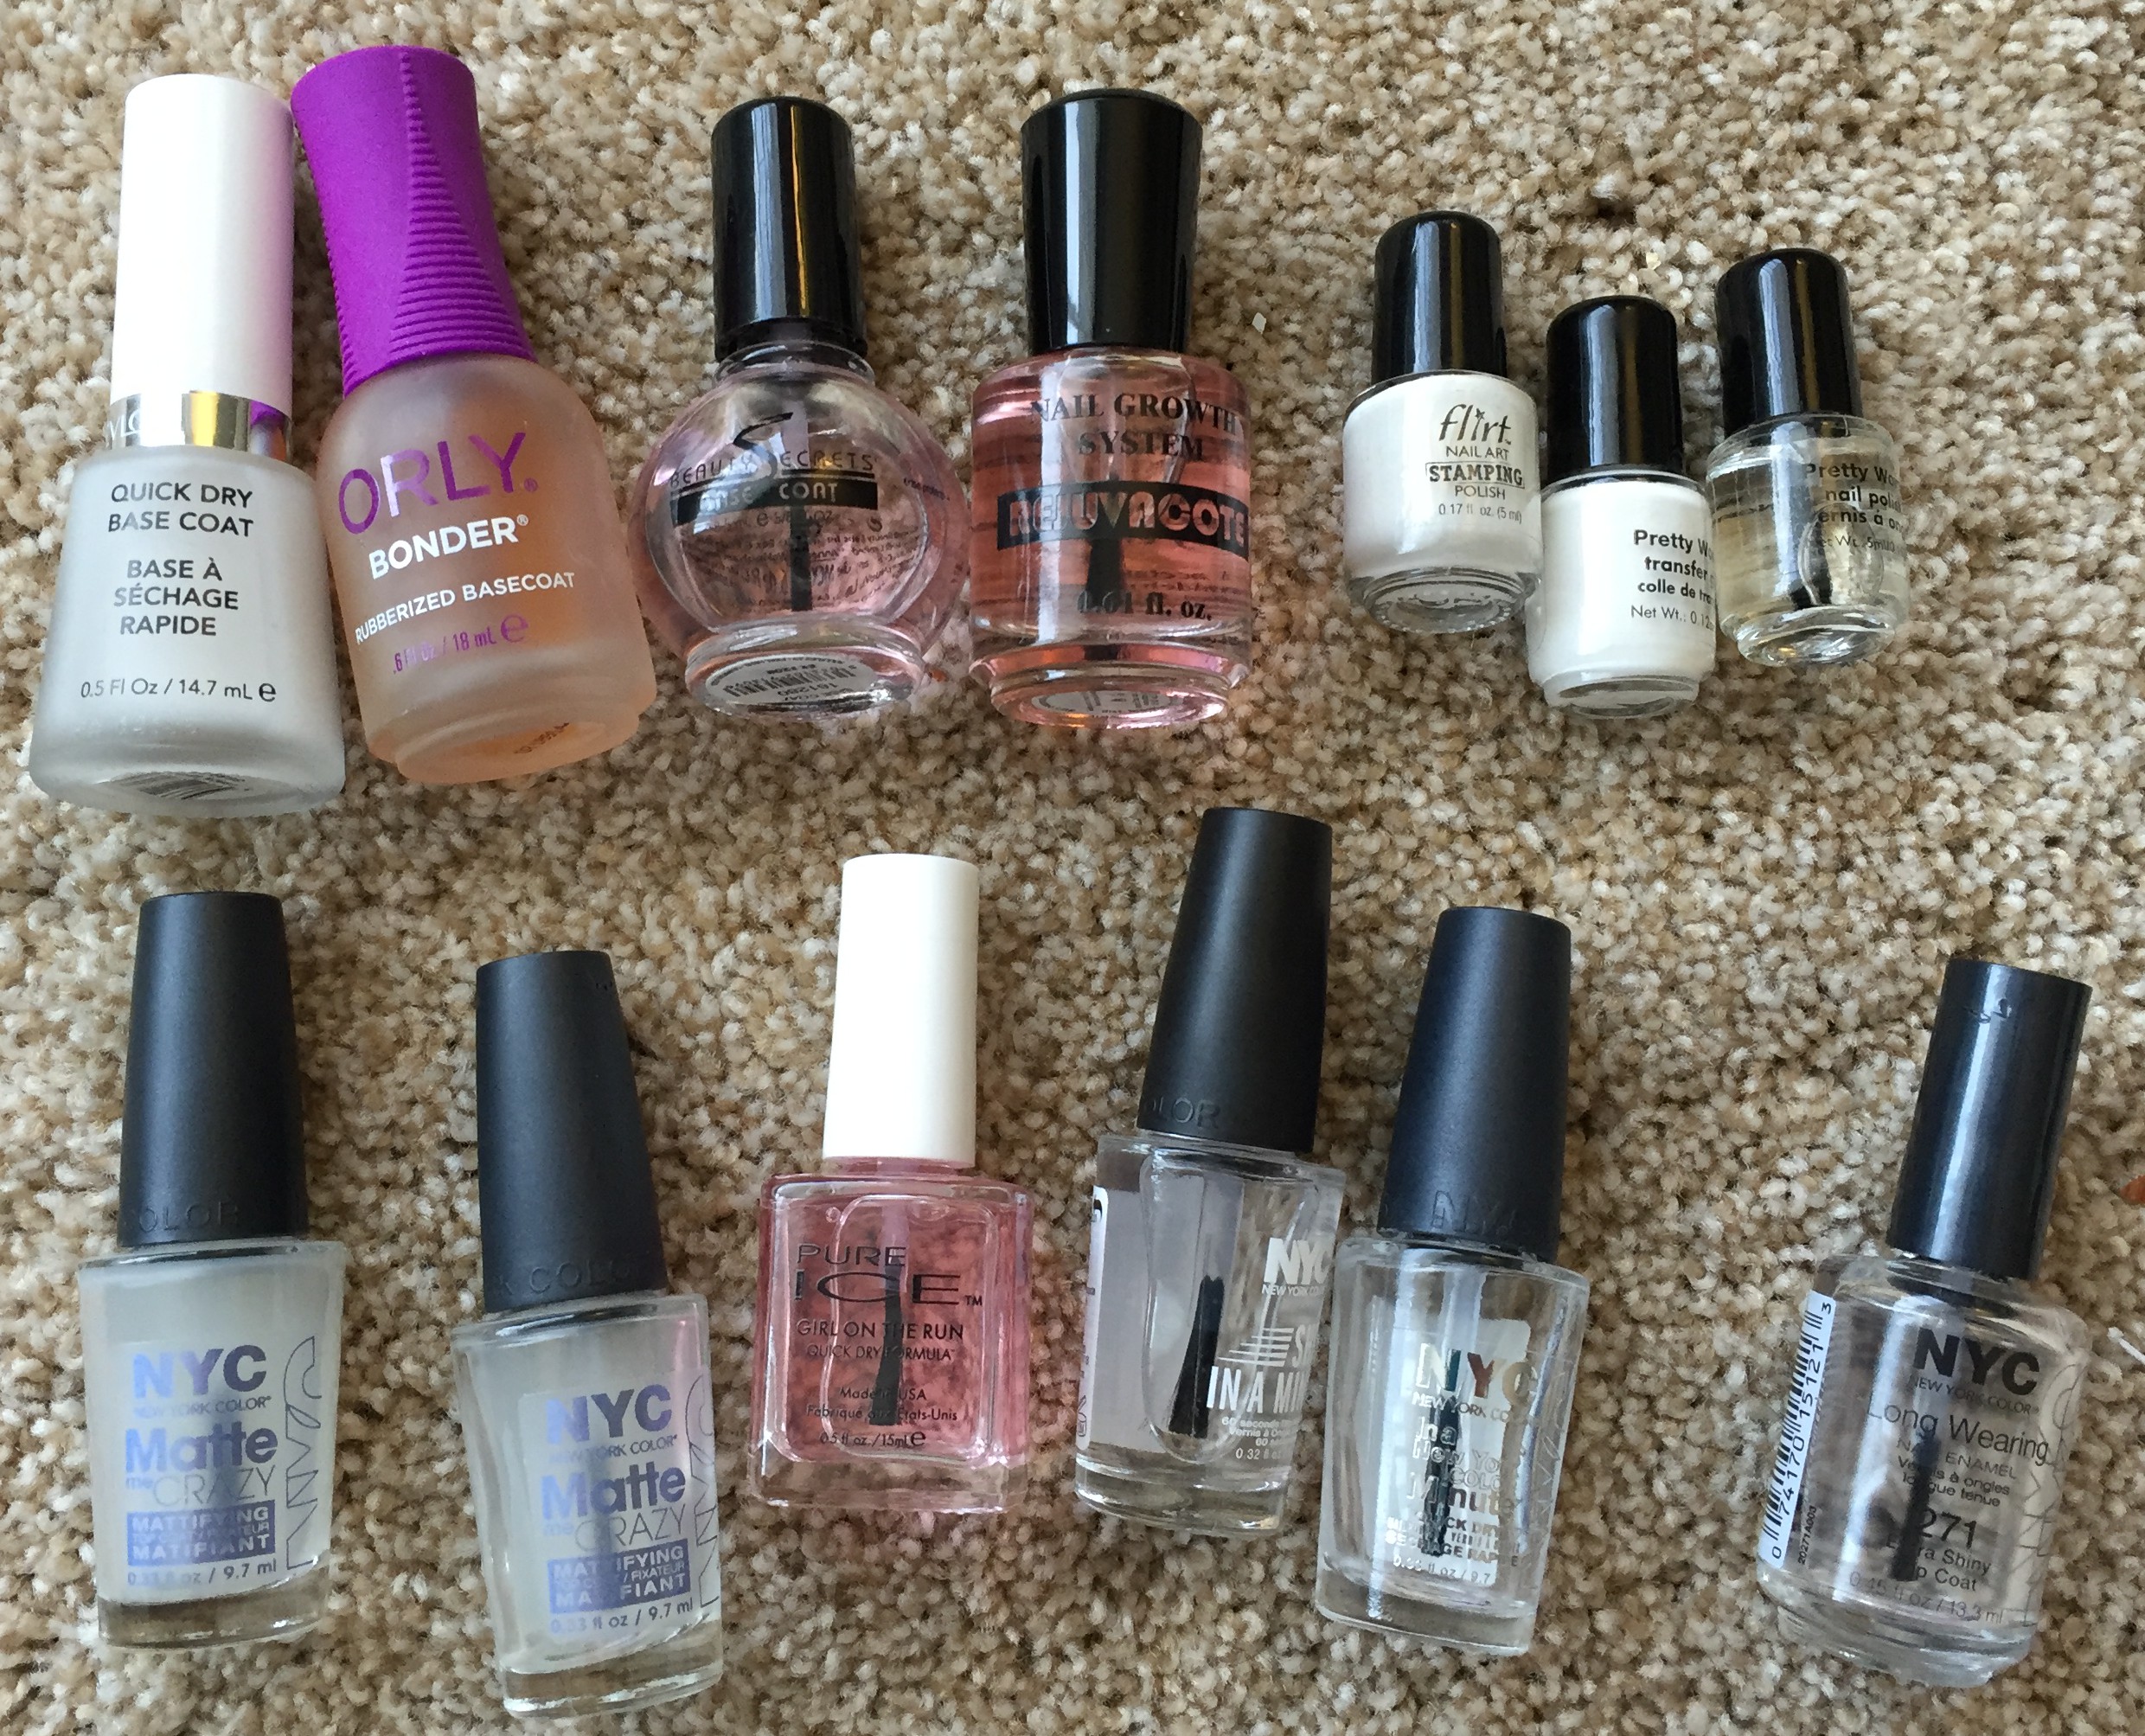
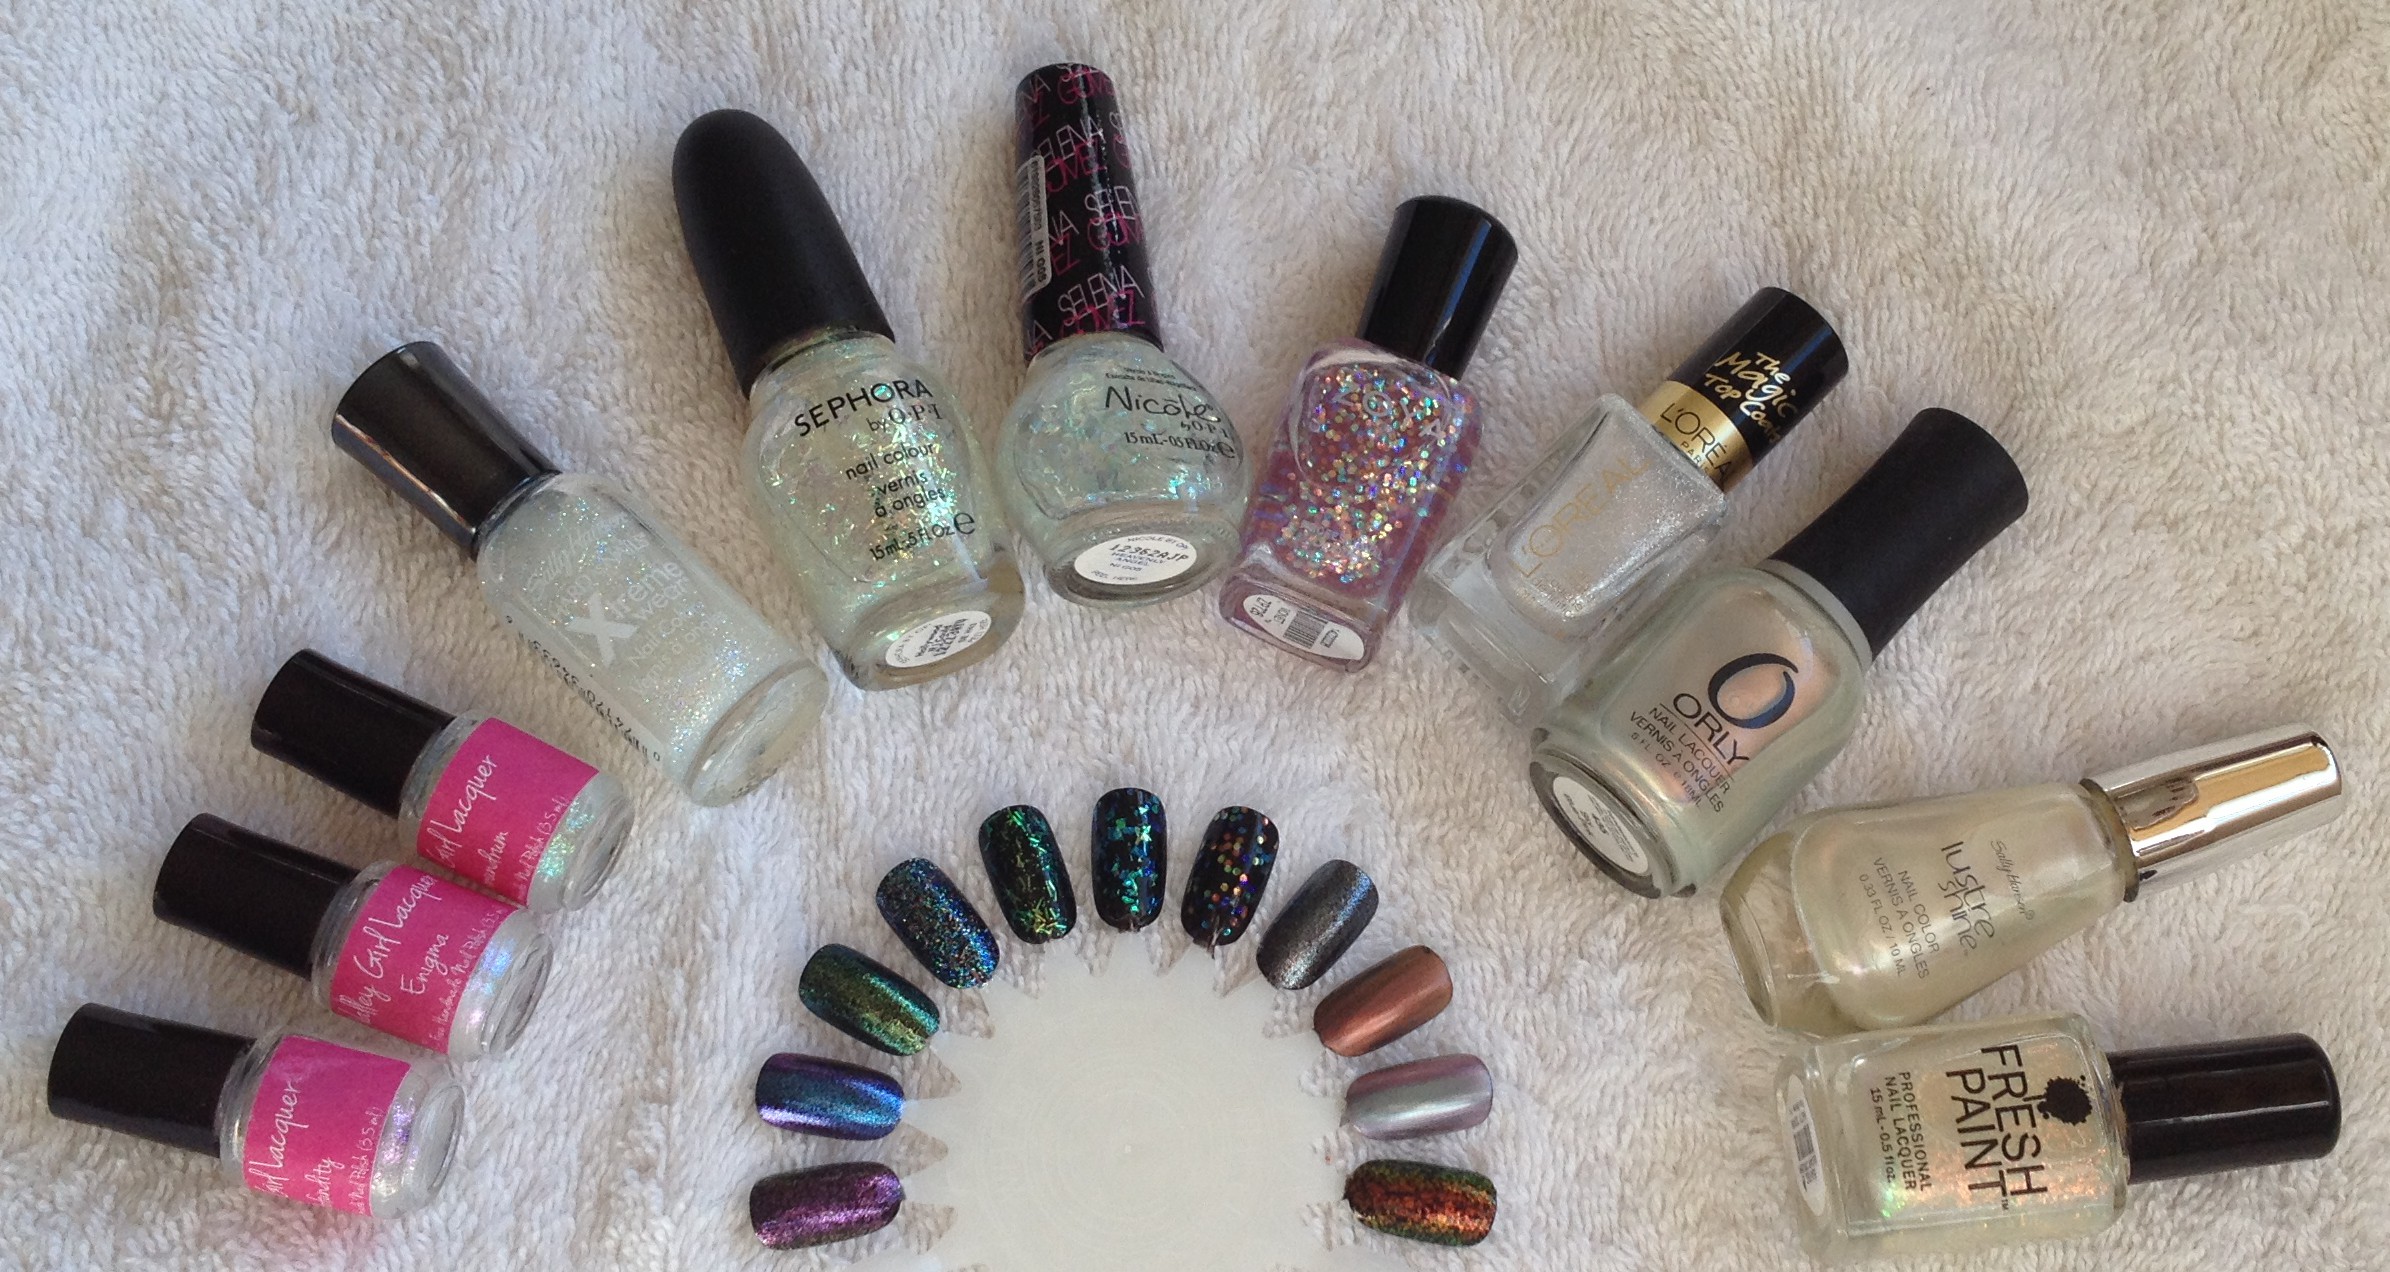
And here’s my pile of base and top coats.

Here's my whole collection after I got them all organized!  Aren't they so pretty?

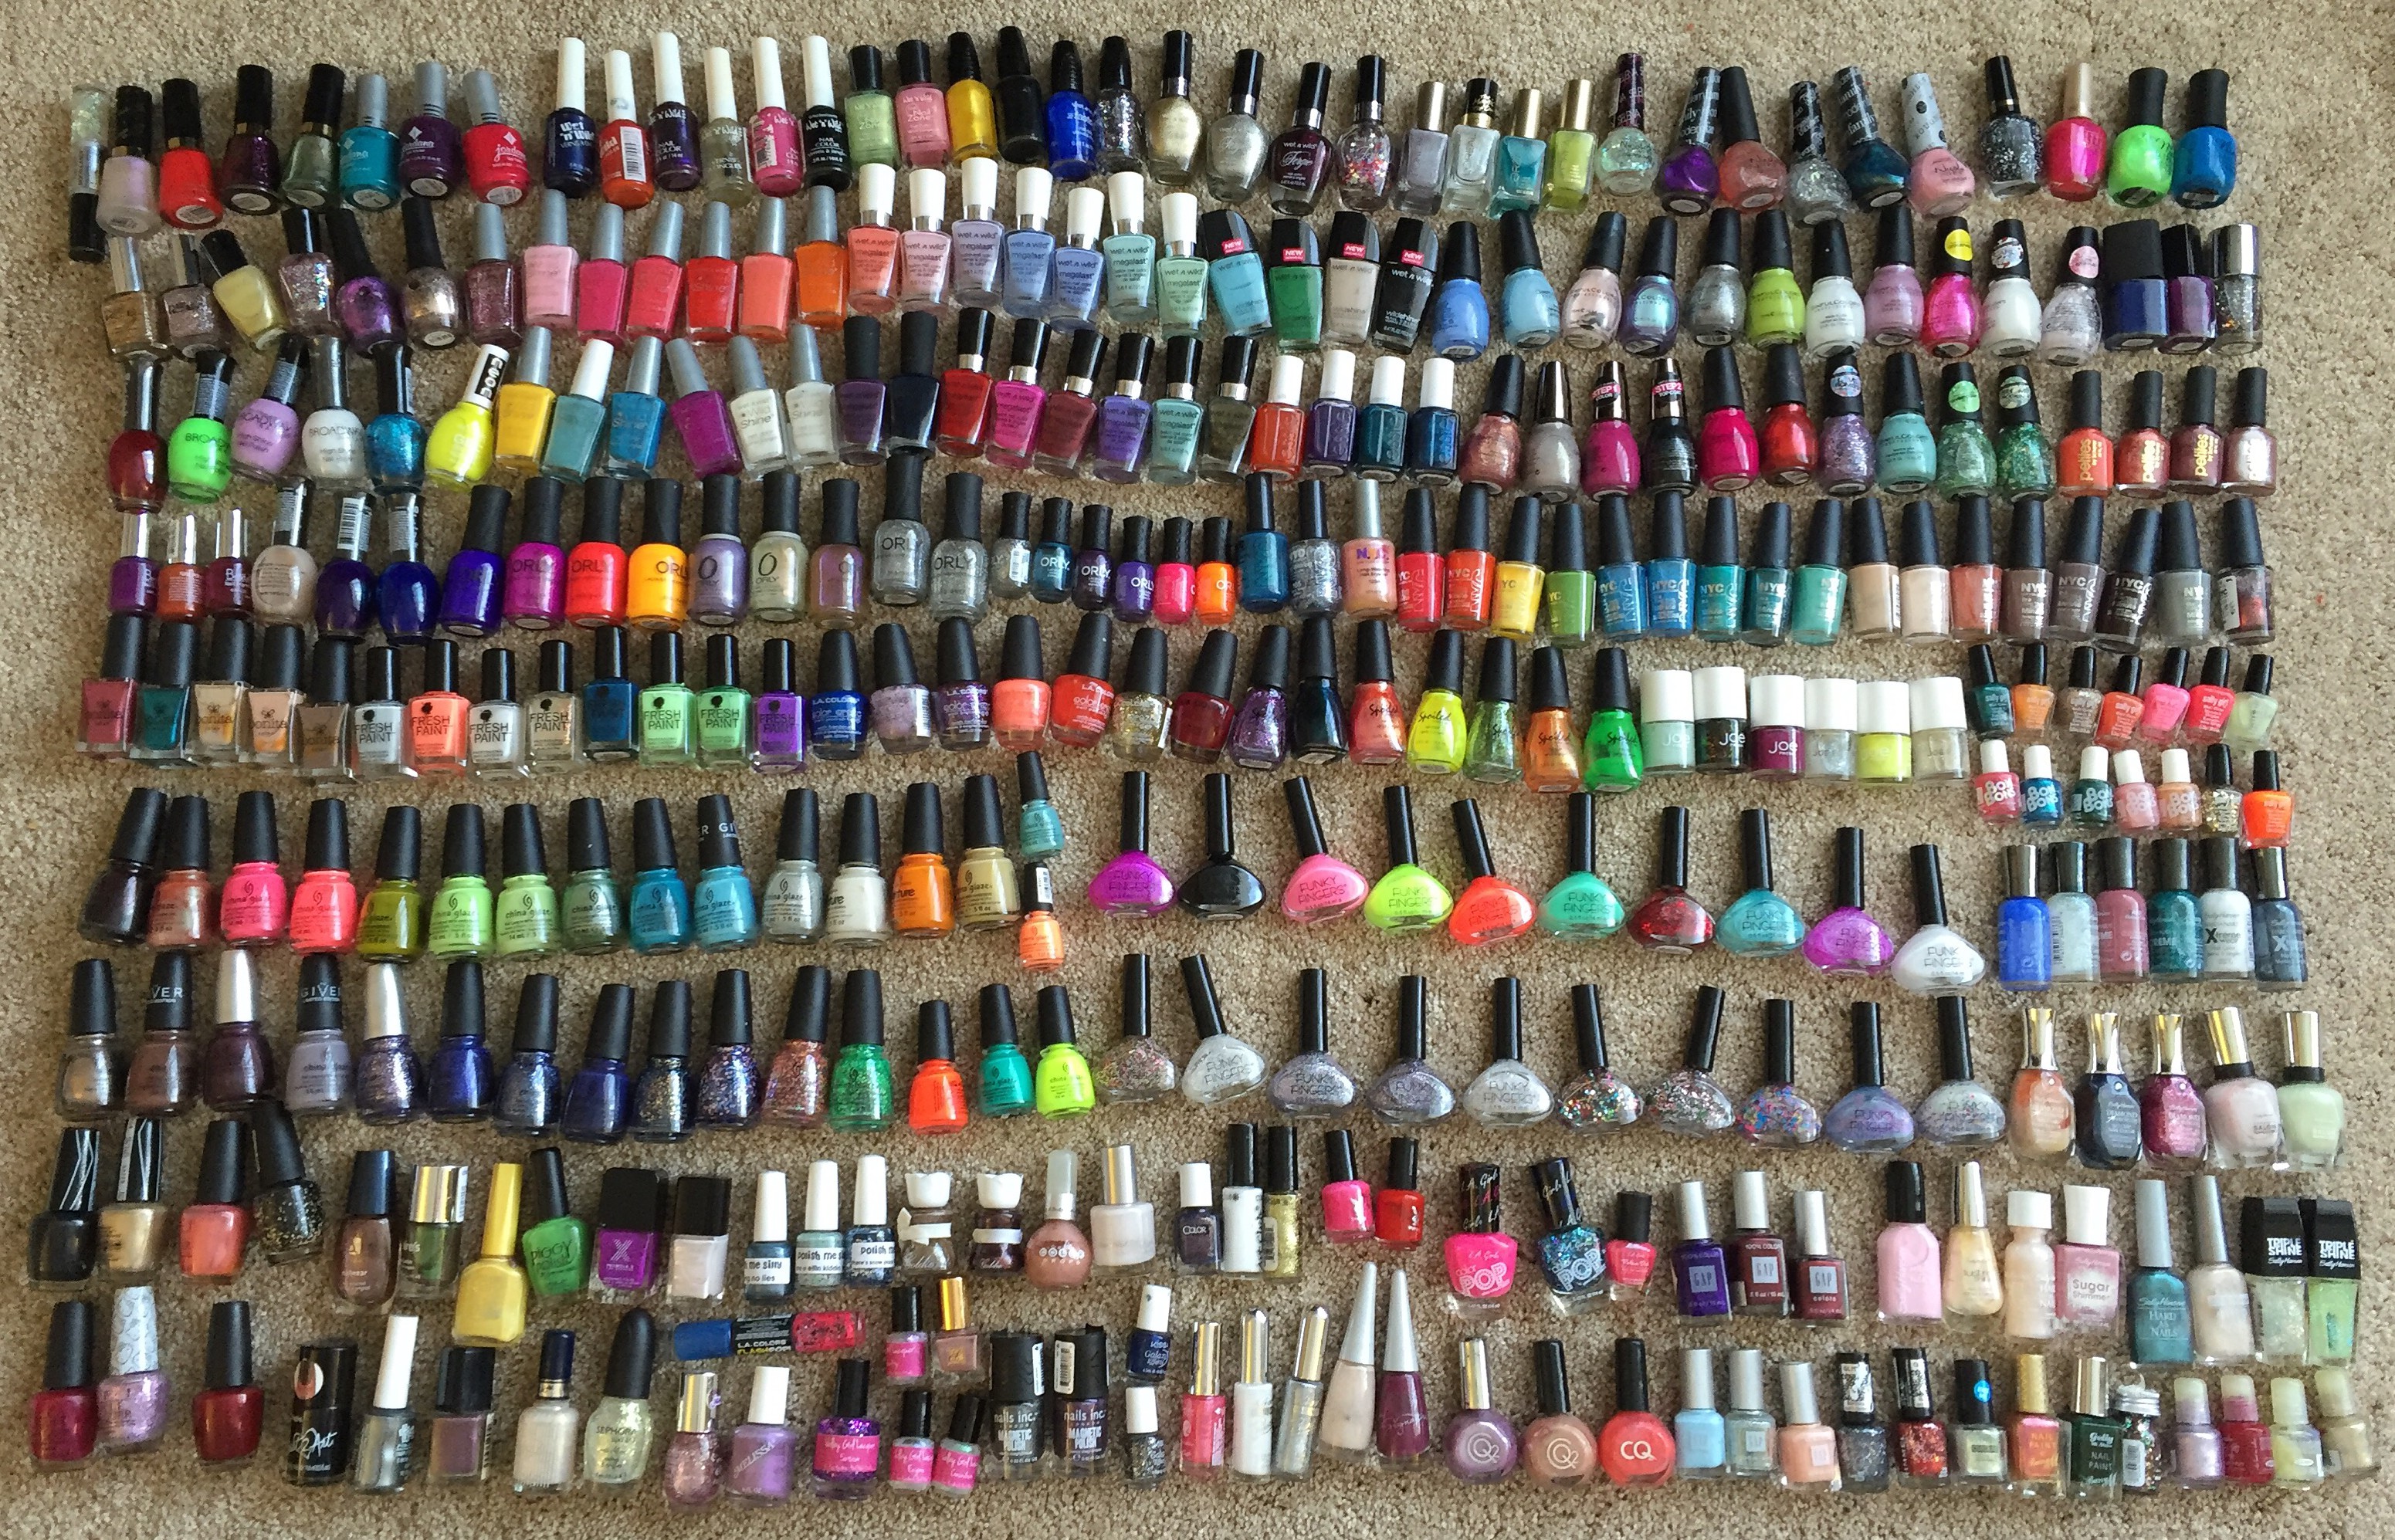
Here’s my whole collection after I got them all organized! Aren’t they so pretty?


And now all of my friends and family know exactly what I have in case they need to do some borrowing. I really don’t mind, though.  Thanks for reading!  Let me know in the comments about your collection!

Just a Bunch of Summer Nails

And the award for Most Infrequent Posting goes to…. ME!  I apologize for my absence.  I’m sure it’s left a gaping hole in your summer.  I’m here and I’m fine and I’m still painting my nails.  I’ve just been busy.  It’s summer, so I can be outside doing stuff.  In a few months it will be cold and miserable and I’m sure I’ll be posting much more regularly then.

I thought I’d just highlight a few manicures that I’ve sported over the past month or so.  Here we go…

IMG_4983Turquoise and red with white polka-dots.  Aren’t these cute?  I really liked them.  I didn’t know until I did them how retro-looking they would be.  And they were so shiny!  These were super easy, too.  You only need a dotting tool.  This is such a fun way to try out different color combinations.  I wish I had a dress that looked like these nails.

IMG_5005

Glittery plaid print.  No picture could do these proper justice.  The base polish was Funky Fingers – Sand & Stilettos which is a crazy sparkly holographic micro glitter.  It’s like camping… It’s in tents.  (Intense.  Get it?)  The pink and blue polishes were both jellies,so the glitter was still visible.  So, so sparkly.

IMG_5019 Dry brush tie-dye.  I started with a white base and then just did a little dry brushing, starting with the yellow at my cuticles.  I just made sure that each of the colors overlapped a little.  The dry brush technique is super easy, by the way.  You just wipe almost all of the polish off the brush on the neck of the bottle and then drag the “dry” brush over your nails.  No tools or artistic skill required!

IMG_5031Neon orange citrus nails.  I should call these neon orange orange nails.  The base color was Orly – Tropical Pop and the darker orange was a Sally Girl polish from Sally Beauty Supply.  To pull off orange polish, I always have to wait until I get a little bit of a “tan”. I don’t really tan.  According to my foundation, I go from “fair” to “light”.  These were so bright, but you know how it is to photograph neons.  IMG_5040

Oh, I also took a picture of these nails while riding the Sky View at Hersheypark.  I really, really liked these nails!  By the way, Hersheypark is where I spent a significant amount of time in June.  It’s an awesome place to go before the crowds get really heavy in July and August.

IMG_5045Metallic butterfly nails.  I’m not sure who came up with butterfly wing nails originally, but ever since I first saw them a year or so ago, I’ve wanted to try them.  I finally got around to it.  These were a little time-consuming, but not really too bad.  I was going to use a pink/purple/blue neon gradient for the base, but I opted for a softer, more realistic green/purple gradient instead.  I also went with a matte top coat to make it a little more true to actual butterfly wings, also.

IMG_4955 Wavy teal nails.  These nails just sort of happened.  I thought they might look like lace of maybe fish scales, but they ended up looking more like waves.   I pretty much just used a doting tool to make rows of dots that touched each other.  I started at my cuticle, and then just picked a contrasting color and overlapped the next row of dots.  I didn’t love these at first, but they sort of grew on me.  IMG_4963

Jaunty Juli recreation.  I can take no credit for this design.  Jaunty Juli came up with it, and lots of people have recreated them.  I had to jump on the bandwagon. Super cute, right?  That Jaunty Juli is so creative!

IMG_4940Matte pastel with gold glitter.  These are pretty much a recreation of some nails that I did last summer and really liked.  I just love how gold glitter looks under a matte top coat.  Its just so frosty and beautiful!  This is another fun way to play with color combinations that requires pretty much no artistic skill either.

So, Those are a bunch of my summer nails!  Between fancy manicures, I love wearing obnoxiously bright neon polishes.  Someday I’ll be too old and they will be out of style, so I’m going to carpe diem.

Thanks for reading, following, liking, commenting, sharing, and whatnot!

What Black Undies Can Do For You

Did you ever buy a polish that you couldn’t really tell in the bottle what it would look like on the nail, but you were sure it would be cool?  Then you tried it and it didn’t rock your world like you thought it would.  I’ve definitely done this a lot of times.   One thing I have discovered is that a lot of these types of polishes take on a whole new life when you put them over black polish.

IMG_3552

Let’s look at each of these starting with…

IMG_3554

These polishes are from Valley Girl Lacquer, and indie polish company.  Here’s the link to their etsy shop.  The polishes from left to right are Profundity, Enigma, and Conundrum. These were actually a gift from my little sis.  When I got them, I thought they pretty much looked the same in the bottle.  My sis assured me that according to the pictures online, they would look awesome over black. And do they ever!  They are all duo-chrome-ish to some degree.  Enigma has the strongest 2-color appearance, as it reflects a really strong purple from some angles.

The middle chunk of polishes I have for you is a little less exciting.

IMG_3557

From left to right: Sally Hansen – Disco Ball, Sephora by OPI – Hollywood if I Could, Nicole by OPI – Heavenly Angel, Zoya – Monet, Loreal –  The True Daimond.

None of these are really earth-shattering.  I guess the thing I want to point out is that all of these colors give a nice mellow sparkle to any lighter color, but when you put them over black, it’s like POW!

Here are the next two:

IMG_3558

They are Orly – Sky Blue-Pink and Sally Hansen Lustre Shine – Moonstone.  Yeah, I don’t know why it’s called Sky Blue-Pink either, because it definitely gives off a copper color.  When either of these are worn on their own, they really just look like a pearly nude polish.  Nice, but super subtle.  One coat over black gives a totally different look!  As I said, the Orly polish gives a really strong copper color, and Moonstone turns into a really cool pink-purple-blue-green multi-chrome.

My last one is the most amazing:

IMG_3560

This is Fresh Paint – Sugar Crush.  This is what’s generally called a flaky topper.  (I hate that name, but if that’s what everyone else wants to call these polishes, I guess it’s not in my power to change it. )  Flaky polishes can sort of look like glitter toppers at first glance, but they are just different, and you can tell when you apply them.  Flaky Polishes are packed with tiny duo-chrome little bits that apply really nicely and evenly to the nail.  They can seem a little like a holographic shredded glitter polish like Nicole by OPI – Heavenly Angel, but the application is really different.  A shredded glitter topper behaves like any other chunky glitter topper: it’s a little hard to apply and can take some dabbing and finagling to get even application.  Flaky polishes apply much more easily.

When I first got this, I swatched it over a neon coral, white, and black:

IMG_2686

(These are actually my sister’s fingers.)  As you can see, over the lighter colors, the effect is pleasant, but not amazing.  I still remember when we were doing the swatches and I painted this polish over the black, both my sister and I were like, “Whoa!”   Ever since I got this polish, I’ve been waiting for October to roll around so I could wear it over black.

Okay folks, that’s it for today.  Thanks for reading, commenting, and liking.  It means a lot!

September Favorites

Doing the 31 day challenge in September led me to use a lot of polishes in my collection that I either had never used much before or had sort of forgotten about.  And because I did my nails every single stinking day of September, my list of favorites for the month was really long!  As I put all of my favorites in a pile, I had 4 or 5 polishes that were in limited edition collections that are pretty tough to find now.  I pulled them out of the pile, because I thought it would be pretty mean to be like, “Oh, this is the most awesome polish ever!  You can’t get it anywhere, though.  Sorry about your luck.”

So here’s the pile of my favorites:

IMG_3536

They are left to right, starting with the top row: Wet n Wild – I Need a Refresh-Mint, NYC – High Line Green, Sinful Colors – Cinderella, Orly – Tropical Pop, Broadway Nails – Space Flight, Wet n Wild – Bubblegum Pop, Jordana – Boy Oh Boy.

I’m going to start with Orly – Tropical Pop.  This one kind of breaks my own rule because it was part of the Baked summer 2014 collection.  I still think you will be able to find this with a little bit of searching, though.  I used this orange as my base color for my Day 2: Orange Nails.  This color is such a fun, light neon orange.  It seemed a little shockingly bright at first, but it really grew on my as I wore it.

NYC – High Line Green is one of the very few polishes that I bought for a specific day of the challenge.  I used this color as the base for my Day 4: Green Nails.  It is just the prettiest “ugly” green!  I loved this color so much on its own that I was a little sad to cover it up with the camo pattern.  It’s a fun green for springtime, but I’m definitely going to wear in here in the fall, too.

The name of this next polish was actually the inspiration for my Fairy Godmother nails for  Day 5: Blue Nails.  Sinful Colors – Cinderella has this beautiful pinkish-gold micro shimmer that just makes my heart skip a beat.  It is SO BEAUTIFUL in the sun!  Love it!

Nails – Space Flight is a dark blue jelly polish that bought back in the summer.  It seemed to dark to use then, but once September rolled around, it finally seemed appropriate.  I used it for both Day 17: Glitter and Day 18:Half Moons even though they were back to back days.  My creativity was waning a little at that point, and I was more interested in just using a particular polish that coming up with some ground-breaking design.  I can’t wait to use this for some more jelly sandwiches in the future!  I’ve only ever seen this line of polish at old exclusively at Dollar General and Family Dollar stores.  They are generally in these stand-alone displays that are like big, tiered clear plastic bowls.

Wet n Wild – Bubblegum Pop is a cool pink color.  Cool as in “it leans blue”, not cool as in “awesome”.  Actually, it is a little bit awesome.  I used this polish for my Day 20: Water Marble. This polish actually marbled beautifully with Sally Hansen – Pacific Blue (original formula).  It made the whole process much less painful than I had anticipated.  Although the Wet n Wild Megalast line is available at most grocery stores and drug stores, this color (along with another 15 colors or so) are also sold exclusively at Dollar General and Family Dollar stores.  I know, that’s such a weird place to go for exclusive polishes.

Jordana – Boy Oh Boy is SO AMAZING!  Sigh.  It just makes my knees weak.  It’s this perfect turquoise color, it’s pretty much a one-coat polish, and it’s SO shiny.  Trust me, you need this polish in your life.  I used this polish for Day: 12 Stripes and Day 26: Inspired by a Pattern.  I know Jordana cosmetics are available at K-Mart.  I’m not sure where else you can get them.  I can tell you for sure that they are not available at Wal-Mart, Target, CVS, and Rite Aid stores, at least in south-central PA.   Jordana also makes some really pretty glitter polishes, too.

Okay, the last polish in my favorites is Wet n Wild – I Need a Refresh-Mint.  I used this polish as the base color for Day 15: Delicate Print and Day 23: Inspired by a Movie.  I also used it as the light blue on my ring finger for Day 27: Inspired by Artwork, but you can barely see it on those nails.  I’ve gotta say, I’m a sucker for this color.  Exhibit A:

IMG_3538

From left to right: Wet n Wild – I need a Refresh-Mint, Sinful Colors – Nice Stems, China Glaze – For Audrey.

I can usually justify owning similarly colored polishes, but even I can admit that nobody really needs all three of these.  For Audrey is a tiny hair darker than the other two, and Nice Stems has a barely discernible shimmer, but really… They’re pretty much the same.  All three polishes have a good formula that is opaque in 2 coats.  The Wet n Wild Megalast polishes come with a wider brush, which I like, but I know some people don’t.  You can pretty much get four Sinful Colors or Wet n Wild polishes for the cost of one China Glaze, so that sort of makes For Audrey totally not worth the price tag for me.

I have one last polish that I used pretty much every single day of the challenge: NYC – Grand Central Station.

IMG_3537

This polish is under $2 and it dries so quickly and leave such a great shine!   It’s just such a great quick-dry top coat for the price.  It doesn’t do that shrinkage thing that Seche Vite does, although I do think Seche Vite is just a hair more shiny.  I really can’t tell a difference in quality between NYC and Out the Door.  I still have not tried the HK Girl top coat, but until I get around to trying that, I think I’m going to stick with this stuff.  It’s just just a great value.  I think I’m on my 3rd or 4th bottle.  Can’t really remember.

That’s it for my September favorites!  Have you used any of these polishes?  What are your current favorites!  I love getting your feed back here, on facebook, and on instagram.  Thanks for reading!


Day 8: Metallic Nails (31dc2014)

It took me a little while to find some inspiration for these nails.  I was a little tempted just to slather gold polish on my nails and call it a day.  This 31 Day Challenge is definitely fun, but sometimes I feel like all my free time and mental energy is being used to paint my nails.  I’m glad it’s only 31 days and I’m glad that I’m 1/4 of the way there!

Sunday evening the hubby and I were at the Pennsylvania Renaissance Faire, which is where we are most weekends from August to October.   On the ride home, I finally got hit with some inspiration to paint some royal nails.  Here they are:

IMG_3145IMG_3149

Yep, my cuticles are stained a lovely purple color. 

The gold polish is from Wet n Wild’s Fergie line and it’s called Gold Album.  Every time I use it I’m amazed and how pretty it is. 

The purple is Orly – Velvet Rope.  I got the mini size of this for $.49 in the clearance section at Ulta this weekend!  I think I’ll be wearing this quite a bit in the colder months.

The “jewels” are just glitters that I fished out of Funky Fingers – Unicorn Farts.  I used a dotting tool to pick them up and place them where I wanted them. 

That’s all for today.  See you again tomorrow!


Day 2: Orange Nails (31dc2014)

Today is orange nails day.  In regular life, I rarely paint my nails orange because I think it just looks bad with my light skin.  I was suckered into buying Orly – Tropical Pop a few weeks ago, though, because it’s just such a pretty, fun shade of orange. Kind of a light neon orange.  That’s the color I used for my base, with a traffic cone orange for the dots and the orange slices.

IMG_3047

I’ve been loving these nails more and more as the day goes on and I’m definitely sad that I have to take them off to get ready for tomorrow…  And I was sad yesterday when I had to take my ladybugs off… I guess I’m going to be sad every day for the next 29 days, unless one of these days is a real nail art fail.  Actually, I’m pretty sure the day I have to do water marble is going to be a major fail.  That’s not until Day 20, so I guess I have 18 more days until I really have to worry about being humiliated online in front of all the other nail bloggers.

One of the most fun things for the past 2 days has been checking out everybody’s nails on instagram.  Seriously, check out all of the awesome nails from people undertaking the 31 Day Challenge on instagram with #31dc2014.  See you tomorrow with some yellow nails!

August Favorites and the 31 Day Challenge

So, I only have 3 new polishes that I’ve particularly loved in August.  I guess  there’s nothing wrong with that.  

IMG_3025

The first is China Glaze Peonies & Park Ave from the City Flourish Collection.  I’m not really sure when this collection came out, but I think I got this polish on clearance last summer.  I’m pretty sure you won’t be able to find this in stores, but you can still buy it online.  It’s just a really pretty almost-neon pink.  I used it as the base for my scrapbook nails, and it was while I was wearing those nails that I realized how much I love this color.

IMG_3019IMG_3018

The next one is Sinful Colors – Snow Me White.  I keep not putting this polish away, so it’s been sitting on my coffee table for pretty much the whole month.  Because of that, I keep using it.  I think it’s the only white I’ve used all month.  I’ve used it at least 4 times, and it’s just great and easy each time.

IMG_3024IMG_3023

My last favorite polish this month is Orly – Hot Tropics from the Summer 2014 Baked collection.  I was able to get mine on clearance, and I’ve seen this color still in stores recently.  It’s the most beautiful bright purple.  The thing that makes it special though, is the gold shimmer in it.  SO pretty in the sun. I haven’t put it on my toes yet, but I think this would be a great toe color.

IMG_3022IMG_3020IMG_2901

That’s it for my August favorites, but I want to fill you in on what I’m doing from September 1 to October 1.  I’m doing the 31 Day Challenge!  If you’re not familiar with this, it’s something that a lot of nail artists and bloggers undertake just to stretch themselves and improve their nail art skills.  Here’s the list of each day’s challenge.  Really, you can do it anytime, but most people do it starting September 1.

IMG_2952

I thought about doing this for a half of a second last year, but it just seemed too overwhelming.  I’ve been contemplating this for a few weeks now, so I think I’m ready to go for it!  My plan is to post a picture of my nails with a little description each day, but no real tutorials.  If one of the looks seems worthy of a tutorial, I’ll tackle that after the whole challenge is over. 

By the way, this is not any sort of exclusive thing.  Anyone who feels like it, can go for this challenge.  A huge part of the fun of this is checking out everybody’s nails each day on Instagram/facebook/nails blogs.  Feel free to join the fun!  Chalkboard Nails has been a great promoter of this challenge.  Check out her blog for inspiration, if you need it. 

Anyway, I look forward to sharing this big undertaking with you!  I’ll be back on Sept 1 with some red nails!


Real Seashell Nails

By now you’ve probably seen those little kits that you can use to create a seashell manicure that include the little bottles of dyed and crushed seashells.  They are pretty cute, but I don’t like paying for stuff if I don’t have to. 

A few weeks ago, we did a day trip to the beach and I took it upon myself to collect a bunch of these really thin shells. 

IMG_2853

I’m sure they have a name, but I don’t know what it is.  They are the kind of shells that you can just easily break with your fingers, and they are really plentiful along the mid-Atlantic coast.

I broke them up into little pieces that were about 1/4 inch or smaller  (That’s about 1/2 cm for those of you in the rest of the world.)

IMG_2855

Then I painted all of my nails with a few coats of NYC – Fashion Safari.  I topped my index finger, pinky and thumb with a coat of Orly – Sky Blue-Pink to mimic the iridescence of a seashell.

IMG_2860

Then, I applied one more layer of Fashion Safari to my middle and ring fingers, and while they were still wet, I sprinkled my crushed up shells onto them.  I tapped off the excess and then patted down the shells that were stuck to the nail.   I then topped it with several layers of top coat in order to make it (sort of) smooth.  Here are my results:

IMG_2861

I didn’t LOVE-love them, but they were okay.  The nails with the shells were pretty thick, and after 4 or 4 days, they started to pull away from the nail.  I do want to try it again, but I think next time I will use a dotting tool dipped into clear polish to pick up the pieces of shell and place them on my nail like a mosaic.  Obviously, this will be a little more difficult, but I think the results will be better. 

Please let me know if you attempt anything similar and how it turns out for you!  As usual, tag me on instagram or facebook  or use the hashtag #polishmesnazzy so I can see your recreations!

All About The Neon

So we’re smack in the middle of summer.  Summer is great for many reasons, not the least of which is wearing neon nail polish!  Actually, summer is pretty much the only season in which you can wear neon polish without looking…  What’s a nice way to say “trashy”?  (You are entitled to disagree with me, but that’s how I feel.)  Anyway, since we are in the season of neon, I figured it was a good time to talk about how we can all sport the most eye-searingly neon nails as possible.

Have you ever purchased a beautifully bright bottle of neon polish that you just couldn’t wait to put on your fingers?  You didn’t want much, just for your nails to be as bright as the bottle of polish.  Then once you got it on your nails, it was disappointingly drab.  It was streaky and see-through, and matte and just didn’t look like anything in the bottle.  It was a sad day.

Well, I’m here to tell you that you CAN have nails that are just as brilliantly bright as the polish appears in the bottle, and for the most-part, there’s just one really important step that you need to take before you slather on the neon polish…(Drum roll, please.)… You need to paint your nails white first.  A lot of neon polish has a pretty shear formula.  Those “highlighter yellow” polishes almost always have a really transparent jelly formula.  Because of that, the only way to get the true color to show up is to make sure it’s on a white background.

And you need to take your time and paint your nails really nicely with the white polish.  Since the neon polish is tends to be shear, any streaks or missed spots in the white polish are going to show through the neon layer, too.  Generally, two good coats of white will make a great base for your neon polish.

There are other bloggers out there (many of whom I like a lot) that claim that painting your nails white first should not have to be a requirement, and the nail polish companies need to step up their game and make true neon polish that doesn’t require a white base.  I say that those sentiments are all well and good, but the truth is, your neon nails will generally be a heck of a lot brighter if you just take the extra 5 minutes to put down a nice white base.

So, let’s get to some examples.  Here are the polishes that I tested:

IMG_2602

I arranged them nicely in rainbow order and took this picture in natural light to try to show the colors as accurately as possible. Starting with the upper left, the colors are:

  • Sally Girl #812157
  • Sally Girl #812158
  • China Glaze – Thistle Do Nicely
  • LA Colors – Hottie
  • Sally Girl – Crazy
  • Spoiled – Did I Dye It Too Blonde?
  • Broadway – Sour Apple
  • China Glaze – Turned Up Turquoise
  • Nina – Blue Blaze
  • Sinful Colors – Dream On

One each hand I painted my:

  • First finger: 2 coats of neon polish on bare nail
  • Middle finger: 3 coats of neon polish on bare nail
  • Ring finger: 4 coats of neon polish on bare nail
  • Pinky: 1 coat of white polish followed by 2 coats of neon polish
  • Thumb: 2 coats of white polish followed by 2 coats of neon polish

I did all of these swatches while watching The Bachelorette.  In retrospect, I should have done them during the day so that I could have photographed them in natural light.   It’s really hard to capture neon colors on camera as it is, and I think artificial light makes it even worse.   I should also point out that I am fully aware that my paint job on some of my fingers is pretty crappy.  I was mostly concerned with getting them all done before Andi gave out her final rose.

Here we go…

Sally Girl #812157:

IMG_2580

This picture is really deceptive.  The color is a crazy bright pink, and with this particular color, it is SO much more vibrant over white.

Sally Girl #812158:

IMG_2583

This is a neon bubblegum pink.  This one is actually just fine without a white base, as long as you do at least 3 coats.

China Glaze – Thistle Do Nicely:

IMG_2584

A hot pinky-coral.  China Glaze makes some really great neon formulas, and this is one of them.  Three coats without a white base looks great.

LA Colors – Hottie:

IMG_2595

This  is actually a bright coral.  This may not be a true neon, because the formula dries glossy instead of matte.  Three coats of this looks good without white underneath.

Sally Girl – Crazy:

IMG_2585

Traffic cone orange.  This picture is a little deceptive.  Without white underneath, it remains a dingy orange.  A white base makes the color blinding!

Spoiled – Did I Dye It Too Blonde?:

IMG_2588

This highlighter yellow is the color that most obviously benefits from a white base underneath.  On the pinky, you can see that the streaks from the thin coat of white show through.  I love how this looks on the thumb!  You definitely need two coats of white under this and then 2 coats of yellow, but the trouble is SO worth it!  You can stop traffic with these nails!

Broadway – Sour Apple:

IMG_2591

This color sure looks neon to me, so I was surprised that it dried glossy.  An amazing formula for a polish that costs $1!  Three coats without white and you are good to go.

China Glaze – Turned Up Turquoise:

IMG_2594

I LOVE this color!  This formula is great, so you don’t need a white base.  This is not a typical neon color, but it is part of China Glaze’s neon collection.  This looks really cool with it’s matte finish, but there is a greenish shimmer in this polish that really shows up when you put a shiny top coat over it.  This color, along with the last two, are actually colors that you can get away with wearing year-round.  Did I mention that I love this color?

Nina – Blue Blaze:

IMG_2598

Again the color in this picture is really deceptive.  I decided to include this color, because like most neons, it dries matte and it really is a bright electric blue in person!  It’s sort of irritating, but this color applies much more smoothly when it is not over white, but the color is much brighter when it is over white.  I think I’ll have to play with this one a little more to get it just right.

Sinful Colors – Dream On:

IMG_2599

This neon purple looks okay if you do 4 coats on it’s own, but a white coat underneath just makes it pop.

And here’s my little trash can by the end of The Bachelorette:

IMG_2600

You can see some of my husband’s peanut shells underneath.  He feels that it is important to shell and eat peanuts while he watches baseball on TV.   So, as long has he doesn’t complain about the nail polish bottles that are strewn all over our house, I won’t complain about the peanut skins that land on the carpet.  The things you do for love.

What are your thoughts on applying a white base under neons?  And what are your favorite neon polishes?