Wet n Wild Spring into the Wild Collection (Spring 2016)

So, I did something I don’t think I’ve ever done before.  I bought an entire collection.  I just have never been able to justify it before.  An entire collection of China Glaze or OPI can easily cost north of $50, and often I don’t really need or want all of the polishes.  I love reading blogs or watching videos made by ladies who have purchased entire collections, but for me it just seems a little frivolous, especially since my little blog doesn’t actually generate any income.   So how did I come to purchase an entire collection, then?

IMG_7089Well, we (my hubby and some other extended family members) had been putting in lots of long exhausting hours cleaning out a house for another family member.  After several days of working, working, working, I ended up in a Christmas Tree Shops staring at the newest Wet n Wild collection called Spring into the Wild.  The display still had all four of the polishes in it, and they were pretty… And they were only $1.79 each.  That meant for under $8, I could get the entire collection.  So I did.   Seriously, aren’t they so pretty?

A day or so after I bought this collection at Christmas Tree Shops, I spotted it atIMG_7091 Kmart.   While I was there, I looked through Sinfull Colors, Sally Hansen, and Revlon for any duplicates (aka “dupes”) of these colors.

The four polishes are from left to right:  Love Fest, Lay out in Lavender, Breeze on By, and Kiss My Mints.

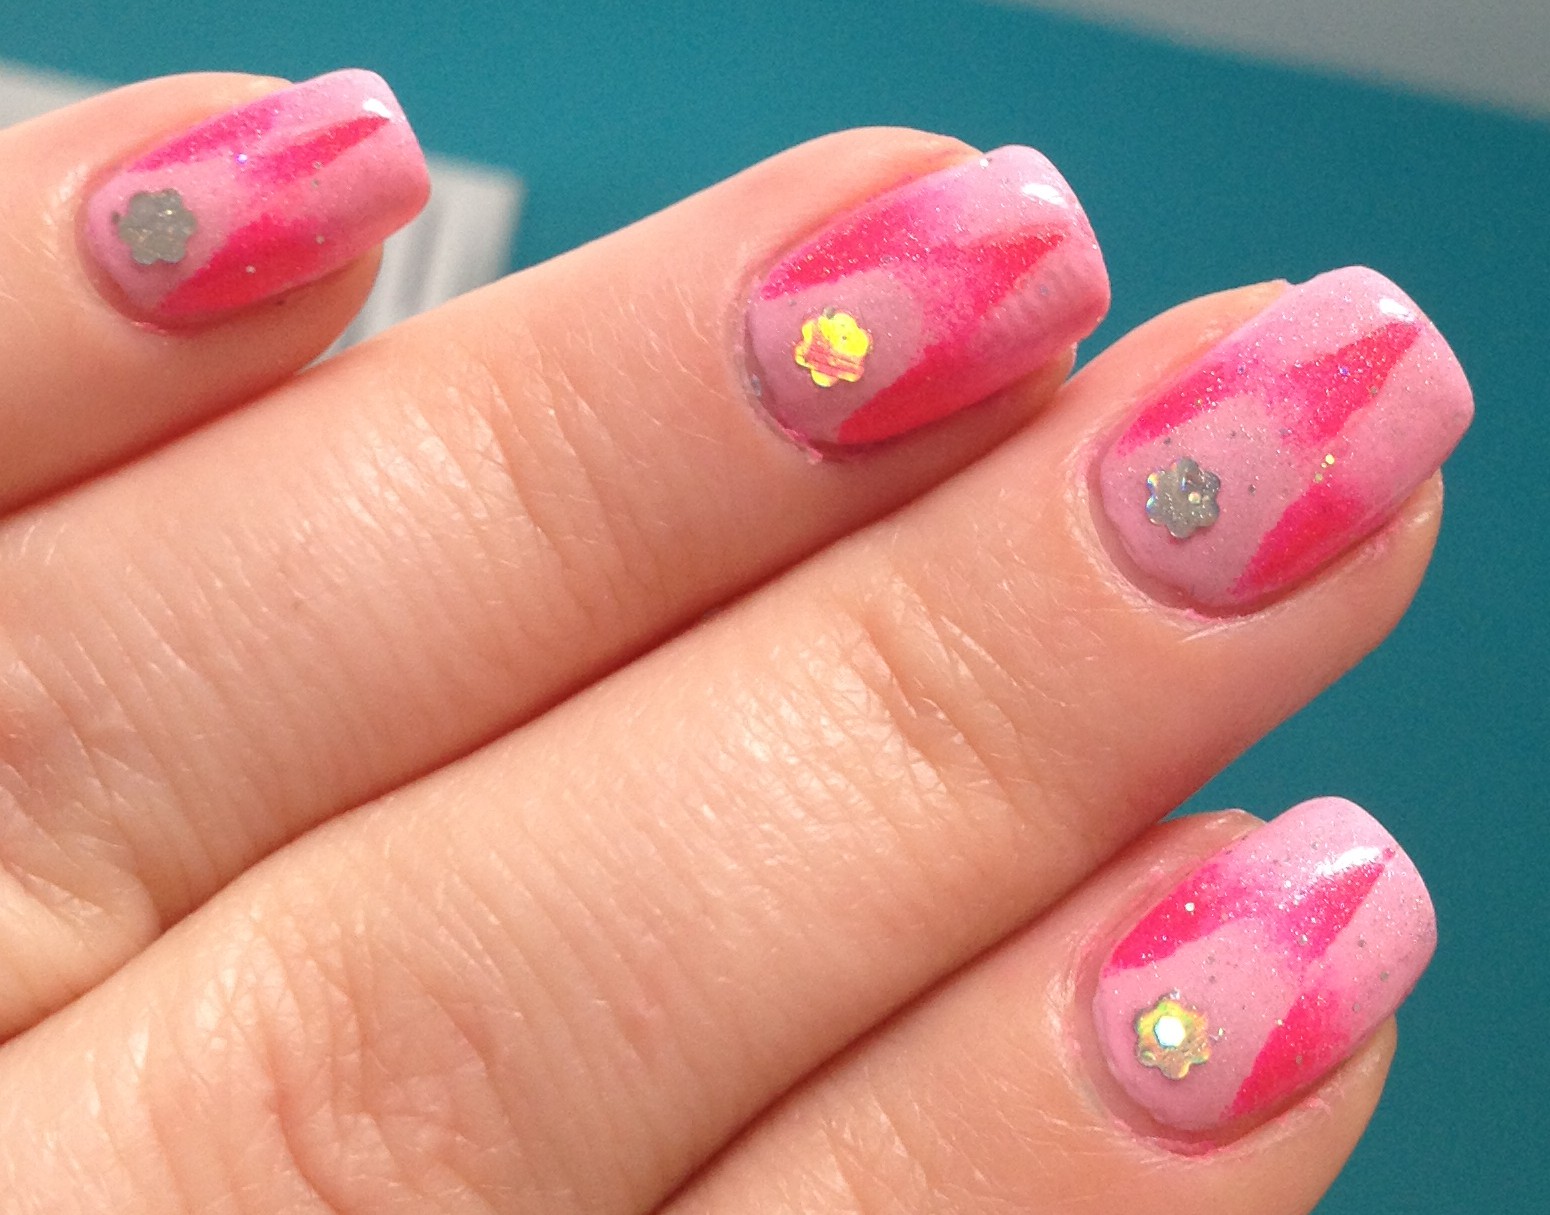
Let’s start with Love Fest.  This is just a lovely pastel pink.  Next to the other polishes in the collection, it looks like it’s pretty warm IMG_7093toned, but when it’s on its own, I feel it’s almost cool toned.  I’ll just say it’s a middle-of-the-road pastel pink.  The formula is pretty sheer, though.  What you’re looking at here is four coats.  Yeah, I know.  Ain’t nobody got time for that.   It dries really glossy and it just looks so pretty once it’s on the nail, so I’ll probably suck it up and wear it anyway.   I think I might attempt some jelly sandwiches with this one.IMG_7103

I have a ton of pink polishes (well, like 30) but I didn’t have any that were a really close match to this one.  The closest that I could pull out of my collection was Wet n Wild – Tickled Pink, but as you can see, these polishes really aren’t that close at all.

IMG_7133At Kmart, however, I did find two dead-on dupes for Love Fest.  Here’s Love Fest on the left, then in the Middle is Sally Hansen – Hard-Core Party in the middle, and Sally Hansen – Tickled Pink on the Right.  (Yeah, both the Sally Hansen polish and the Wet n Wild Polish are called Tickled Pick.  People need to come up with more clever names.) I picked up Hard-Core Party since it was only $.50, and I can definitely verify that these two are pretty much exactly the same.


IMG_7104
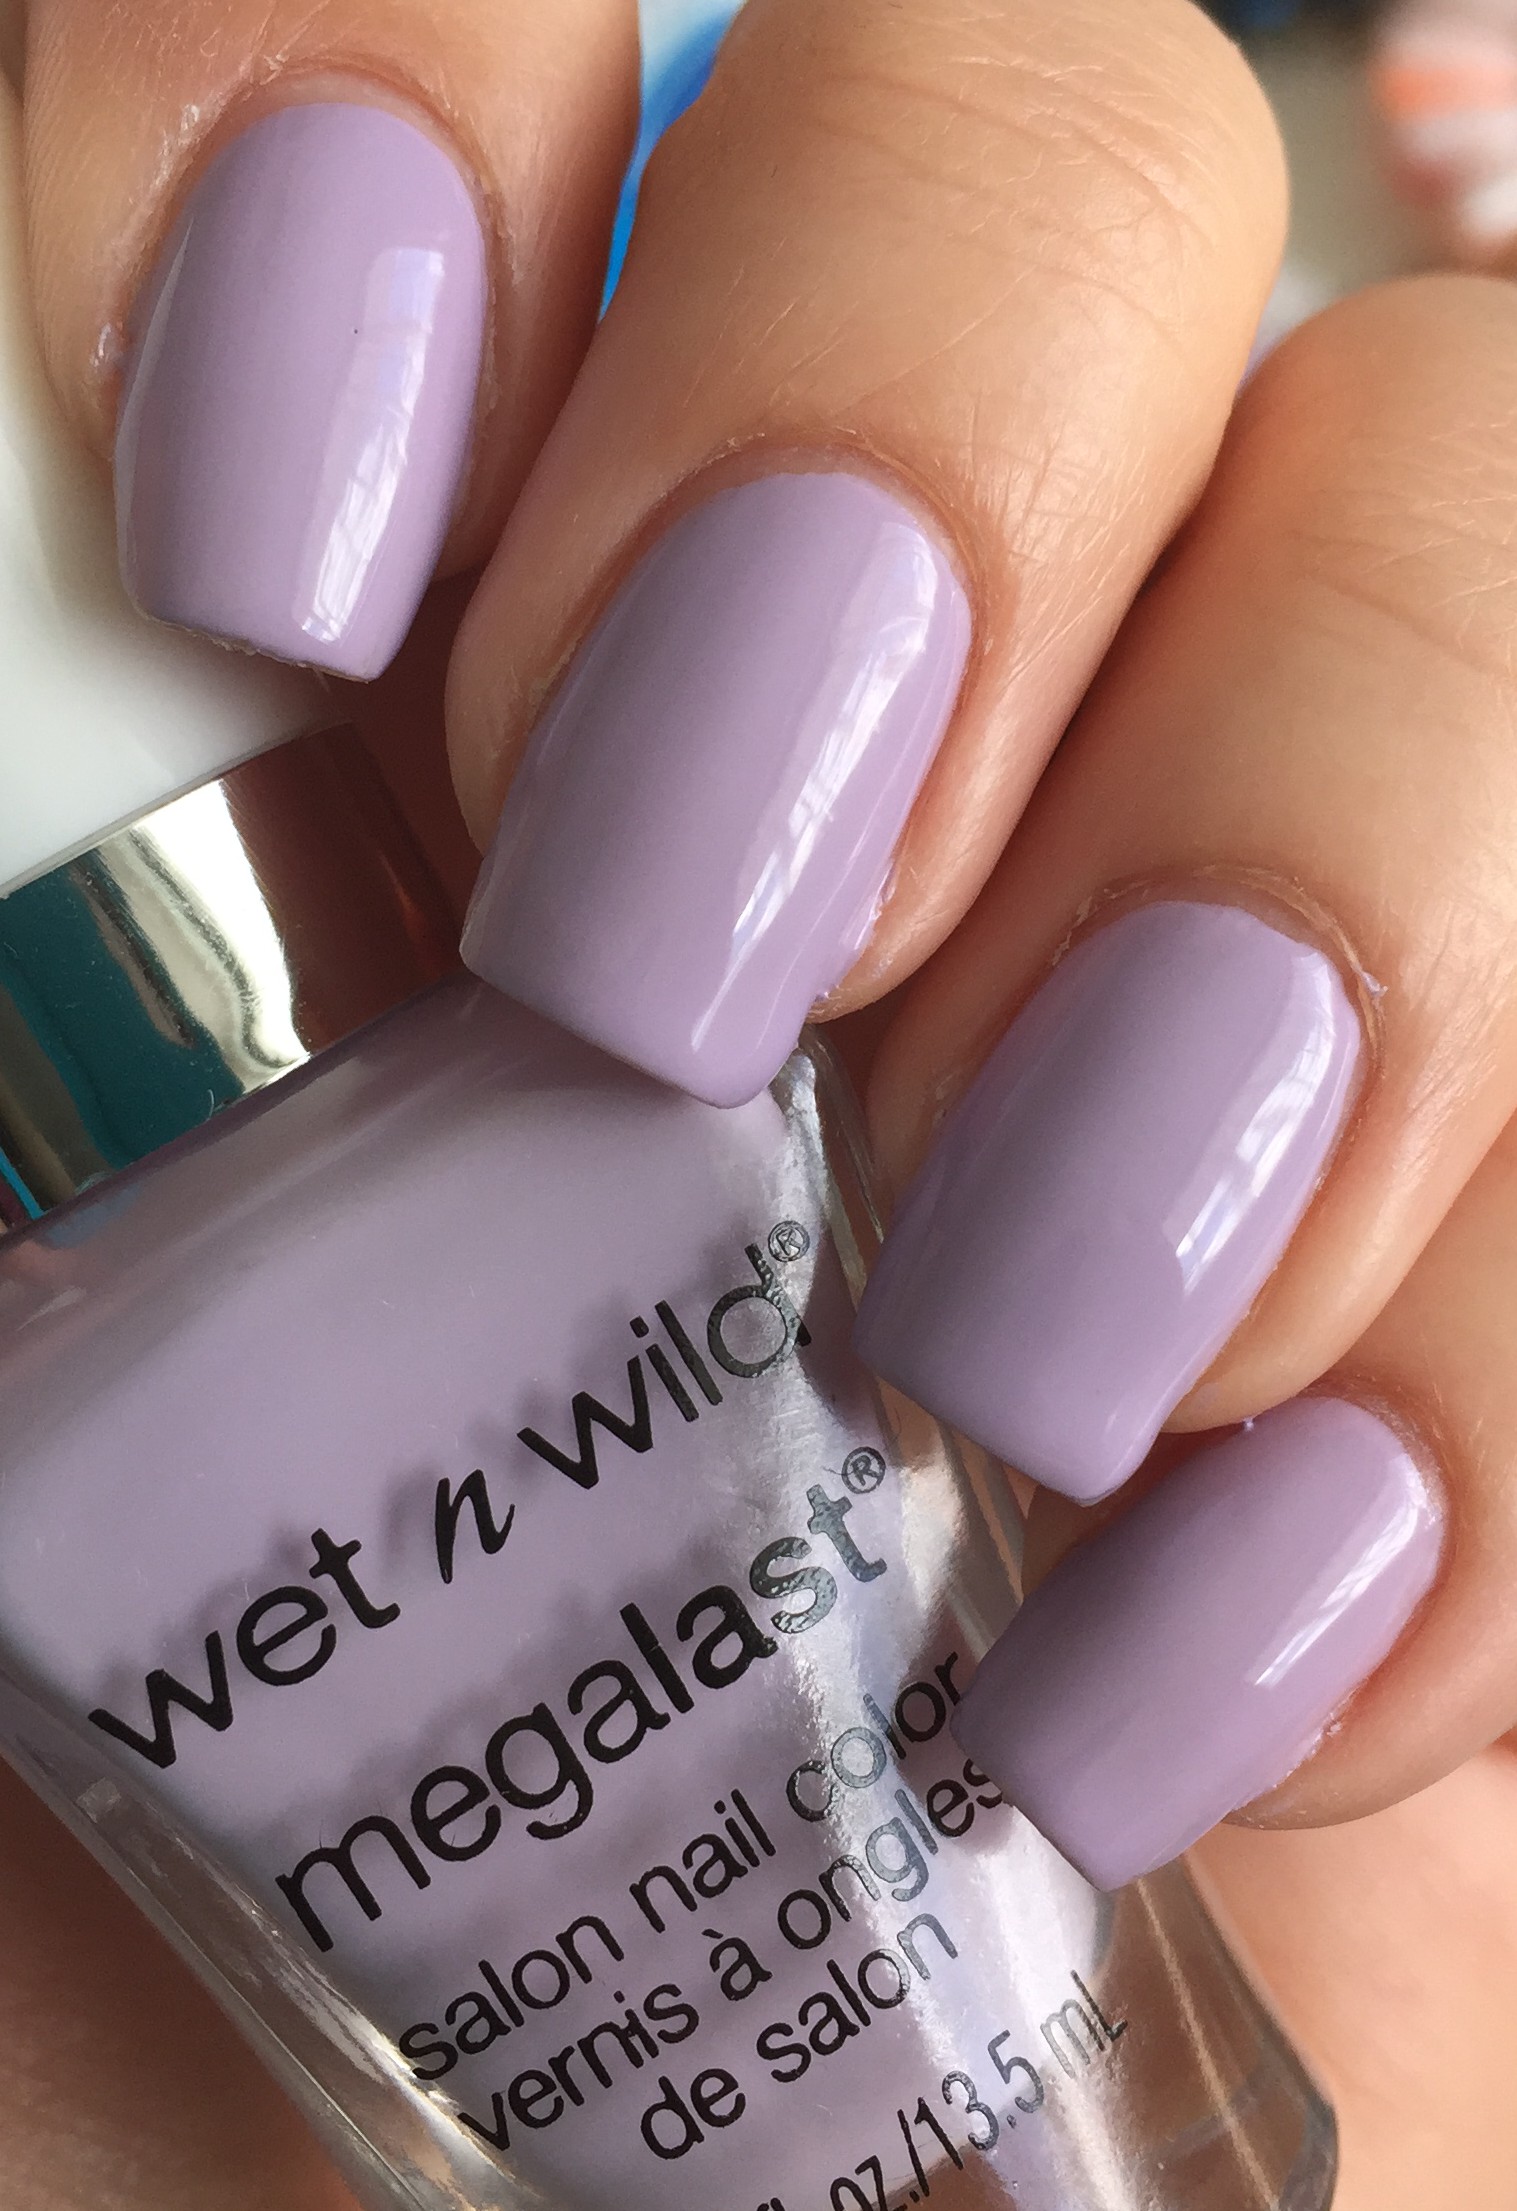
Next we have Lay Out in Lavender.  This one’s a stunner, right?  It’s just so pretty!  This is sort of a muted lavender.  This polish was opaque in two coats.  None of that four coat nonsense here.

When I first saw this polish, I thought it might be similar to China Glaze – Release from IMG_7108The Giver collection from a few years ago, and when you look at them in the bottle, they actually don’t look that different.  Once I got the polish on the nail, it was clear that they were really different.  Release is a gray polish that leans purple, and Lay Out in Lavender is a purple polish that leans gray.

Just for kicks, I also pulled out Broadway Nails – Easter Annie for comparison, but this polish is obviously much more pink with no IMG_7136hint of gray.  I’m super happy to add Lay Out in Lavender to my collection since I really don’t have anything like it!

While I was at Kmart, I found a few polishes worth comparing to Lay Out in Lavender.  The polish on the left was the closest match, and that is Sally Hansen Miracle Gel – All Chalked Up.   All Chalked Up is just a tiny bit warmer than Lay out in Lavender, like it’s got a half a drop of yellow polish in the bottle.  It’s still super close, though.  The polish on the right is Sally Hansen – Lacey Lilac.  Lacey Lilac is definitely more pink and it doesn’t have that hint of gray that Lay Out in Lavender has.

IMG_7109Next we have Breeze on By.  This is a pretty periwinkle cream that was opaque in two coats.  Another really beautiful color!IMG_7092

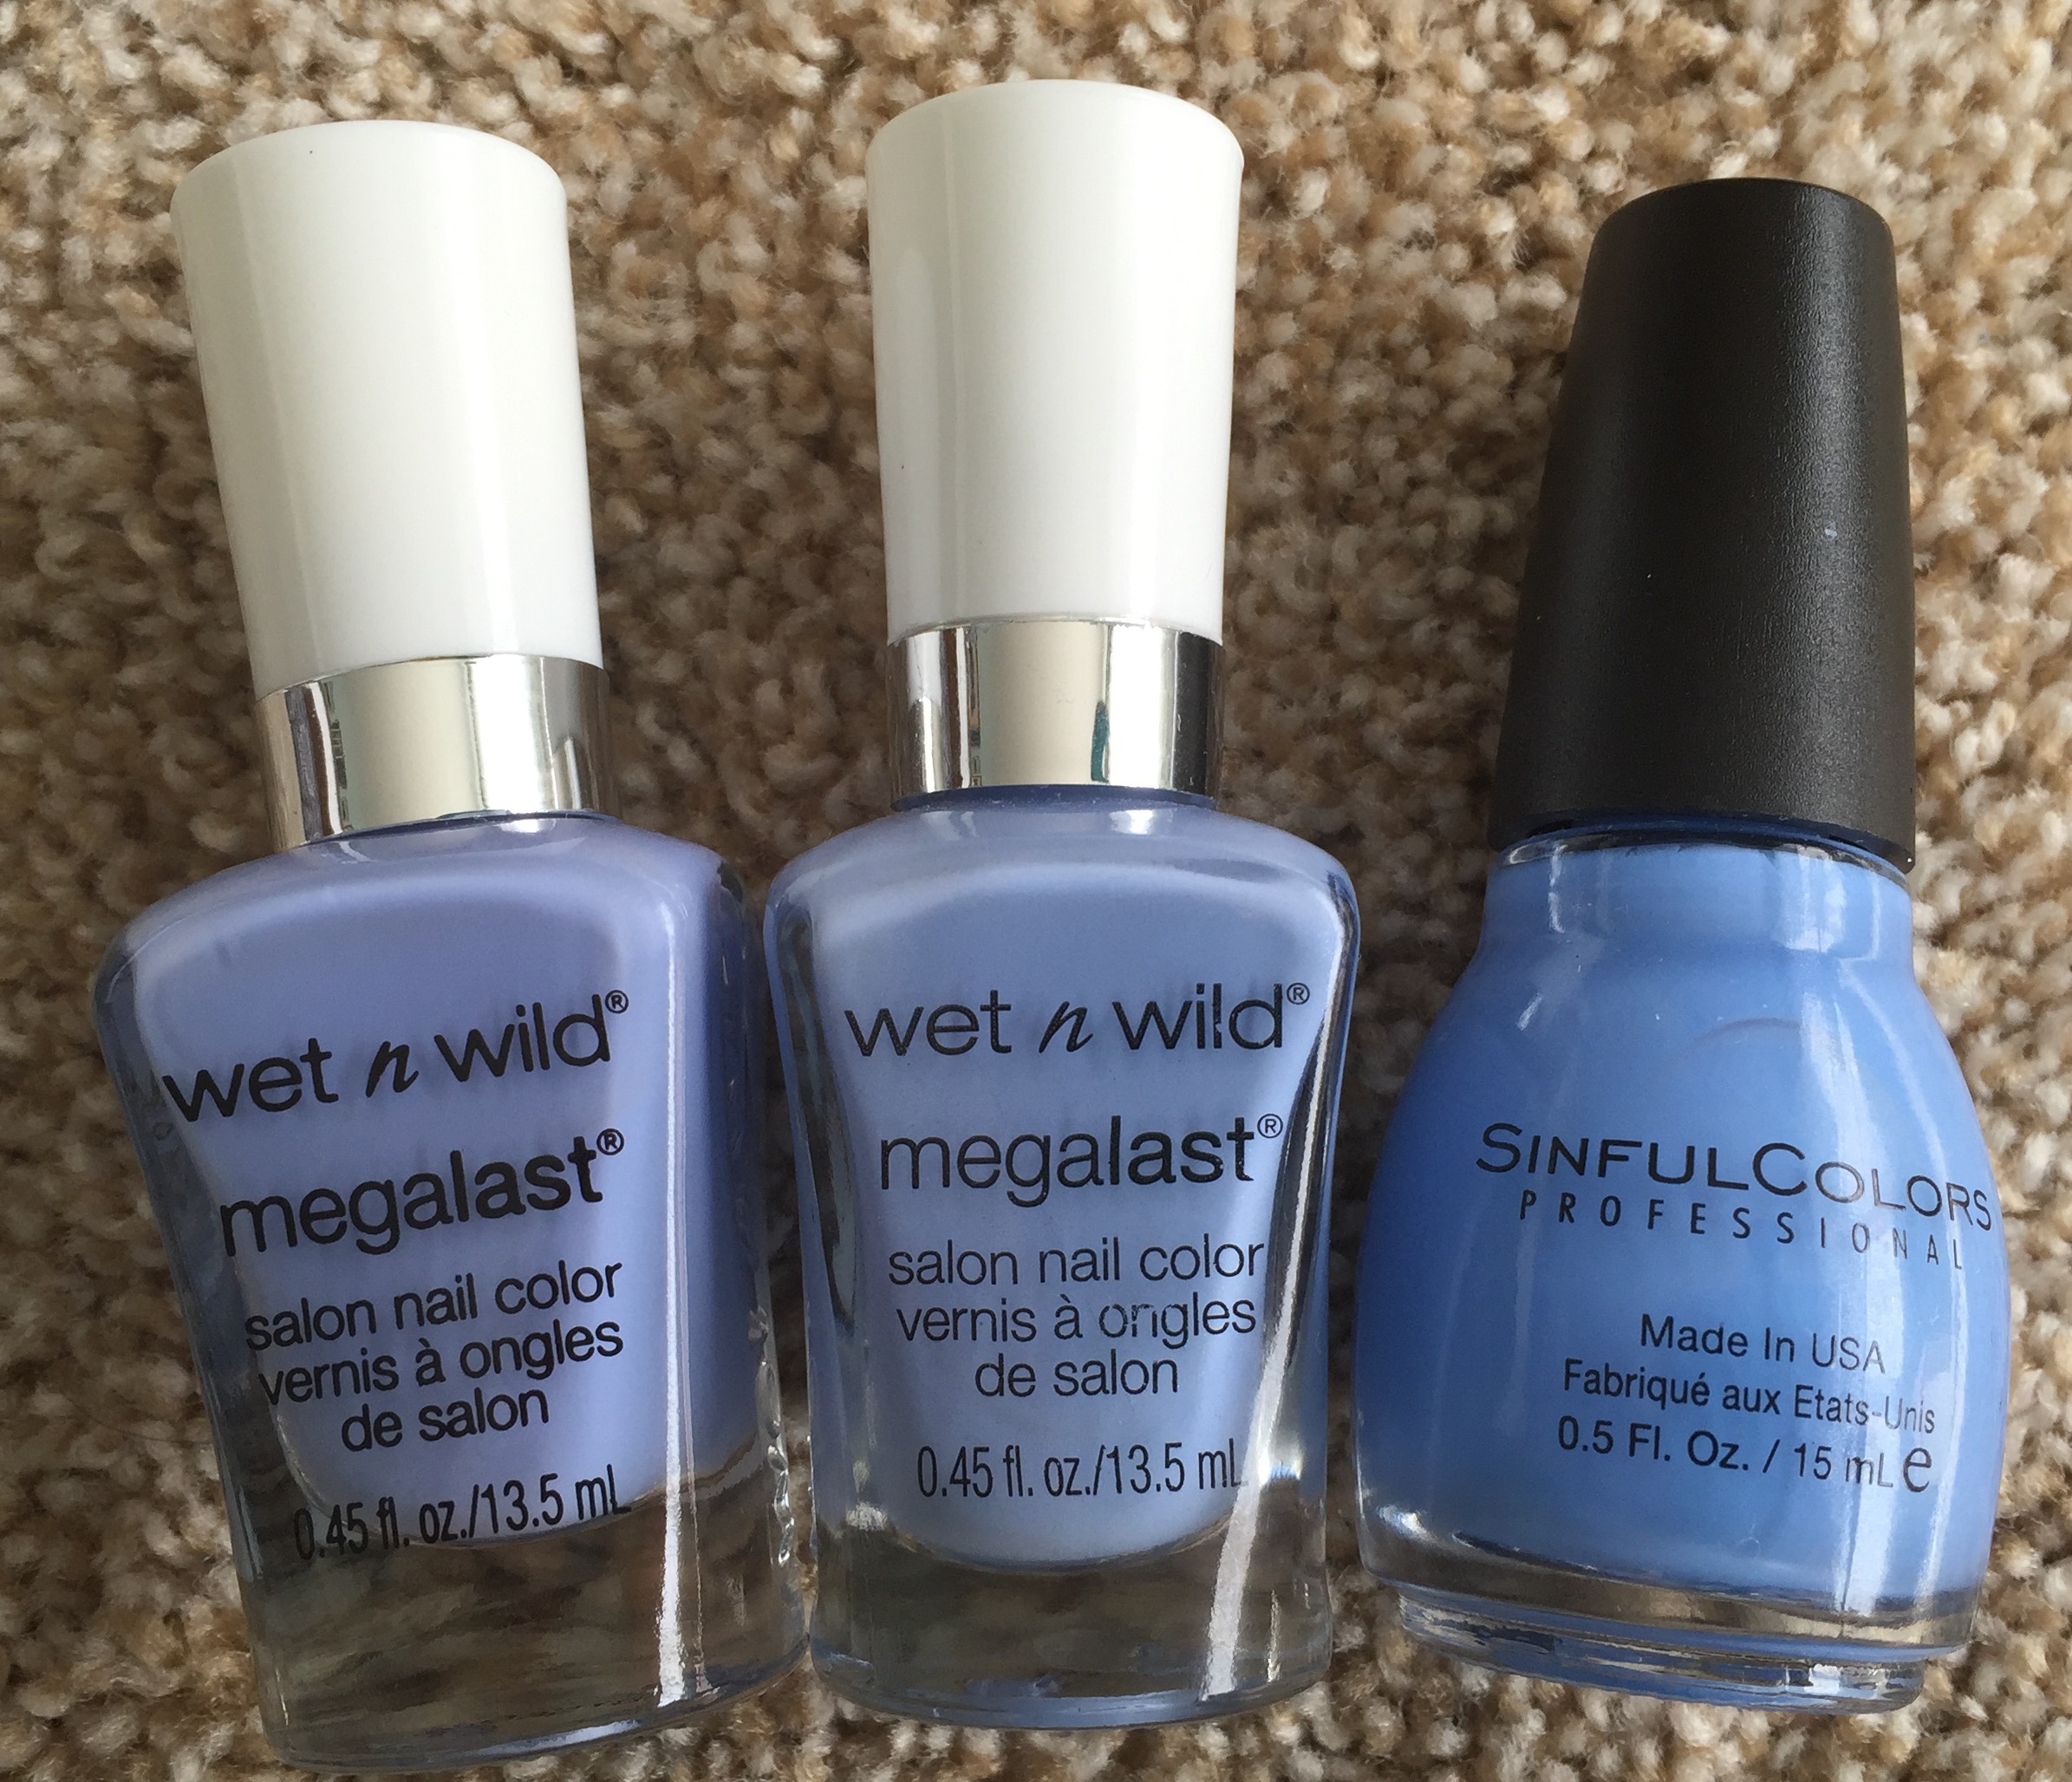
As soon as I saw this polish, I thought it looked exactly like Wear Skinny Jeans from last year’s Silver Lake Collection.  As you can see, they are pretty darn close.  The one difference is that Wear Skinny Jeans has a silver shimmer running through it, but since the shimmer doesn’t actually show up on your nail, that difference really doesn’t count for much.  I threw in Sinful Colors – Sail La Vie for comparison as well. I have Breeze on my on my first finger, Wear Skinny Jeans on my IMG_7113
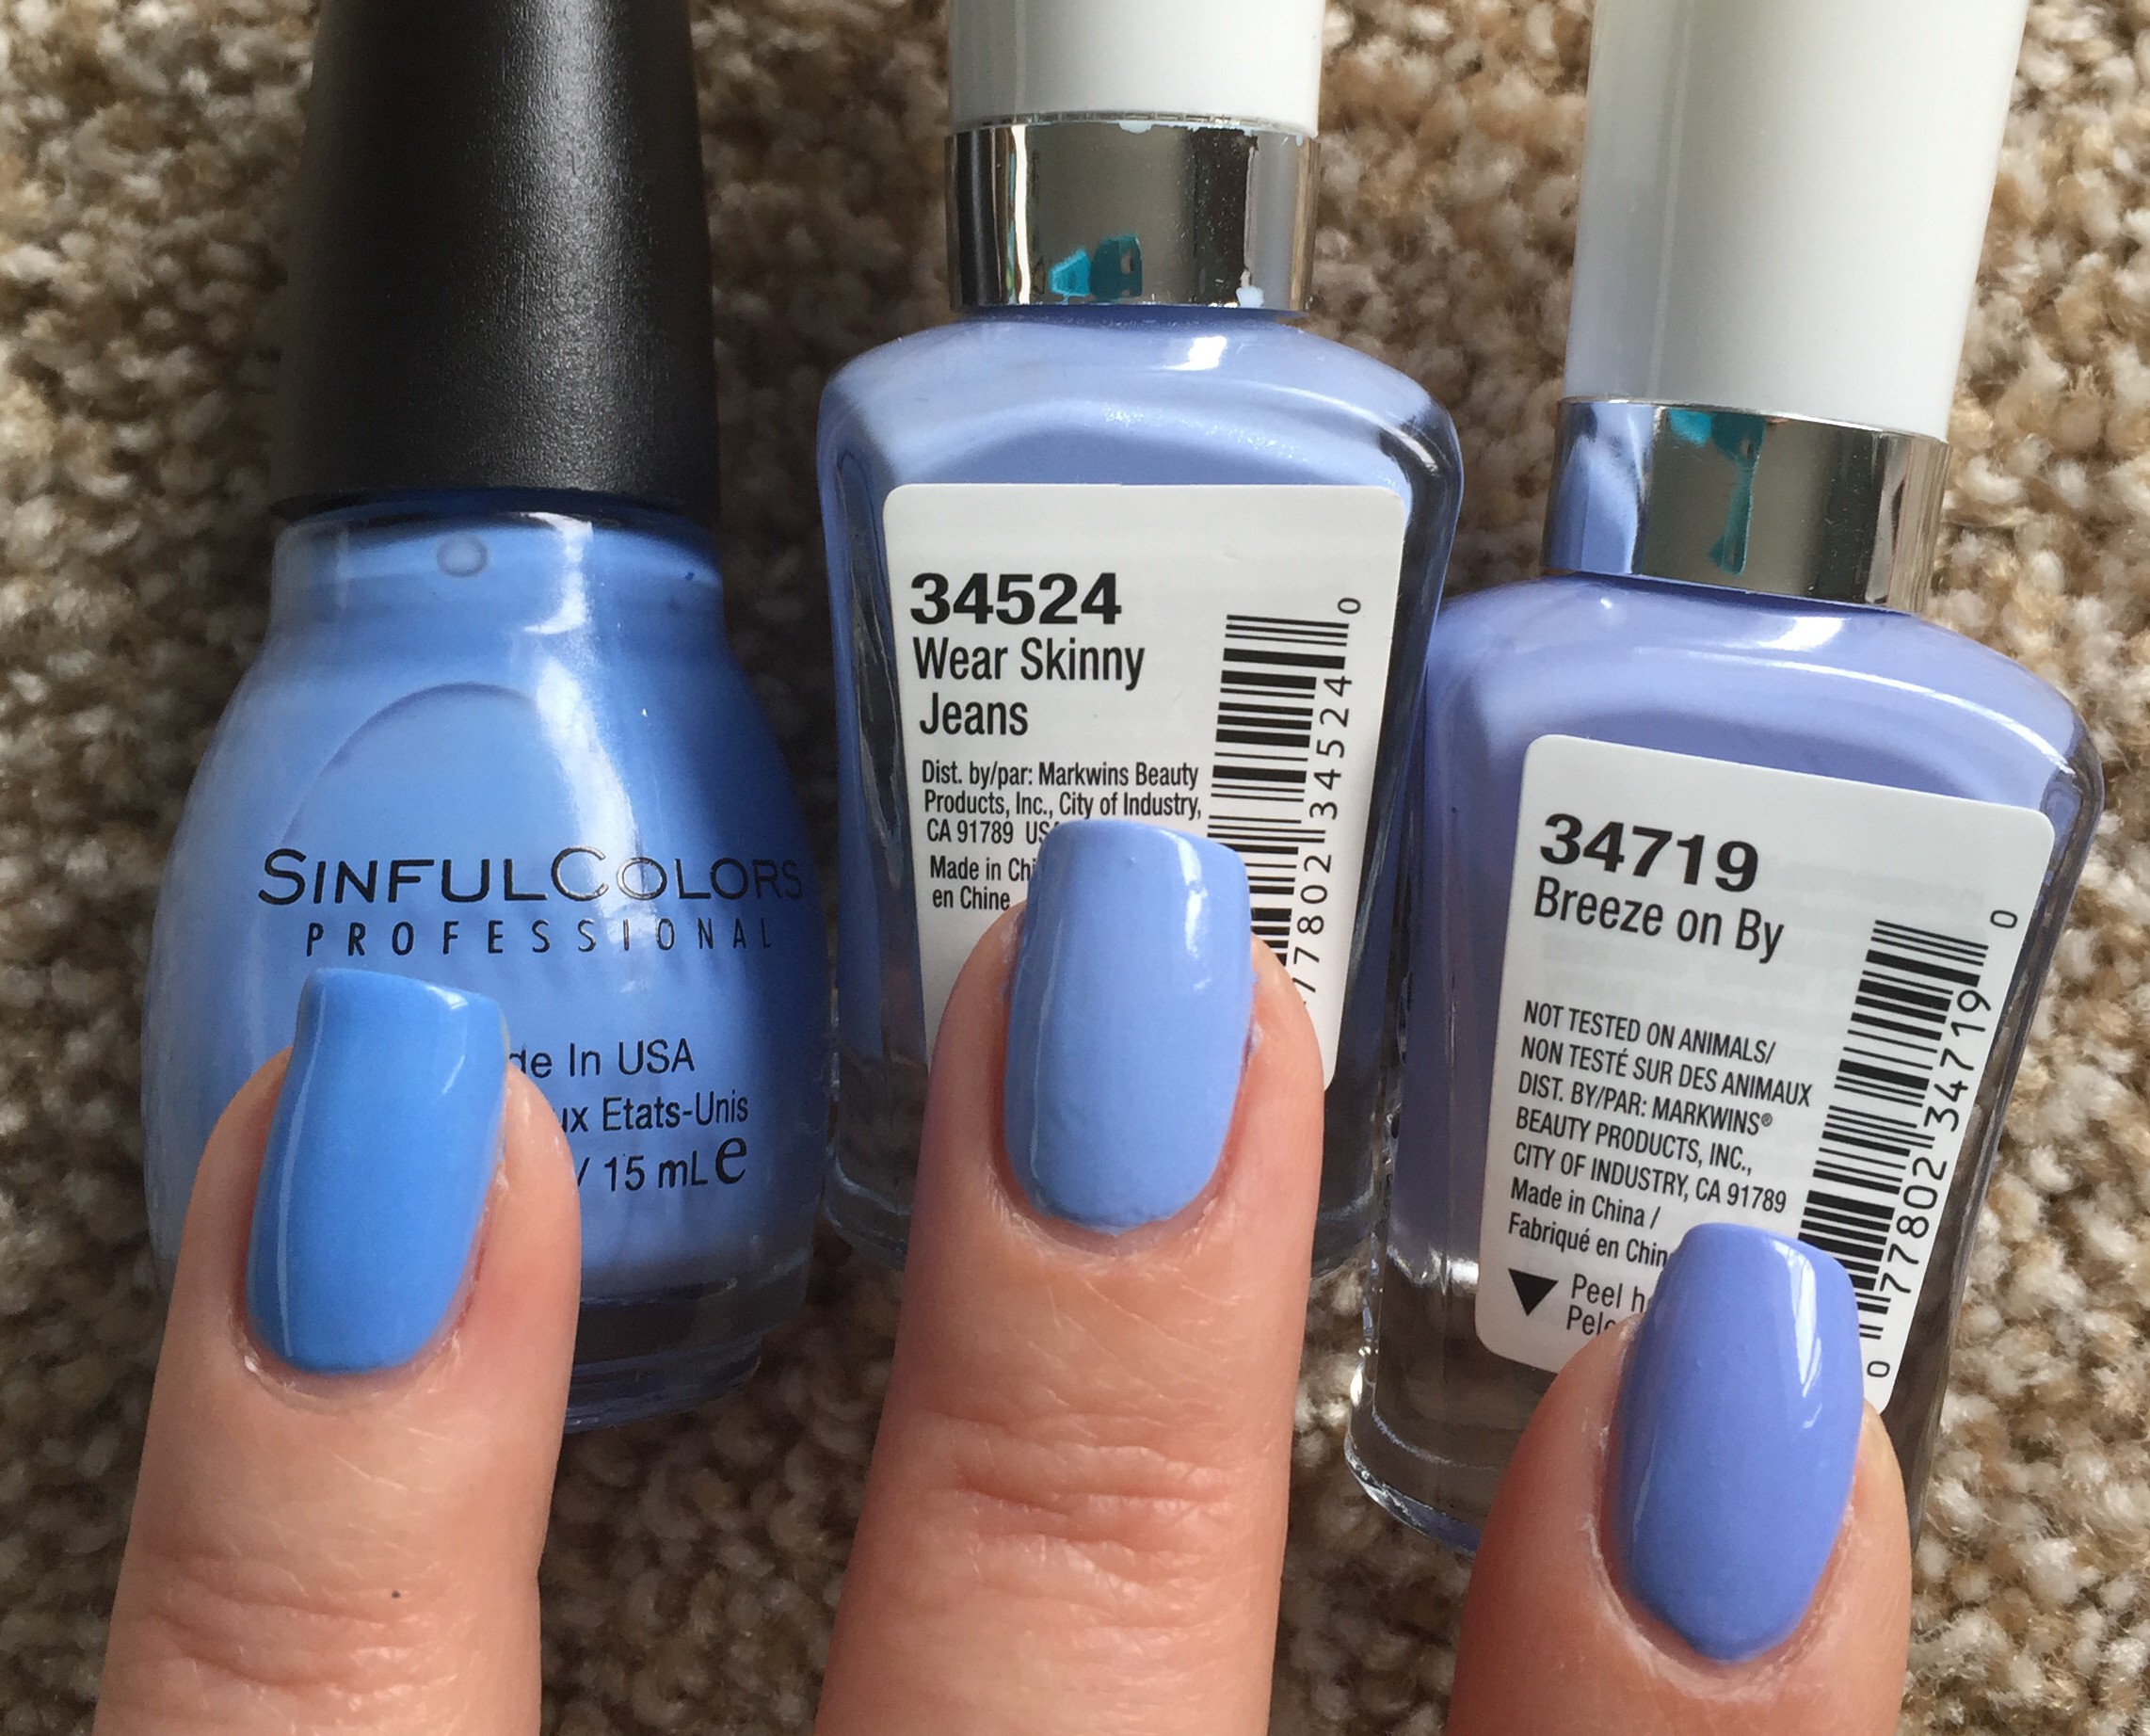
middle finger, and Sail La Vie on my ring finger.  As you can see, Breeze on By is a IMG_7114hint more purple than Wear Skinny Jeans, but if you already own Wear Skinny Jeans, I’d say you could skip picking up Breeze on By.  Sail La Vie is obviously more blue than either of the Wet n Wild polishes.  I’m sure that Essie – Bikini So Teeny is super similar as well, but I don’t own that one.  I know it’s a classic Essie polish, but I  seriously don’t need anymore periwinkle polish.

When I was at Kmart I found a few more polishes worth comparing to Breeze on By.  The polish on the left is Sail La Vie, which I just threw in the picture for comparison’s IMG_7130sake.  The next polish is Sally Hansen – Hard Bitten.  This is a little less purple than Breeze on By, and it has a fine silver shimmer.  I’m not sure if that shimmer actually shows up when you get it on your nails or not.  Next is Sally Hansen – Babe Blue.  Babe Blue also has a shimmer running through it.  From images I’ve seen online of this polish, the shimmer just barely shows up.  (Rant:  Why is it so difficult to make a periwinkle polish with a shimmer that actually shows up?  Am I missing something here?  Nothing is more annoying than purchasing a polish and then not being able to get what you see in the bottle to show up on your nails.) Babe Blue is really close to Breeze on By, maybe just a hair more blue.  I think it’s probably just about identical to Wet n Wild – Wear Skinny Jeans.

IMG_7116
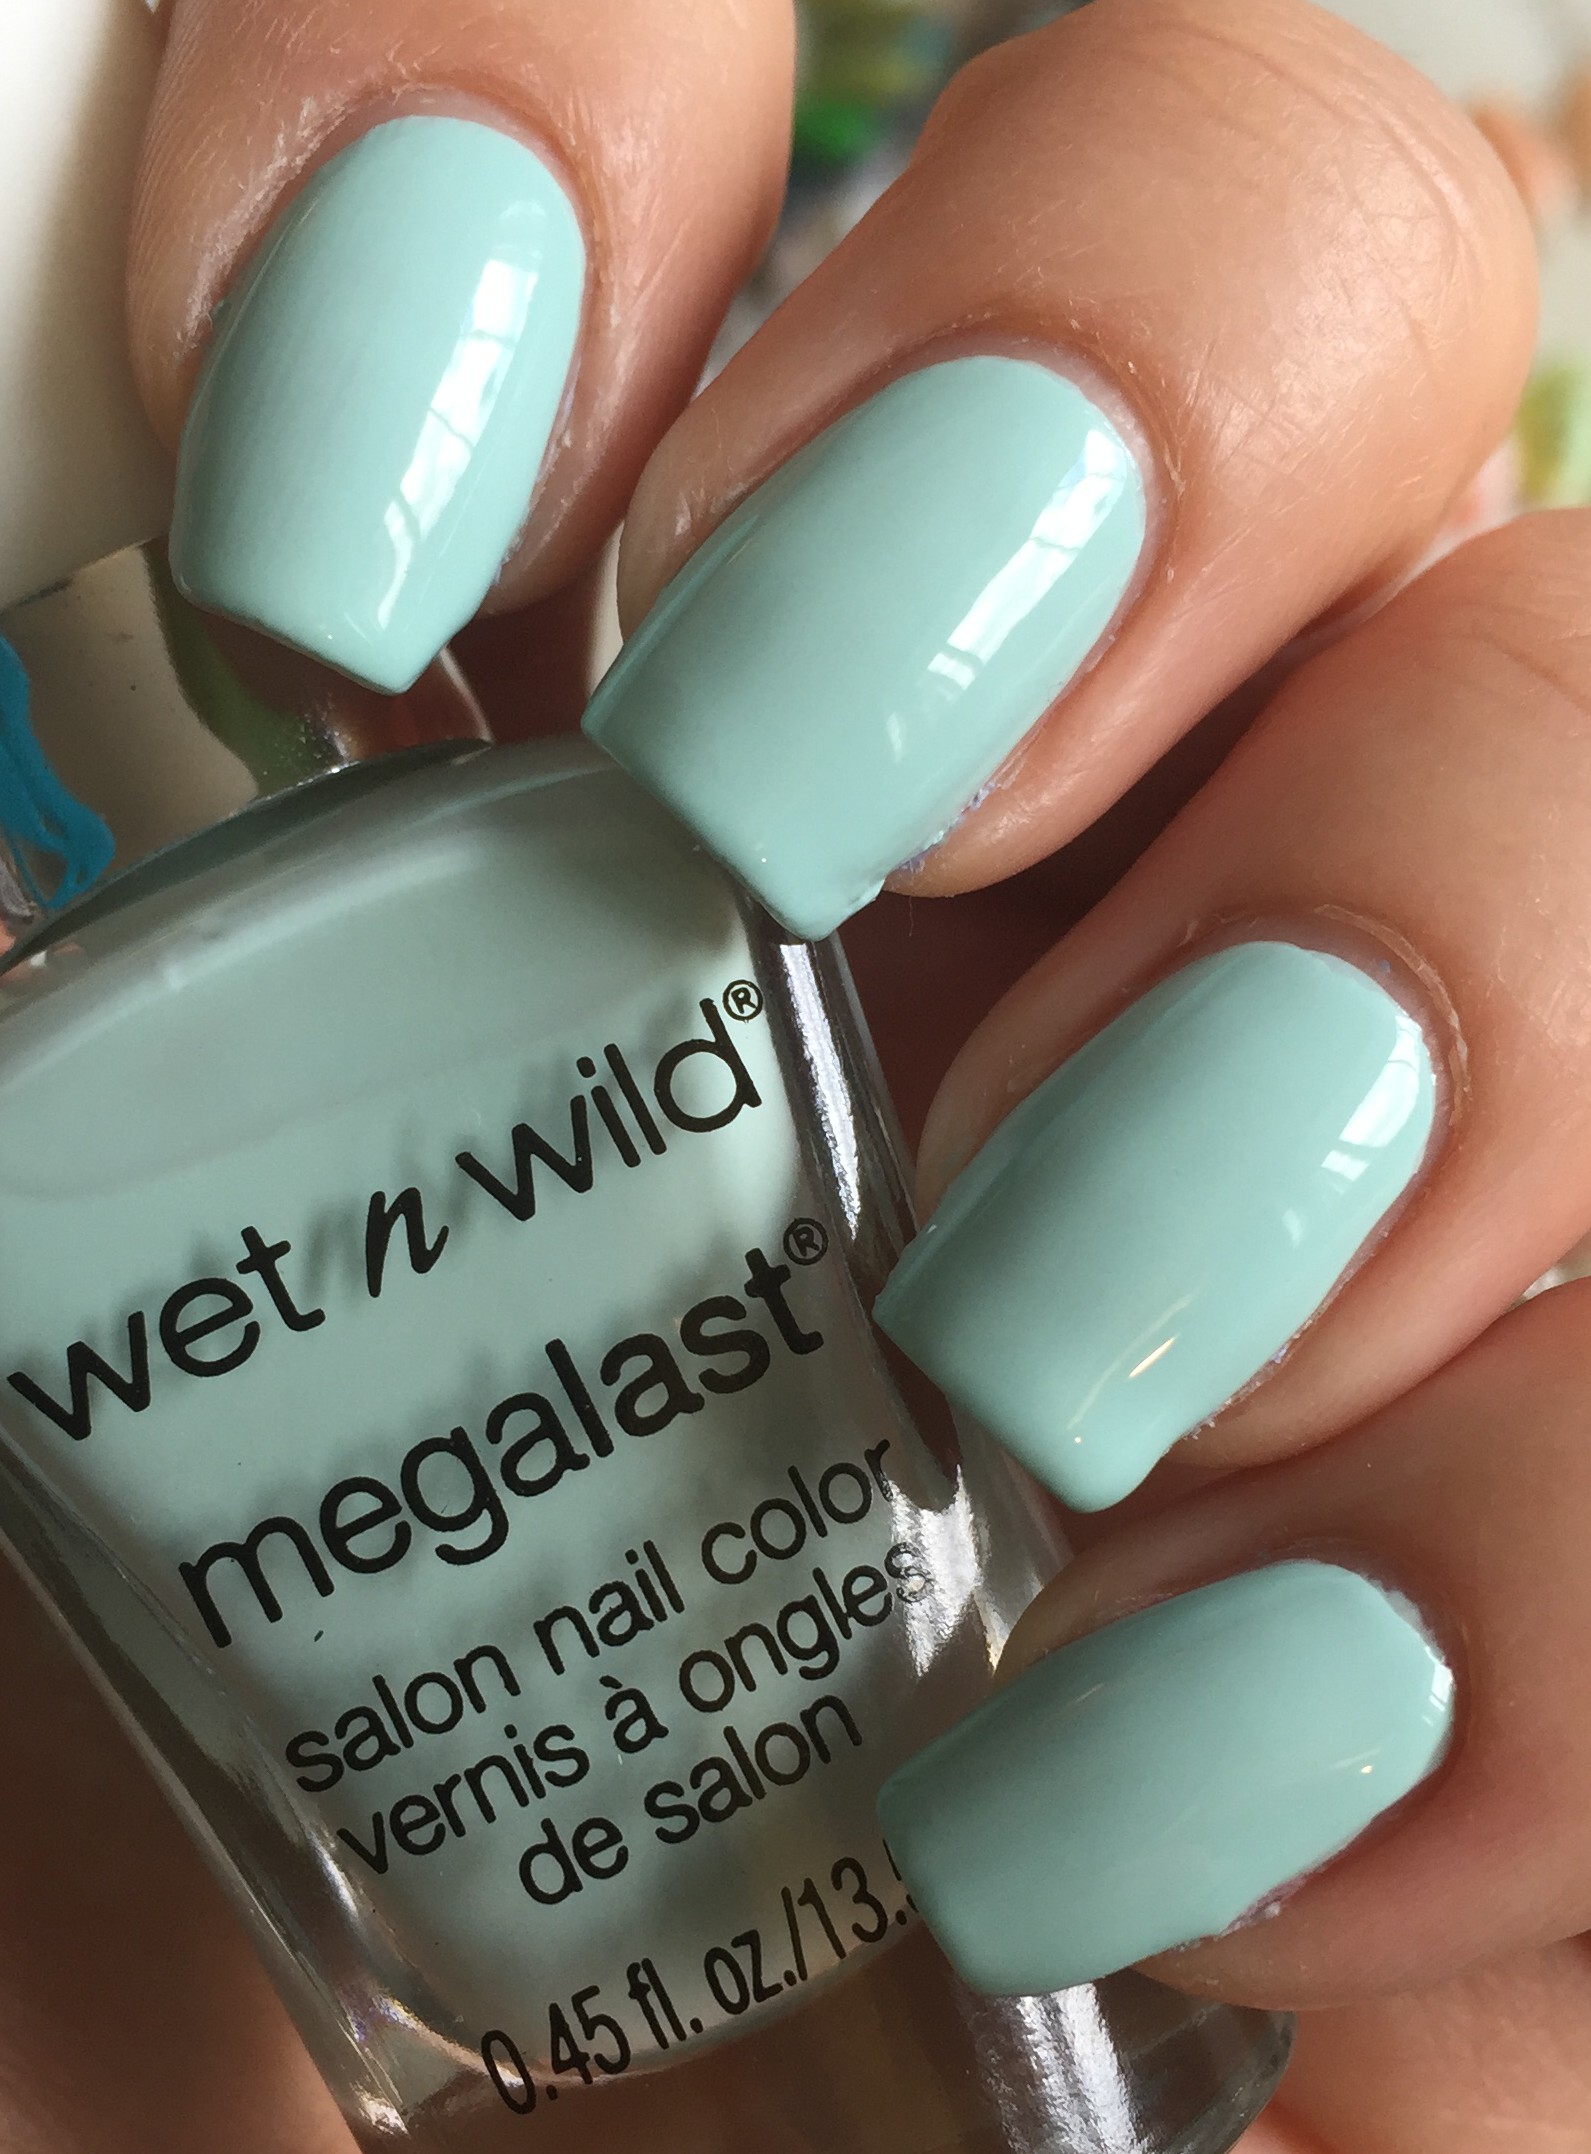
Now we come to our final – and maybe my favorite – polish of the of the collection: Kiss My Mints!  This is the most beautifully perfect mint color ever!  It’s not too green, not too blue.  I IMG_7121just love it so much! This is perfect in two coats and it’s just so pretty!!!

I compared this to three other polishes in my collection.  On my little finger is Wet n Wild – Tree Hugger from last year’s Silver Lake collection.  This polish is obviously much greener.  On my ring finger is Joe Fresh – Mint.  (Whoa, such a creative name.  My mind is blown!)  This polish is also more green than Kiss My Mints and it has a bit of a dusty gray quality to it, also.  On my first finger is China IMG_7144Glaze – For Audrey.  I knew this polish wouldn’t be a match, but it felt to me like Kiss My Mints is the exact same hue as For Audrey, only a lighter tint.  ( I had to check an art dictionary to make sure I was using “hue” and “tint” correctly.)  Petty much that means that if you added white polish to For Audrey, I think you’d get Kiss My Mints.

At Kmart, I found a few polishes worth comparing to Kiss My Mints.  The one on the left is Sally Hansen Miracle Gel – B Girl.  This one is really close to Kiss My Mints, maybe just a hair darker.  The polish on the right is Sally Hansen – Mint Sorbet, which is obviously much more green.  I just figured it was worth comparing since it had the word “mint” in the name and it’s readily available.

So, Here are my final thoughts…

  • Skip buying Love Fest and pick up one of the Sally Hansen polishes if you really love this color.  Nobody should be applying four coats of anything.
  • Lay Out in Lavender is really beautiful and different from most purple/lilac/lavender polishes that are out there.  I think this is a good one to grab.
  • Breeze on By is definitely pretty and it has a good formula, but it’s hardly unique.  Only pick this one up if you don’t have a periwinkle in your collection.
  • Kiss my Mints is awesome!  The formula is great, and although there are a lot of mint green/teal/aqua/turquoise polishes out there, this exact shade is still pretty unique.  If you’re only going to pick up one, I’d pick up this one.

Oh, and just one more thing.  Breeze on By and Love Fest are super close to the Pantone colors of the year for 2016, Rose Quartz and Serenity.  I’m sure that’s no accident.

Thanks for reading, if you made it this far!  Find me on instagram and Facebook!


Dry Brush Nails

Here are my current nails:

IMG_6388Pretty cute, right?  I’ve only done dry brush nails a few times, but every time I do, I’m reminded of how easy they are!  And they look really cool!  I’ve acquired a good pile of compliments on these nails so far, and nobody really believes me when I say these are super easy, so I figured I’d provide a little quicky tutorial on these.  Disclaimer: I totally didn’t invent this technique.  It’s been around for a few years now, and I really don’t have any idea who the originator is.  But I’m definitely sure that it wasn’t me.

First you start with your base coat and then a light, neutral polish.  This time I went with Wet n Wild – Yo Soy.   IMG_6386Seriously, this is such a pretty nude color and it’s only $.99!  I’m not sure how it works with other skin tones, but with my pale pinkish skin, it works really well.  This picture was taken without a top coat, so you can really see how shiny it is!  This is two coats, and it’s totally opaque.  For dry brushing, you can never go wrong with a white base either.

IMG_6393Now, pick a few contrasting colors.  I opted for Jordana – Hypnotizing, China Glaze – Budding Romance, and Fresh Paint – Let the Games Begin.  Budding Romance is the most sheer out of these three polishes, so I decided to use it last.  I decided to start with Let the Games Begin, the blue.

Shake (or better yet, roll) your polish like normal, but here’s the important part: after you open your bottle, wipe as much polish as possible off on the neck of the IMG_6399bottle.  Like, six times.  Just keep wiping.  You just want the littlest bit of residual polish on the brush.  After you’ve wiped all of the excess polish off of the brush, pick a direction, IMG_6387and drag the brush over your nail.   I decided to mix it up, so I dragged the brush down my thumb, middle finger and pinky vertically, and across my other two fingers horizontally.

I then did the exact same thing with the purple polish, and then with the green polish, kind of filling in the empty spaces.  Although I intended to take pictures of each step of this manicure, I didn’t.  Fail.  See, I’m usually watching something important on TV (like Sister Wives or Dance Moms) while I’m doing my nails, so I tend to forget to take pictures of each step.  I just crank along and then I’m like, “Oh dang, I’m done… And I only have 2 pictures.”

So anyway, after adding the purple and green polish, I finished off with a matte top coat.  I don’t know why, but I feel like dry IMG_6401brush nails look the best with a matte top coat.

Oh, cautionary tale time; there’s really only one way you can screw up dry brush nails, and that is by not wiping the brush off well enough.  Exhibit A is here on the right.  This is my ring finger on my right hand.  See that big blob of blue?  That’s where I didn’t wipe the brush off well enough.   Moral of the story: wipe the brush off.  A lot.

Thanks for reading!  I hope this inspires you to try this technique.  Please let me know if you have any questions.  Until next time, happy polishing!


Fun With Painter’s Tape

We are in the process of redoing our living room.  Right now we’re painting.  I was actually supposed to be painting when I came up with these nails.

IMG_4705While I was getting ready to start painting, I saw a roll of painter’s tape laying there, and it hit me that painter’s tape should work really well to make my own nail vinyls.  And it did!   Here’s how I got this look…

FirstIMG_4719 I picked out five polishes that I liked together and painted each finger a different color.  Then, while my nails were drying, I took a piece of wax paper and stuck about a 10 inch piece of painter’s tape to it.

IMG_4702Then I took my zig-zaggy crafty scissors and snipped the tape into a bunch of little strips.   When my nails were really dry, I stuck a strip of my zig-zag cut tape down the center of each nail.

Then, one nail at a time, I painted the sides of each nail a different color.  I brushed a pretty thick coat down the sides of the nails because I wanted it to cover the polish that was underneath in one coat.

As soon as I painted both sides of the nail, I pulled up the painters tape with tweezers.  You don’t want to wait until the polish is dry, or the polish will come up with the tape.

The colors on my nails look pretty random, but there actually is a pattern.  I lined up my polishes in this order:  pink, yellow, periwinkle, coral, green.  For the sake of ease, let’s just number them 1 – 5.  I painted my nails with colors 1-5, starting with my thumbs.  on the sides of my thumbs, I used colors 2 and 3.  On my first fingers, I used colors 3 and 4, on my middle fingers I used 4 and 5, on my ring fingers I used 5 and 1, and on my pinkies, I used 1 and 2.

I topped these with a quick dry top coat, and I loved how glossy they looked!

I sort of felt like the end result looked like a pinata, but I really liked it!  The colors were soft enough to keep them from looking obnoxious.   These nails actually got a ton of compliments and they really weren’t hard at all!  I will definitely be using this technique in the future.

Thanks for reading!  I hope this inspires you to fancy up your nails.

Easter Nails 2015

This is just a little recap of the nails that I wore for Holy Week and Easter.

IMG_4661

Although I like chicks and bunnies and candy as much as the next person, Easter is just so much bigger than that for those who believe in Jesus.  It’s the day that we celebrate his resurrection from the dead, a fact for which there is pretty good historical evidence.  Because this is the foundation of my belief system and worldview, I love taking this opportunity to fancy up my nails with some symbols that hold some really important significance to me.

IMG_4667

So, here are the two designs that I wore for Holy Week and Easter.  The ring finger on the bottom picture was inspired by @icandynails on instagram. I’m loving that we are finally out of winter, so I’ve been sporting the springiest colors on my nails!

I totally get that not everyone shares my beliefs.  I welcome any civil discussion, but I won’t tolerate any nastiness in the comments.  I hope you all had a blessed Easter.  Thanks for reading, as always.

Reciprocal Gradient Nails

It’s been too long, I know!  Today I have the day off.  I haven’t had one of those in forever.  I think my part-time job is actually going back to part-time, so I’m anticipating that I will have more time for the fun things in life again, like writing regular posts.  IMG_4636

I won’t delude myself by thinking that you all have nothing better to do than sit around and refresh your screens to see if I’ve posted something new, but I like to think I can add a tiny bit of pretty color to your lives.

I haven’t had as much time to devote to fancy nails lately, but I did try out a new (for me) technique that I wanted to share with you.

Behold the reciprocal gradient!  I’m not gonna lie – this was time-consuming.  Here’s how to get this look…

Start with doing a plain old gradient nail.  I leaned the hard way that this technique works best if your polish colors are not too drastically IMG_4625different.  A lighter and darker shade of the same color works well and the more opaque your nail polish is, the better.  I think pastel colors – like pink to green or purple to yellow – would work really well with this technique, too, as long as your polish is really opaque.

I took a bit of a short cut when doing the gradient for my first coat.  I just pained my nails two coats of the light pink and let that dry.  Then I brushed a little bit of the dark pink polish on a makeup sponge and dabbed that onto the nail, starting at the tip and moving up toward the middle of the nail.  As I blotted the polish from the sponge to the nail, the polish starts to dry, so less and less transfers to the nail.  That’s how you get the gradient effect.  I went over the tips again with a little more polish on the sponge just to make sure they were nice and bright.  After I finished my gradient, I applied a quick dry top coat to help blend it together.

IMG_4627 I don’t own little triangle stickers, so I took a sheet of labels, a ruler, and a pen and made my own little triangles.  I measured the length and width of my nail to figure out how what size I wanted my triangles to be.  Then I cut them out and stuck them to my nails IMG_4626after the gradient was dry.  To get the stickers to conform to the shape of my nails, I cut a little slit in the base of the triangle.  It’s important to make sure that you’ve got a good seal between the sticker and your nail when you’re doing nail art like this.  If there are any gaps or ripples between your nail and the sticker, the polish is going to get underneath, and you won’t end up with crisp lines.

IMG_4628Next I took a makeup sponge and brushed both my light and dark pink onto it.  One step I ALWAYS for get to do is to wet the sponge first.  If you wet your sponge and then squeeze out all the excess water, it won’t absorb nearly as much polish and it will help the colors blend a little better.  I never remember to do this until it’s too late, so I lose a lot of polish in my sponges when I do a gradient.

Anyway, now we get to the reciprocal part.  In my initial gradient, I had the light pink polish at the base of my nail and the dark pink polish at the tip.  The key to the whole reciprocal thing is to revers the gradient, so I sponged on IMG_4629the polish with the light pink polish on the ends of my nails and the dark pink polish toward the base.  See?  I worked on two nails at a time.  I blotted on several coats of polish until I felt like the dark polish on the tips was well covered by the light polish.

This was actually my second attempt at a reciprocal gradient.  My first attempt was a miserable nail fail.  In my first attempt, I used two really bright colors – a neon pink and a really bright blue.  The fail part happened when I attempted to do the second layer of the gradient.  My blue polish was not opaque enough to cover up the neon pink, so the blue ended up looking purple.  I did a ton of layers in an attempt to get the blue to look blue, but it just turned into a thick, gloppy mess.  That’s why it’s really important to make sure that the polish you use is going to be opaque enough to really cover whatever color is underneath.

IMG_4630After peeling the stickers off, I quickly applied a quick drying top coat.  I then cleaned up around the edges of my nails with a little brush dipped in acetone.

IMG_4633I was actually prompted to try this technique as part of a weekly nail art challenge on instagram.  (Check out #wnac2015 on instagram!)  The nails were also supposed to have an element of holographic-ness, so I added a little flower shaped holographic glitter on each nails as well as a top coat that had some holographic glitter in it.  I was actually really happy with how these turned out!

This technique is not really that hard, but it is time-consuming.  This is not the kind of thing you want to try to tackle if you have somewhere to be in a half an hour.  It’s more the kind of thing you can do while you watch your favorite long movie.  (The Sound of Music, Titanic, Gone With the Wind,…)  Let me know if you decide to tackle this technique!

So, thanks for reading, commenting, liking, and following!  Find me on instagram @polishmesnazzy !

Patchwork Nails

Hi, everyone!  I’m back!  Last week was a busy one for the hubby and me.  For the first part of the week, we babysat my brother and his wife’s 3 kids at their place while they were on vacation.  An 8, 6, and 3-year-old kept us good and busy!  Then we went up to Niagara Falls for a 3-day mini-vacation.  The falls only about a 5 1/2 hour drive from our place, so we try to get up there every few years.   Anyway, I’m back with a tutorial for you all today!

I wanted to do something that was Halloween-ish, but not super overt.   I also was in the mood to do some mixed-up patterns with a little bit of negative space.  Here’s what I came up with:

IMG_3602

The first steps to every manicure is pretty much the same: deal with your cuticles and then apply a base coat.  After that I just applied a few green patches of polish:

IMG_3597

I knew I wanted it make green, orange, and purple patches with two patches on each nail, so I knew I would need 3-4 patches of each color.  I also knew that I wanted shapes and sizes that appeared to be sort of random, so I made each of the patches different.  I then added orange polish:

IMG_3598

I filled in the remaining spots with purple polish:

IMG_3599

Then, using my dotting tools and little brushes, I added some patterns using the same orange, green, and purple polish:

IMG_3600

Next, I outlined my patches in black with a thin brush dipped in acrylic paint:

IMG_3601

Then I added “stitches” with the same brush in black acrylic paint:

IMG_3606

And here’s my right hand:

IMG_3604

I finished off with a top coat and then I did a little bit of clean-up with a brush dipped in acetone.   I really like how these turned out!  Cute and not too crazy.

I’ll leave you now with a few pictures from our little trip up to Niagara Falls:

IMG_3708

IMG_3737IMG_3732IMG_3765

Thanks for reading, following, and commenting!


What Black Undies Can Do For You

Did you ever buy a polish that you couldn’t really tell in the bottle what it would look like on the nail, but you were sure it would be cool?  Then you tried it and it didn’t rock your world like you thought it would.  I’ve definitely done this a lot of times.   One thing I have discovered is that a lot of these types of polishes take on a whole new life when you put them over black polish.

IMG_3552

Let’s look at each of these starting with…

IMG_3554

These polishes are from Valley Girl Lacquer, and indie polish company.  Here’s the link to their etsy shop.  The polishes from left to right are Profundity, Enigma, and Conundrum. These were actually a gift from my little sis.  When I got them, I thought they pretty much looked the same in the bottle.  My sis assured me that according to the pictures online, they would look awesome over black. And do they ever!  They are all duo-chrome-ish to some degree.  Enigma has the strongest 2-color appearance, as it reflects a really strong purple from some angles.

The middle chunk of polishes I have for you is a little less exciting.

IMG_3557

From left to right: Sally Hansen – Disco Ball, Sephora by OPI – Hollywood if I Could, Nicole by OPI – Heavenly Angel, Zoya – Monet, Loreal –  The True Daimond.

None of these are really earth-shattering.  I guess the thing I want to point out is that all of these colors give a nice mellow sparkle to any lighter color, but when you put them over black, it’s like POW!

Here are the next two:

IMG_3558

They are Orly – Sky Blue-Pink and Sally Hansen Lustre Shine – Moonstone.  Yeah, I don’t know why it’s called Sky Blue-Pink either, because it definitely gives off a copper color.  When either of these are worn on their own, they really just look like a pearly nude polish.  Nice, but super subtle.  One coat over black gives a totally different look!  As I said, the Orly polish gives a really strong copper color, and Moonstone turns into a really cool pink-purple-blue-green multi-chrome.

My last one is the most amazing:

IMG_3560

This is Fresh Paint – Sugar Crush.  This is what’s generally called a flaky topper.  (I hate that name, but if that’s what everyone else wants to call these polishes, I guess it’s not in my power to change it. )  Flaky polishes can sort of look like glitter toppers at first glance, but they are just different, and you can tell when you apply them.  Flaky Polishes are packed with tiny duo-chrome little bits that apply really nicely and evenly to the nail.  They can seem a little like a holographic shredded glitter polish like Nicole by OPI – Heavenly Angel, but the application is really different.  A shredded glitter topper behaves like any other chunky glitter topper: it’s a little hard to apply and can take some dabbing and finagling to get even application.  Flaky polishes apply much more easily.

When I first got this, I swatched it over a neon coral, white, and black:

IMG_2686

(These are actually my sister’s fingers.)  As you can see, over the lighter colors, the effect is pleasant, but not amazing.  I still remember when we were doing the swatches and I painted this polish over the black, both my sister and I were like, “Whoa!”   Ever since I got this polish, I’ve been waiting for October to roll around so I could wear it over black.

Okay folks, that’s it for today.  Thanks for reading, commenting, and liking.  It means a lot!

Day 31: Honor Nails You Love (31dc2014)

I MADE IT! I MADE IT!

I’m pretty sure I painted my nails more in the past 31 days than the average woman paints her nails in a year.  For today, I recreated a mani that was originally done by Jaunty Juli.  (She is awesome, so check her out on YouTube.)  I almost did these nails yesterday, but I decided to save these for today so that I don’t have to take them off after one day.  Here they are:

IMG_3502

These nails took a little bit of time, but they really weren’t hard.  Check out Jaunty Juli’s tutorial on her YouTube channel for the details on how to get this look.

So, now that this whole thing is over, I think I’m going back to posting on Mondays, Wednesdays and Fridays so that I can get my sanity back.  Thanks so much to all of you who have hung in there with me for the past 31 days!

Day 29: Inspired by the Supernatural (31dc2014)

So, today my nails are a bit on the preachy side:

IMG_3488

On my thumb, I have “us” on one side and “God” on the other, separated by a chasm.  My first finger represents Jesus’ blood as he sacrificed himself as payment for our sin.  My middle finger depicts how the cross bridges the gap between us an God.  My ring finger is green to represent then new life we have when we accept this gift from God.  The dove represents the peace God gives us, as well as the Holy Spirit.  My pinky represents the promise of heaven, where the streets are paved with gold.

I’m more than happy to have an open conversation about any of this with any of you!

See you tomorrow with nails inspired by a tutorial.  Only 2 more days to go!  I’m gonna make it!

Day 28: Inspired by a Flag (31dc2014)

Today was another long day for me, so this is going to be good and short again.  I’m mostly Swiss (with a little bit of German) so I decided to do a little tribute to the Swiss flag:

IMG_3464

And here’s my Cinderella hand, in case you’re curious:

IMG_3467

I’ll see you tomorrow with some supernatural fingers!