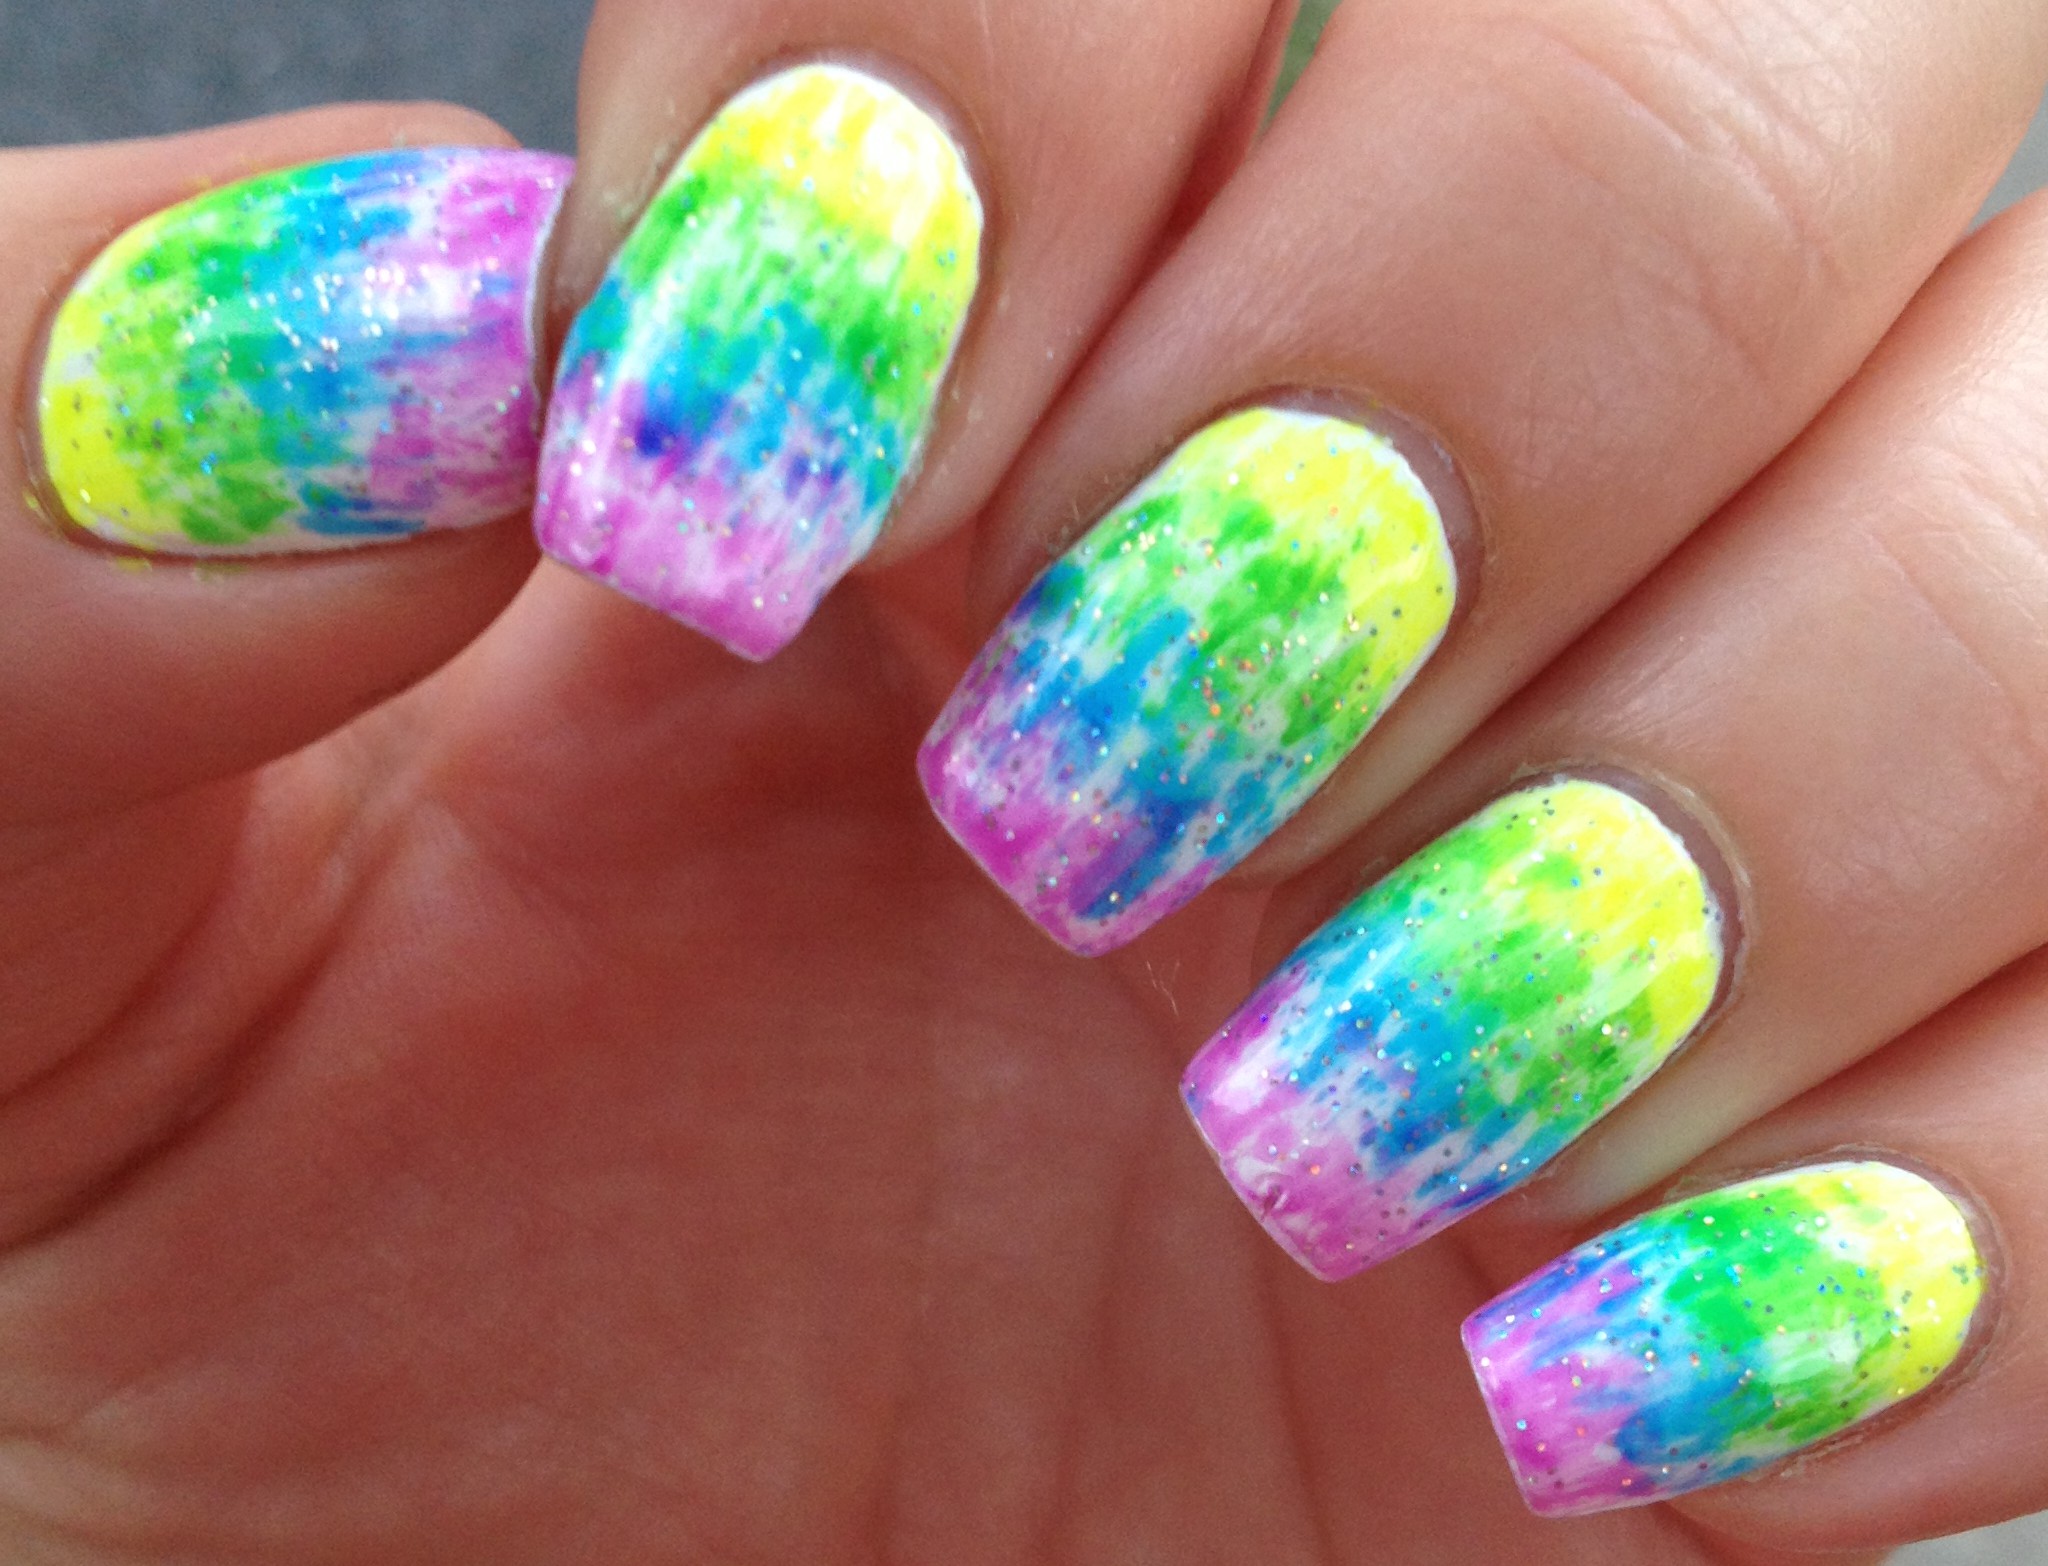
Here are my current nails:
 Pretty cute, right? I’ve only done dry brush nails a few times, but every time I do, I’m reminded of how easy they are! And they look really cool! I’ve acquired a good pile of compliments on these nails so far, and nobody really believes me when I say these are super easy, so I figured I’d provide a little quicky tutorial on these. Disclaimer: I totally didn’t invent this technique. It’s been around for a few years now, and I really don’t have any idea who the originator is. But I’m definitely sure that it wasn’t me.
First you start with your base coat and then a light, neutral polish. This time I went with Wet n Wild – Yo Soy.  Seriously, this is such a pretty nude color and it’s only $.99! I’m not sure how it works with other skin tones, but with my pale pinkish skin, it works really well. This picture was taken without a top coat, so you can really see how shiny it is! This is two coats, and it’s totally opaque. For dry brushing, you can never go wrong with a white base either.
 Now, pick a few contrasting colors. I opted for Jordana – Hypnotizing, China Glaze – Budding Romance, and Fresh Paint – Let the Games Begin. Budding Romance is the most sheer out of these three polishes, so I decided to use it last. I decided to start with Let the Games Begin, the blue.
Shake (or better yet, roll) your polish like normal, but here’s the important part: after you open your bottle, wipe as much polish as possible off on the neck of the  bottle. Like, six times. Just keep wiping. You just want the littlest bit of residual polish on the brush. After you’ve wiped all of the excess polish off of the brush, pick a direction,
 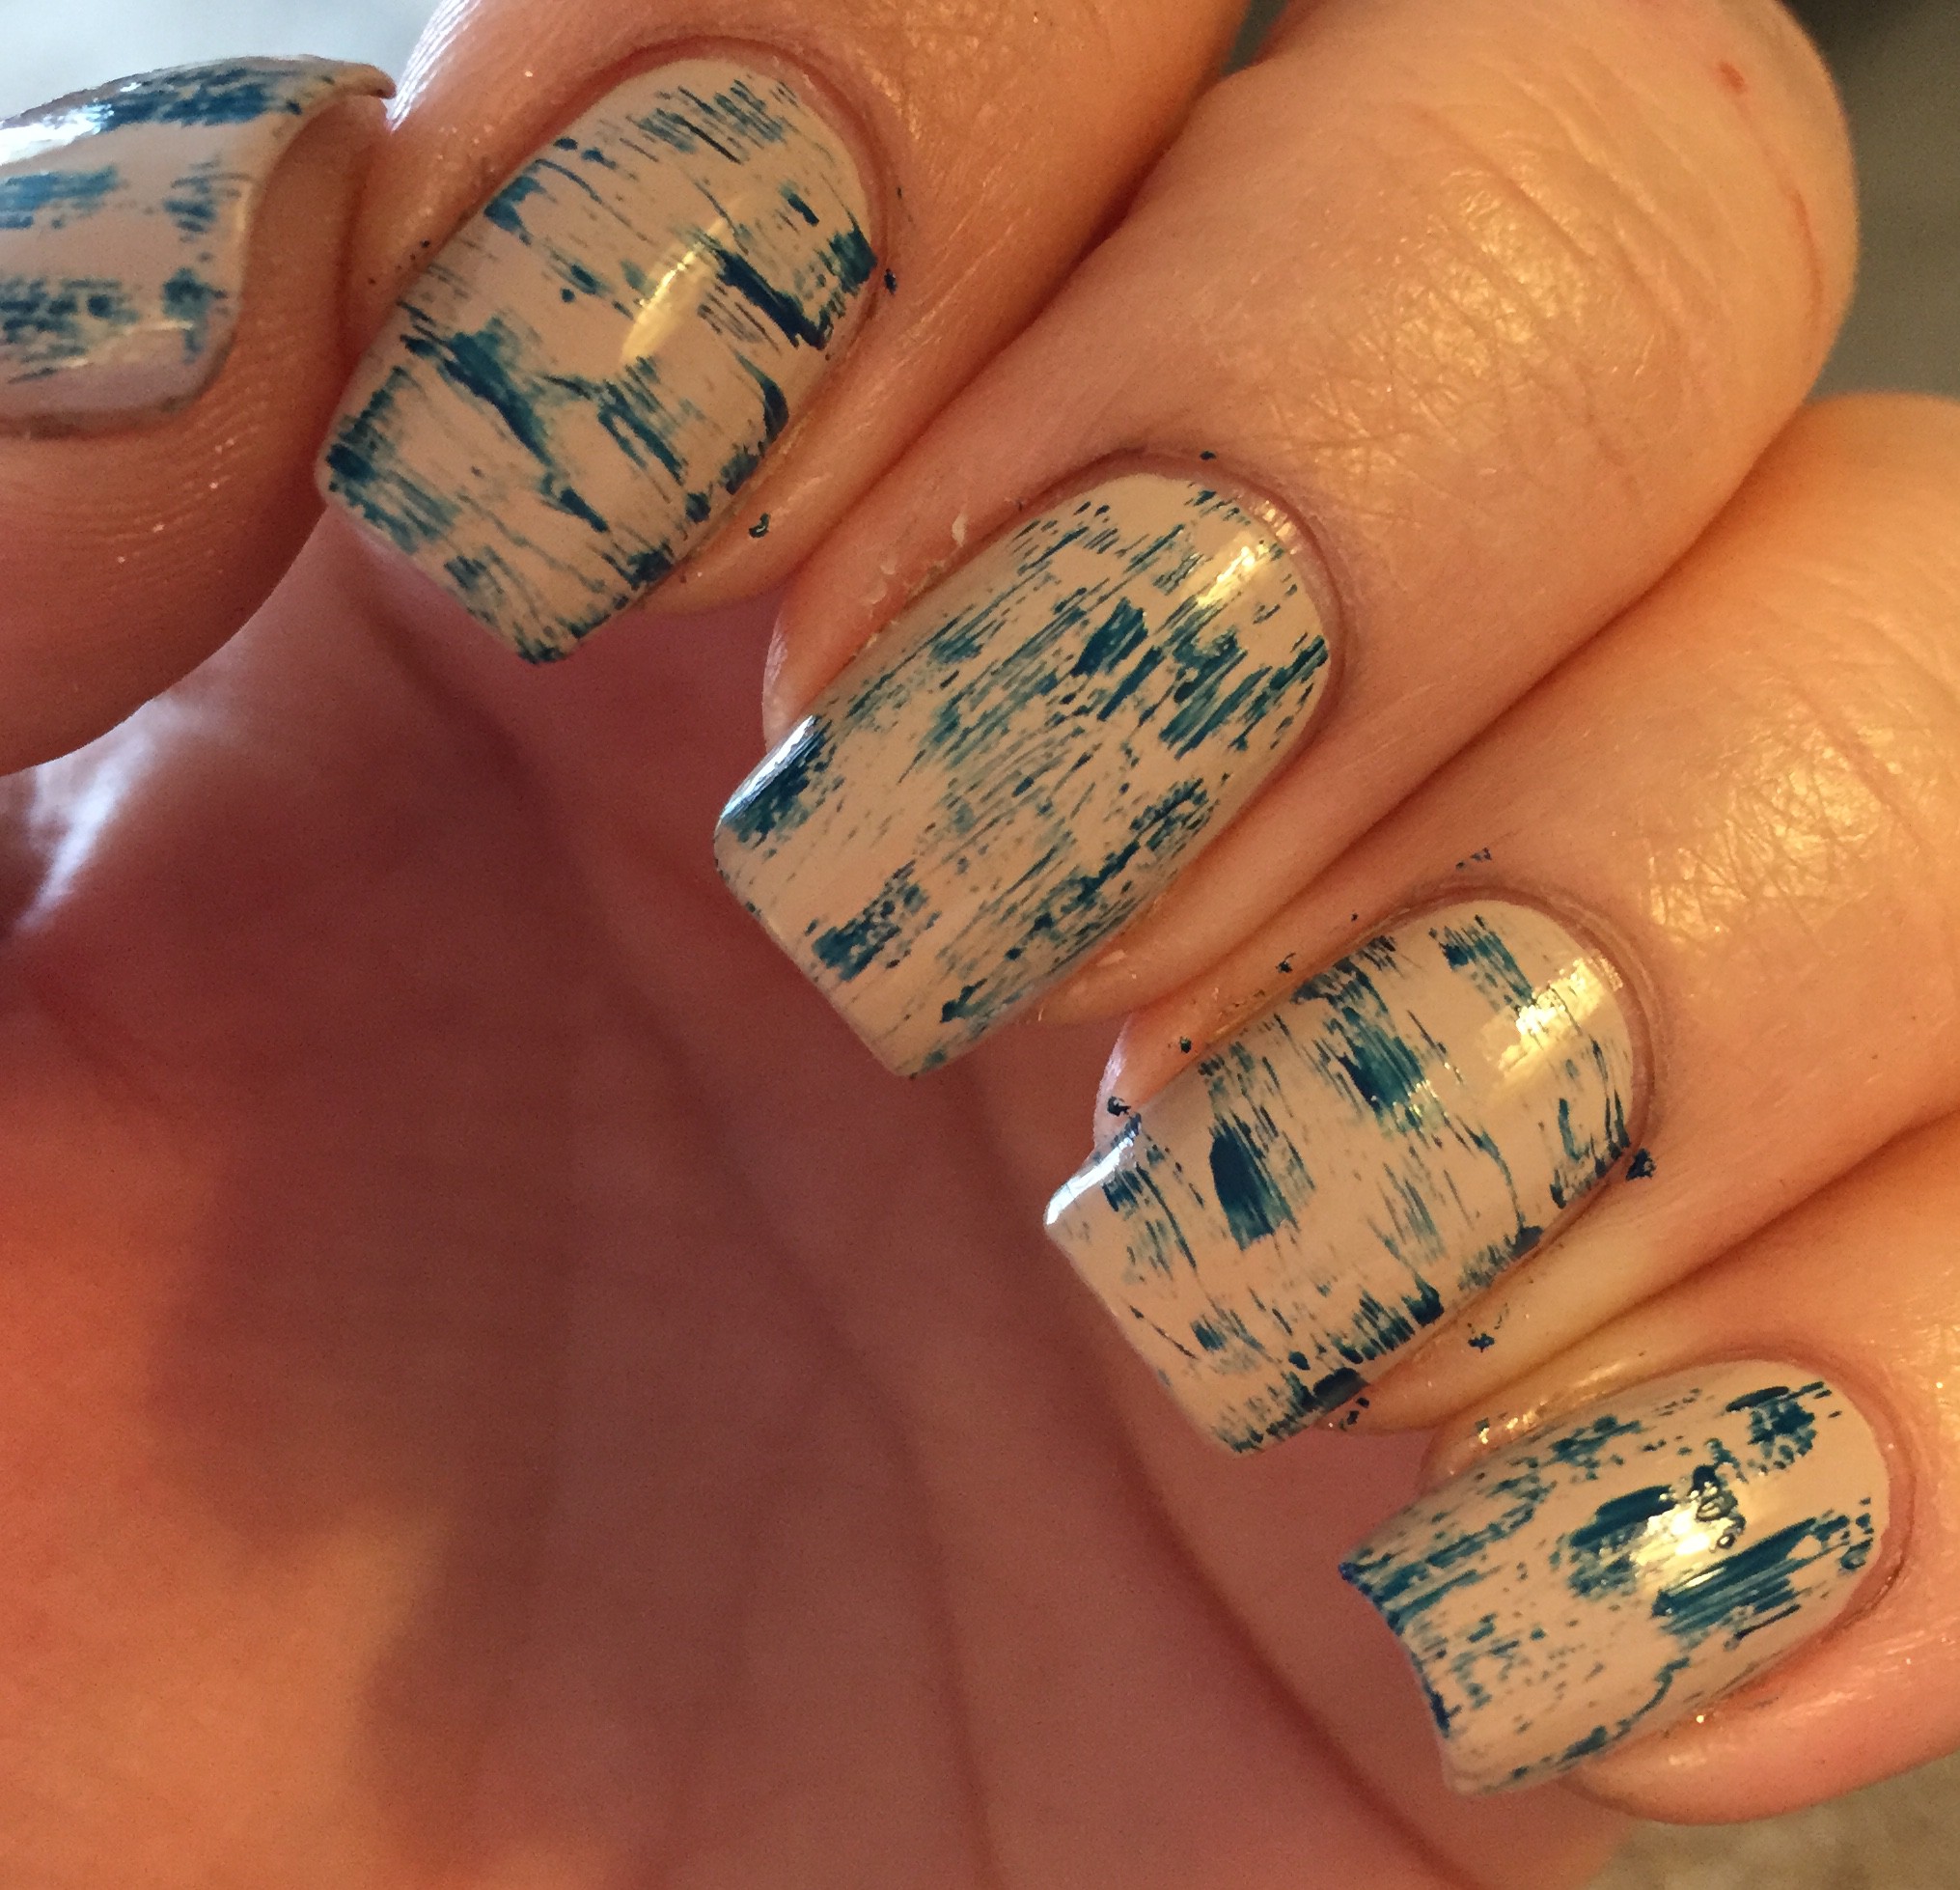 and drag the brush over your nail. I decided to mix it up, so I dragged the brush down my thumb, middle finger and pinky vertically, and across my other two fingers horizontally.
I then did the exact same thing with the purple polish, and then with the green polish, kind of filling in the empty spaces. Although I intended to take pictures of each step of this manicure, I didn’t. Fail. See, I’m usually watching something important on TV (like Sister Wives or Dance Moms) while I’m doing my nails, so I tend to forget to take pictures of each step. I just crank along and then I’m like, “Oh dang, I’m done… And I only have 2 pictures.”
So anyway, after adding the purple and green polish, I finished off with a matte top coat. I don’t know why, but I feel like dry  brush nails look the best with a matte top coat.
Oh, cautionary tale time; there’s really only one way you can screw up dry brush nails, and that is by not wiping the brush off well enough. Exhibit A is here on the right. This is my ring finger on my right hand. See that big blob of blue? That’s where I didn’t wipe the brush off well enough. Moral of the story: wipe the brush off. A lot.
Thanks for reading! I hope this inspires you to try this technique. Please let me know if you have any questions. Until next time, happy polishing!