Mastering the Homemade Peel-Off Base Coat

Many of us have a love/hate relationship with glitter polish.  It’s so sparkly and beautiful, but removing it with nail polish remover is next to impossible.  It’s even a chore with pure acetone.  To remedy this, somebody somewhere came up with a peel-off base, and soon the DIY-ers were coming up with homemade solutions, most of which involved Elmer’s School Glue.

I jumped on the glue wagon, and through trial and error, I think I’ve finally mastered the DIY peel-off base! IMG_4561

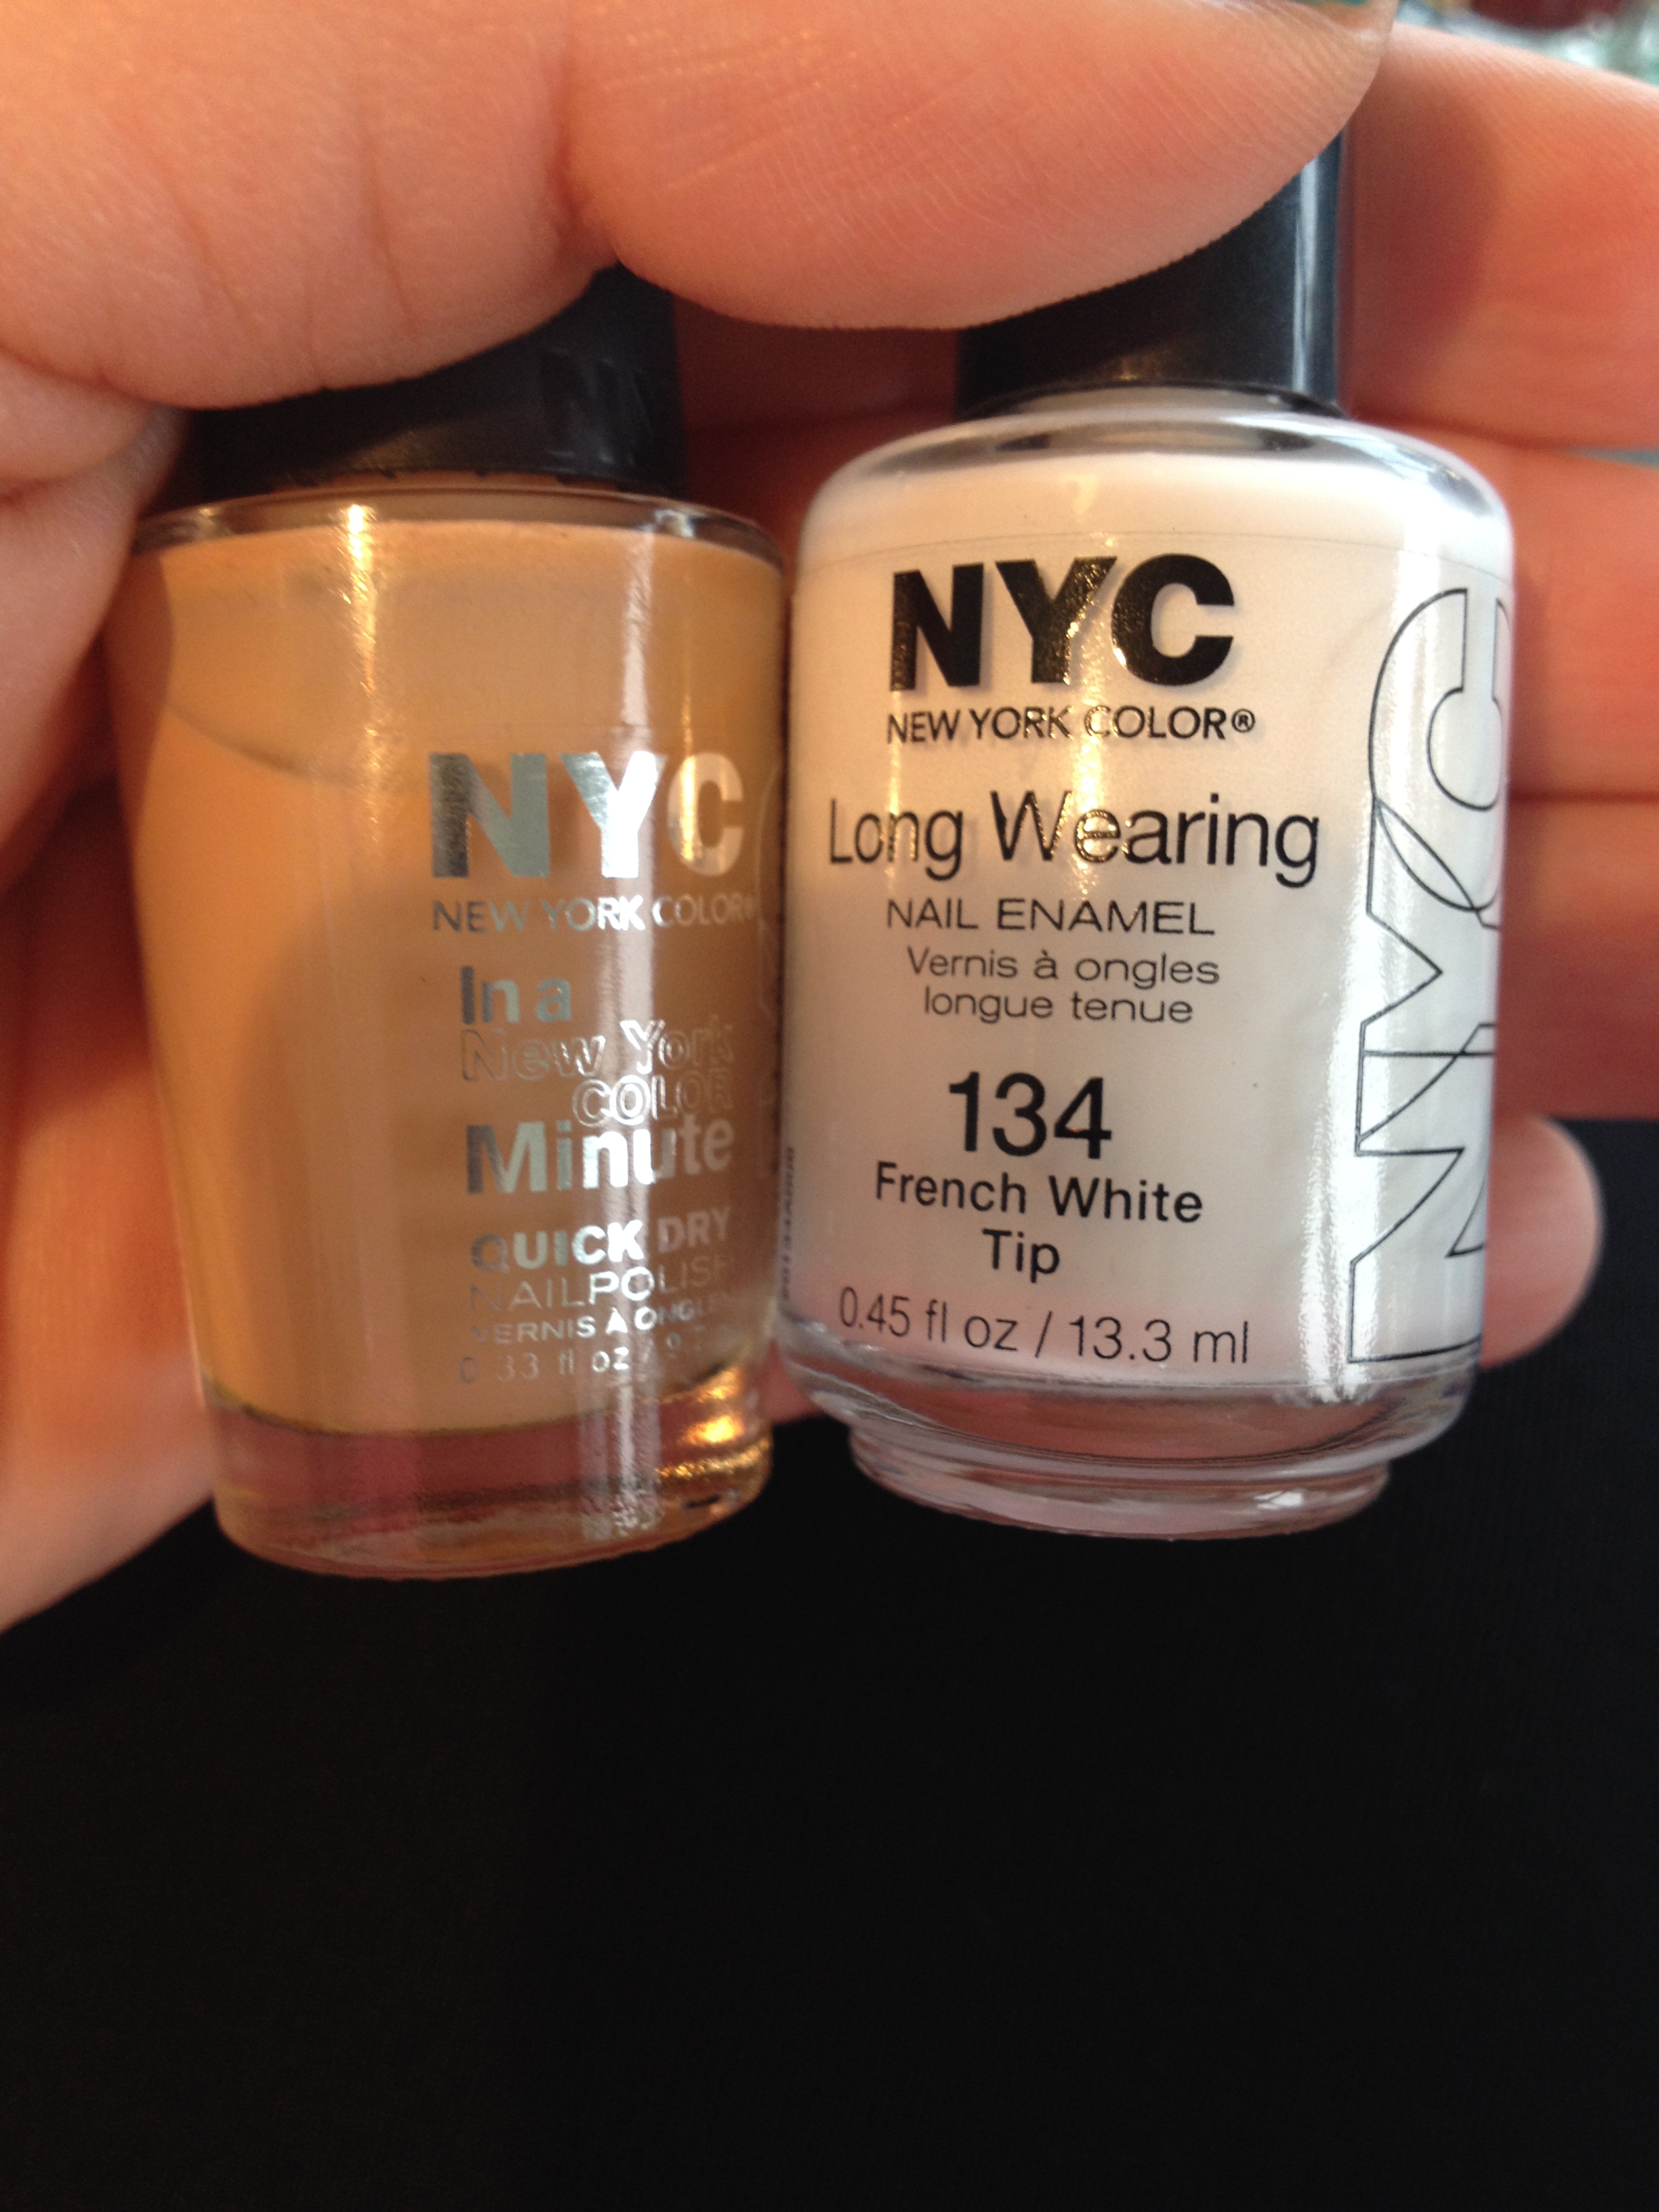
I found that it works best to take an old empty polish bottle and fill it half full with glue.  Application is just so much easier when it’s in a polish bottle with a nice little brush.  I used an old Seche Vite bottle.  (I cleaned out the bottle with Q-tips and acetone.)

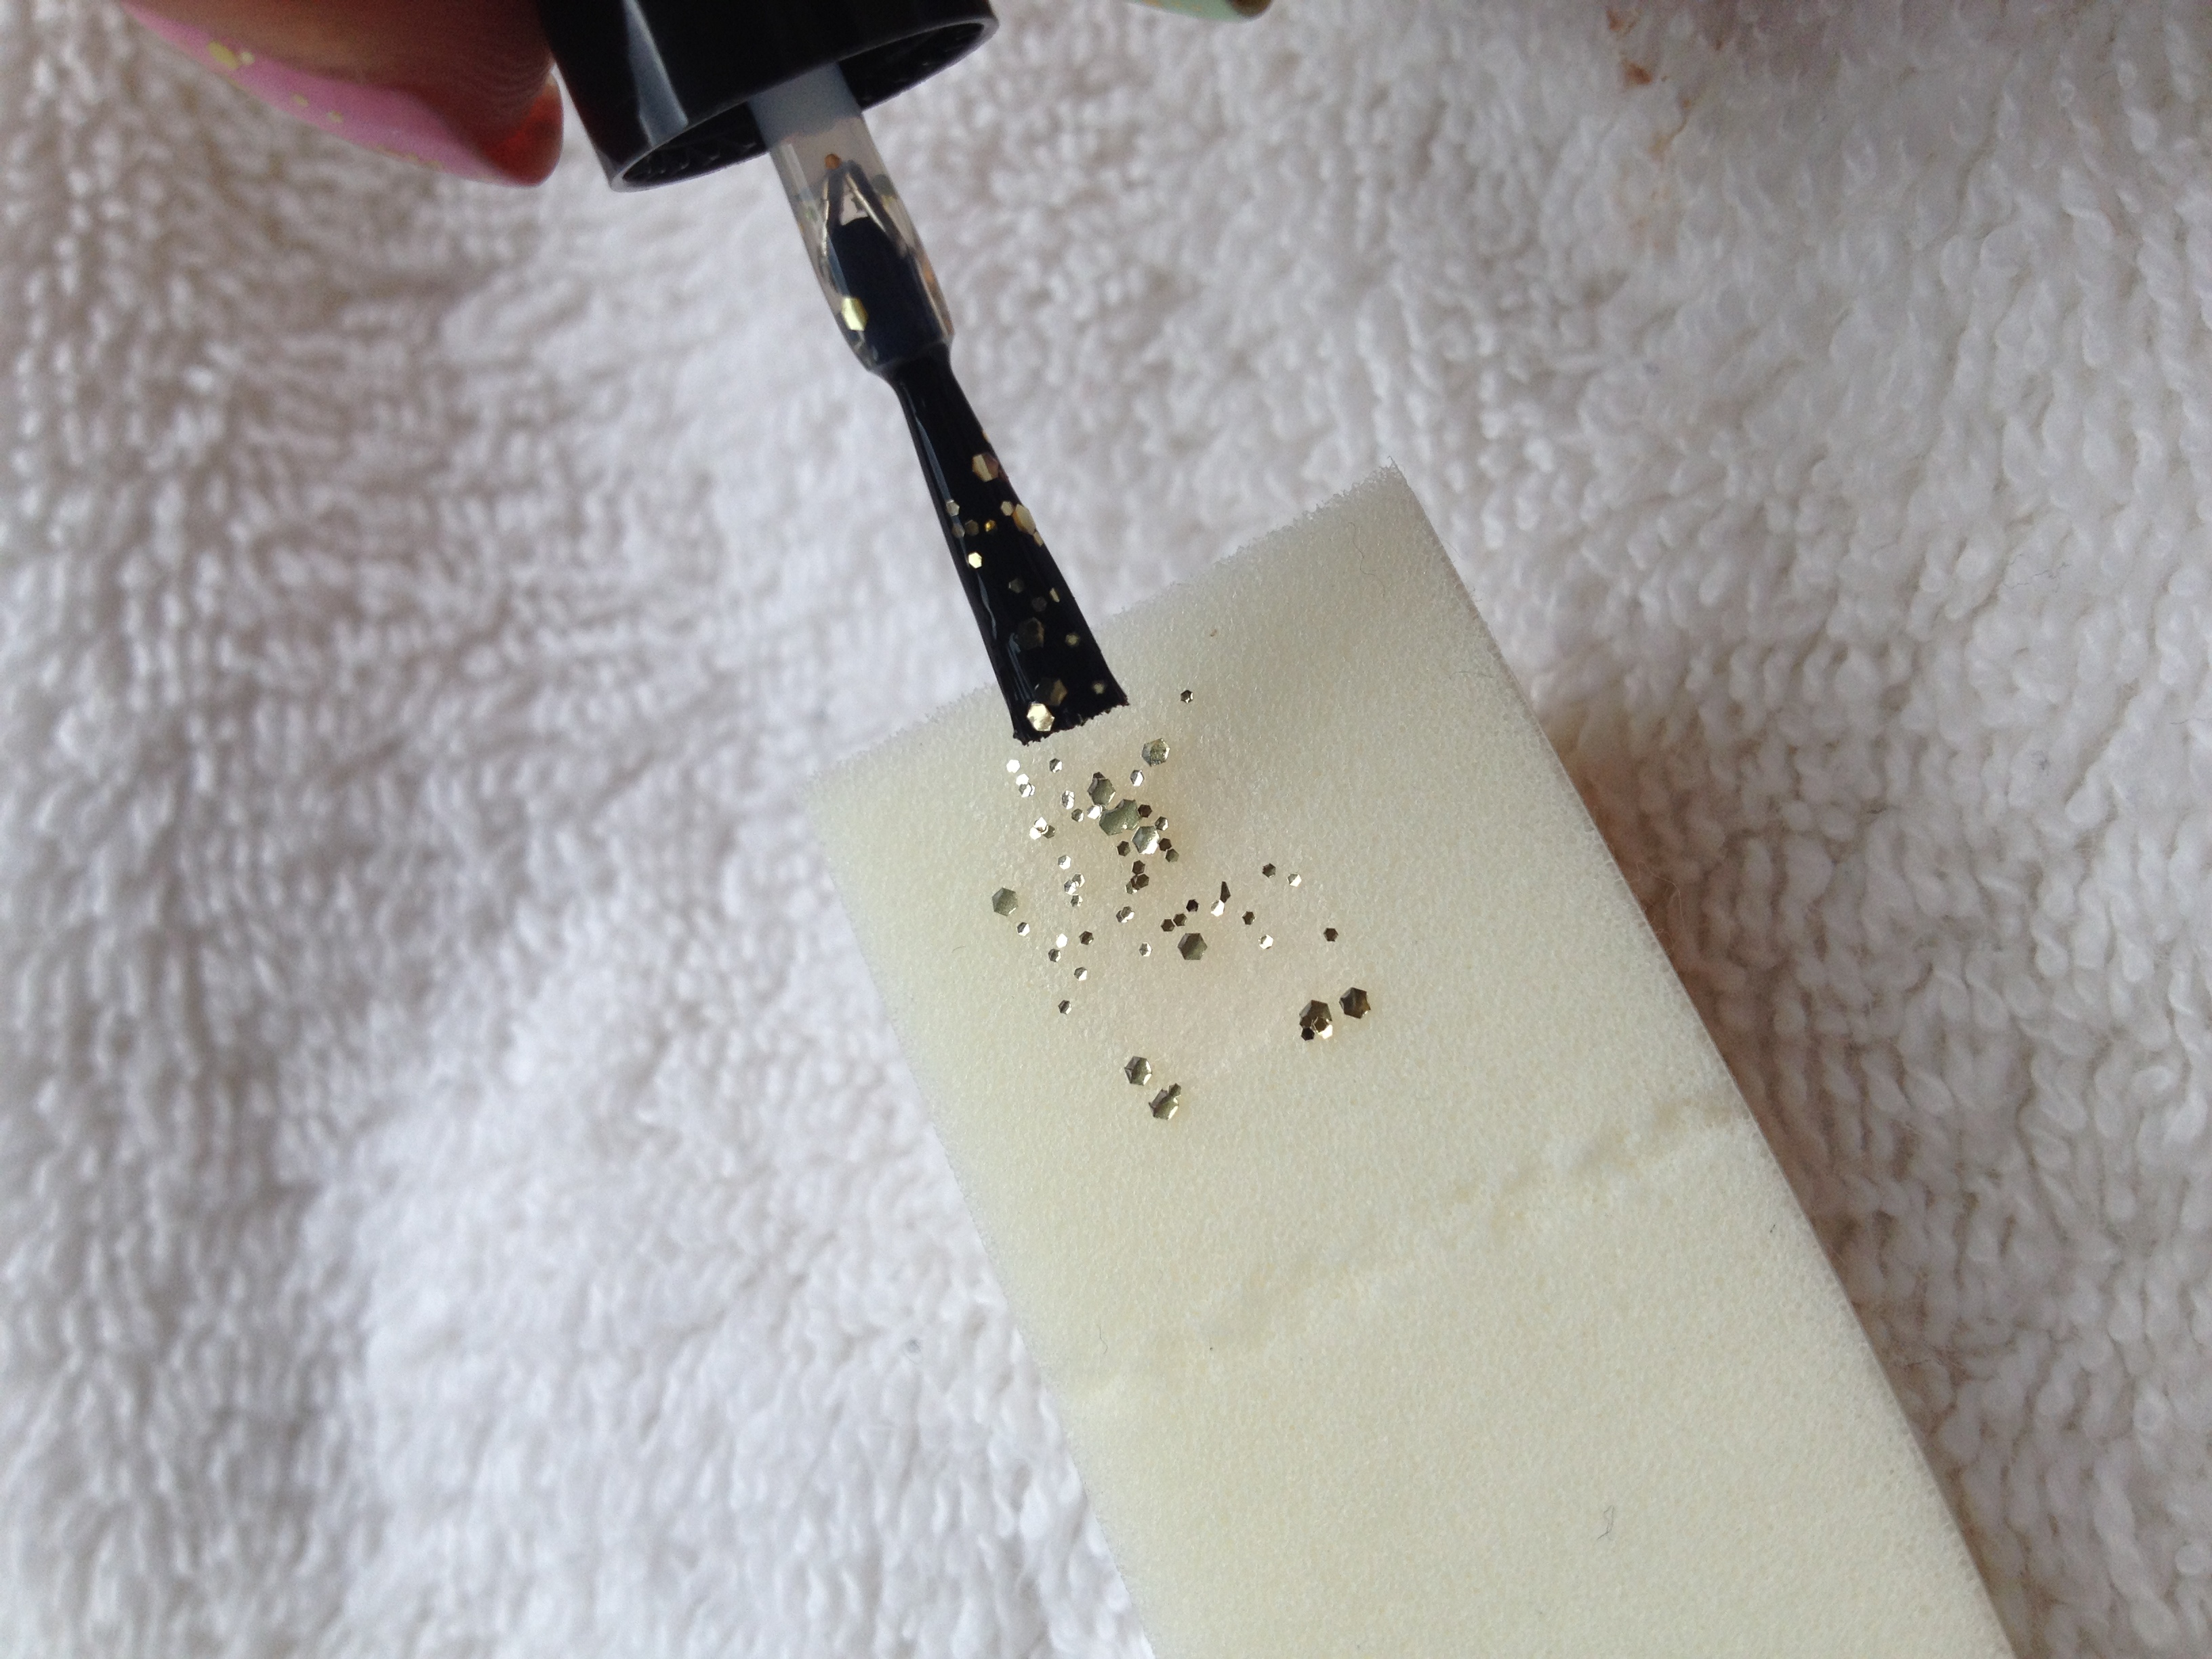
After you fill the bottle half up with glue, fill it the rest of the way up with water.  When I tried to use straight-up glue without watering it down, I found that the polish would pop off way too easily with out me even trying to take it off.  Plus, it was just thick and hard to apply.  A 50/50 glue/water ratio seems to be just perfect.  Mix it up well.  A toothpick will help you get the job done well.

Once you have your watery glue mixed up, apply a thin layer to your bare nails.  Another early mistake I made was applying a base coat, then the glue, then the polish.  The base coat really did it’s job, and even with the glue layer in there, the polish was REALLY hard to peel off.

Wait until the glue is completely dry.  It’ll lose it’s shine and become semi-matte.  I’m sure I don’t need to tell you this.  We’ve all used glue before.
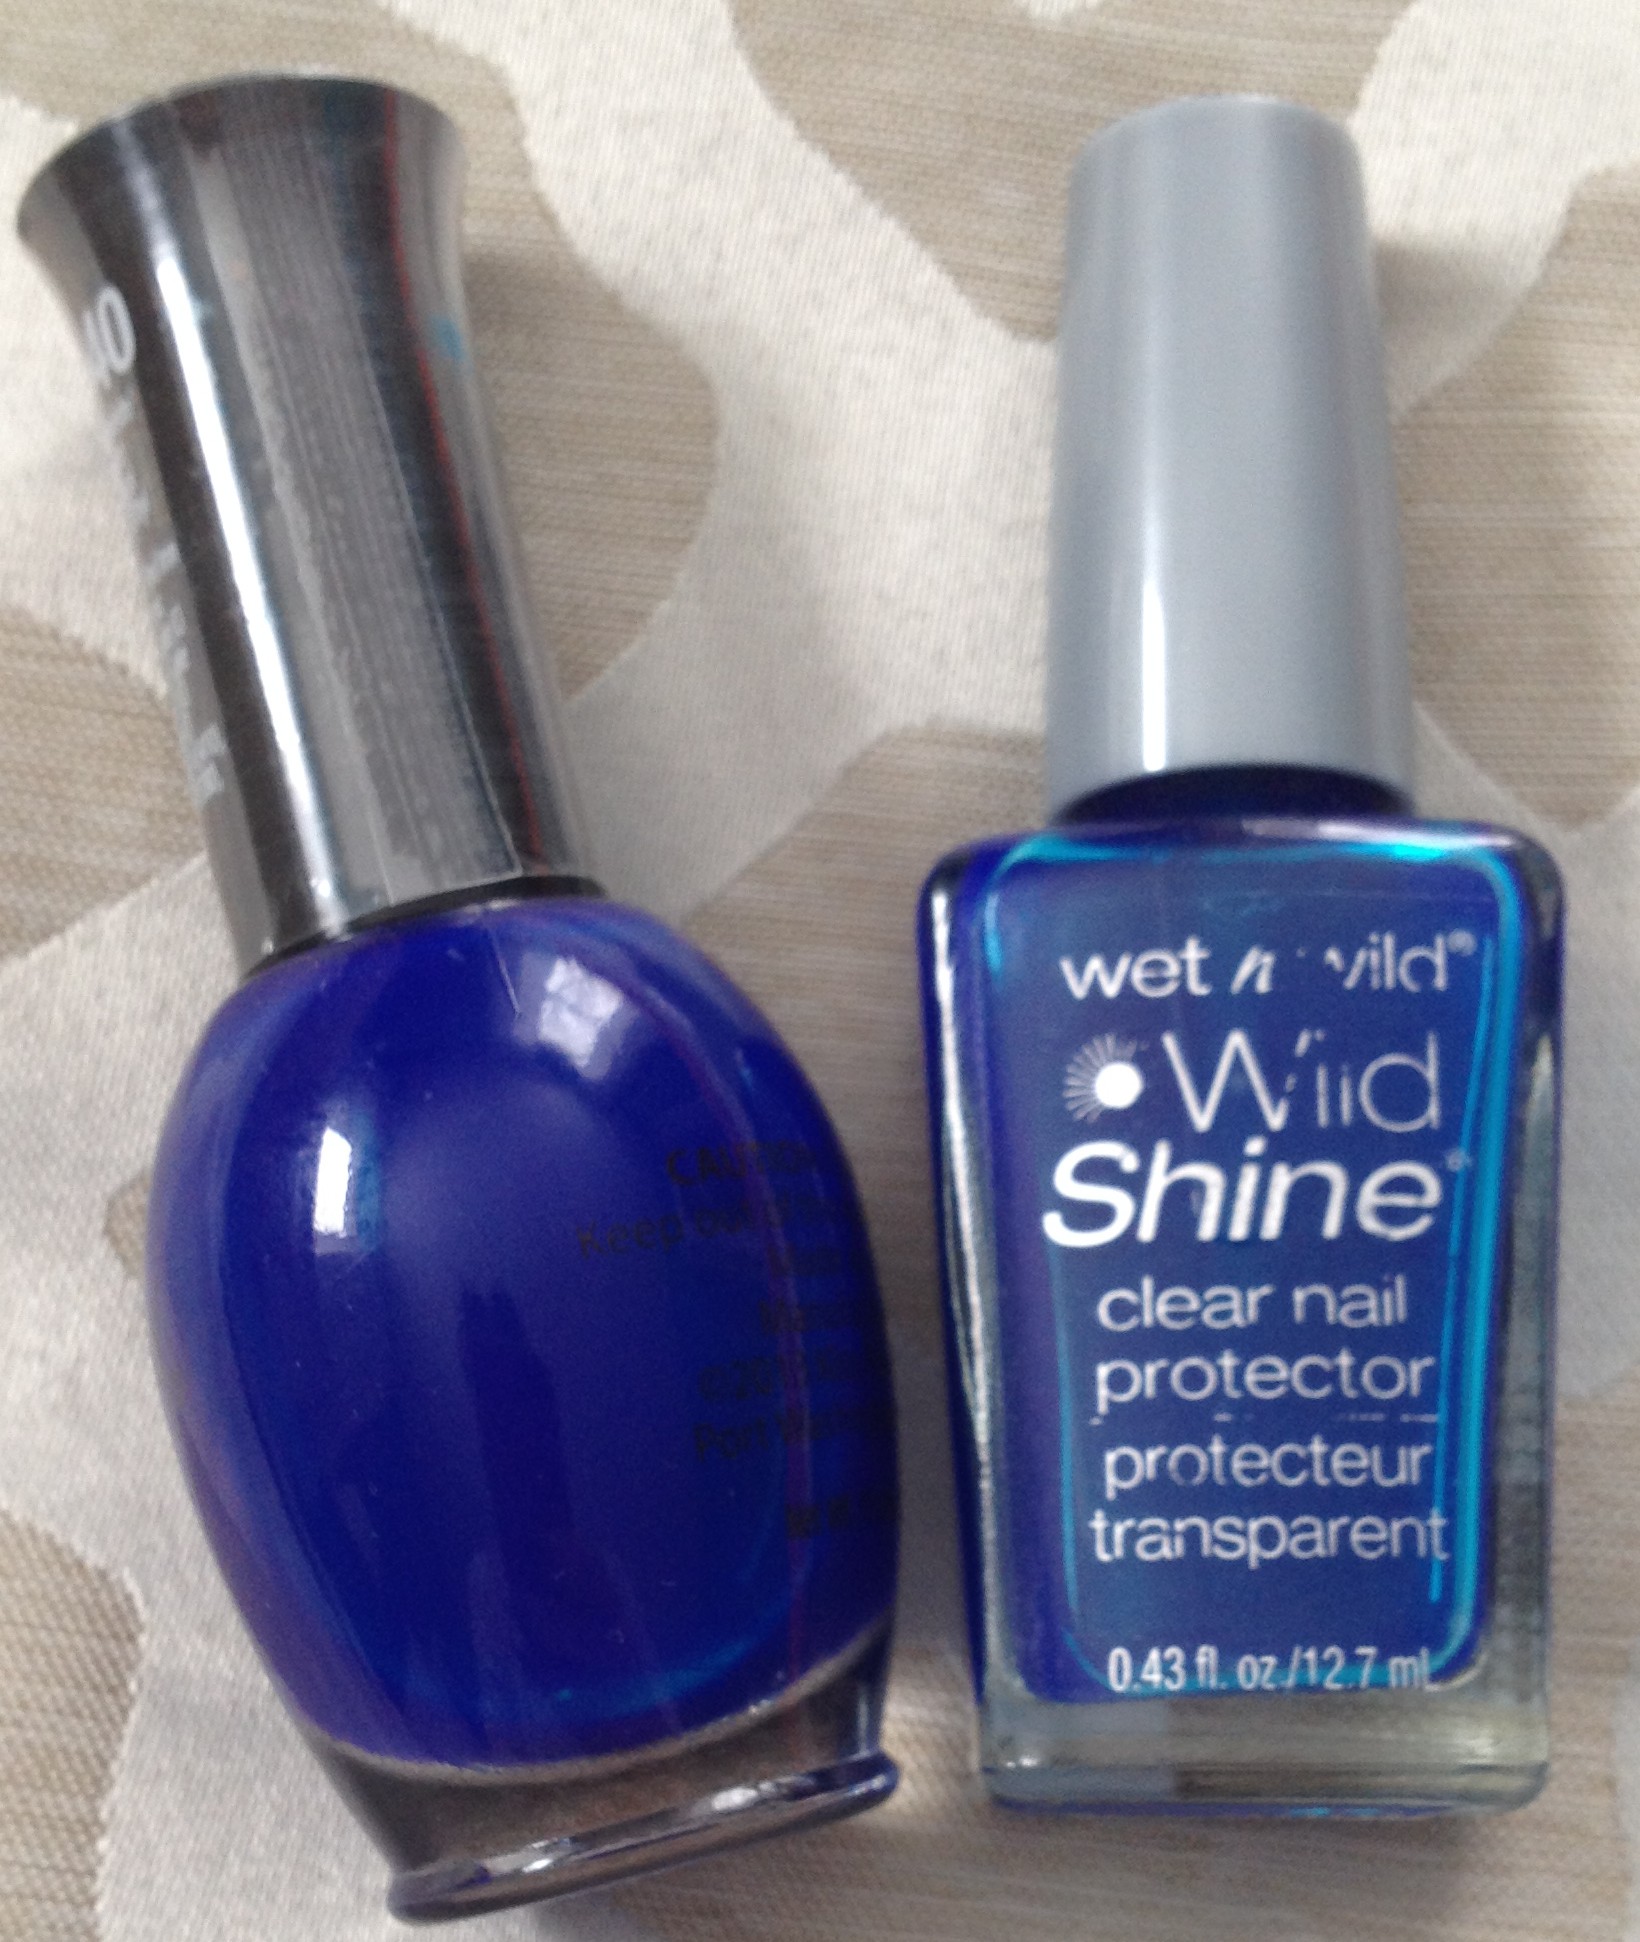
Once the IMG_4549
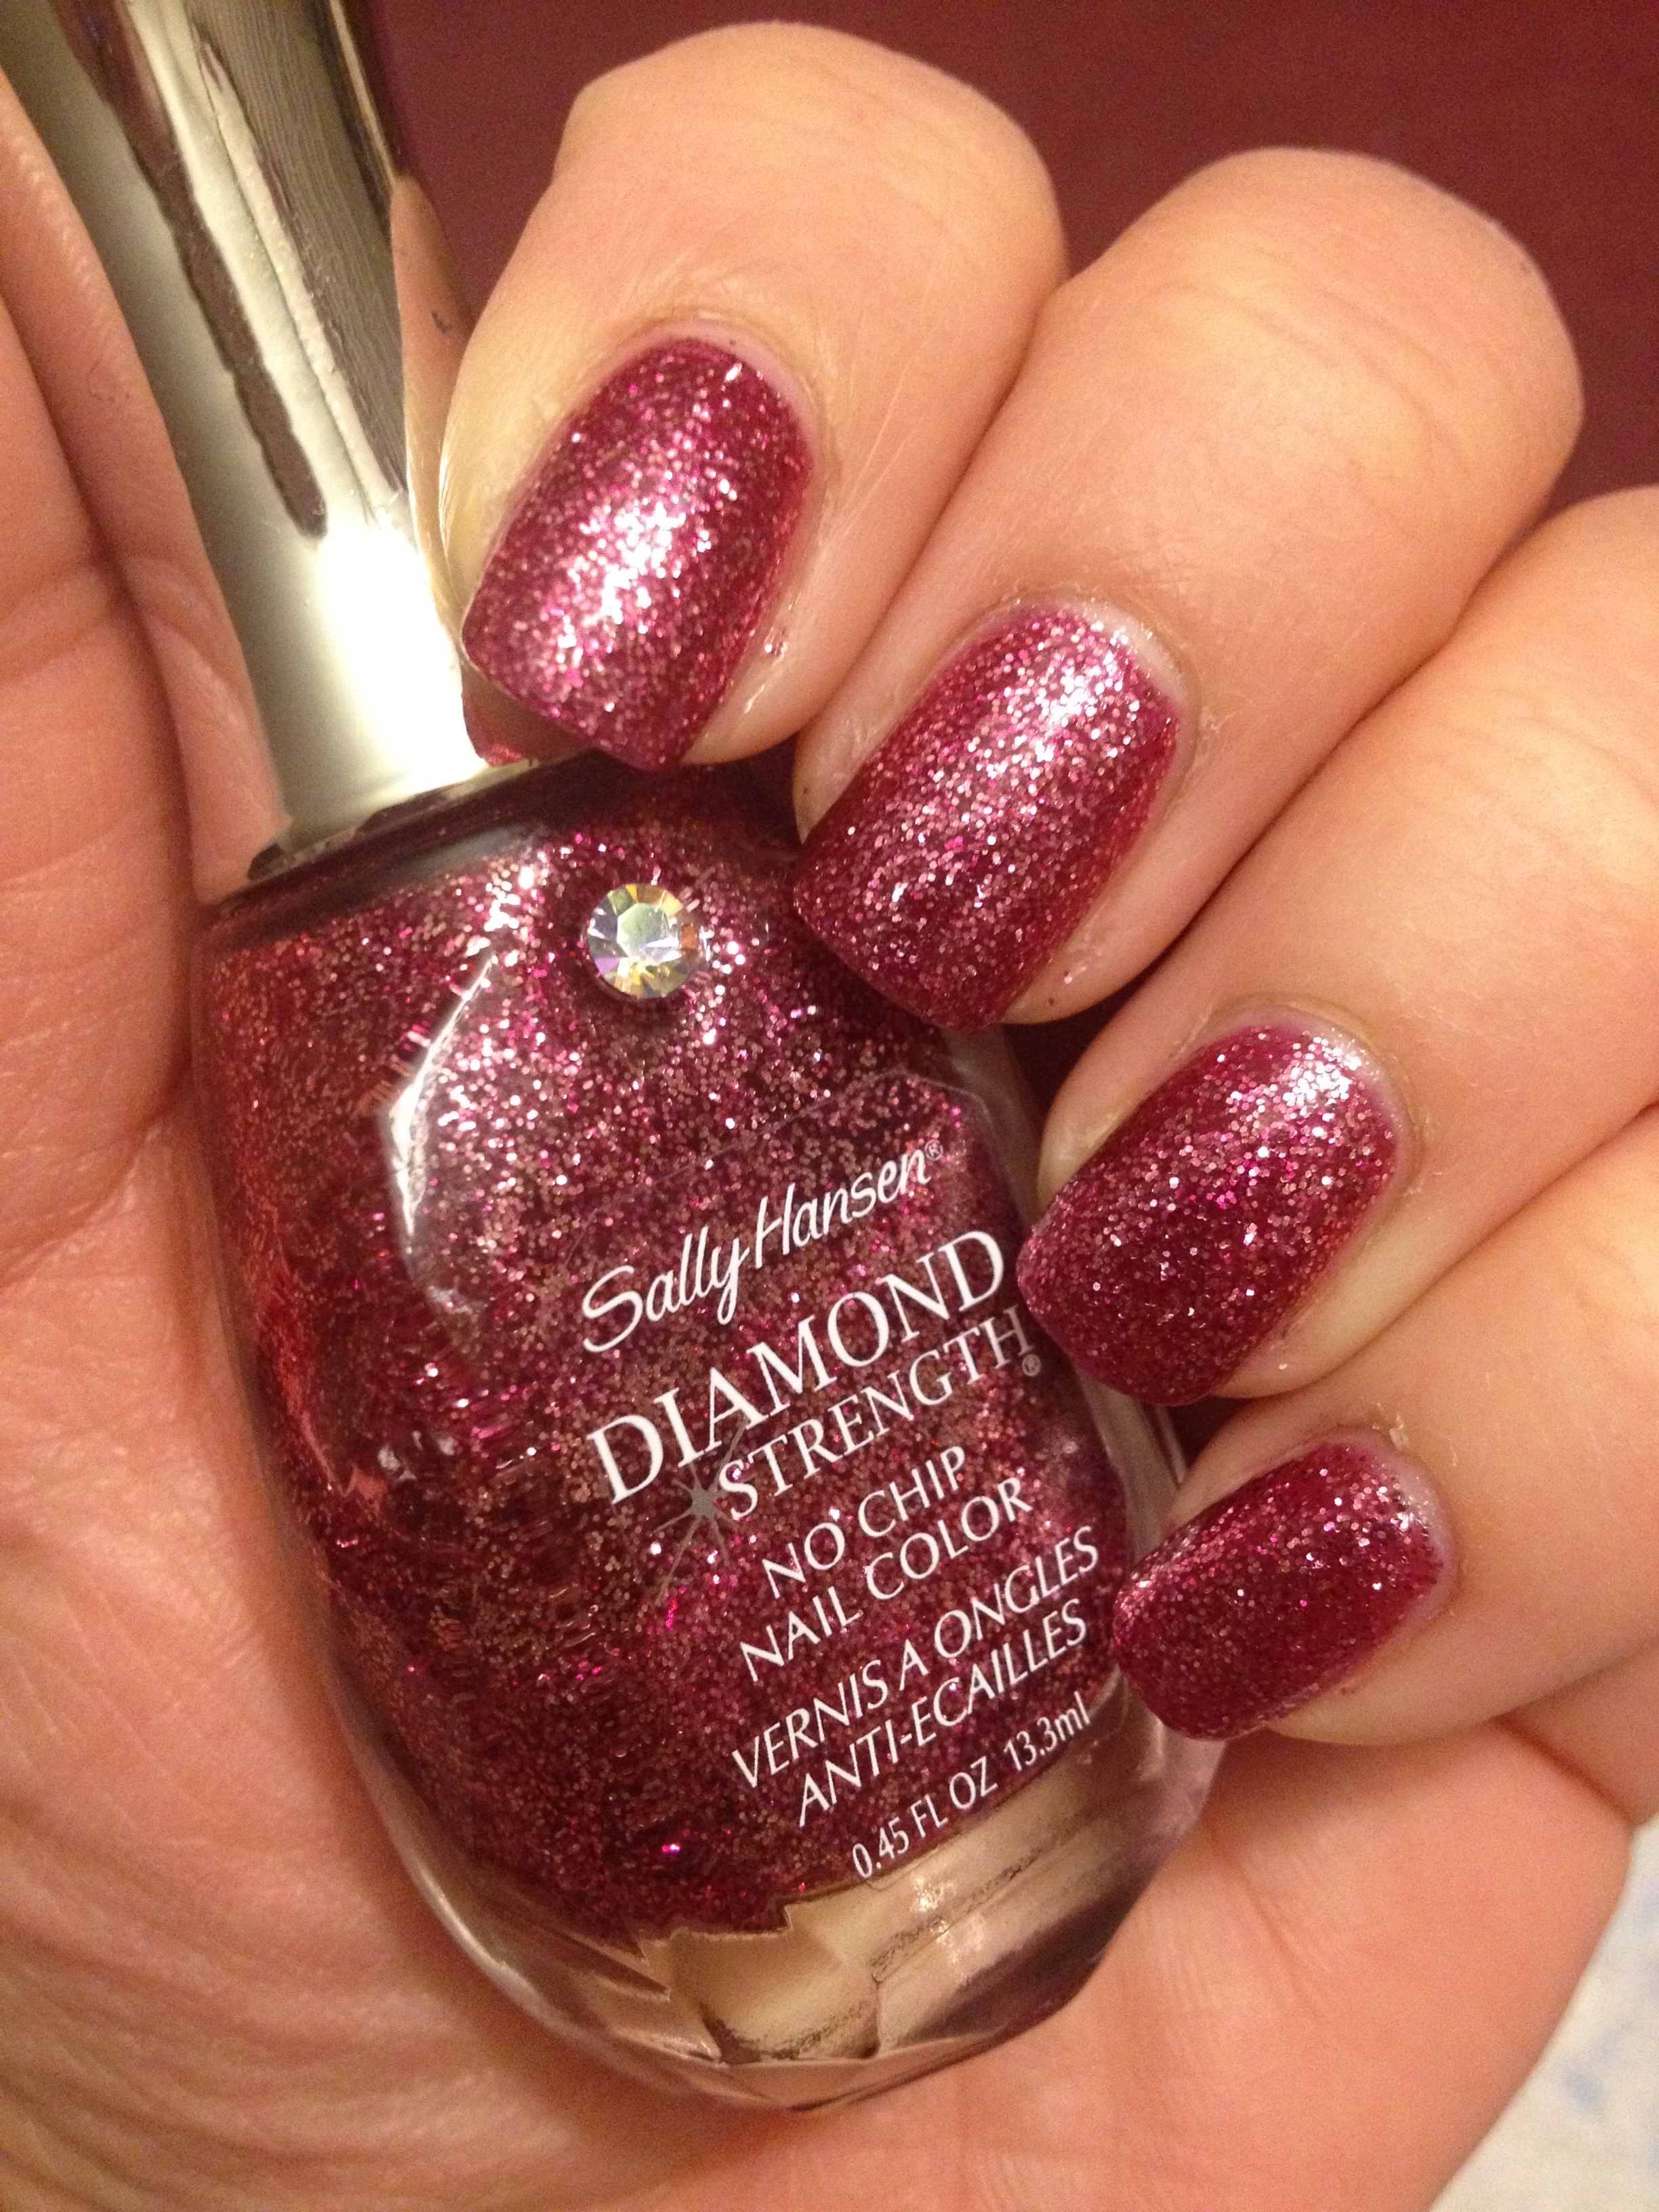
glue is completely dry, add your polish.  It doesn’t have to be glitter polish.  Obviously, you can use this peel-off base with any polish, but the real benefit of the stuff is that it makes glitter polish easy to remove.  I used Sally Hansen Diamond Strength – Wedding Crasher.  It’s just so pretty and sparkly!

IMG_4555
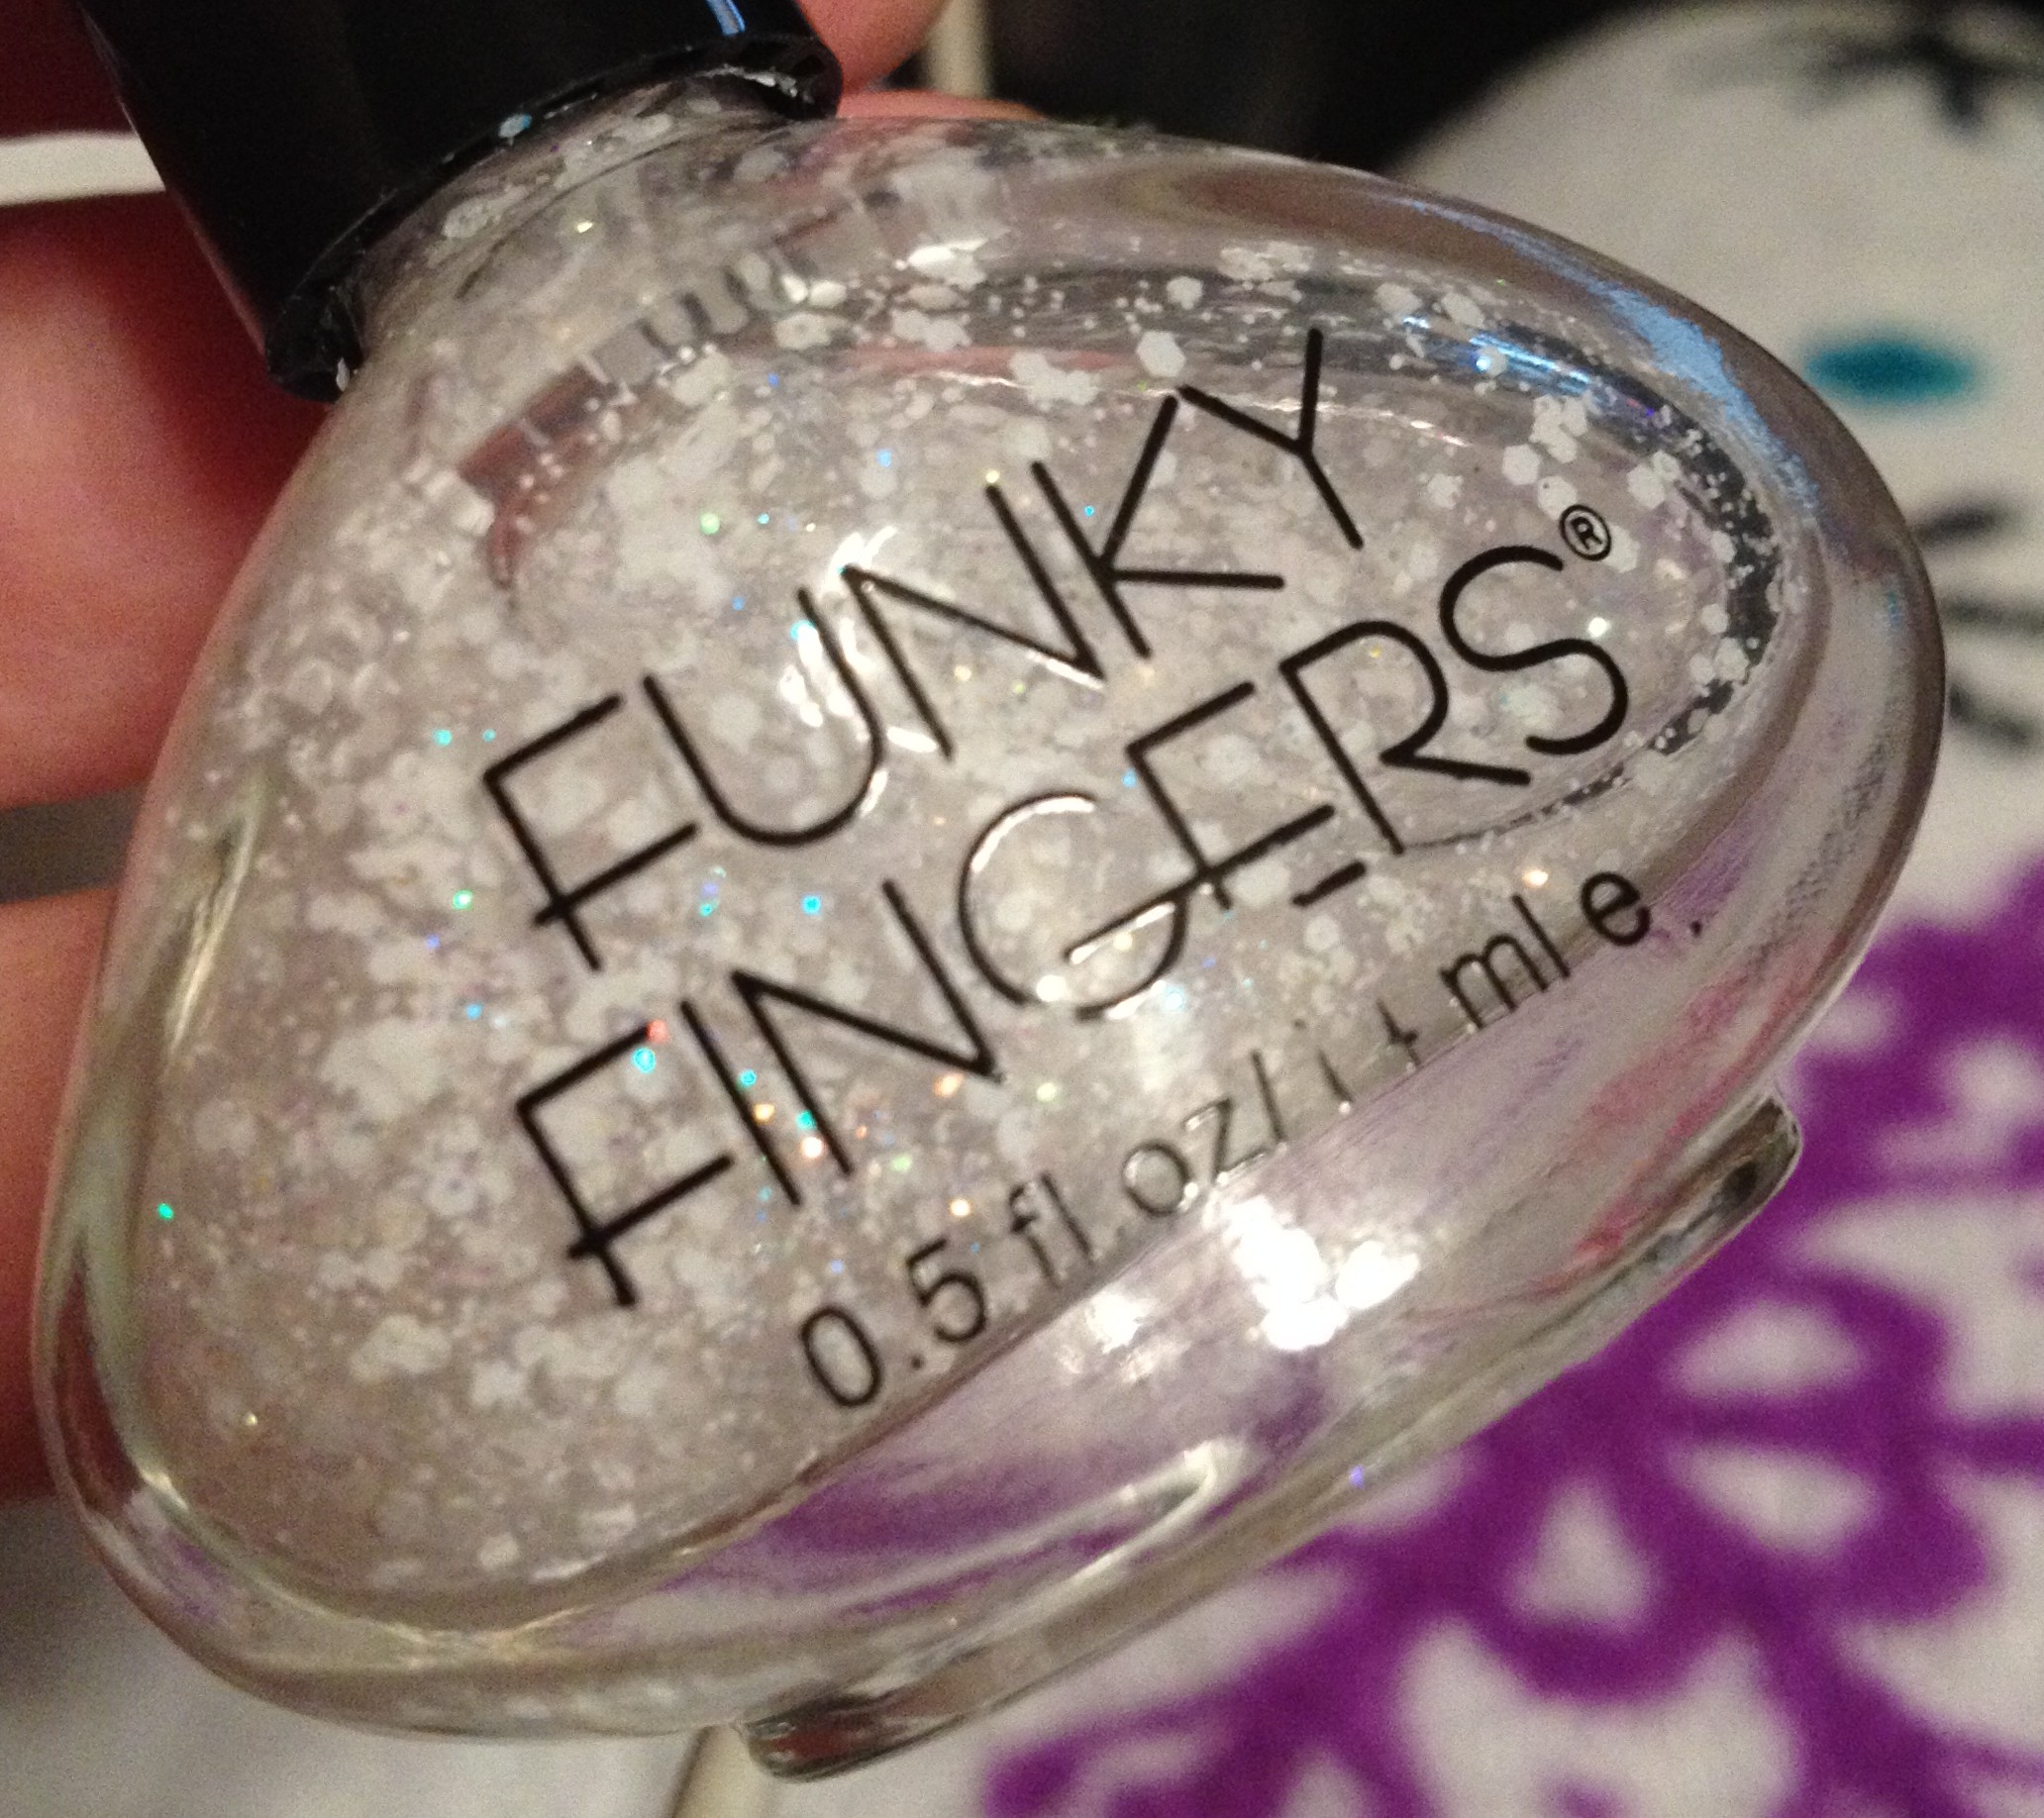
I felt the mood to fancy it up a bit, so I added Sinful Colors – Love Sprinkles on top.  Really, I love this combo!  I wish I would have thought about it before Valentine’s Day, but I guess pink polish and hearts are okay anytime.

I did my nails on Sunday evening.  They lasted for about 48 hours before I got my first major chip.  They made it through two showers and lots of hand washing and cooking – not too bad!

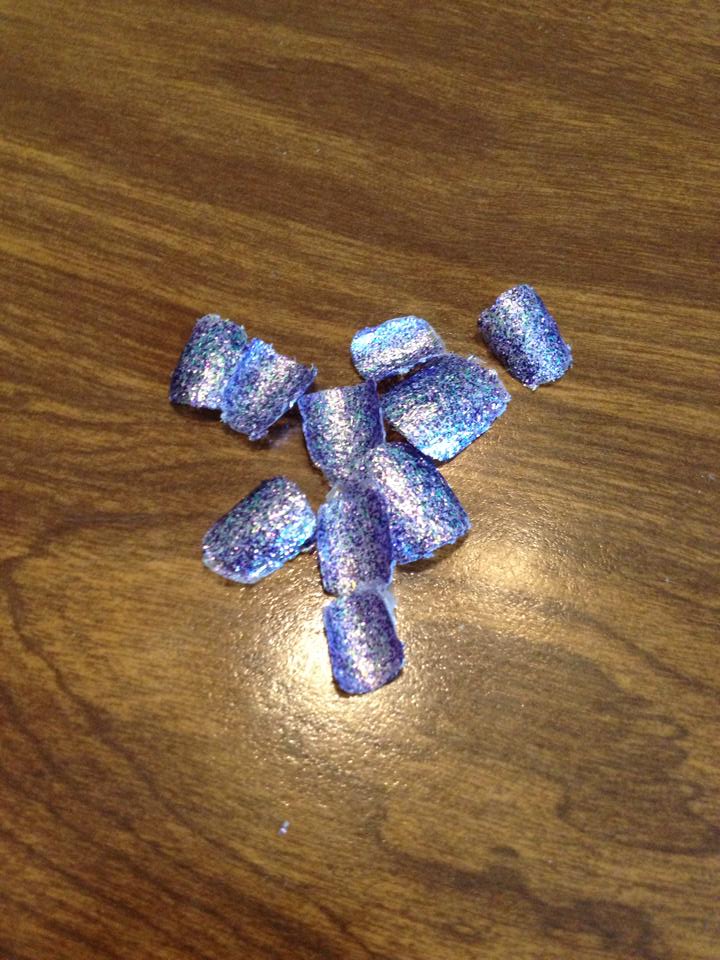
Since I got a chip, I decided it would be a good time to test the peel-off-ability of the polish.  I had to work a little to get each nail sIMG_4559tarted.  I found that it was harder to peel the polish off from the cuticle end.  It was much easier to start at the tip of the nail where there was already a little tip wear happening.  IMG_4558I used a metal cuticle pusher to work the polish off the nail.  For most of the nails, the polish came off pretty easily in one or two big pieces.  Some nails took a little more effort than others, but overall, I felt the polish came off pretty easily.  For me, I felt this was the perfect balance between being easy to remove and not falling off before I wanted it to come off.  IMG_4560

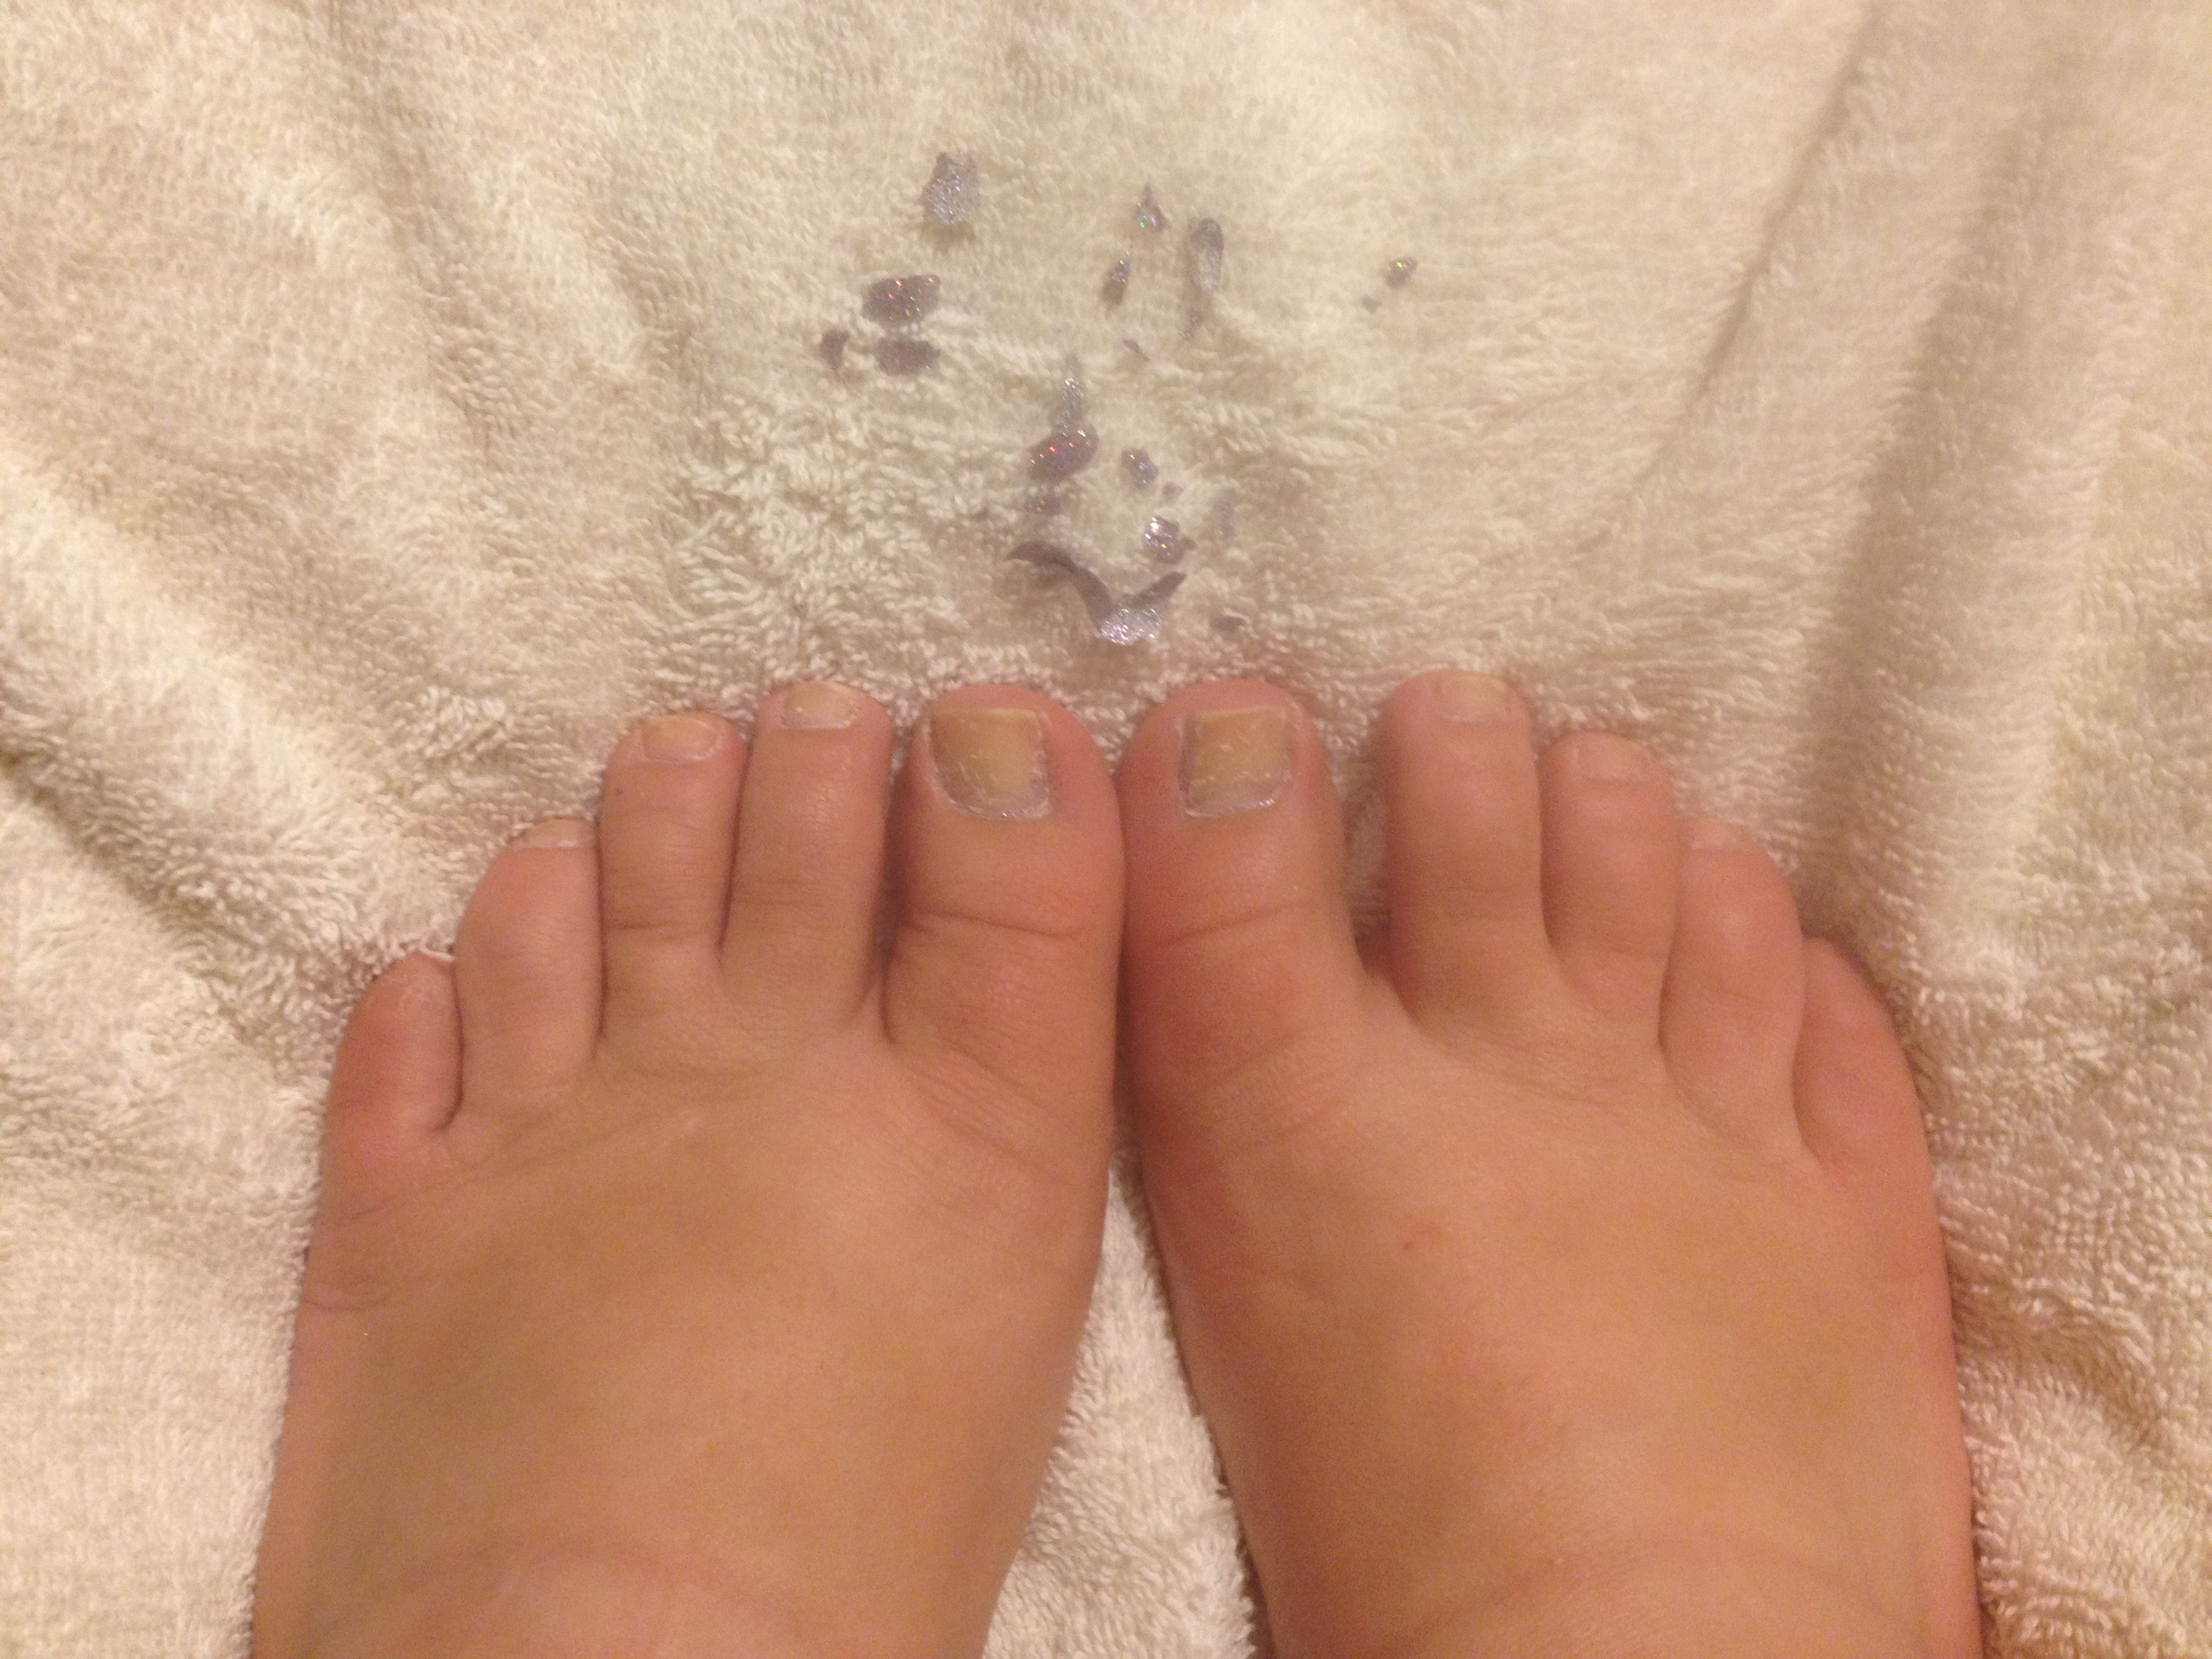
Here are my nails after I peeled the polish off.  This is the state of my nails as I type this.  (Please ignore the peeling tips, yellow stains, and terribly dry cuticles.)  As you can see, there’s still a little bit of polish that I will need to use remove the last little bits of polish, but I can deal with that!  IMG_4562

Considering that I got a pretty good sized chip in my polish after only two days of wear, I don’t think you could make it for much more than 2 or 3 days using a peel-off base coat.  If I had plans to wear a glitter polish for a week, I would probably just use a regular base coat to ensure good wear and just deal with removing it the old fashioned way.

I’ve gotta go and put something new on my nails now!  Please let me know if you’ve had any experience with a peel-off base or if you are going to give the DIY version a try.  Thanks for reading!

Snowflake Sandwich with Frankenjelly

I’m pretty open about my love for Broadway Nails – Space Flight.

IMG_3297IMG_3335IMG_3321

I mean, what’s not to love?  It’s a beautiful blue jelly polish that only costs $1!  Well, actually, there are two things that I don’t love about this polish…

1.  It stinks crazy bad.  Like oil-based paint bad.  Like “It’s below freezing, but I need to open a window for ventilation” bad.

2. It’s really dark.  I mean, it’s definitely a jelly polish, but it’s so dark that it covers up whatever is in the middle of my jelly sandwich just a little too much.  And if I felt the need to apply a second coat over my glitter in the name of smoothness or evenness, it just covered my glitter more than I wanted it to.

Then, late one night, in a moment of inspiration I though, “Why don’t I just add some of Space Flight to a clear polish to make a more sheer jelly?”  So that’s what I did.  Behold:

IMG_4277

I added maybe 20 drops of Space Flight into a 3/4 full bottle of clear Wet n Wild polish.  Seriously, it did not take much Space Flight at all to make the clear polish a lovely shade of blue.  Here is one coat of each of these painted over an expired mailer from Bath & Body Works:

IMG_4276

Isn’t that great?  Now that I had my new lovely sheer blue jelly polish, I needed to do something with it.

I acquired Funky Fingers – Olaf on a recent trip to 5 Below.

IMG_4275

This is a clear base with small white hex glitter, tiny white and iridescent glitter, and large white snowflake shaped glitter.  I figured that this would be perfect to use in a jelly sandwich with my Frankenjelly!

I actually started by applying 2 coats of Space Flight to get a nice deep base.  Then I applies one coat of Olaf followed by one coat of my new blue Frankenjelly.  Here’s the result:

IMG_4259I love how this turned out!  The Frankenjelly was dark enough to give the glitter a wonderful blue color and give the effect that the glitter is suspended in the middle of the polish with out covering it up too much!  I wore this for almost 5 days, so that’s saying something!

With the success of this frankenjelly, I may be experimenting with more jellies like this in the future.  Stay tuned!  Thanks for reading!  Oh, and just a reminder, I’m on intagram so find me there!!!

I

Scrapbook Nails

You know how you can transfer newspaper print onto polished nails using rubbing alcohol?  (If you don’t know what I’m talking about, google “newspaper nails.”)  Well, I started to wonder if you could just transfer ink from any paper onto nails with alcohol.  Specifically, I started thinking about how cool it would be to transfer the print from scrapbook paper onto nails.  I mean, you can get a whole huge sheet of scrapbook paper for like, $0.59 at the craft store, which is way cheaper than any sort of nails stickers.

When I first started thinking about this, I did a little searching online to see if I could find any info anyone who had attempted something like this.  I did find some people who had printed out digital scrapbook paper and successfully transferred it to their nails.  I’m a little stingy with my printer ink, though, and so I didn’t really want to pay for downloadable scrapbook paper and then use a million dollars worth of ink to print it out.  Plus, I wanted an excuse to go to the craft store.  So that’s what I did.

I figured it would be best to use the thinner scrapbook paper instead of the really heavy-duty kind.  I also looked for a pattern that was had some cool small detail, and here’s what I picked out:

IMG_2982

Then I cut out some little nails-size pieces.

IMG_2984

I painted my nails like this:

IMG_2981

The pink is China Glaze – Peonies & Park Ave.  It’s an almost-neon pink, and the more I wear it, the more it grows on me!  I let my nails dry for about a half an hour before I moved onto the next step.

I poured a little rubbing alcohol into the lid.

IMG_2986IMG_2987

After a little trial and error, I found that it worked best to dip the paper into the alcohol and then press it print side down onto my nail and hold it for about 30 seconds.

IMG_2988

Really press it down well, especially around the edges of the nail.  If it looked like it wasn’t transferring very well, I used a brush dipped in alcohol to re-wet the paper while it was on m nail and then I pressed it down a little longer.

Here was my first nail!

IMG_2989

After removing the paper, there was often still some paper residue stuck on my nail.

IMG_2990

To remove that, I just made a finger on my opposite hand wet and gently rubbed the nail.  The paper residue would sort of pill up while I was rubbing it, and I could easily brush it off.  I was really careful while I was doing this so that I didn’t rub too hard and remove the ink.  Once all of the paper was rubbed off, I applied  Seche Vite top  coat.

Here are the finished nails on my right hand. Oh, I added some stars to my pink nails..

IMG_2996

And here’s my l left hand:

IMG_3004

While the ink didn’t transfer 100% perfectly, I am pretty happy with this first attempt!  If you give this a try and figure out any tips along the way, please let me know.  Make sure you post a picture on facebook or instagram and use the hashtag #polishmesnazzy so that I don’t miss it.  Happy polishing !

Frankenpolish Strikes Again!

Lately I’ve been seeing a lot of cute nail art around that starts with a base that is sort of a light nude color.  You know, not as dark as a “mannequin hands” nude, but definitely not white.  I didn’t have a color like this, but I’m trying (although my hubby may not believe it) to not buy unnecessary nail polish.  

Then I remembered that I bought a bunch of white polish so that I could compare them, and really, who needs 5 bottles of white?  You know what that means?  Frankenpolish time! 

My initial plan was to add some of NYC – Fashion Safari to NYC – French White Tip.

IMG_2876

I realized pretty quickly that I was going to have to add a ton of Fashion Safari to get my desired shade, so I raided my nail polish rack and found these two:

IMG_2921

Wet n Wild Megalast – Haze of Love is a beautiful brownish-reddish-raisinish color that I love to wear in the fall.  Spoiled – Permission to Proceed is just a true green.  I knew if I just added Haze of Love to the white, it would end up being too pink, so added some Permission to Proceed just to mellow out the pinkness. I didn’t really keep track of how much of each I added to the white.  I would just add some and then shake-shake-shake the bottle, assess the color and then add some more of the colored polish as needed. 

In the end, I wound up with the color on my middle finger:

IMG_2913

(Sinful Colors – Snow Me White is on my first finger, and Fashion Safari is on my ring finger.)

So, I think I’m pretty happy with how it turned out!  Sometimes when I look at it, I think it might still be a little too pink.  Maybe I’ll add a few more drops of green polish to it.  Not sure yet.

Do any of you have any Frankenpolish stories?   I’d seriously love to hear them!

Real Seashell Nails

By now you’ve probably seen those little kits that you can use to create a seashell manicure that include the little bottles of dyed and crushed seashells.  They are pretty cute, but I don’t like paying for stuff if I don’t have to. 

A few weeks ago, we did a day trip to the beach and I took it upon myself to collect a bunch of these really thin shells. 

IMG_2853

I’m sure they have a name, but I don’t know what it is.  They are the kind of shells that you can just easily break with your fingers, and they are really plentiful along the mid-Atlantic coast.

I broke them up into little pieces that were about 1/4 inch or smaller  (That’s about 1/2 cm for those of you in the rest of the world.)

IMG_2855

Then I painted all of my nails with a few coats of NYC – Fashion Safari.  I topped my index finger, pinky and thumb with a coat of Orly – Sky Blue-Pink to mimic the iridescence of a seashell.

IMG_2860

Then, I applied one more layer of Fashion Safari to my middle and ring fingers, and while they were still wet, I sprinkled my crushed up shells onto them.  I tapped off the excess and then patted down the shells that were stuck to the nail.   I then topped it with several layers of top coat in order to make it (sort of) smooth.  Here are my results:

IMG_2861

I didn’t LOVE-love them, but they were okay.  The nails with the shells were pretty thick, and after 4 or 4 days, they started to pull away from the nail.  I do want to try it again, but I think next time I will use a dotting tool dipped into clear polish to pick up the pieces of shell and place them on my nail like a mosaic.  Obviously, this will be a little more difficult, but I think the results will be better. 

Please let me know if you attempt anything similar and how it turns out for you!  As usual, tag me on instagram or facebook  or use the hashtag #polishmesnazzy so I can see your recreations!

Adventures with Elmer’s Glue

Glitter polish.  I love it as much as the next person.  (Actually, I think it’s safe to say that I love it more than the next person, since at any give time there’s a good chance that my husband is the “next person” to me.)  It sure is a bugger to remove, though.  Even when using straight acetone, it can still be a pain to remove completely.  

Then one day, someone somewhere had the brilliant idea of applying a base coat of Elmer’s School Glue on the nails before applying glitter polish so that you could just literally peel the polish of when you were ready to remove it.  When I first heard about this, I just about fell over.  I’m pretty sure that I went out that same day to buy some glue.   

Attempt #1:  I applied a medium-thick coat of glue to my bare nail with a little brush and let it dry completely.  I then applied a few coats of a really dense glitter polish.  It really seemed like everything was going well until I woke up the next morning and found that one of my one of my nails had just fallen off while I was sleeping!  (Well, the nail didn’t actually fall off, but the polish did and it looked just like a press-on nail.)  By the time I was done making breakfast, four more nails had fallen off, so I just easily popped the rest of them off, too.  This all happenbed pre-blog for me, but I actually did take a picture of it at the time:

polish fell off

So, Attempt #1 was a fail.

Attempt #2:  After lamenting about how my beautiful polish just fell off on facebook, someone suggested that I apply a base coat first, then apply the glue, then the polish.  So, that’s what I did.  The good news was that the polish did not fall off.  The bad news was that it was really, really hard to get the polish off without nail polish remover, and I actually did a little damage to the top layer of my nails when I ripped the polish off.  So, Attempt #2 was another fail.

Attempt #3:  Somebody – and I forget who, so if it was you, let me know so that I can give you credit – suggested that I water down the glue before applying it, so that’s what I did.  I mixed together roughly equal parts water and glue and brushed it only my toenails.  Adding the water made it easy to apply a really thin coat of glue.  I let it dry completely and then painted my toes with my currently favorite glitter polish, Funky Fingers – Sand & Stilettos.  Well, the next morning, none of my toenails had fallen off, so that was a good thing.  The polish actually survived 6 days, including a day at the beach until I noticed that the polish had popped off of my middle toenail on my right foot. 

IMG_2799 

(Yes, I’m fully aware that I have stubby toes, so you don’t need to tell me that in the comments or anything.)  Well, since one of the nails was bare, I decided that I might as well take the polish off the rest of the toes.  I took a little bit of picking around the edges with tweezers, but all of the polish on the little toes came off in one chunk.  The polish on the big toes came off in a 4 or 5 chunks.

IMG_2801

In the end, all of the polish came off pretty easily with little to no damage to the nail!

IMG_2804

I just gave my toenails a quick wipe-down with some acetone to remove a few stubborn pieces of glitter, but that was all I had to do!  Attempt #3 was a Success!  (And there was much rejoicing, yay.) 

So, I haven’t actually tried the watered down glue on my fingernails yet, and I know they take a lot more abuse than toenails, but someday I will and I’ll let you know how it goes.  And if you give it a try, please let me know how it works for you!

Nails of the Day

Here’s what I’m currently sporting on my nails:

IMG_2722

The pink color is Wet n Wild Tickled Pink and the green color is my Frankenpolish that I made here.

The gold glitter I used is from Sally Girl, available at Sally Beauty Supply.  You know how sometimes glitter polish is in a really thick clear base and it seems like you can’t get the glitter coverage that you want on your nails without applying a bunch of really thick coats?  Well, there’s a way around that.

For this look, I first waited until my pink and green polish was mostly dry.  Then I brushed the gold glitter polish onto a makeup sponge like this:

IMG_2724

Then I waited just a few seconds so that the clear base was mostly absorbed into the sponge, but still wet.  Then I dabbed the sponge with the glitter directly onto my nail.  This technique works like a charm!  I learned this from jessface90 on youtube.  Check out her tutorial on this.

I then applied the NYC You Matte Me Crazy top coat.  I love how the glitter looks with the matte top coat!  The glitter is still shiny, but in more of a frosted glass sort of way.

If you found this information helpful, I’d be honored if you’d share this by using the little “share” buttons below!  If you try this technique, I’d love to see your results, so use the hashtag #polishmesnazzy on instagram or facebook so that I can find your posts.  Thanks for reading!

Tools of the Trade

I’m about to reveal something that may blow your mind…  Here it is: Nail art is not really that hard.  Anyone can make their own nails look really awesome if they know a few tricks, and have the right tools.  Now, before I go any further, there are people out there doing nail art that actually have real artistic ability (do a search for Robin Moses Nail Art some time), and those people are in an awesome class of their own, but I’m not talking about those people right now.   I’m talking about regular people with very average drawing and painting skills.  I’m one of those regular people.

You will have a whole new, wonderful world of nail art open up in front of you if you can acquire just a few inexpensive tools.  Here’s my collection of tools:

IMG_2714

On the left are my dotting tools.  “What the heck is a dotting tool” you ask?  It’s pretty much a handle with a little round metal nub at the end that you can dip into polish or paint and then make perfectly round dots on your nails.  And don’t underestimate the versatility of dots.  You can do a ton of designs with just dots.  Five dots arranged in a circle with a different colored dot in the center is a flower.  Seriously Dots are great.

The first dotting tools I ever got were the three in the middle with the wooden handles.  I got them at Michael’s.  I’m pretty sure you could find something similar at just about any craft store.  After that I got the 5 pretty dotting tools with the plastic colored handles.  I’ve seen that set in beauty stores for over $10, but you can get them on Amazon for under $3.  That’s right, the whole set of 5 tools for under $3.  Just go to Amazon and search for “nail art dotting tools” and you’ll find a bunch of them listed.

Just to the right of my dotting tools is a little multi-functional little guy.  It’s got a dotting tool on one end, and an angled handle with a little brush on the other end.  I got that at Sally Beauty Supply for around $4.  I really like it and used it a lot when I first got it.  Ultimately, I wanted a brush that was just a little smaller so that I could be a little more detailed in my designs.  That first led me to the purple handled brush on the far right


In Pursuit of the Perfect Green

Lately, I’ve been into light green nail polish.   More than once, I’ve purchased what I thought would be a perfect light green and it either turned out to be too blue or too dark or just not quite what I thought it would be.  Meanwhile, I have this half-a-bottle of Essie in the color Blanc, that I really wasn’t loving anymore:

IMG_2619

Truth be told, I never really loved it in the first place.  The formula was never as opaque as I felt it should be for an $8 white polish.  (There are much better whites out there for much cheaper.)  Plus, it was starting to get a little old an gunky.

The first thing I did was restore the polish out with this awesome product:

IMG_2620

This stuff is great!  It was only around $3 at Sally Beauty Supply, and I’ve revived so many old polishes with it already!  A little side note here: Don’t thin your polish out with acetone or polish remover.  It may work temporarily, but ultimately, it will ruin the polish you are trying to fix.

Anyway, after I thinned out my Blanc, I added about 20 drops of this green and one or two drops of this blue:

IMG_2621

I did a lot of shaking and ended up with this:

IMG_2626

It’s exactly the color I was hoping for!  I haven’t actually used it yet, but I totally will before too long!  I totally feel like a winner, winner, chicken dinner because I now have a new color that I can’t wait to use, and I didn’t spend any money!  My hubby will be so proud!

UPDATE:  I finally did use this polish for this pink, green, and glitter mani and I love it!

Have you ever mixed your old polishes to create a new one?  Did you like your results?