My 14 Favorite Polishes of 2014

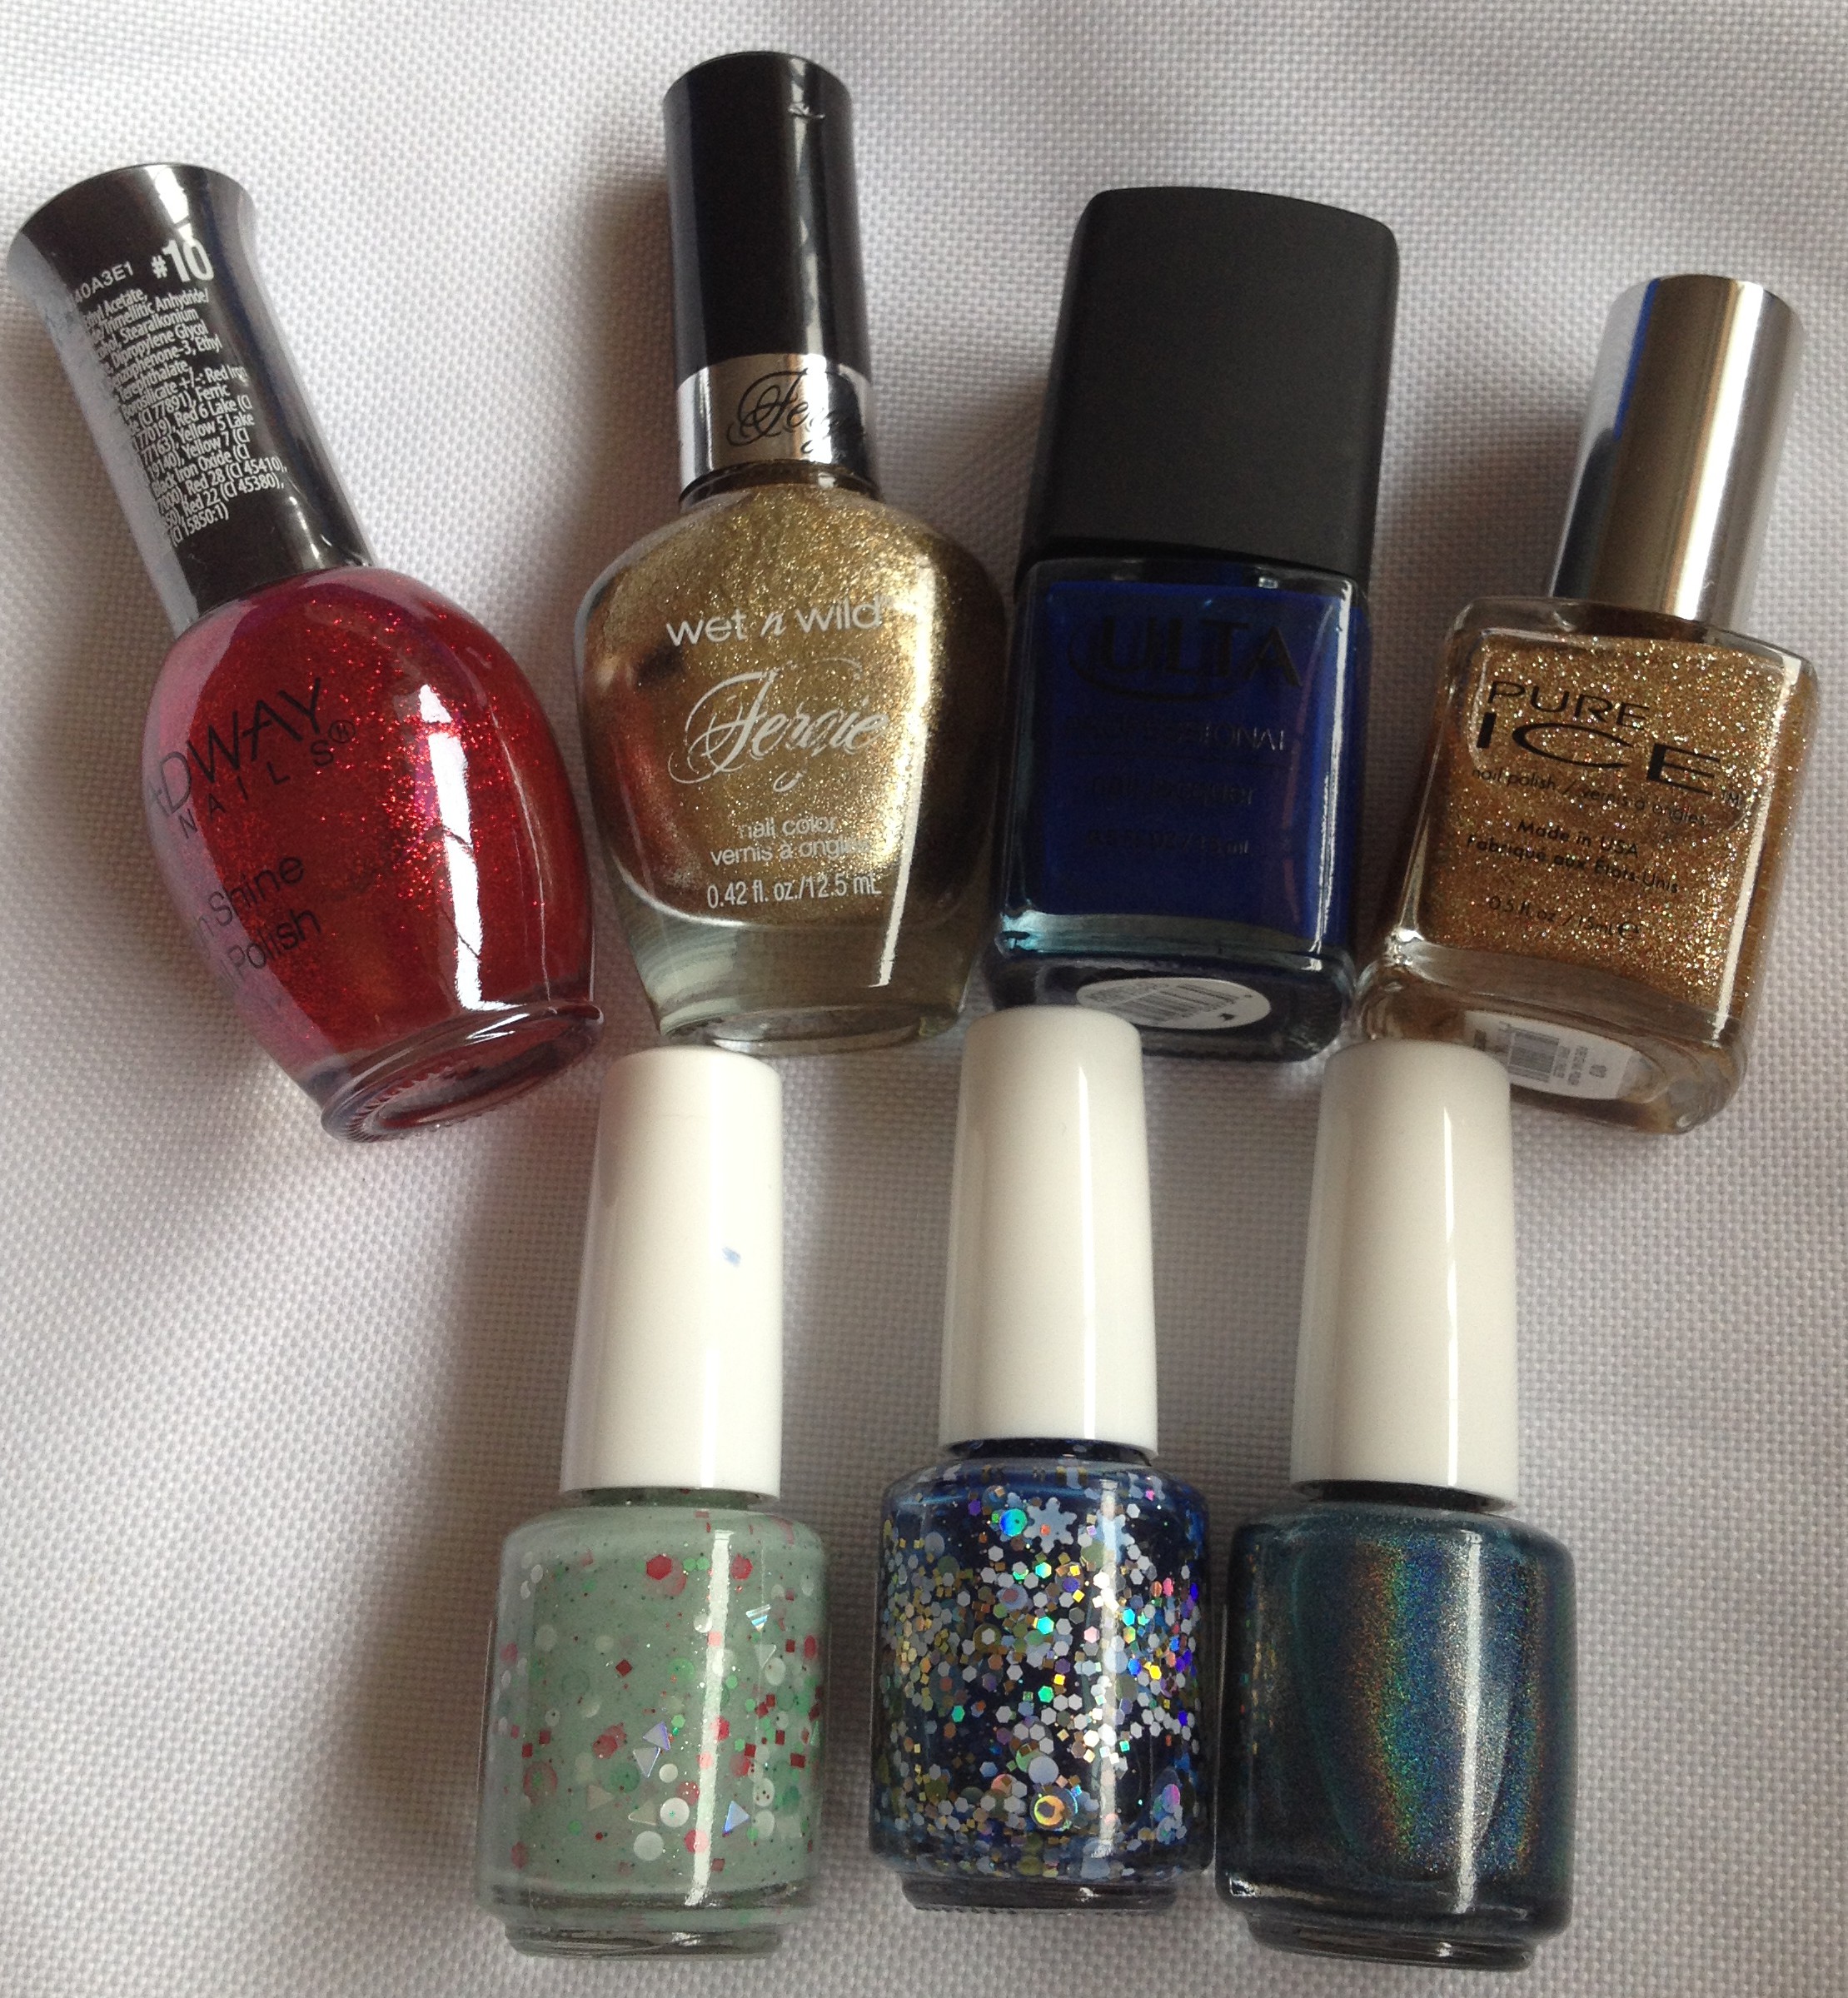
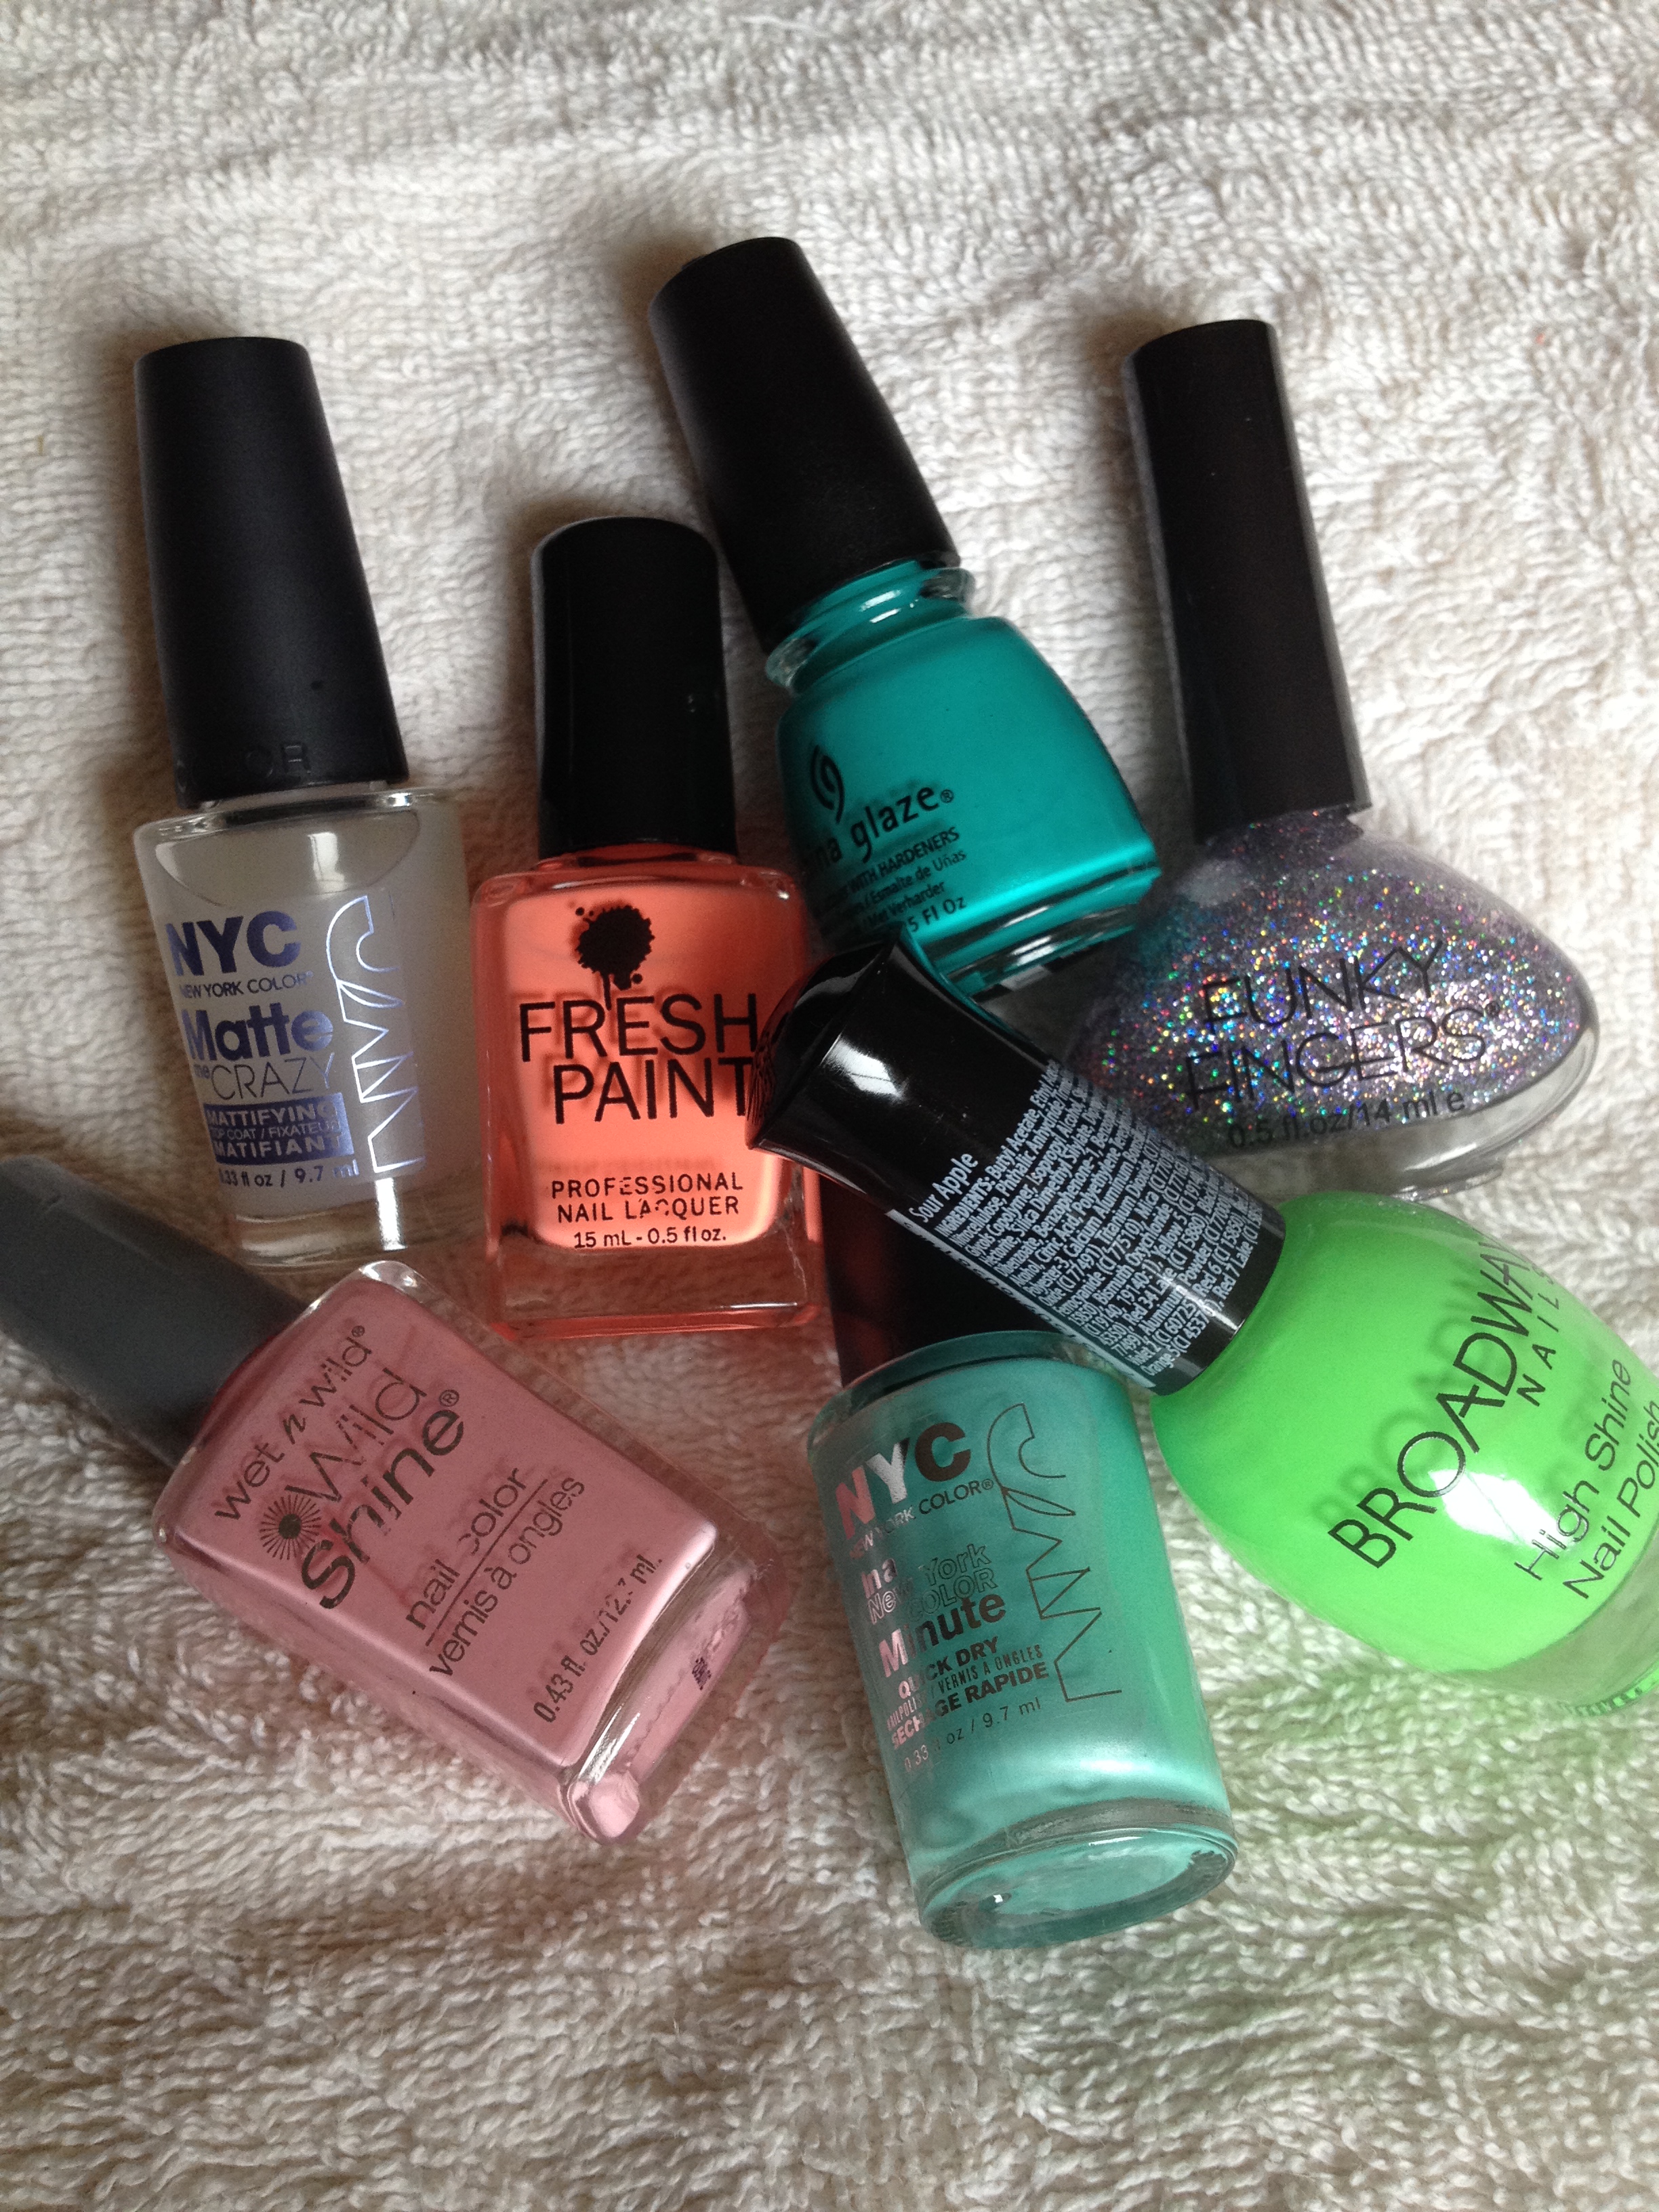
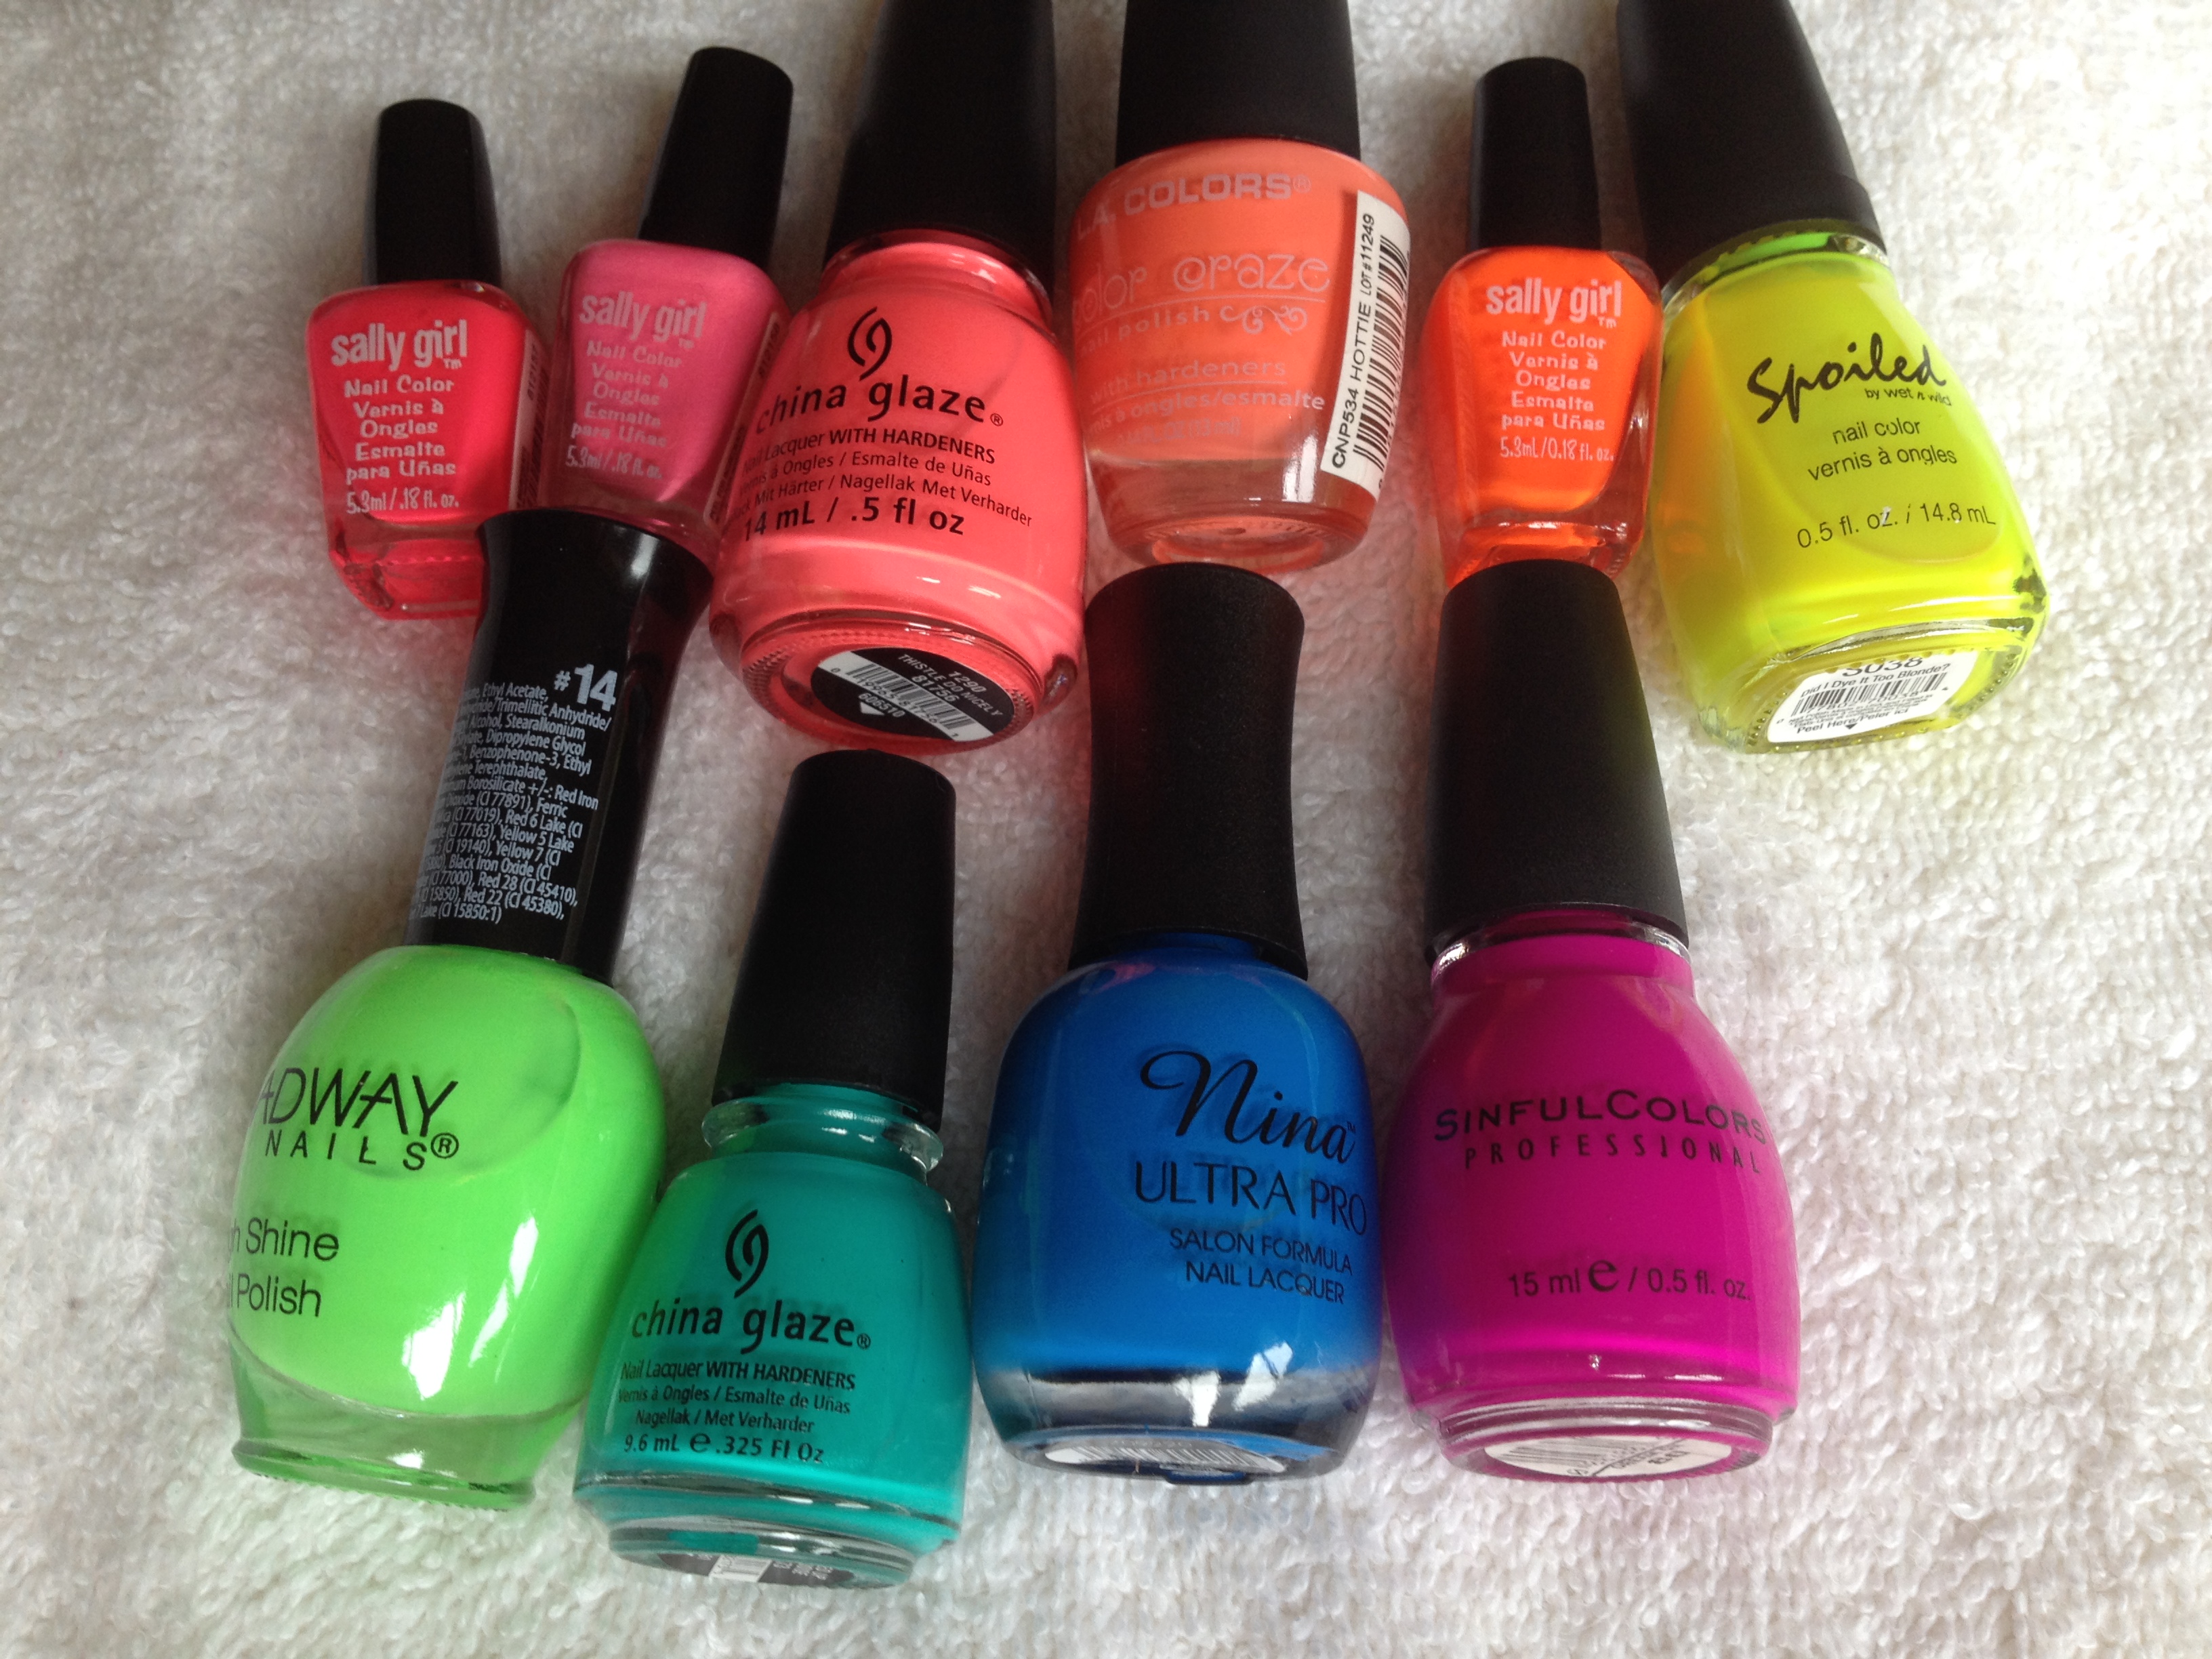
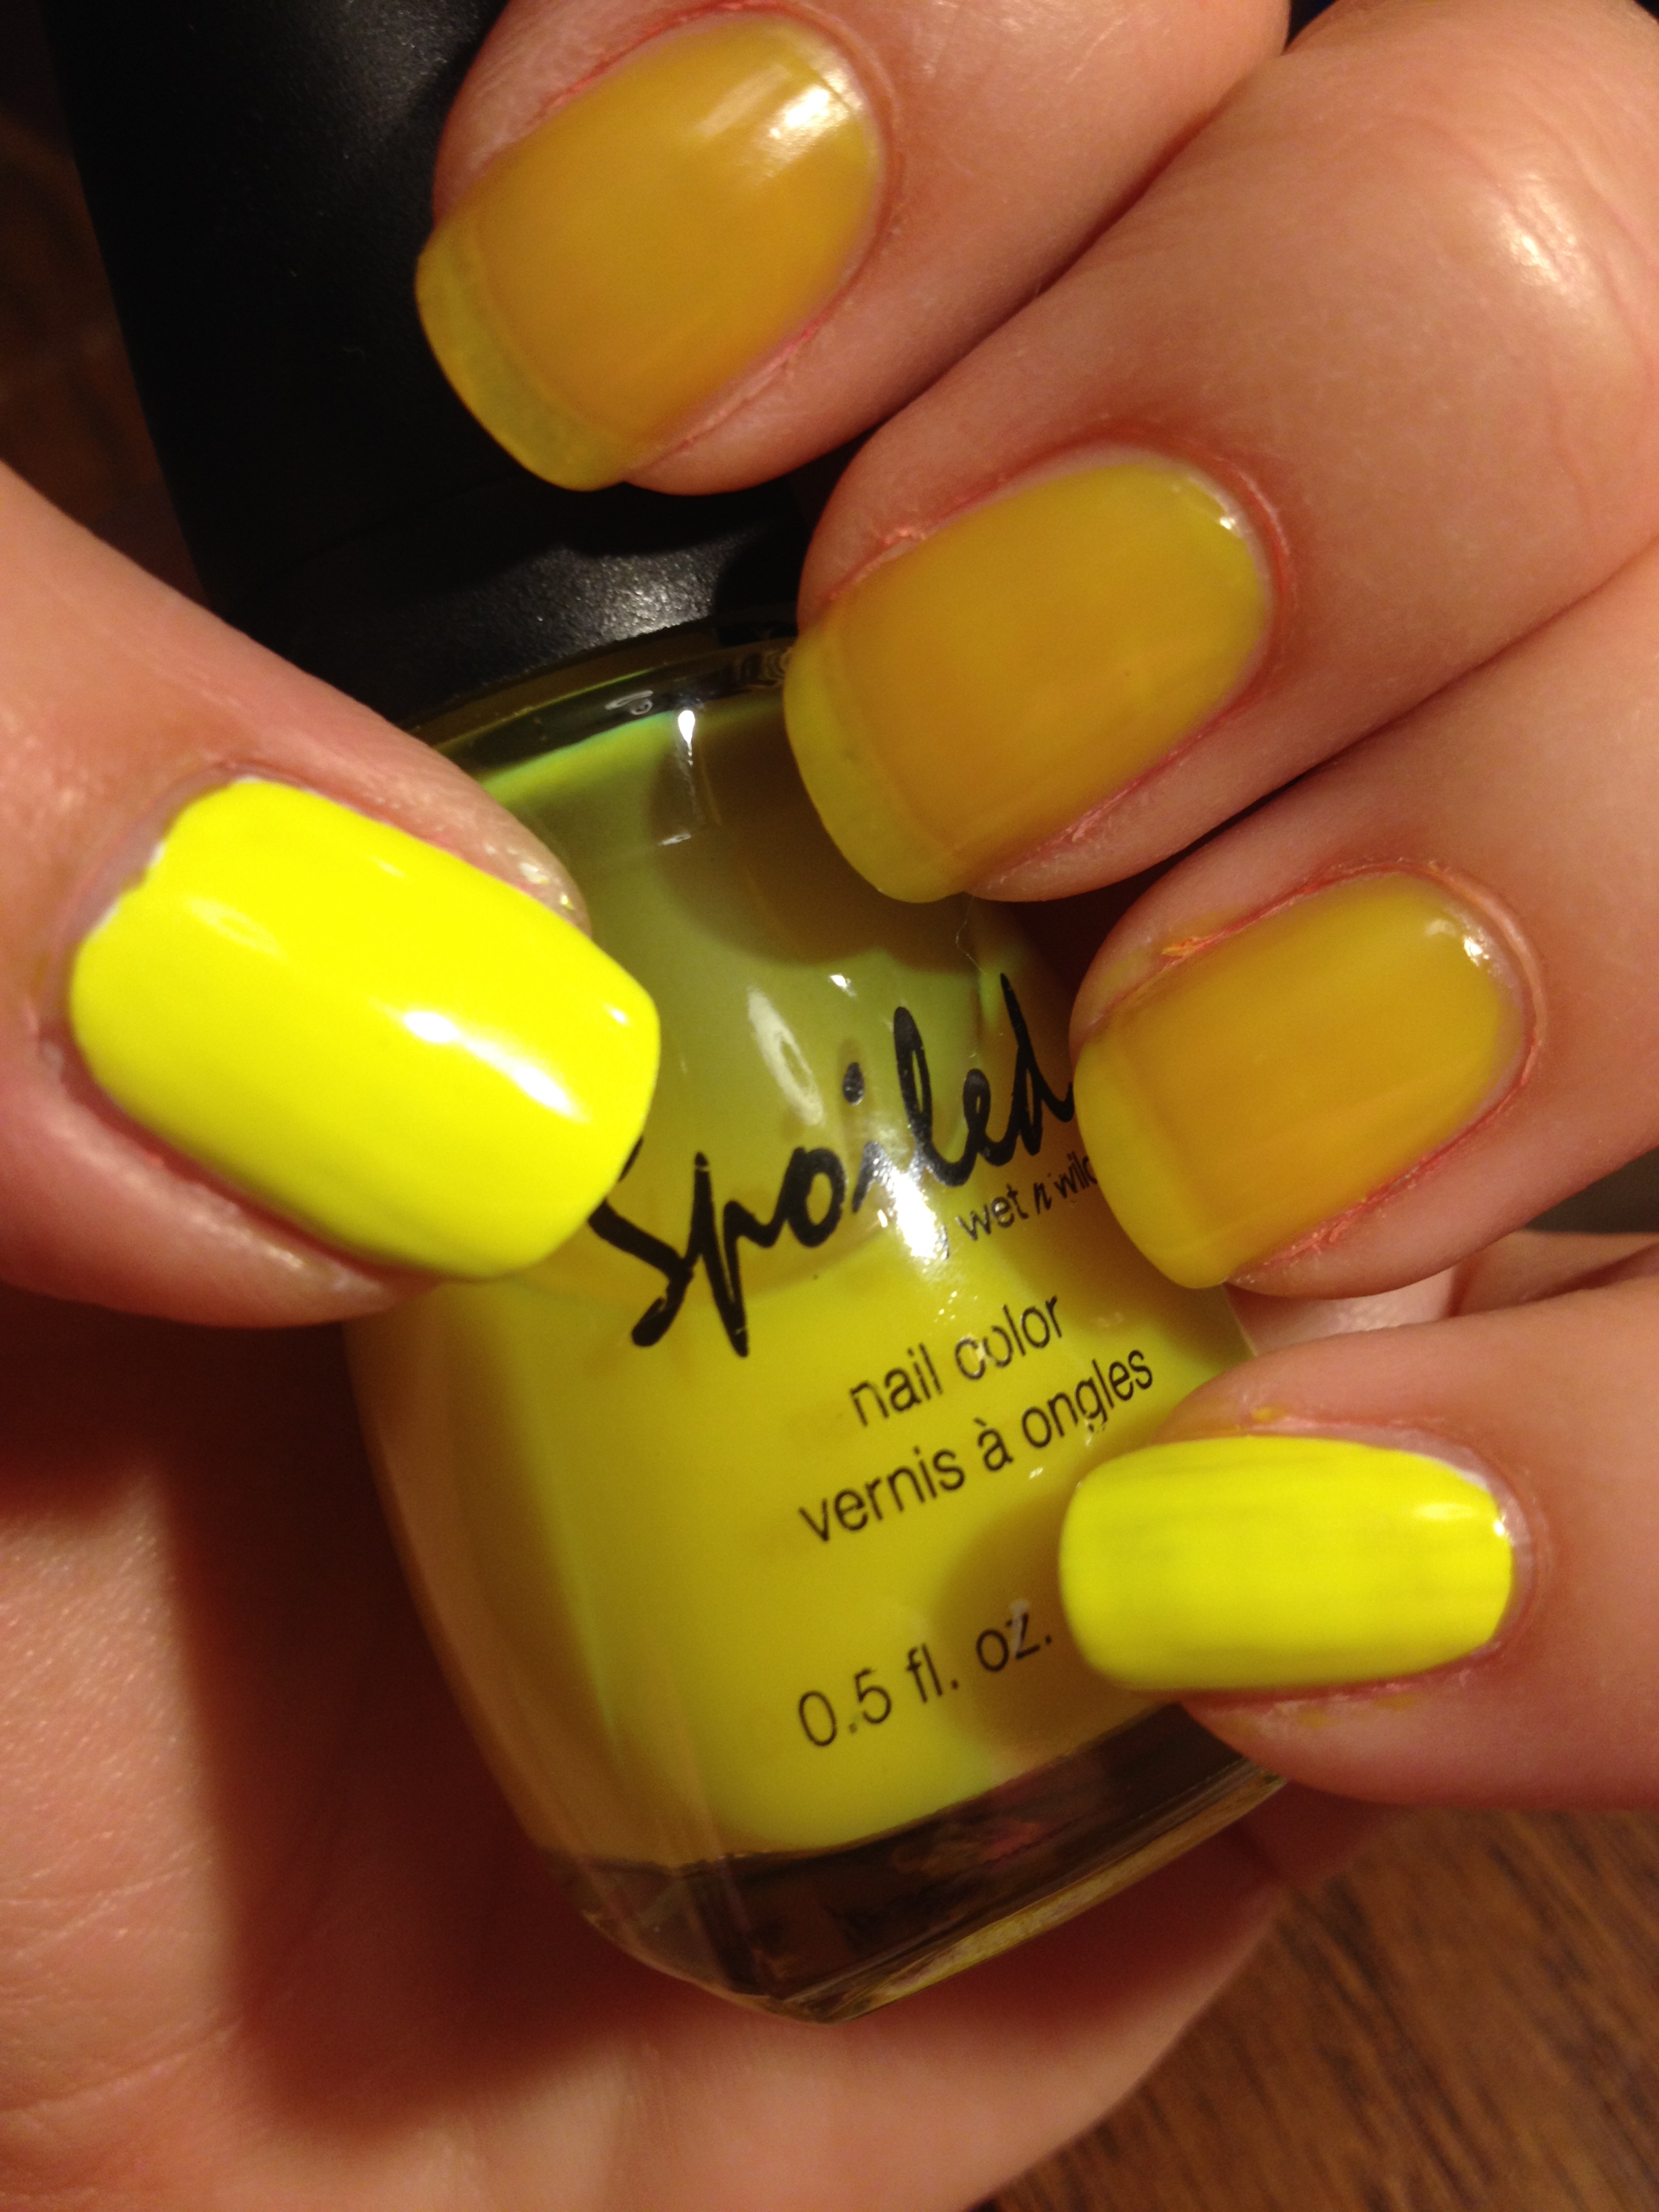
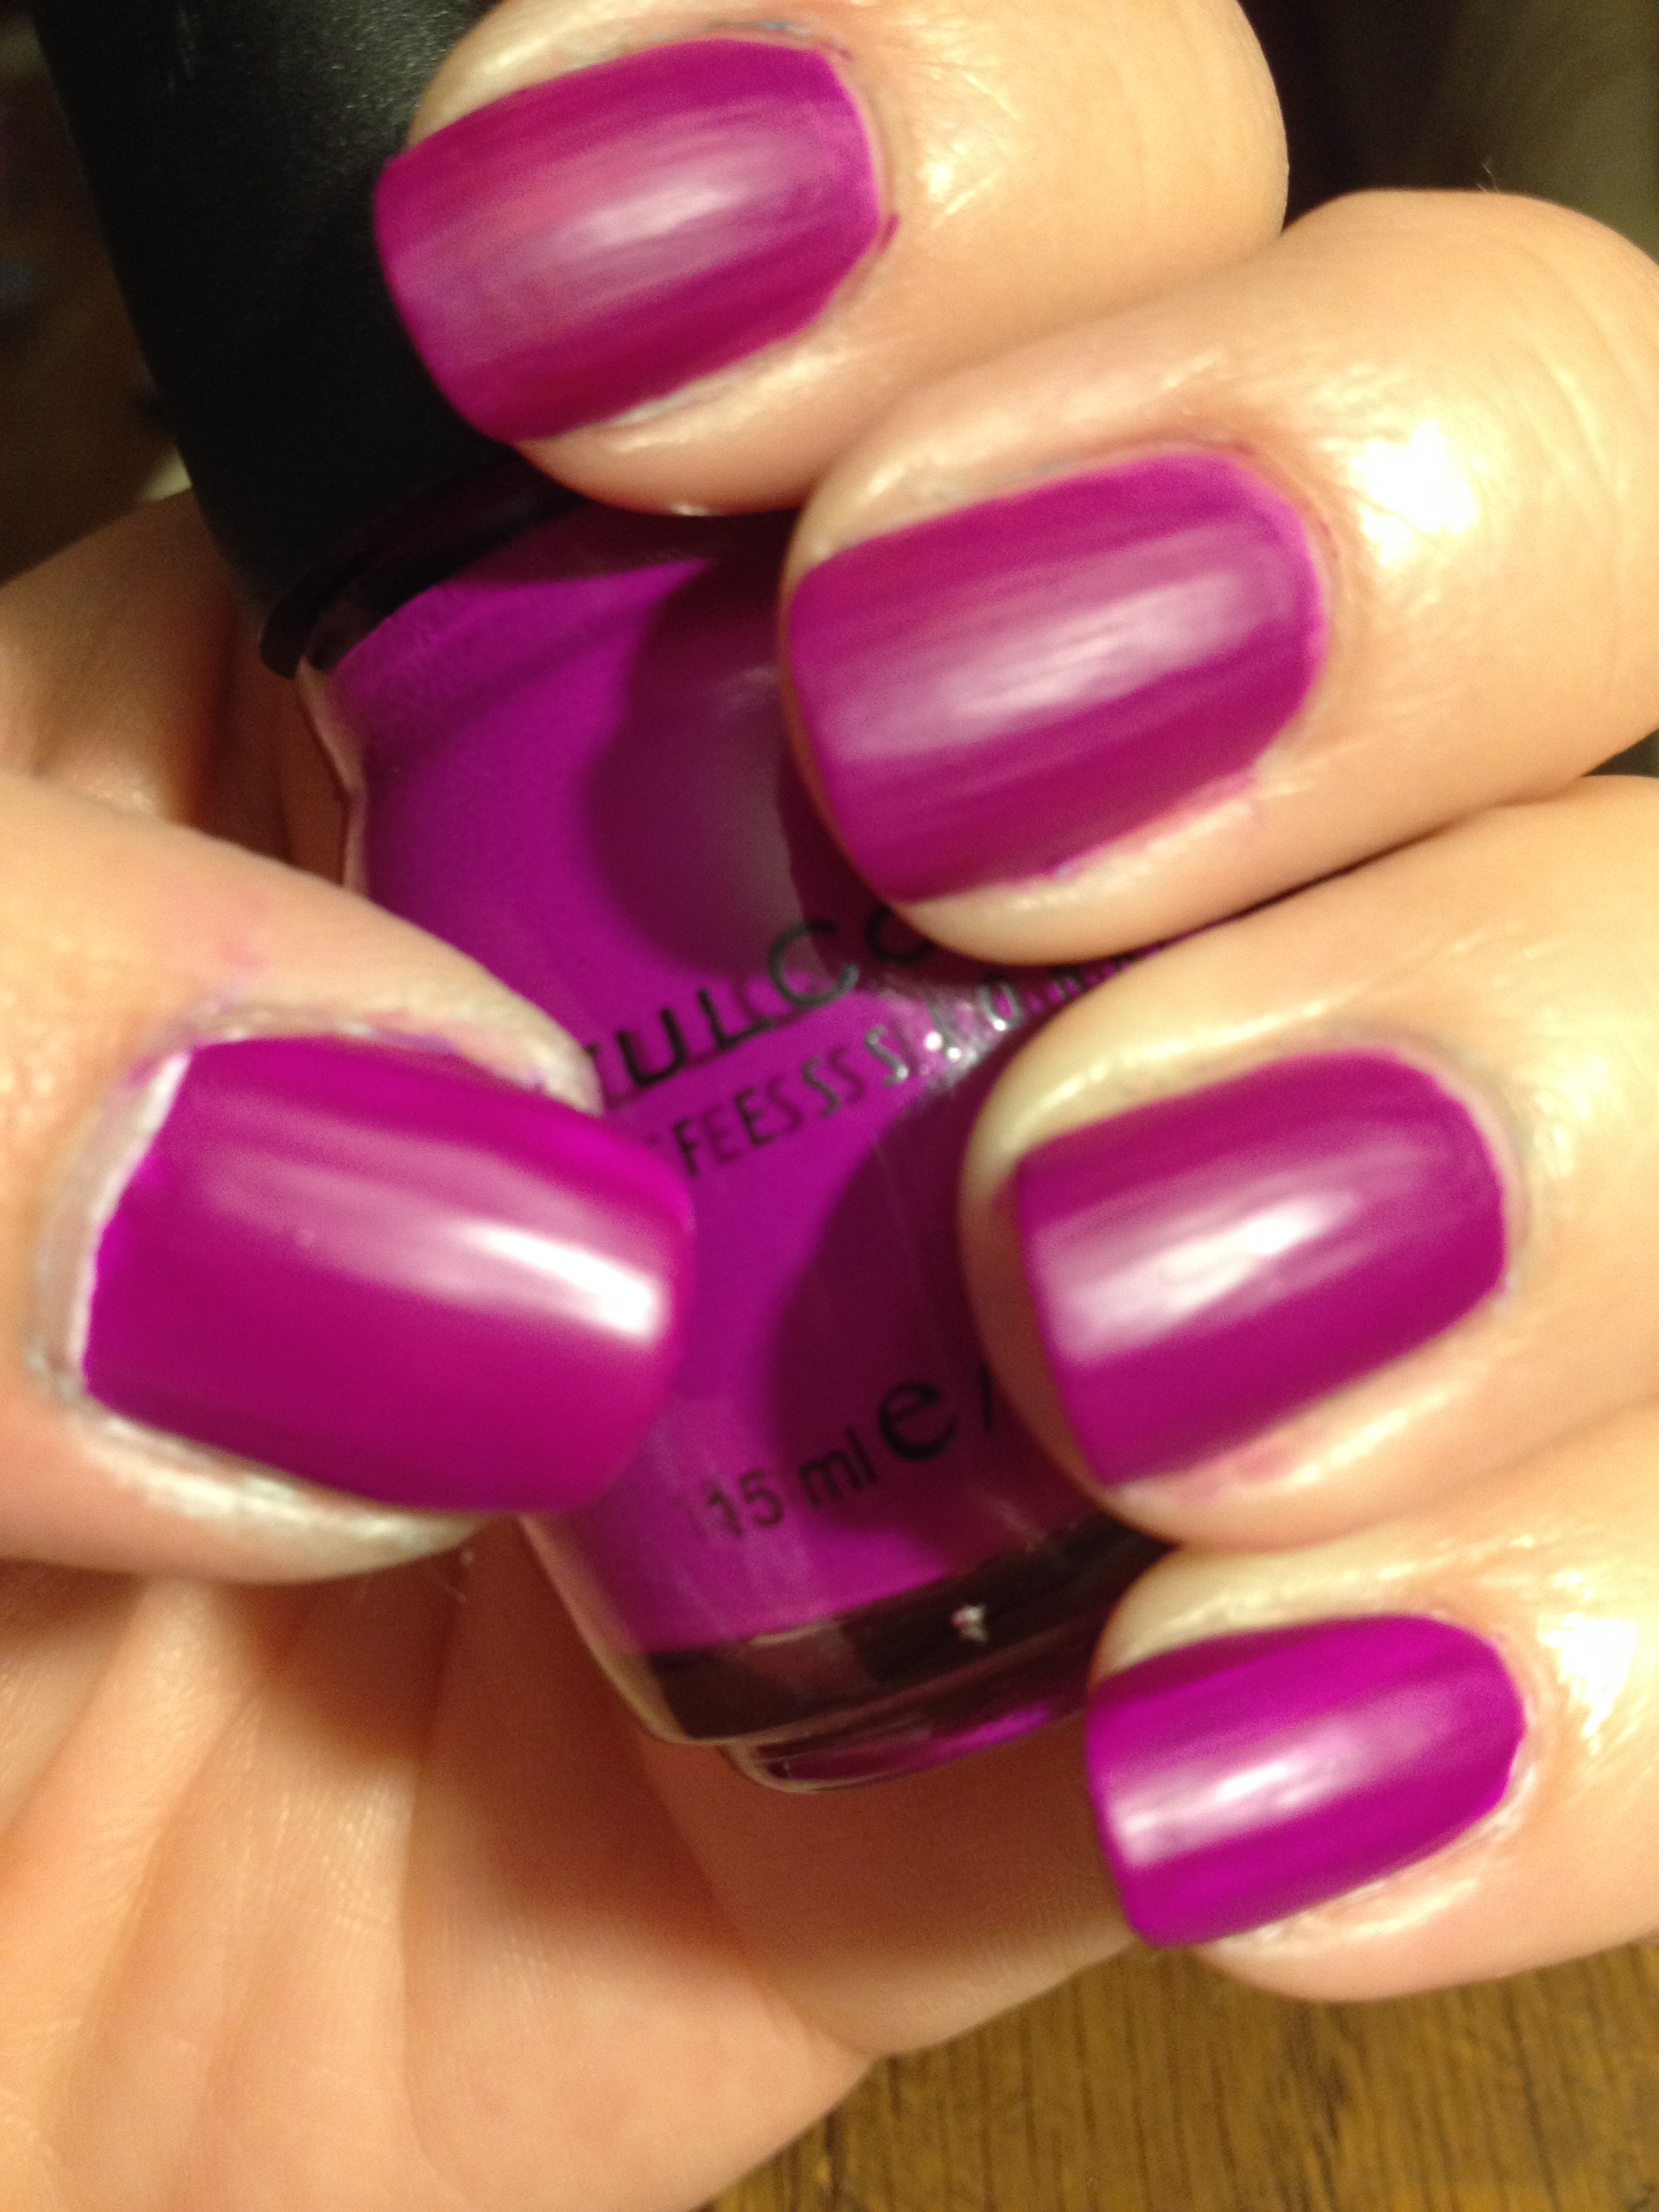
It seems like pretty much every blogger and YouTuber has listed their 14 favorites from 2014.  I’m totally jumping on that bandwagon.  This was tough, but I did it.  There were a few polishes that it pained me to leave out, but I finally narrowed it down to the 14 polishes that I just couldn’t stop reaching for last year.  Here they are:

IMG_4262
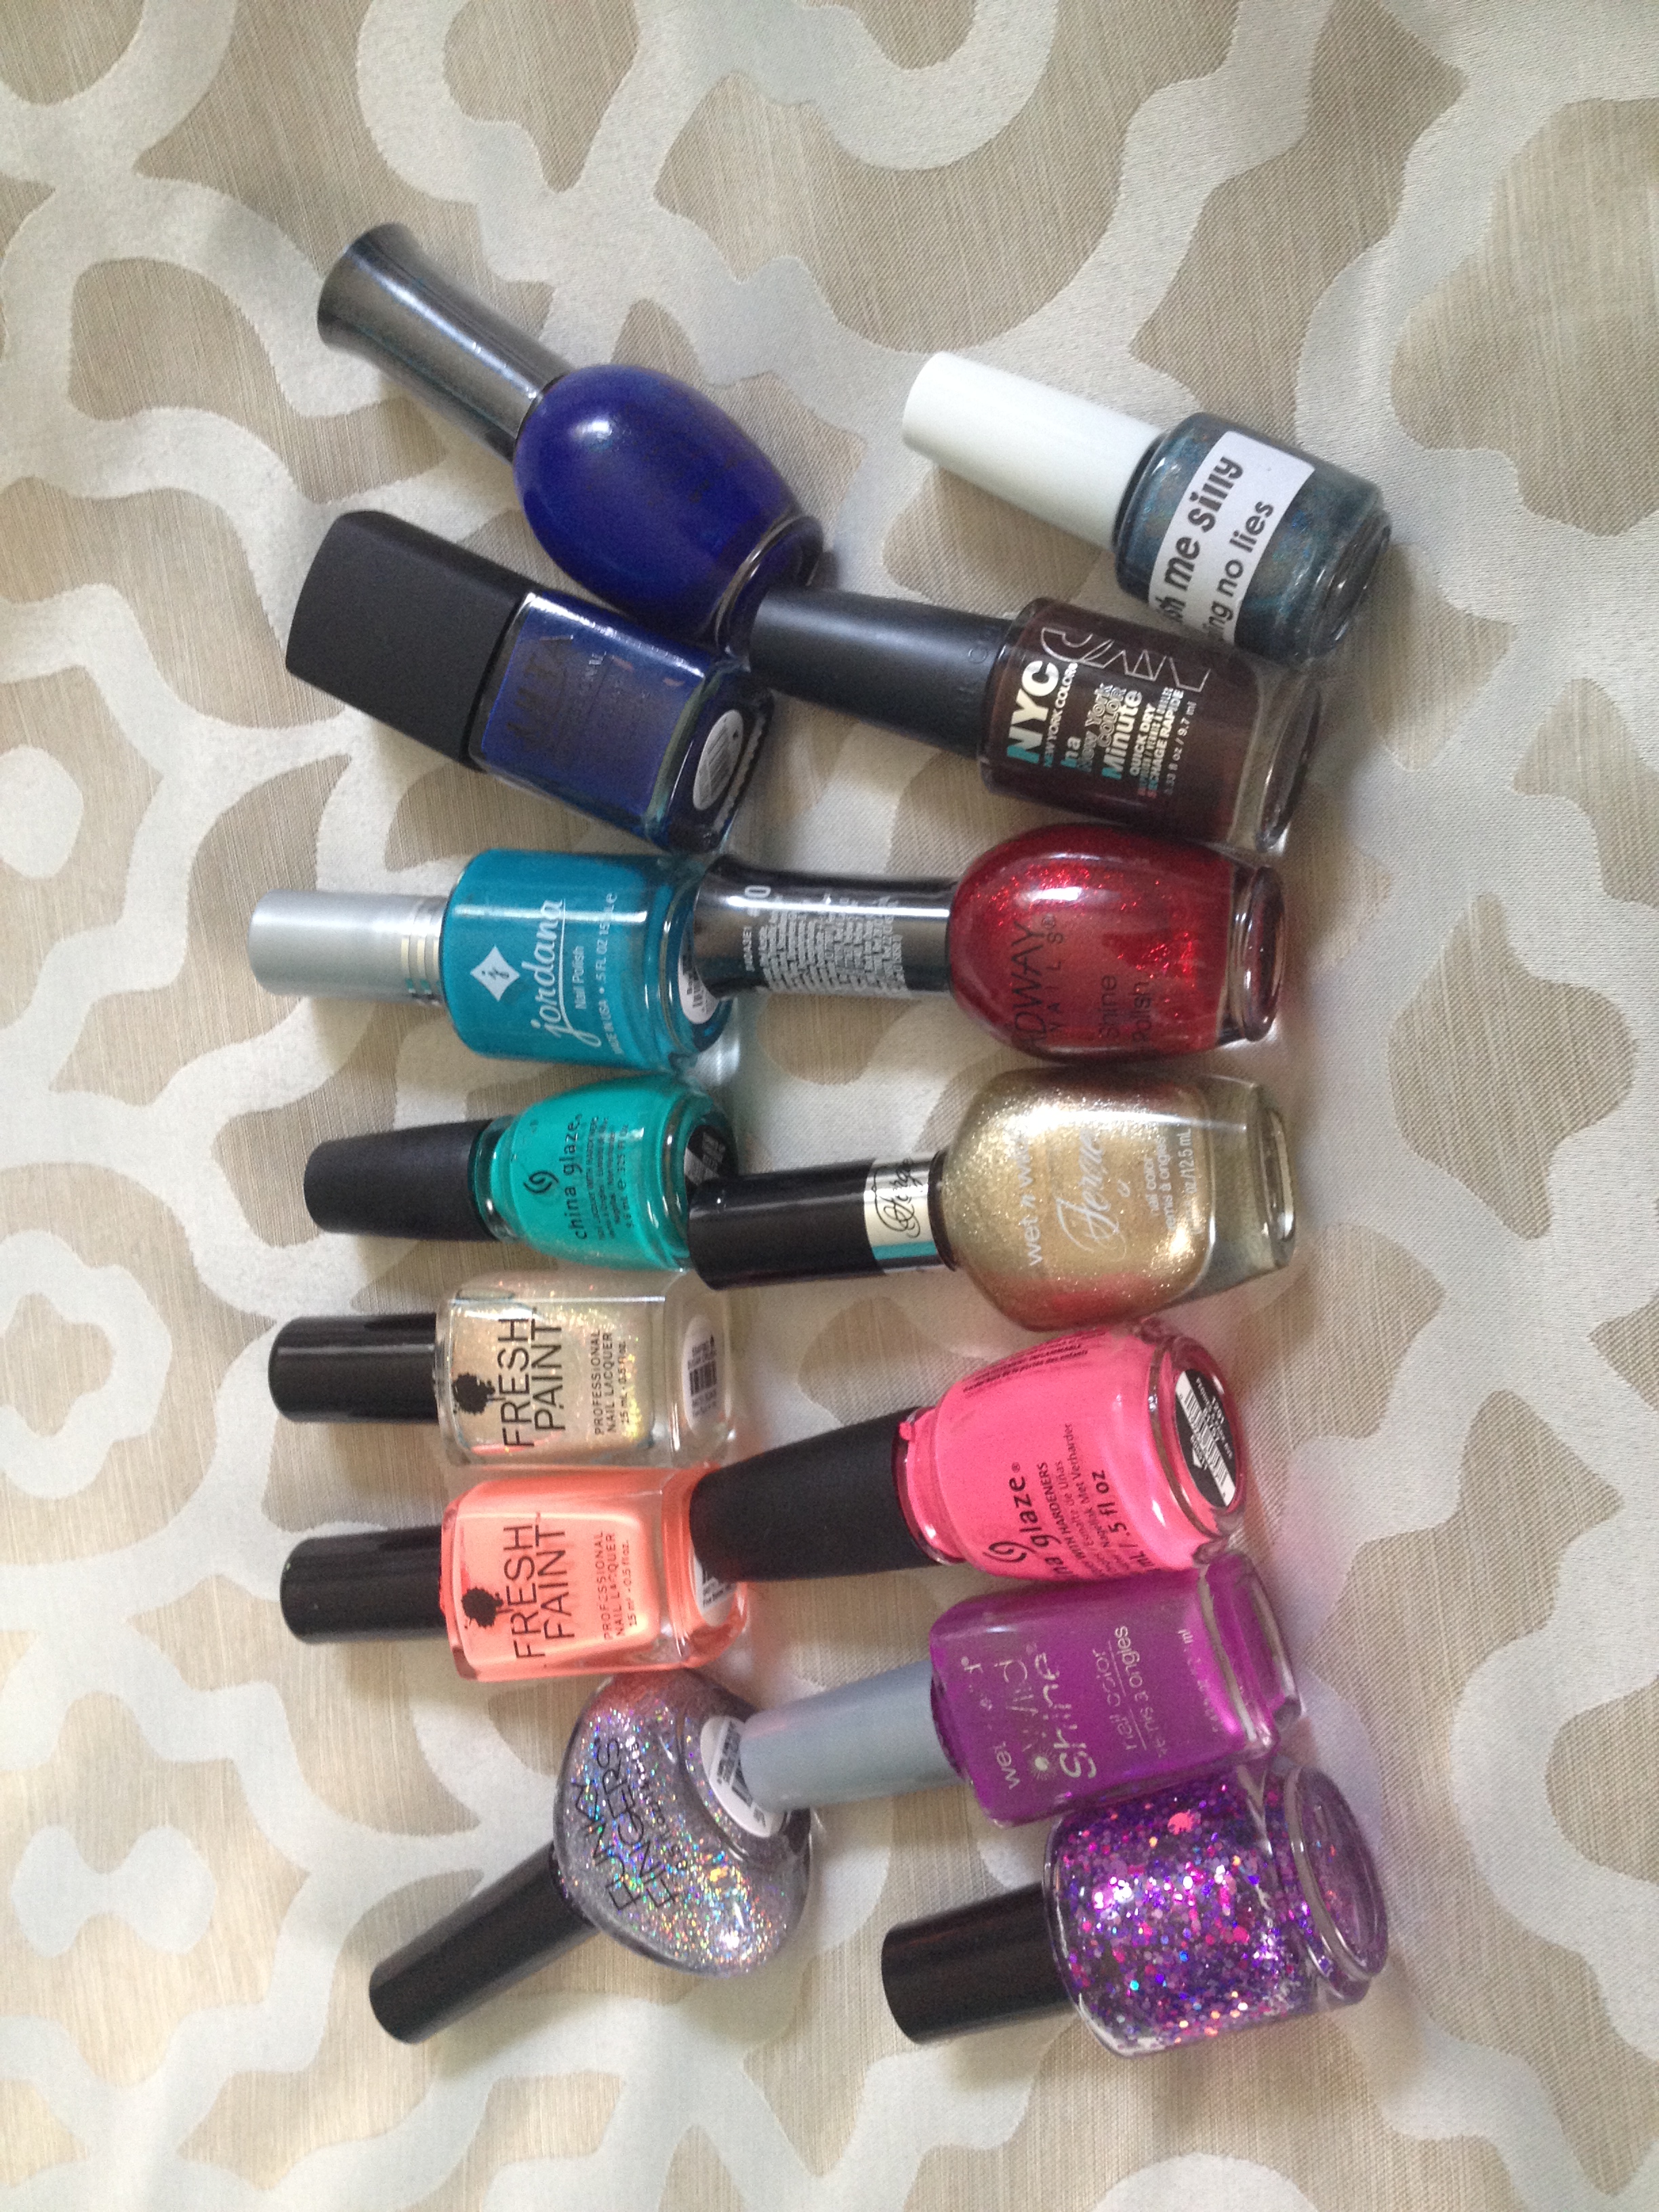
Aren’t they so pretty?

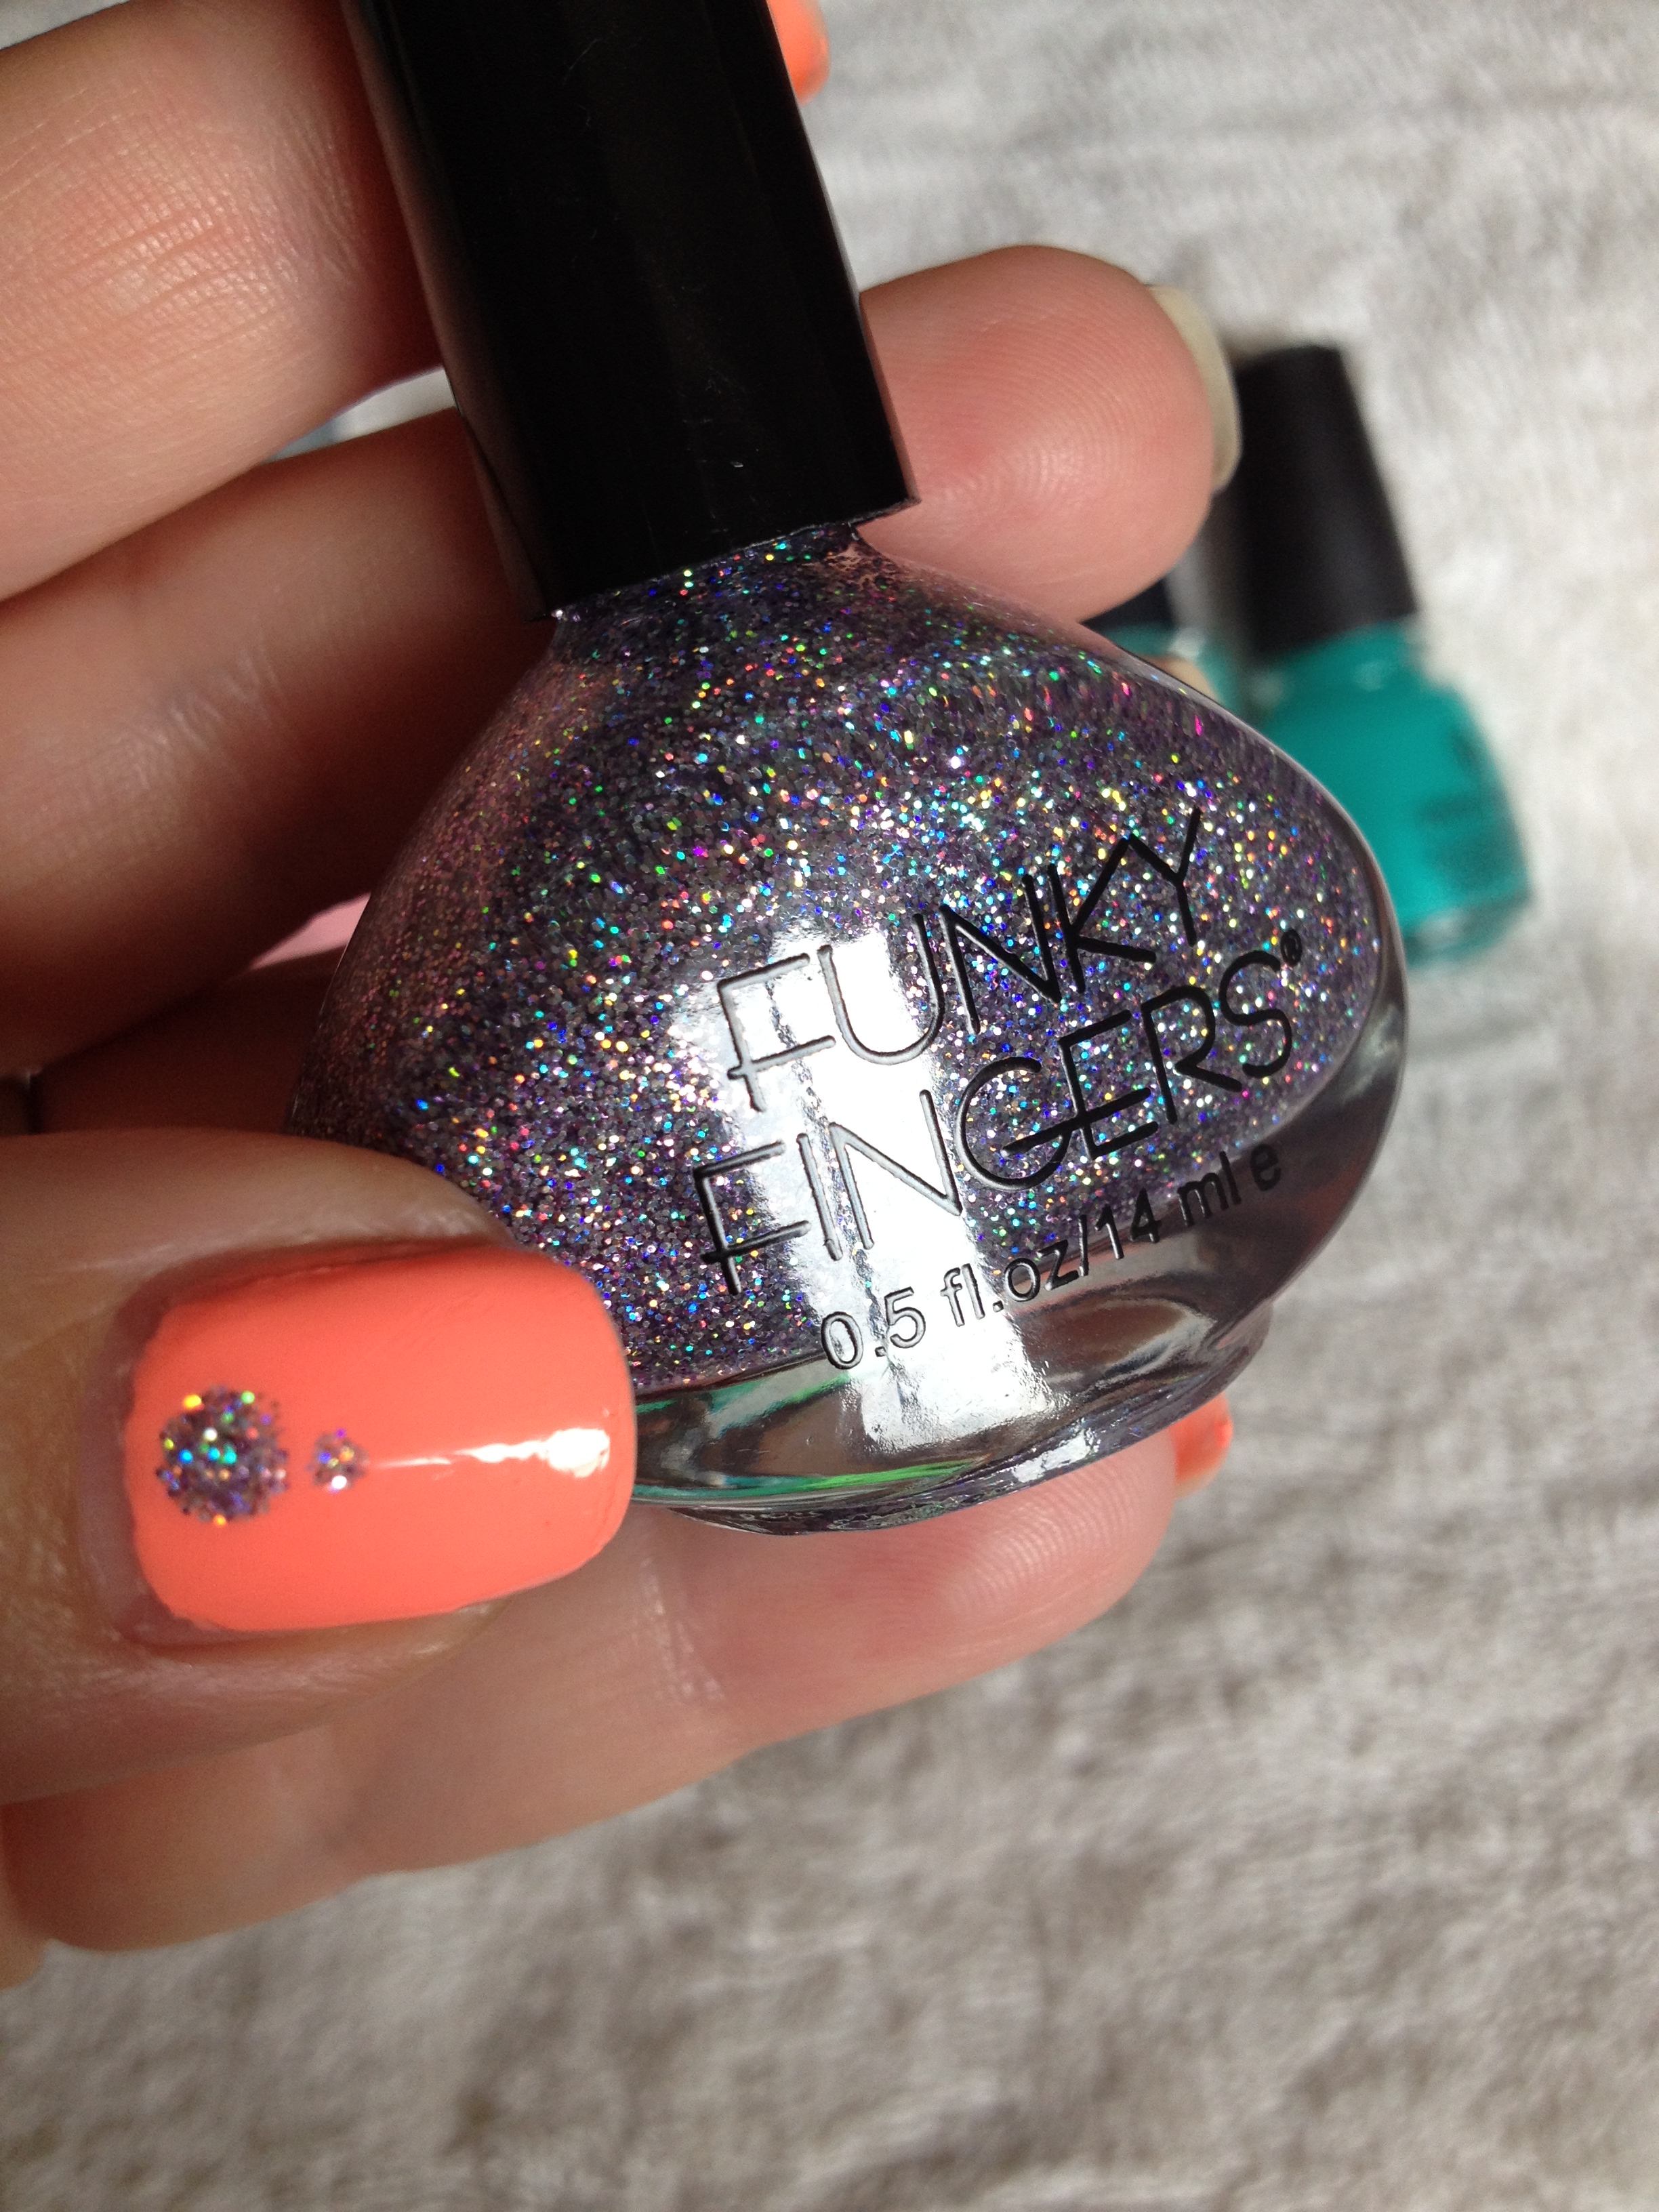
Starting in the upper left corner we have Funky Finger – Sand & Stilettos.

IMG_2698IMG_2695IMG_3219

This is just the best sparkly polish ever.  It’s available exclusively at 5 Below.  I’ve seen it at my local 5 Below within the past few weeks, so you can still grab this stunner for yourself for a mere $2.

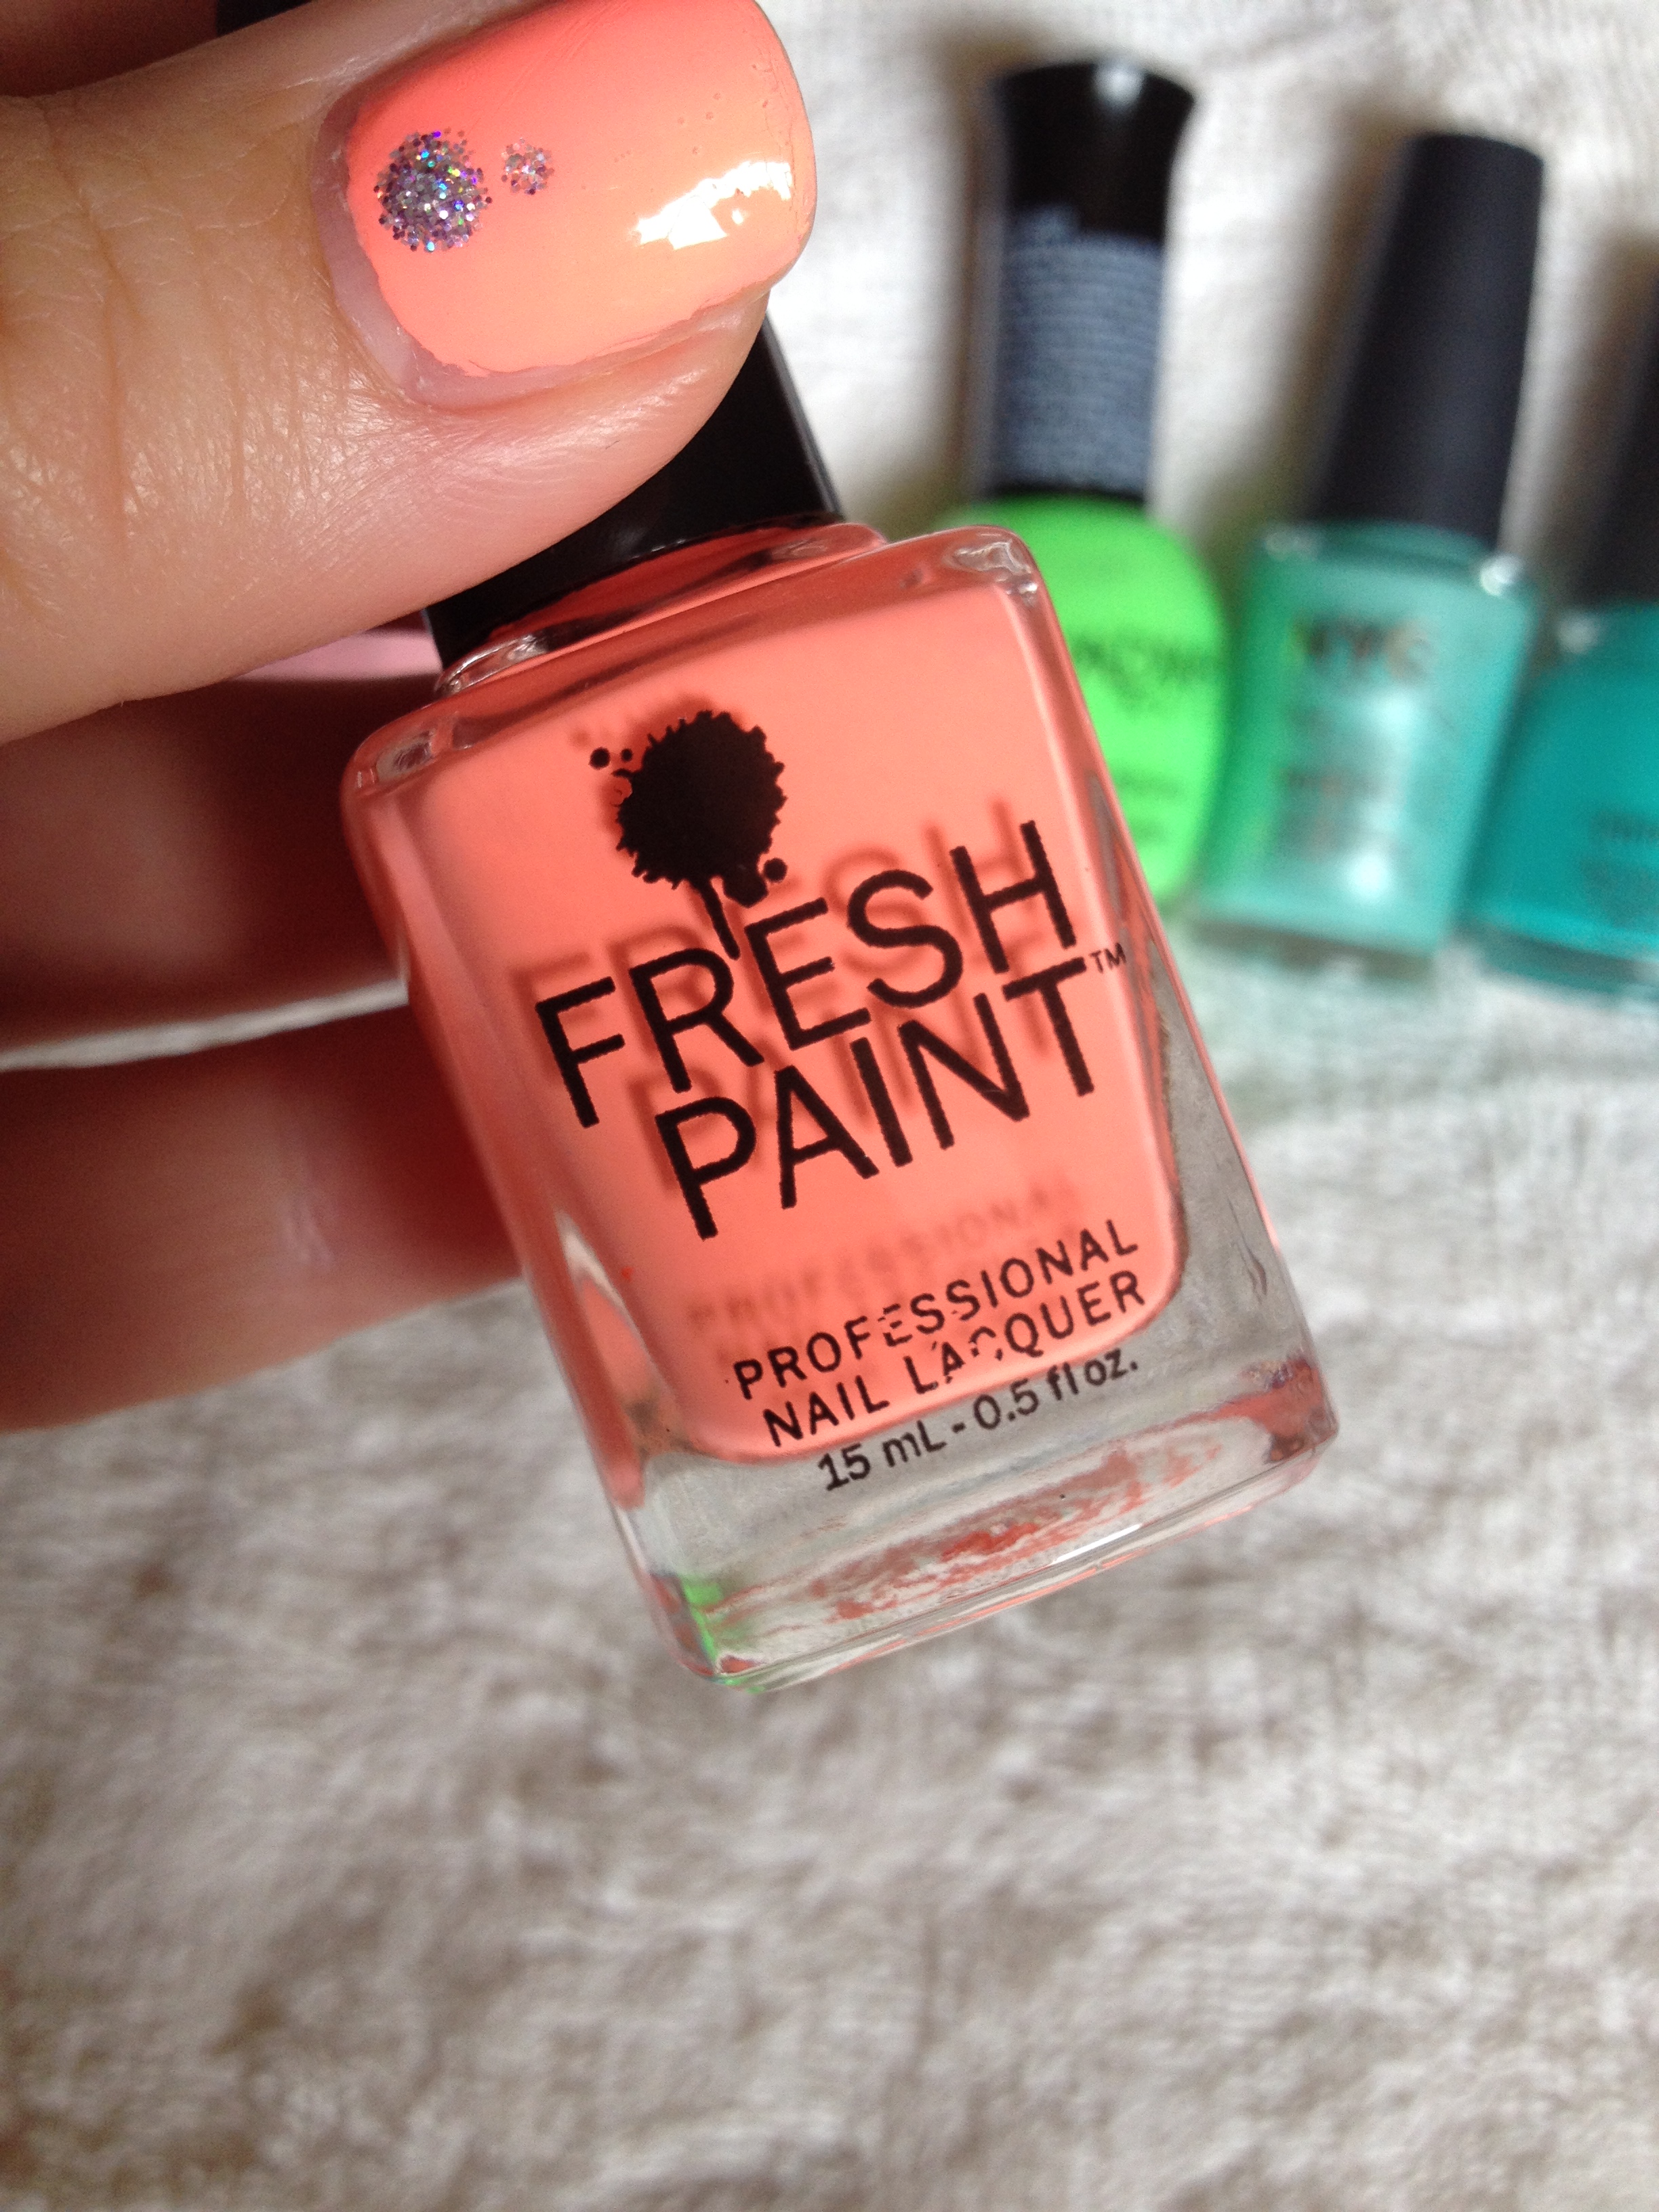
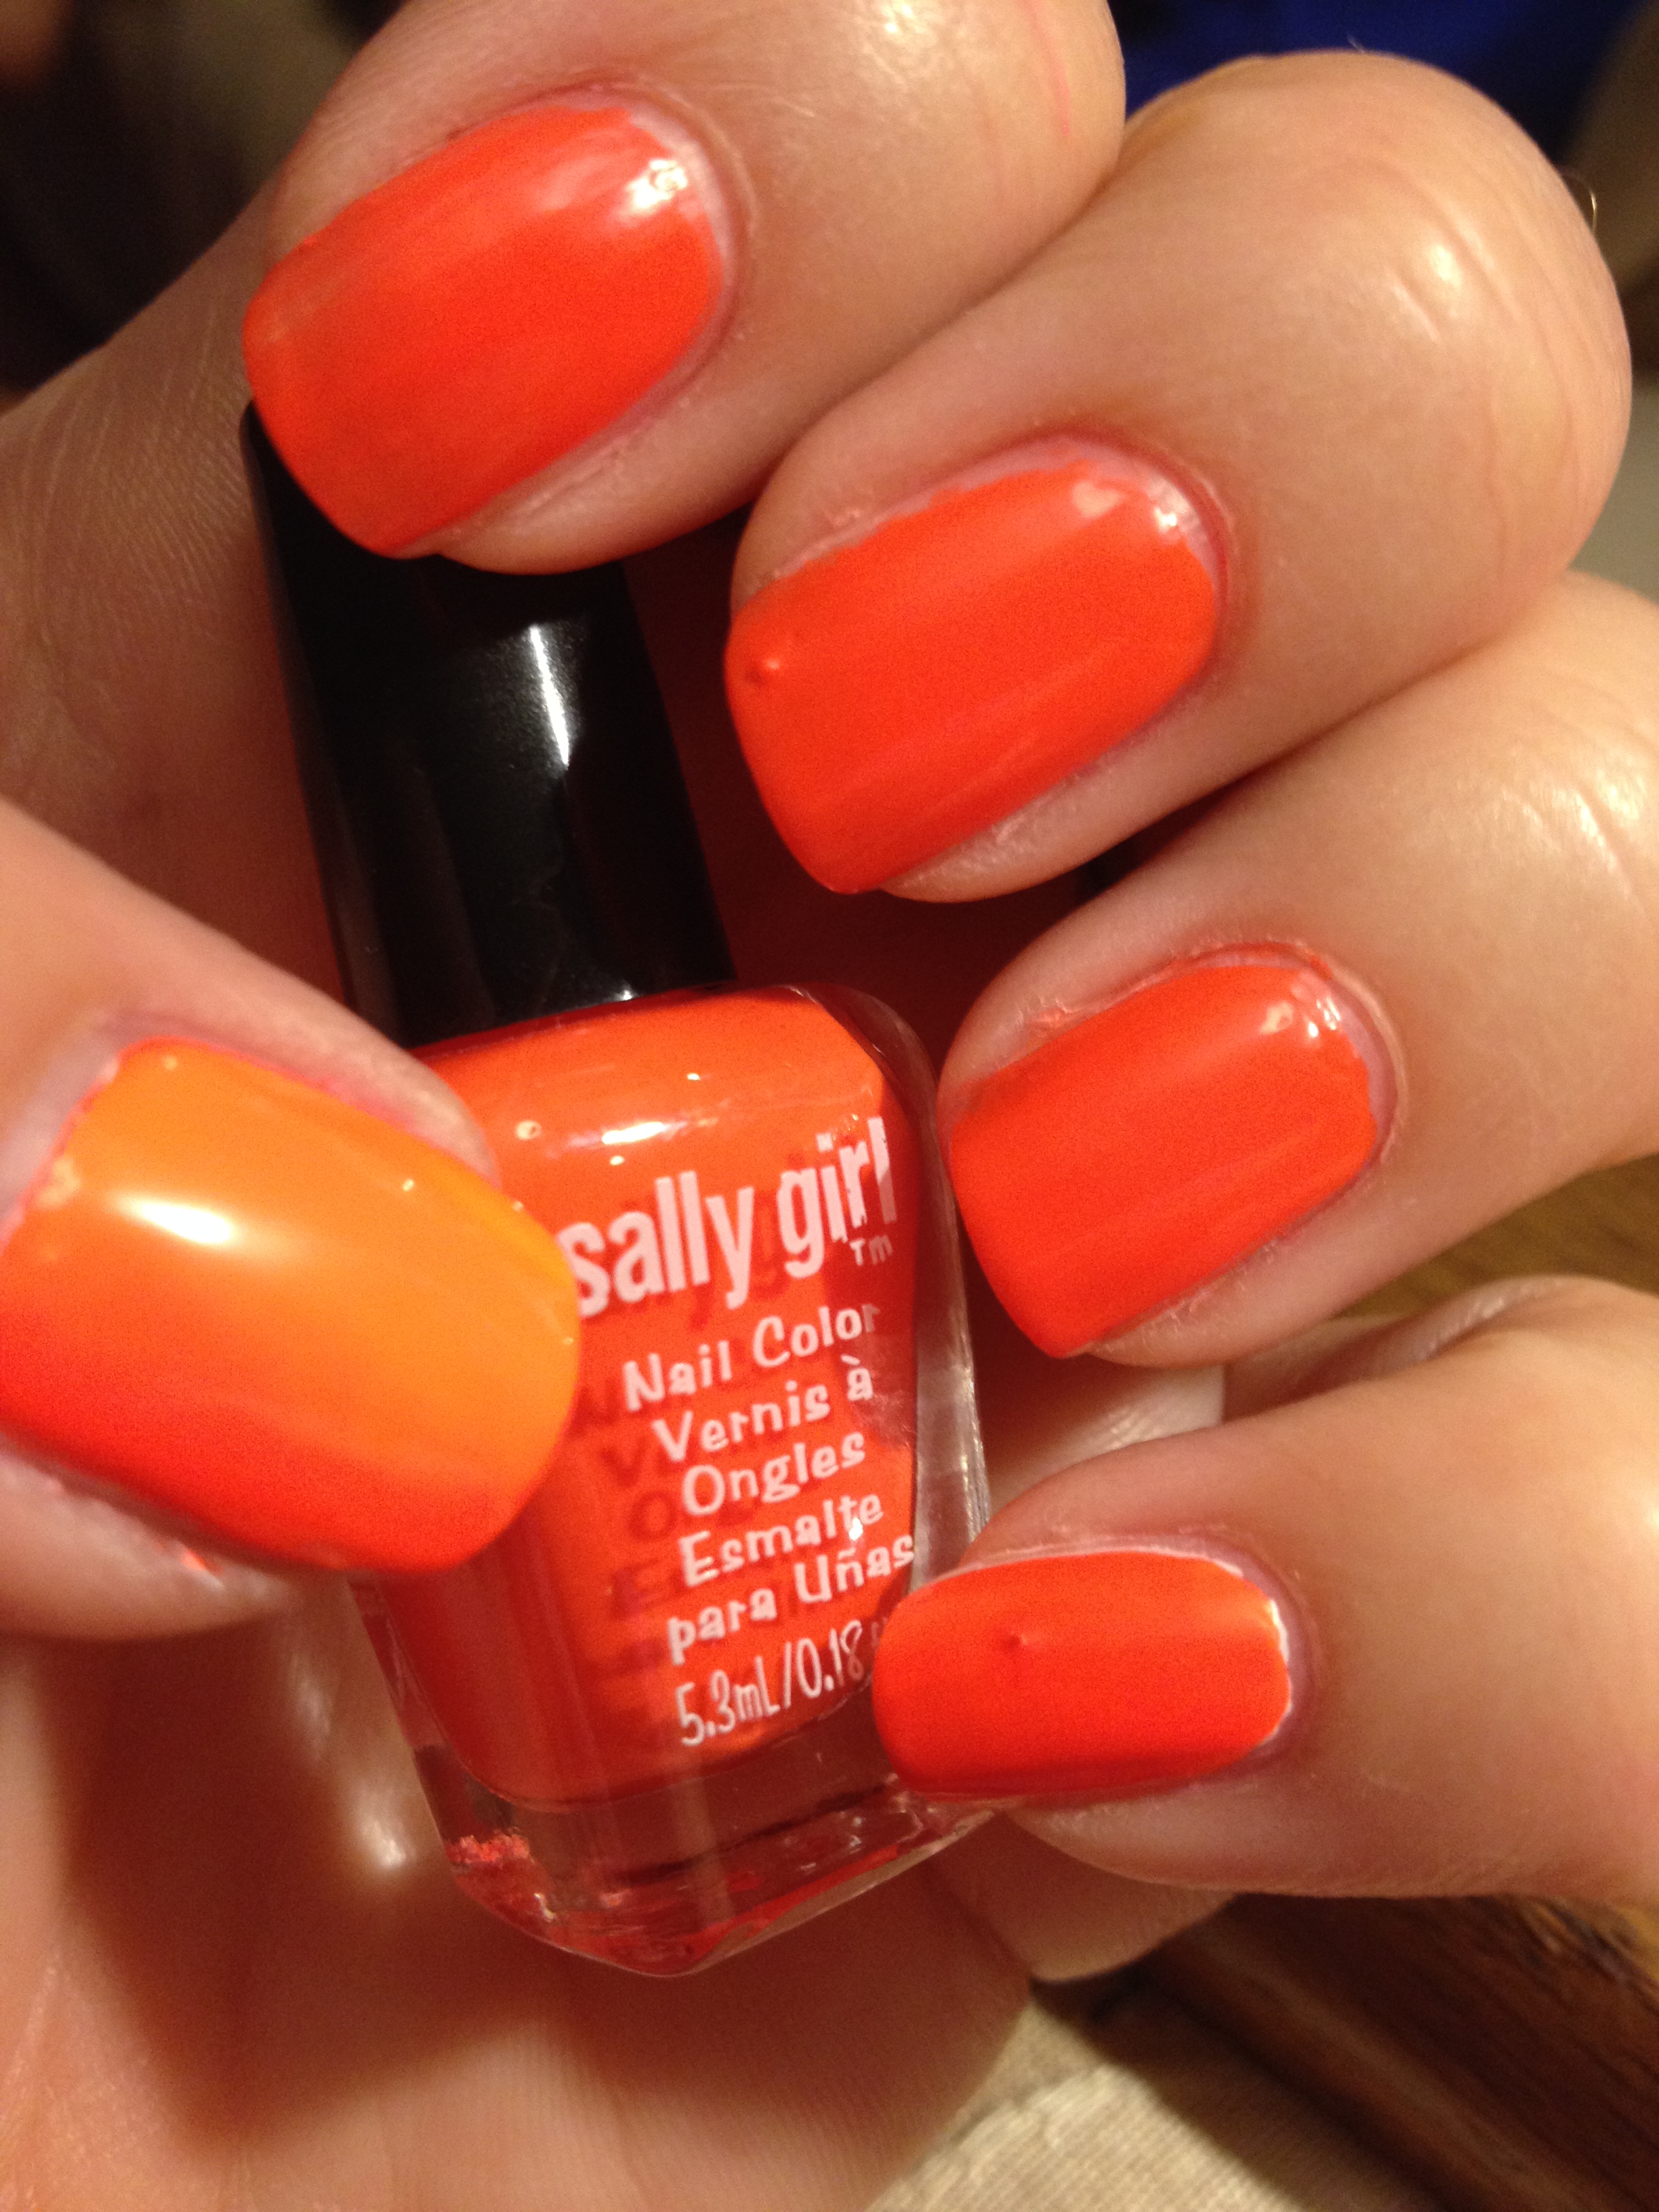
Next, also available exclusively from 5 Below is Fresh Paint – Guava.  Fabulous color, fabulous formula.  A must-have for summer.  Here it is paired with Sand & Stillettos:

IMG_2727IMG_2681

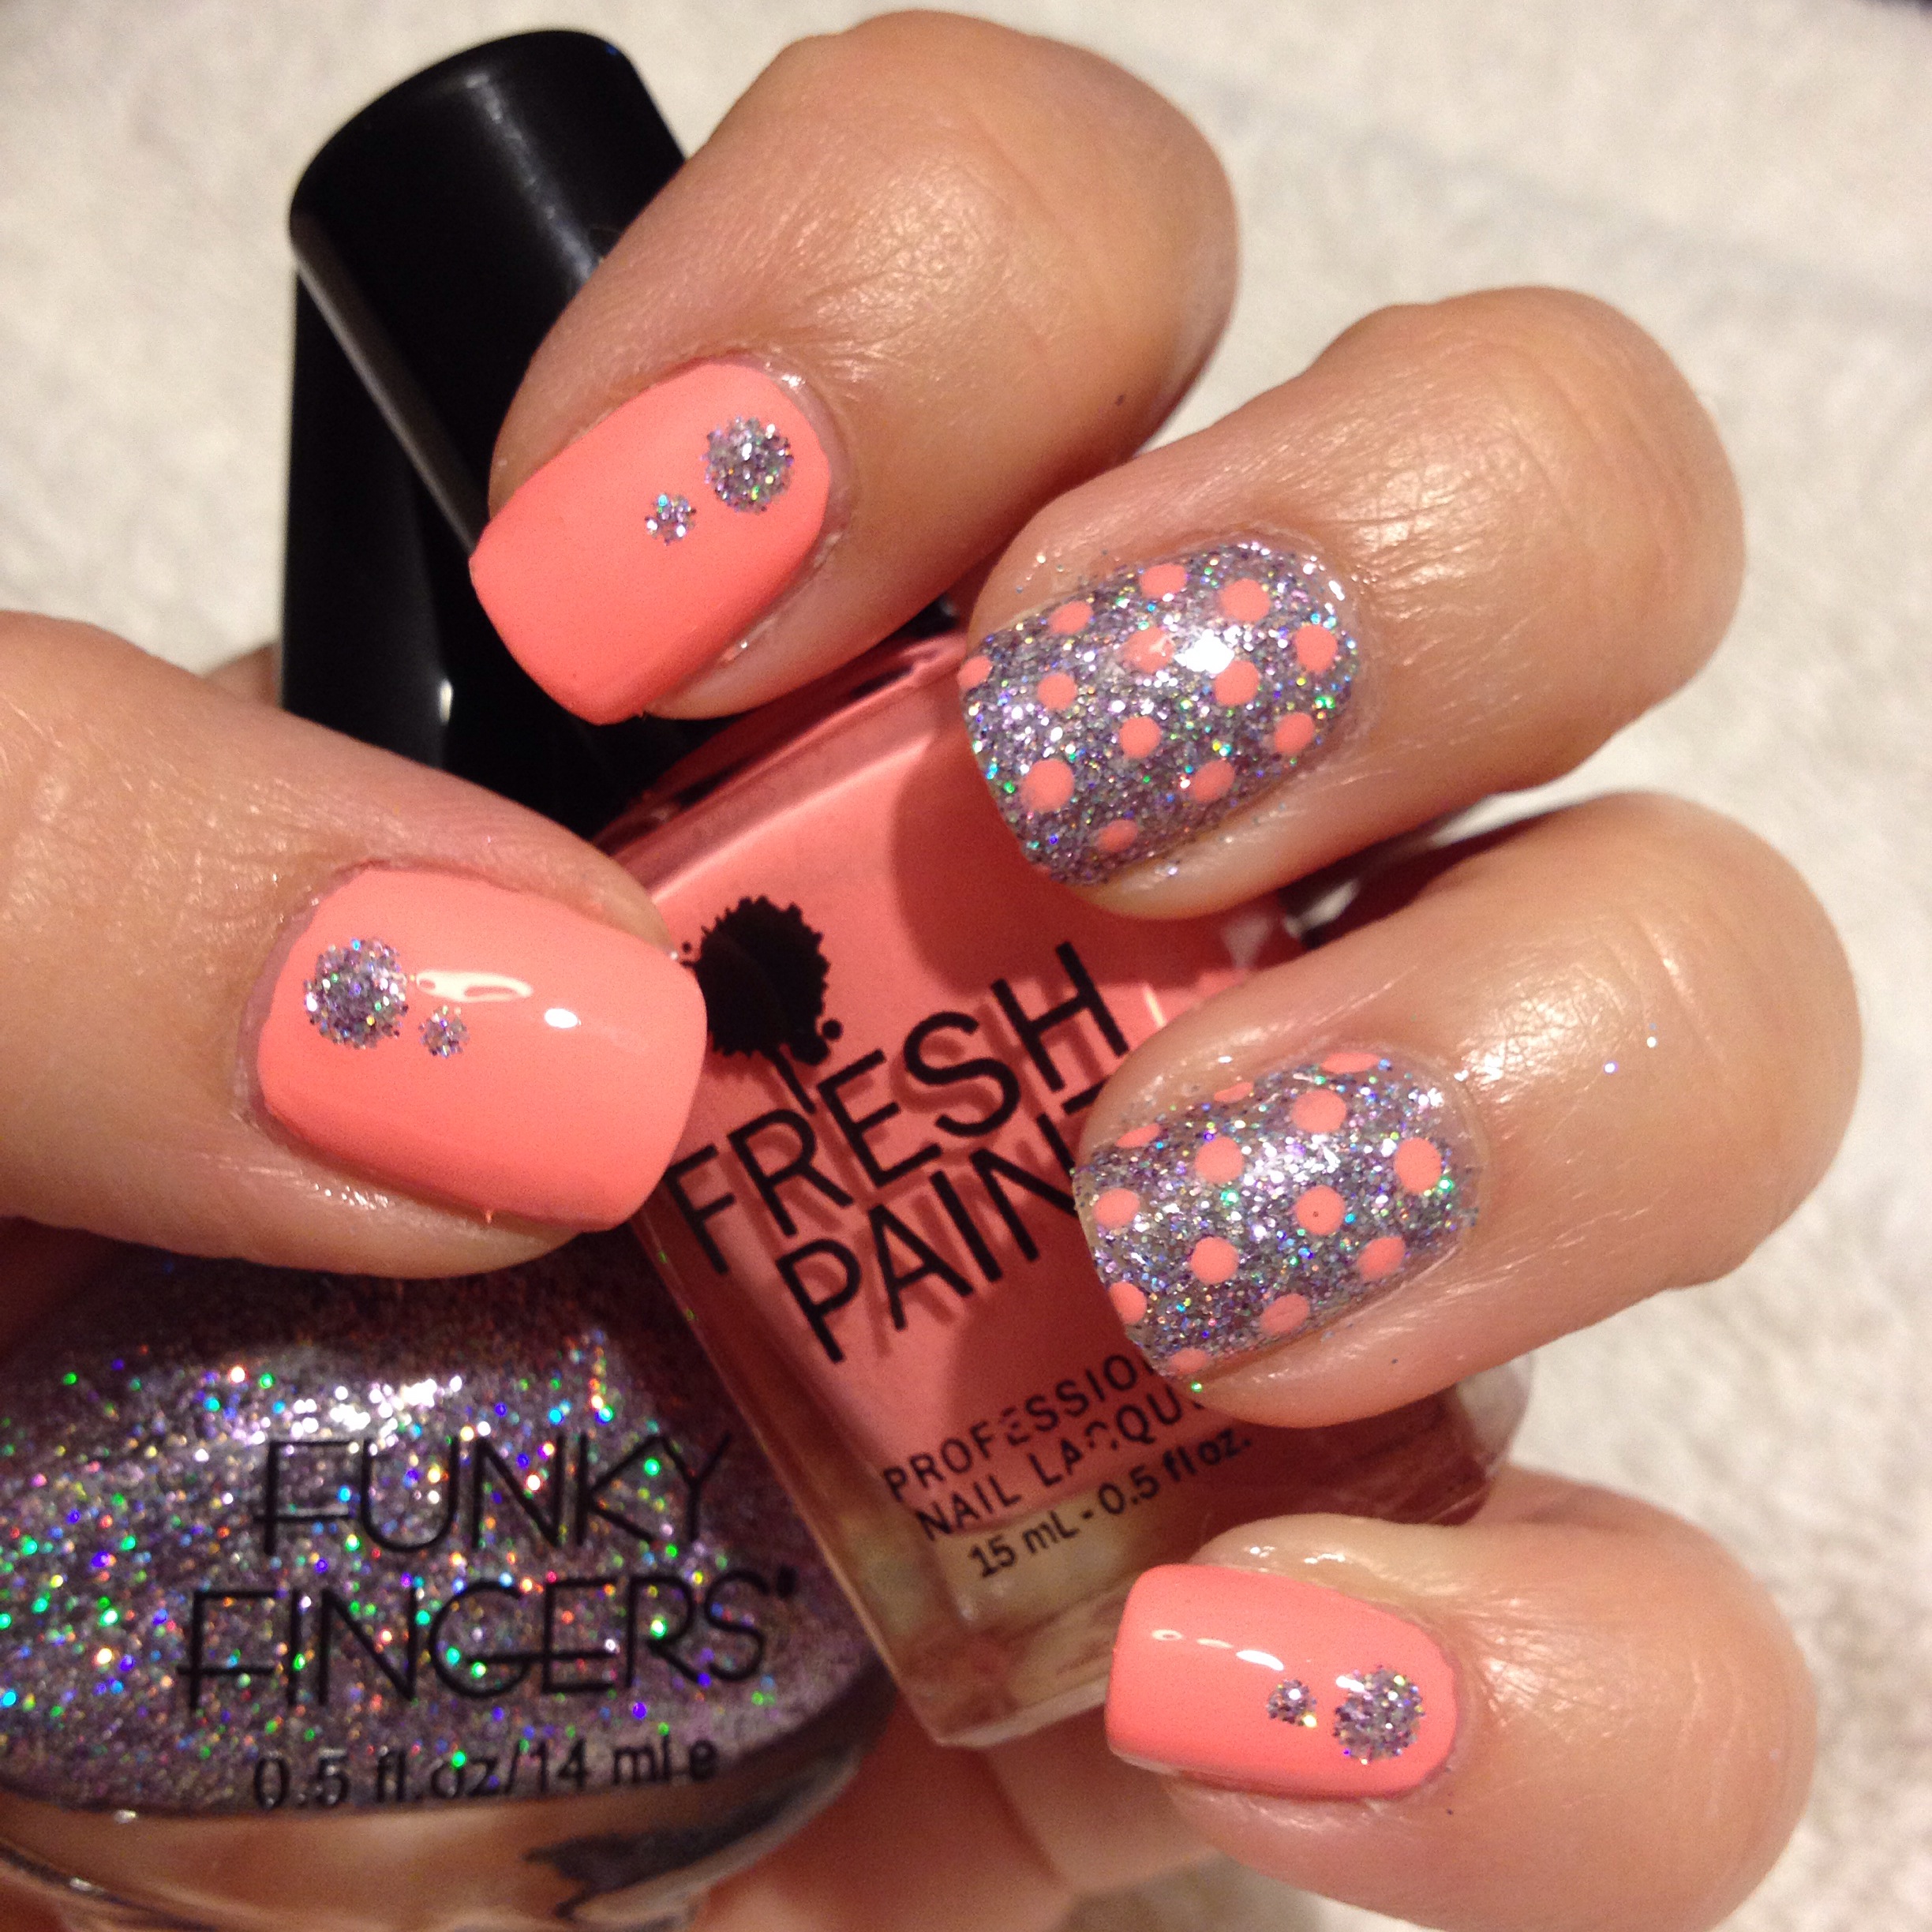
It’s just the perfect neon peachy color, and a perfect dupe for China Glaze – Flip Flop Fantasy.  I just couldn’t get enough of this color over the summer.

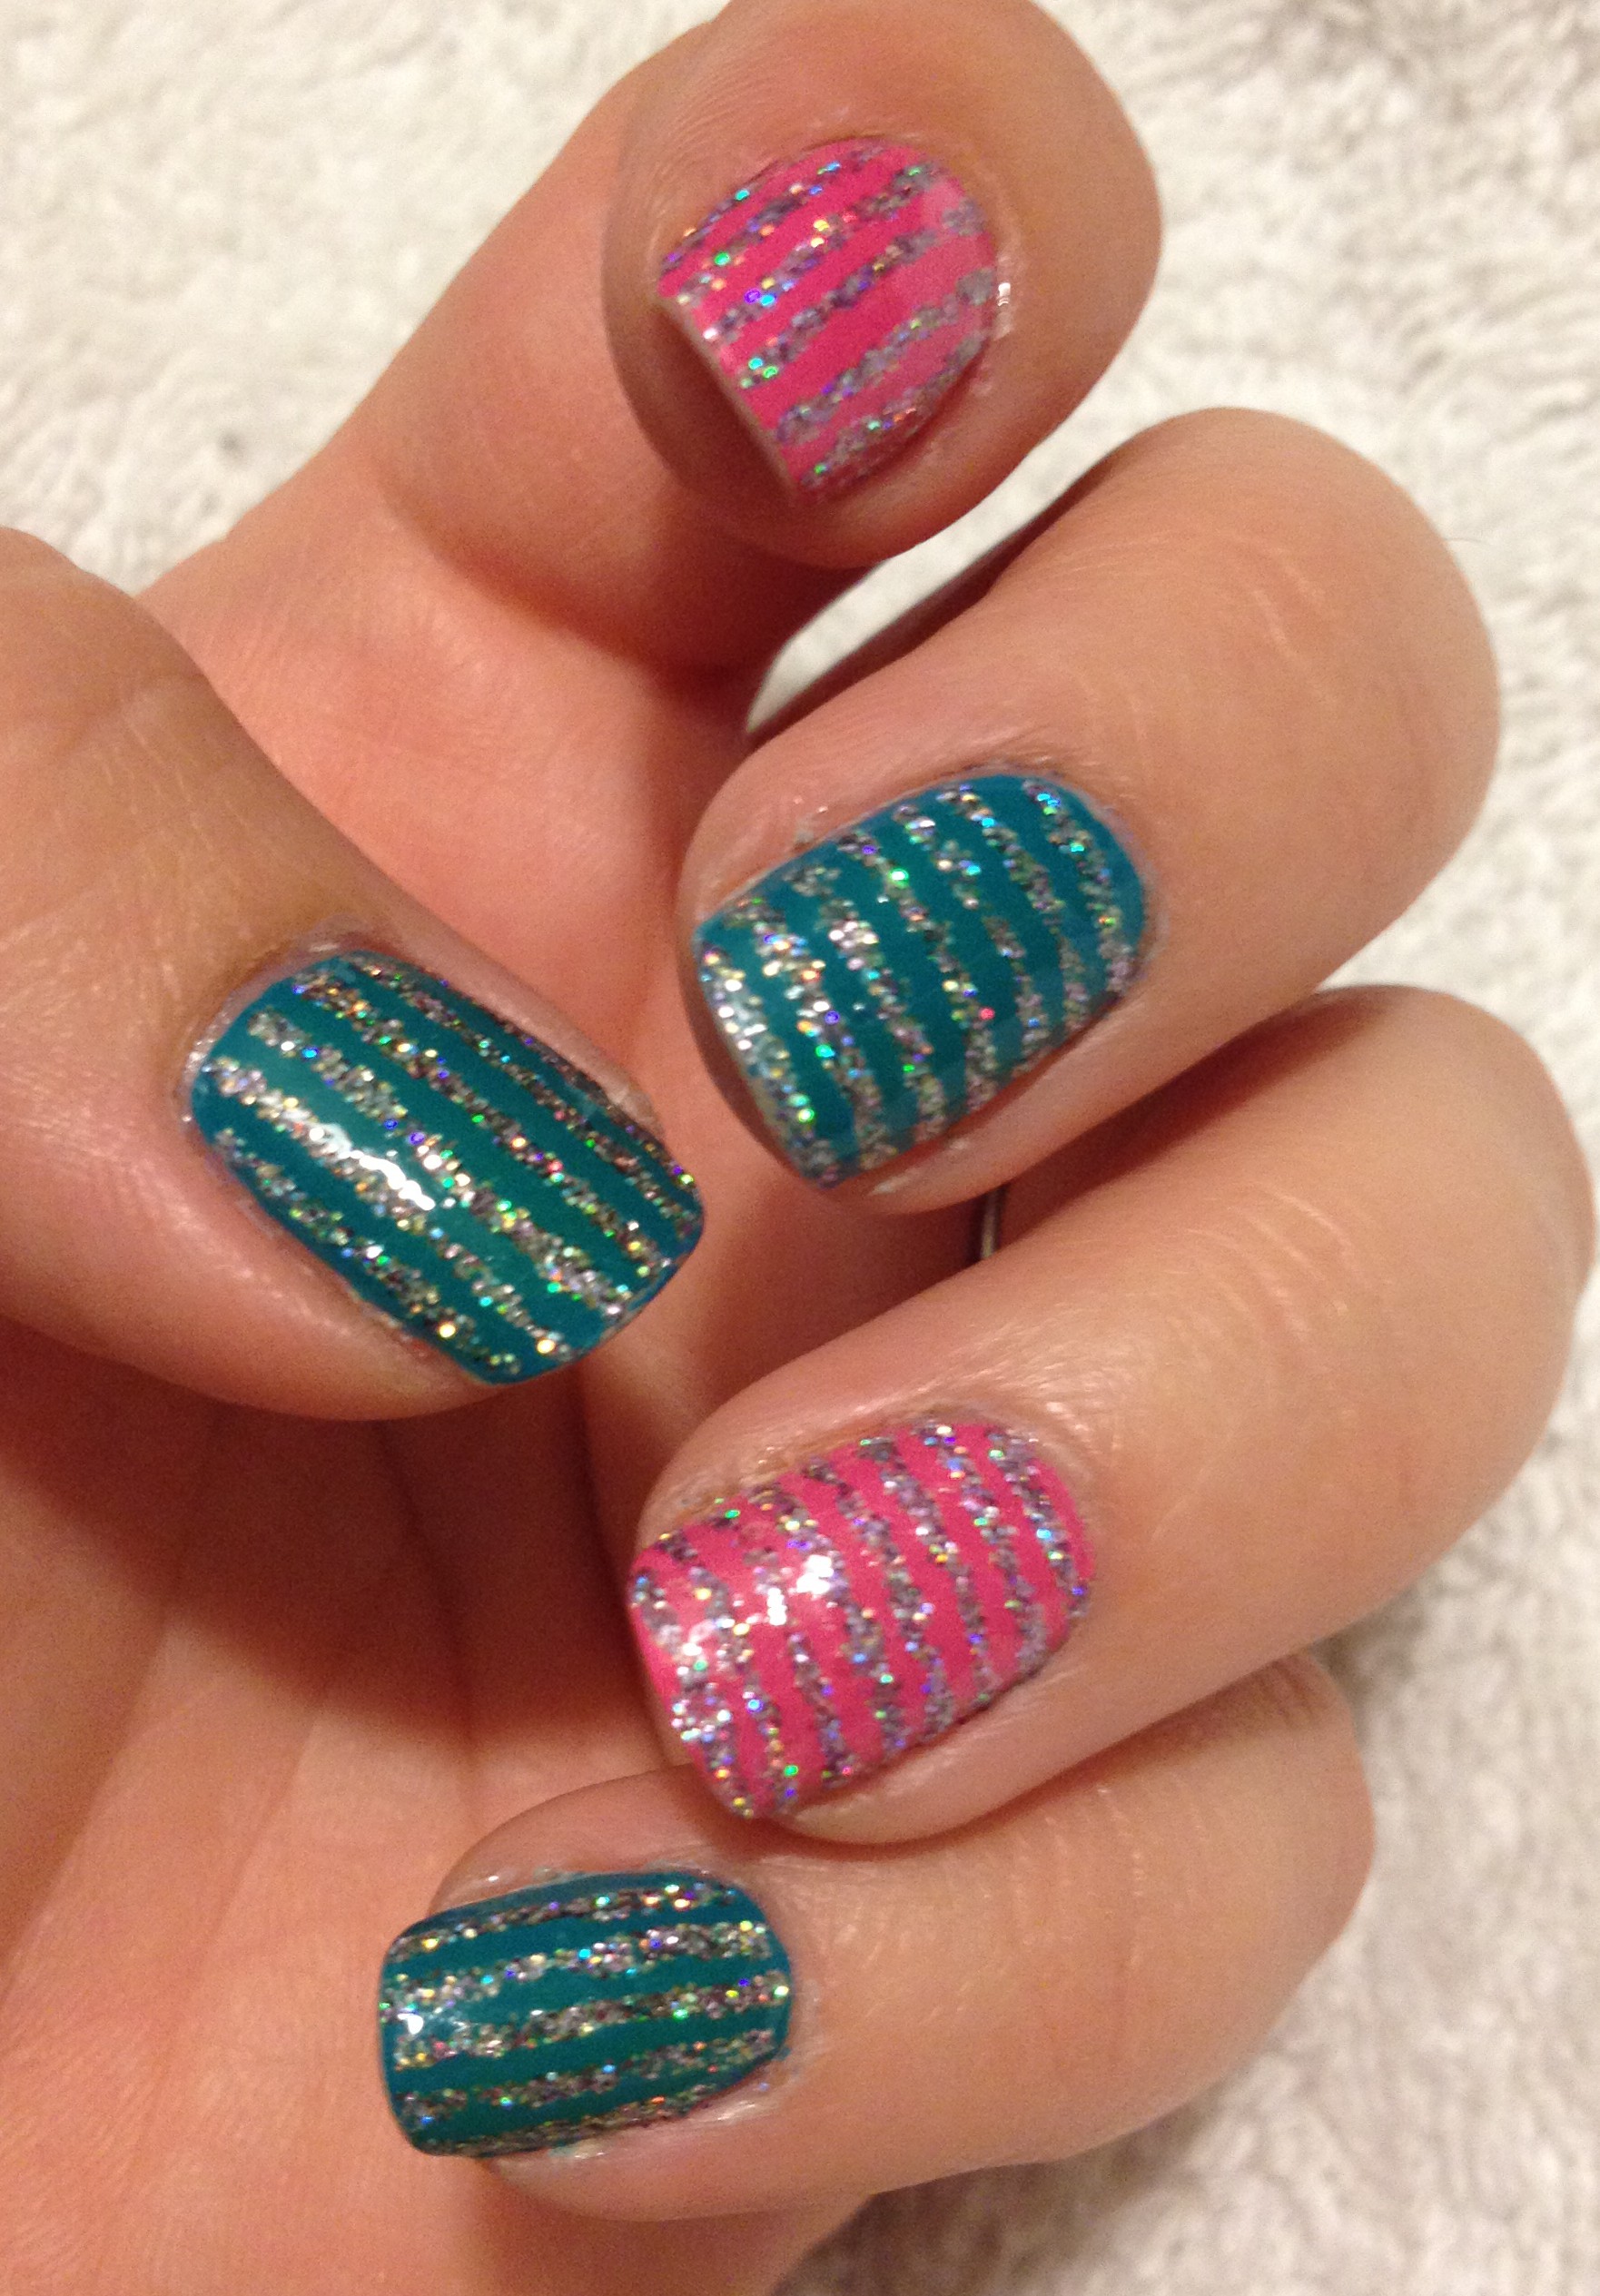
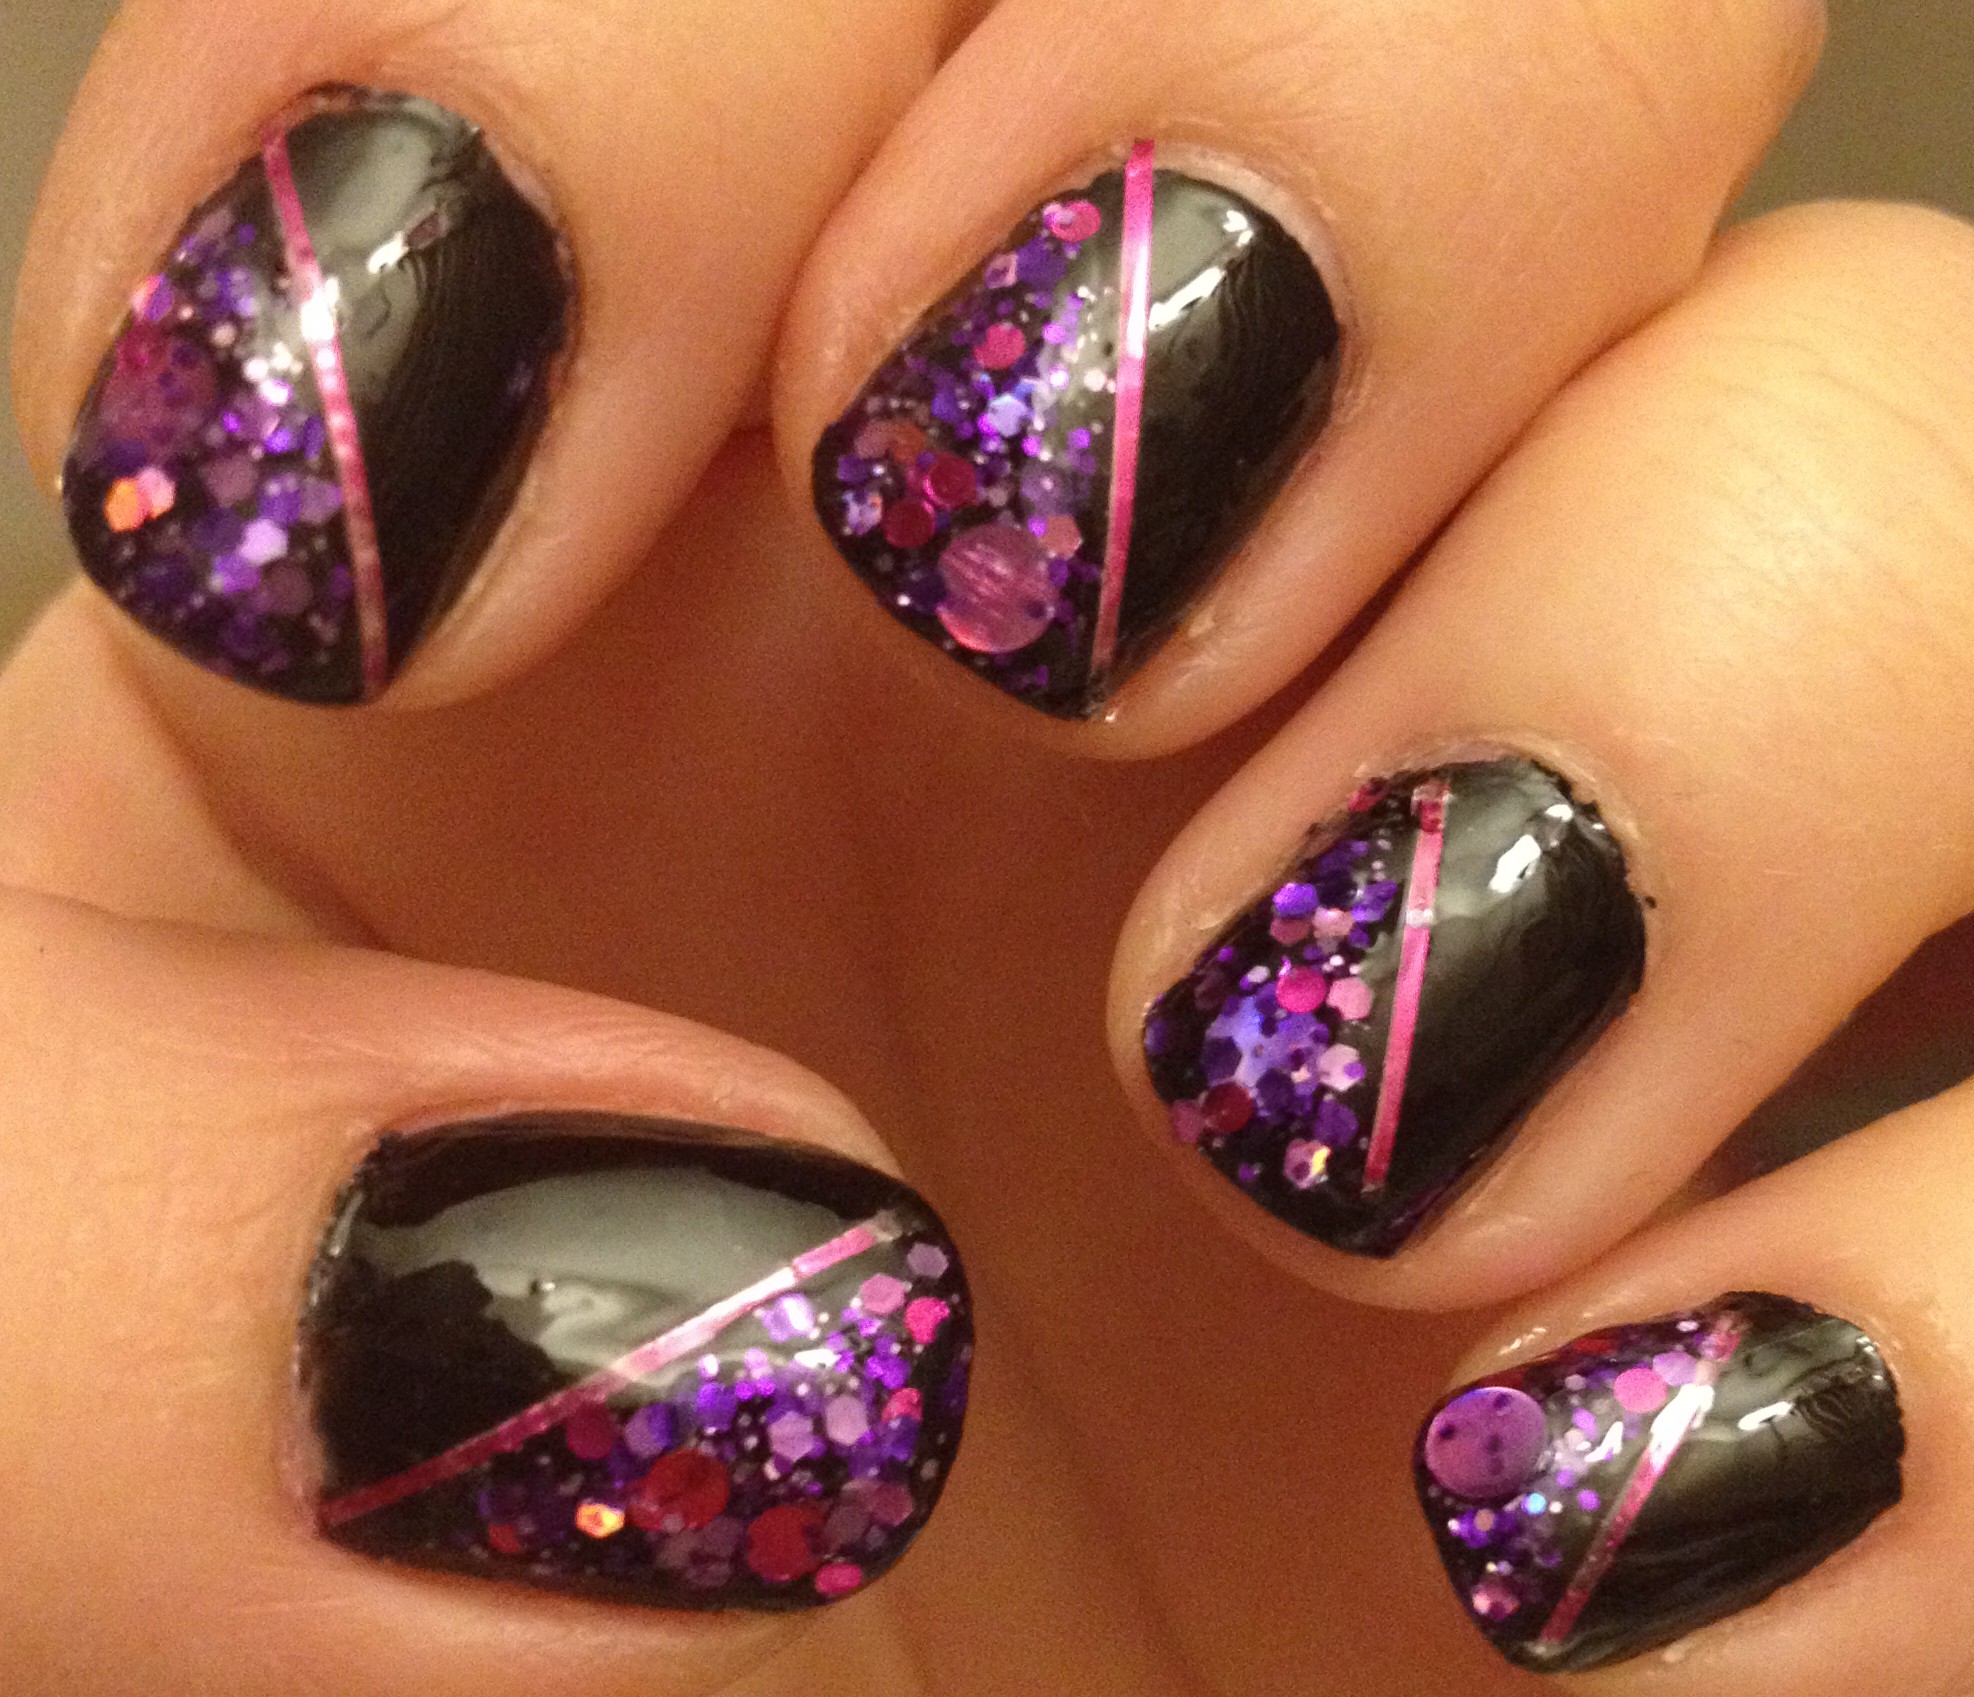
Next, we have one more 5 Below polish: Fresh Paint – Sugar Crush.  This is the first true flaky polish that I’ve ever owned.

IMG_3560

This polish is a show-stopper over any dark color.  It’s mind blowing over black, teal, or dark purple, and I don’t know if I love it better shiny or matte.  You just can’t go wrong with this one.  I’m not sure if you can still find this at 5 Below or not, but if you see it there.  GRAB IT!

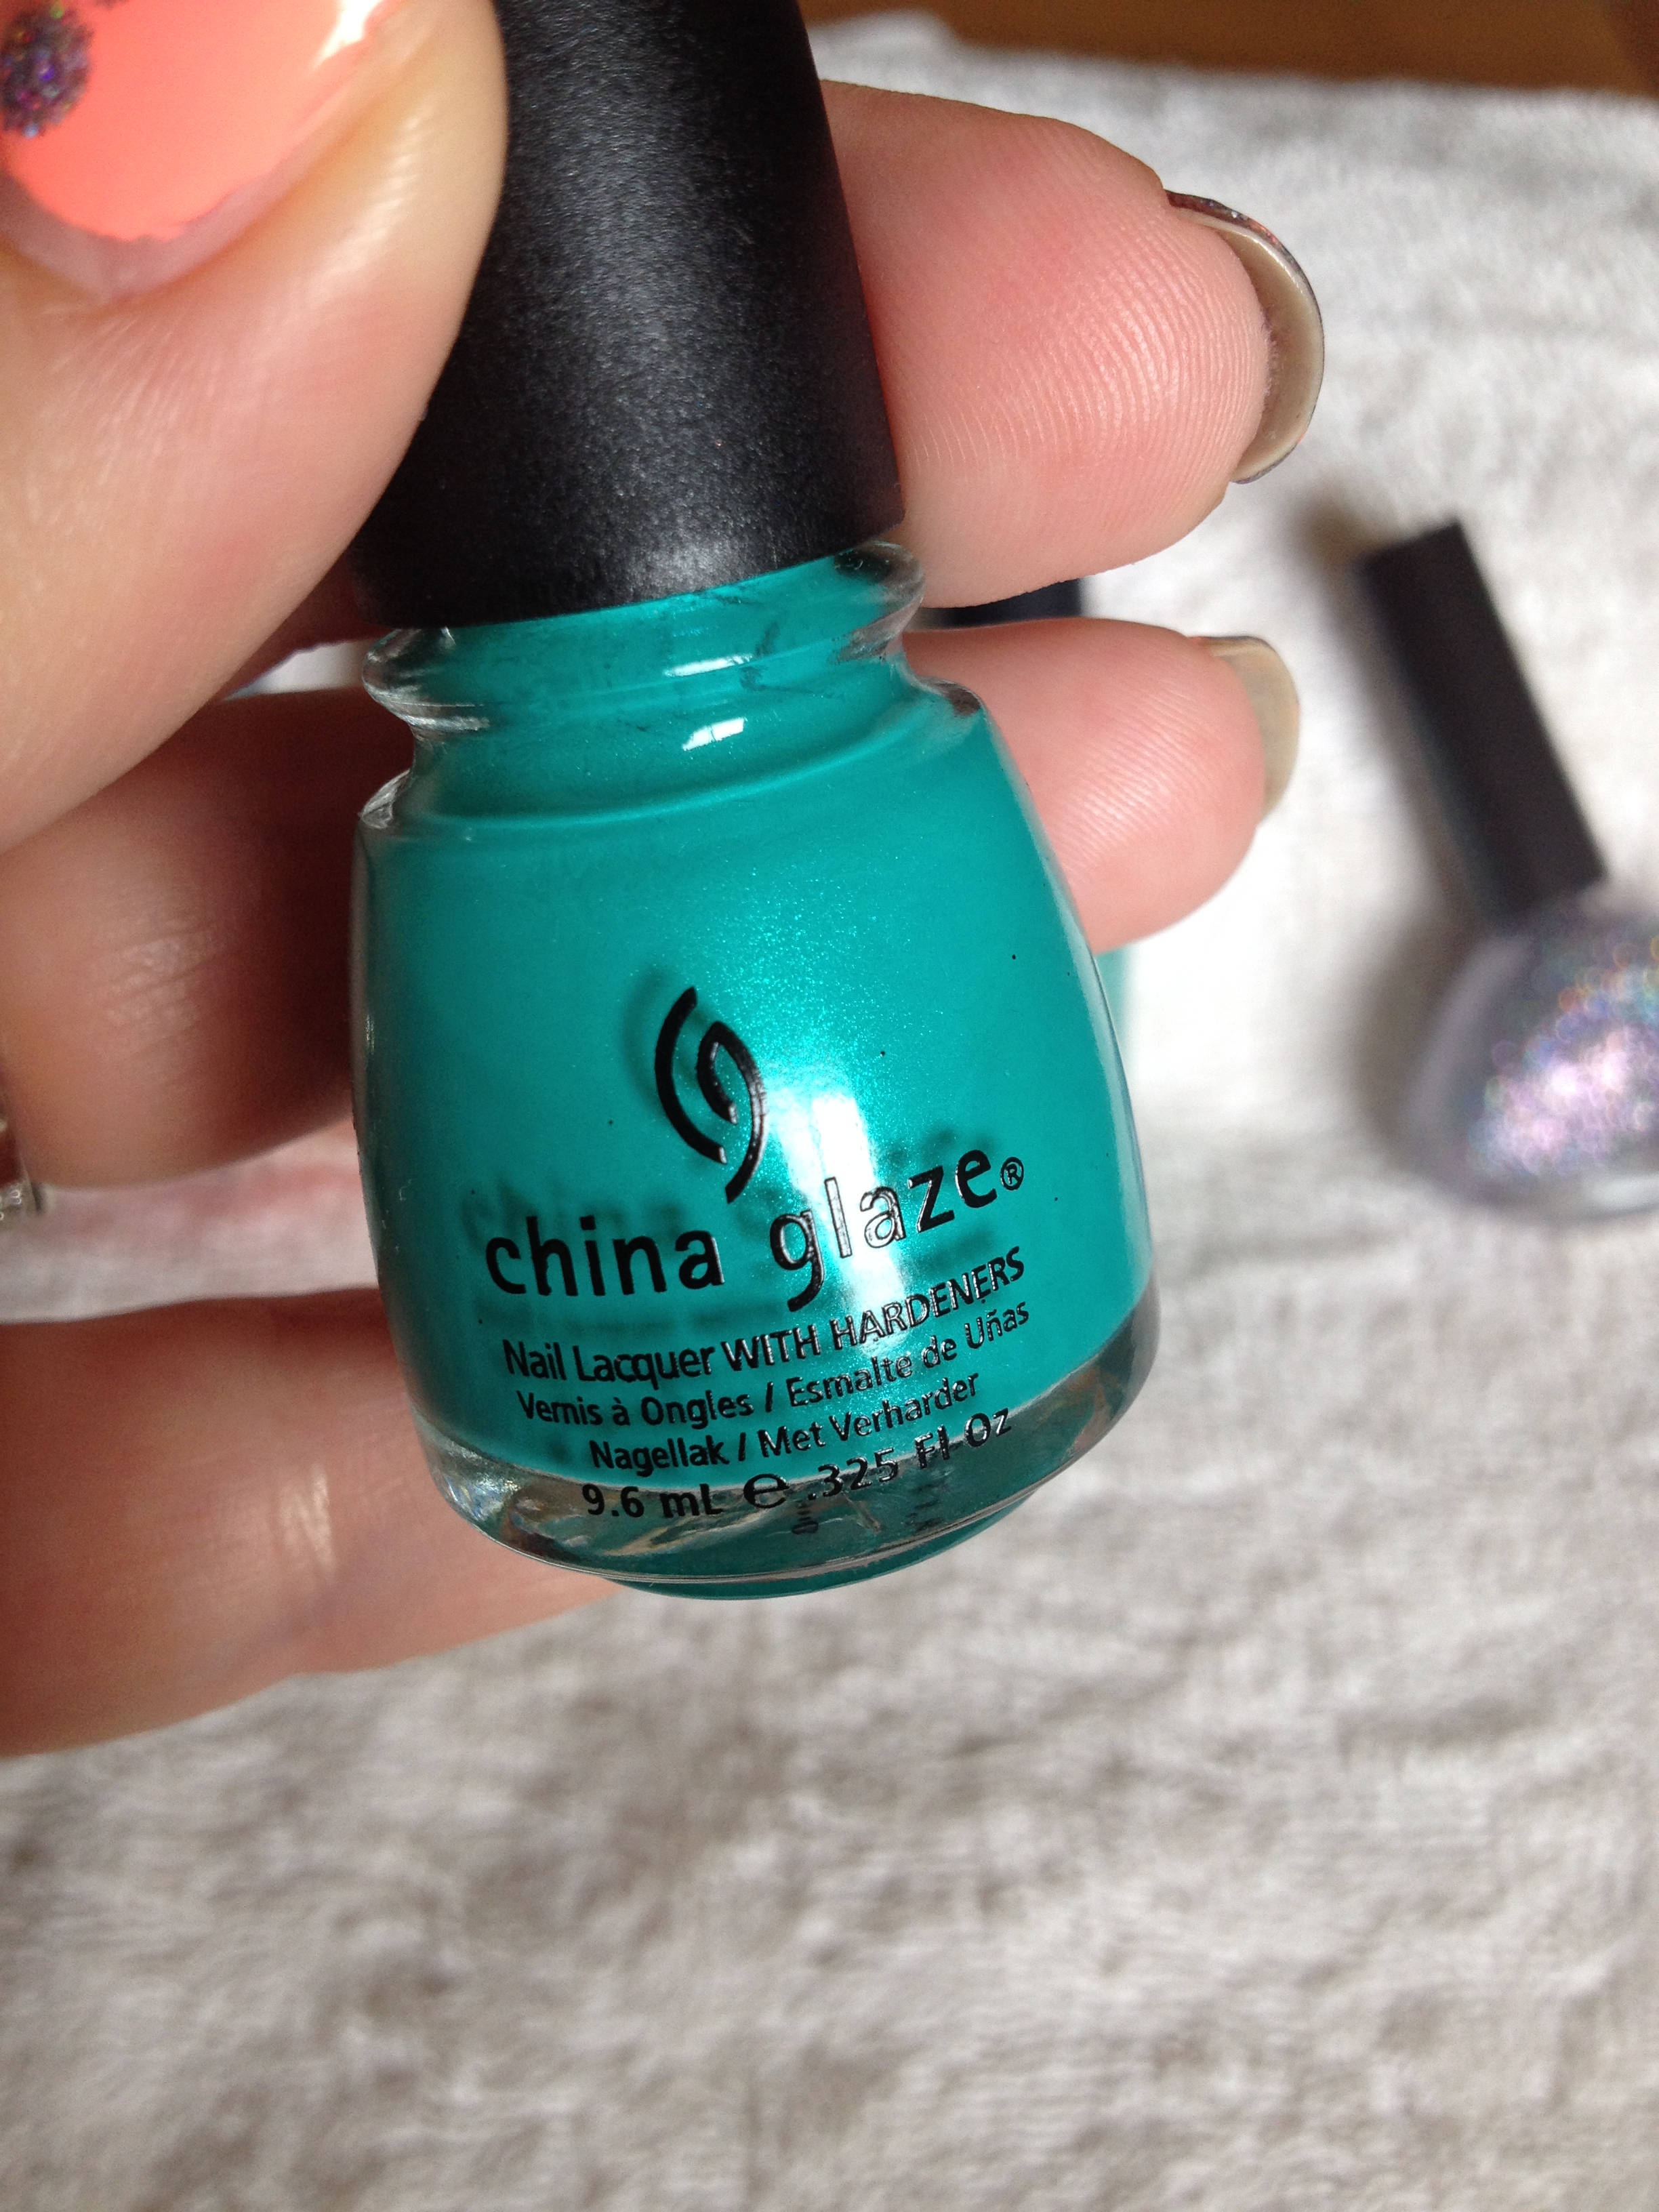
Next, I loved China Glaze – Turned Up Turquoise.

IMG_2594IMG_3228

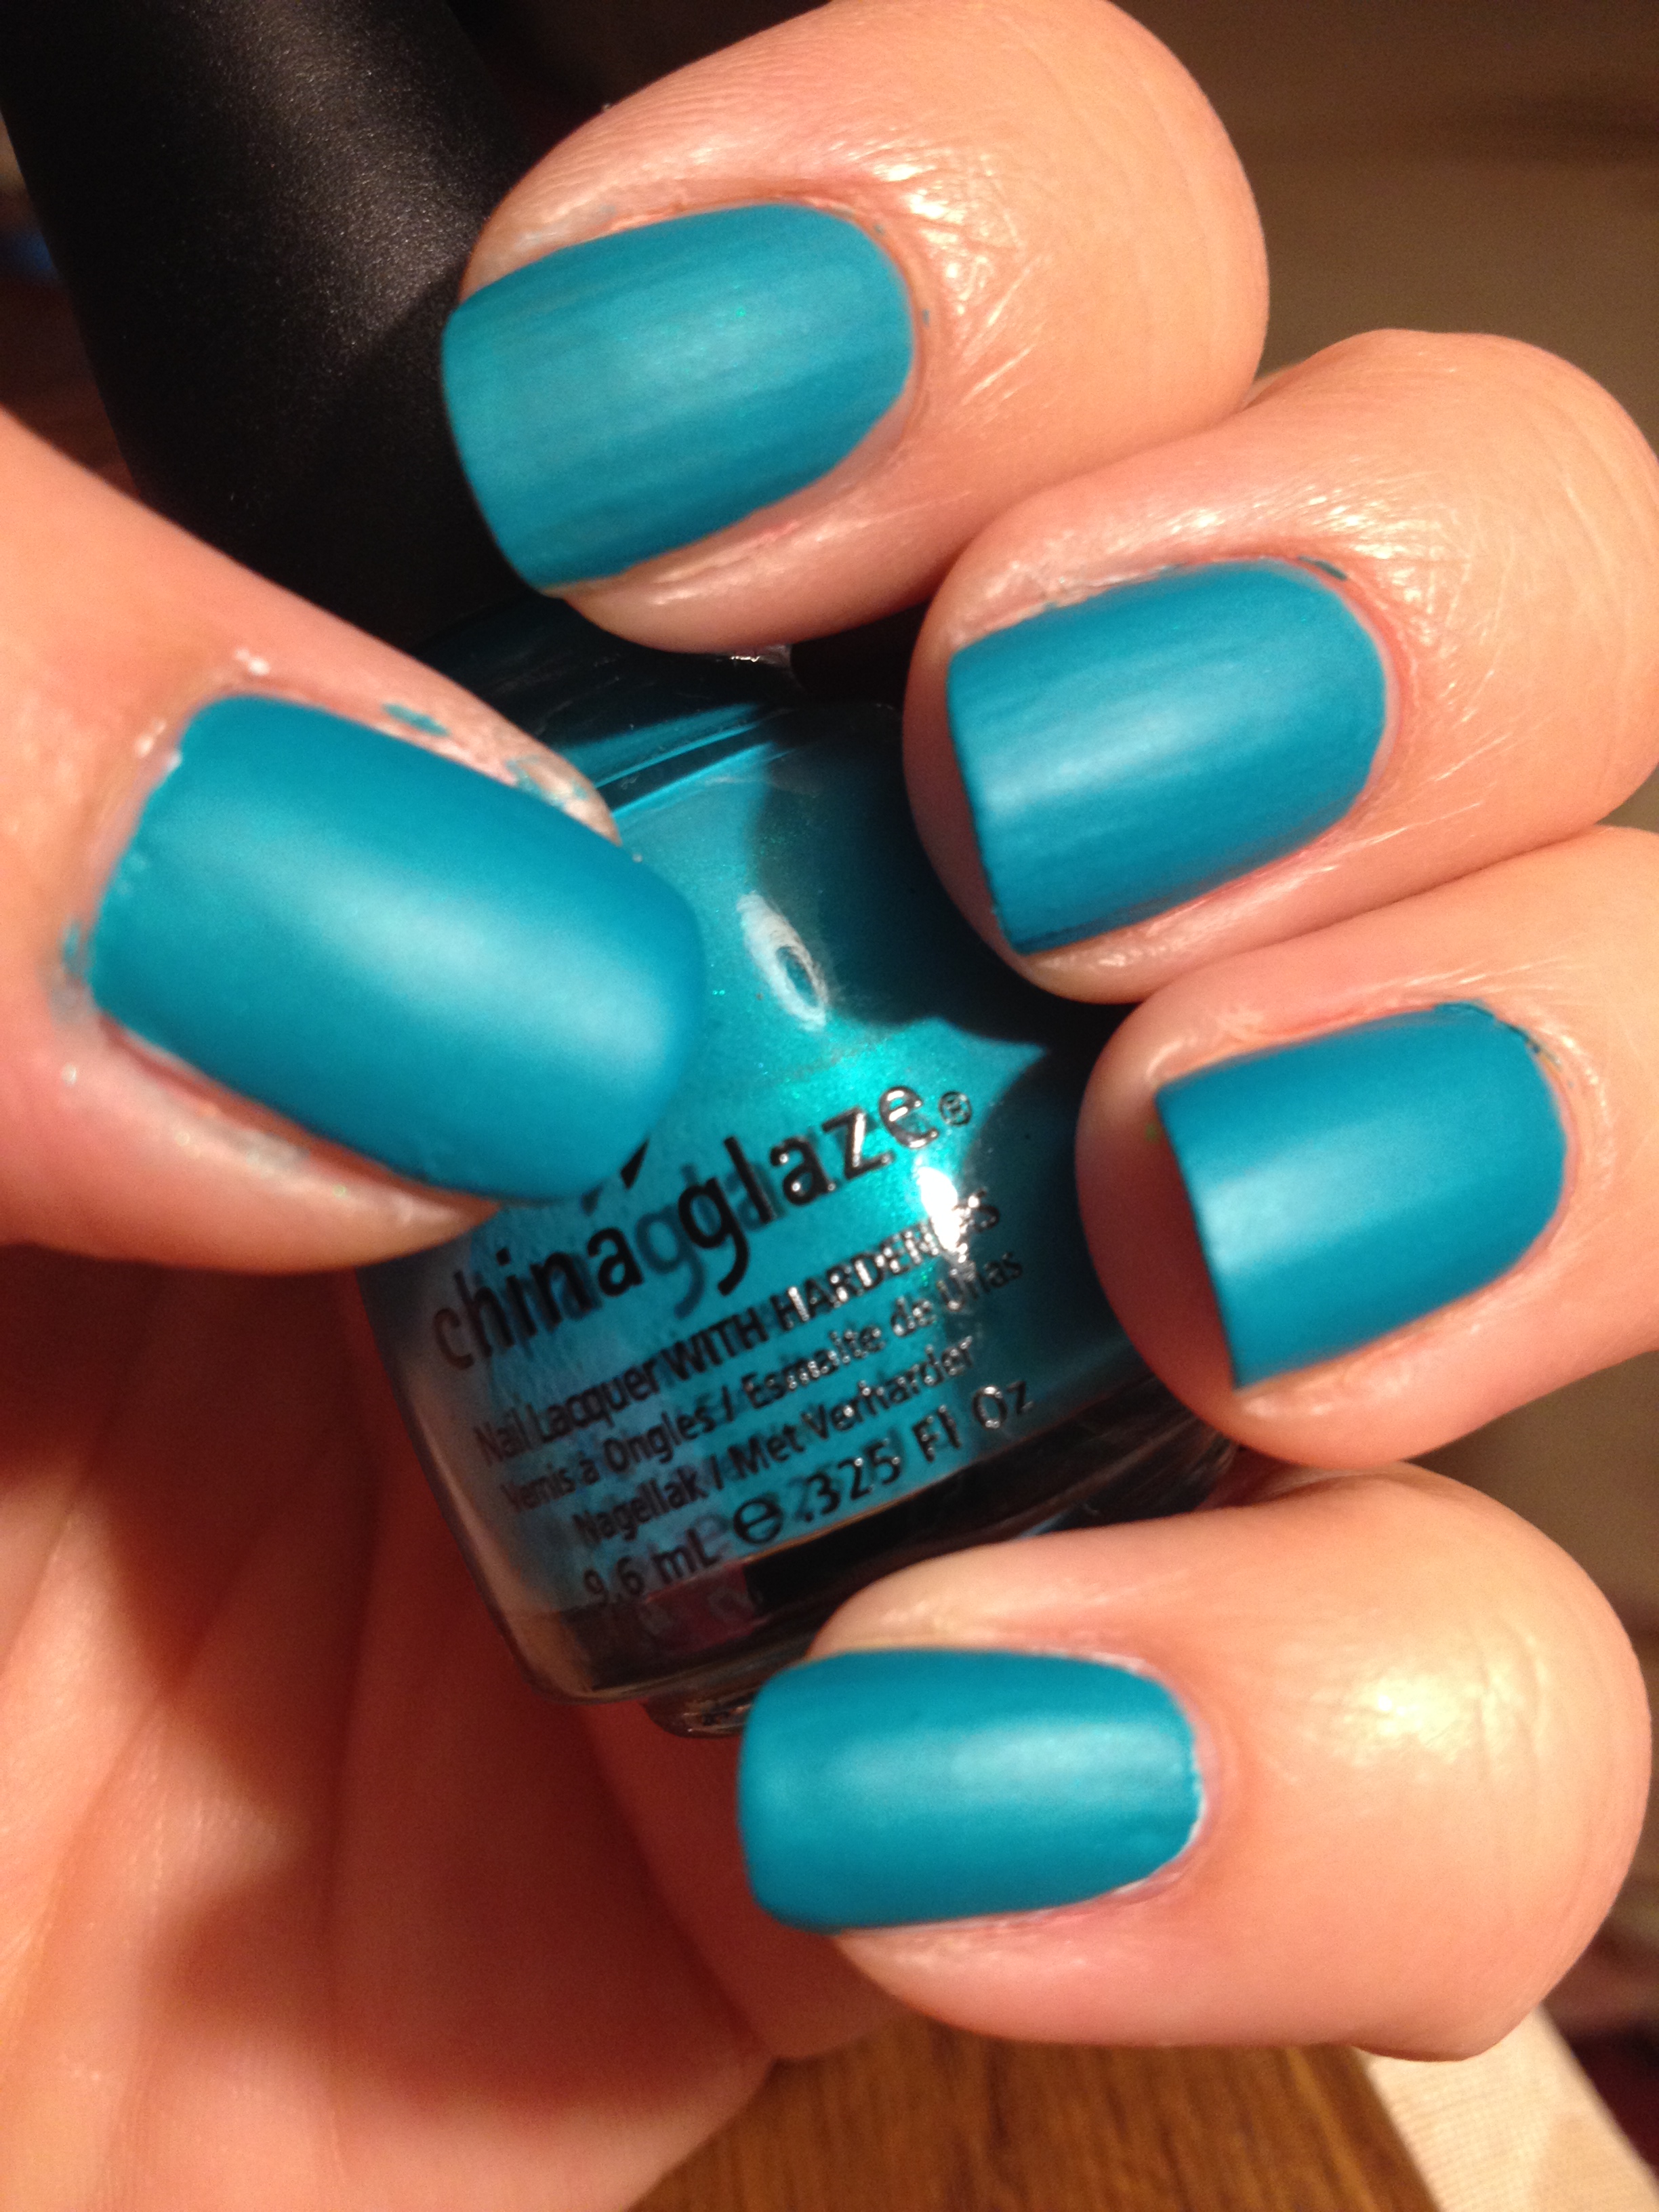
The intense color and the shimmer make me swoon!  I don’t have a picture of it with a shiny top coat, but when you do put a shiny top coat on, the shimmer really pops.  Such a perfect color!

Yes, I’m a sucker for turquoise.  Next is Jordana – Boy Oh Boy.

IMG_3446IMG_3218IMG_2790

It almost looks green in the middle picture, but it’s not.  It’s a deep, beautiful turquoise.  And the formula on this baby is wonderful!  Almost a one coater!

Next we have Ulta – Joined at the Hippo.

IMG_4090IMG_4091IMG_4092

This is one of my more recent favorites.  Actually, I just talked about this polish in my December Favorites.  It’s got a great formula, and while it is a really deep blue, it never looks black.  Just a beautiful polish!

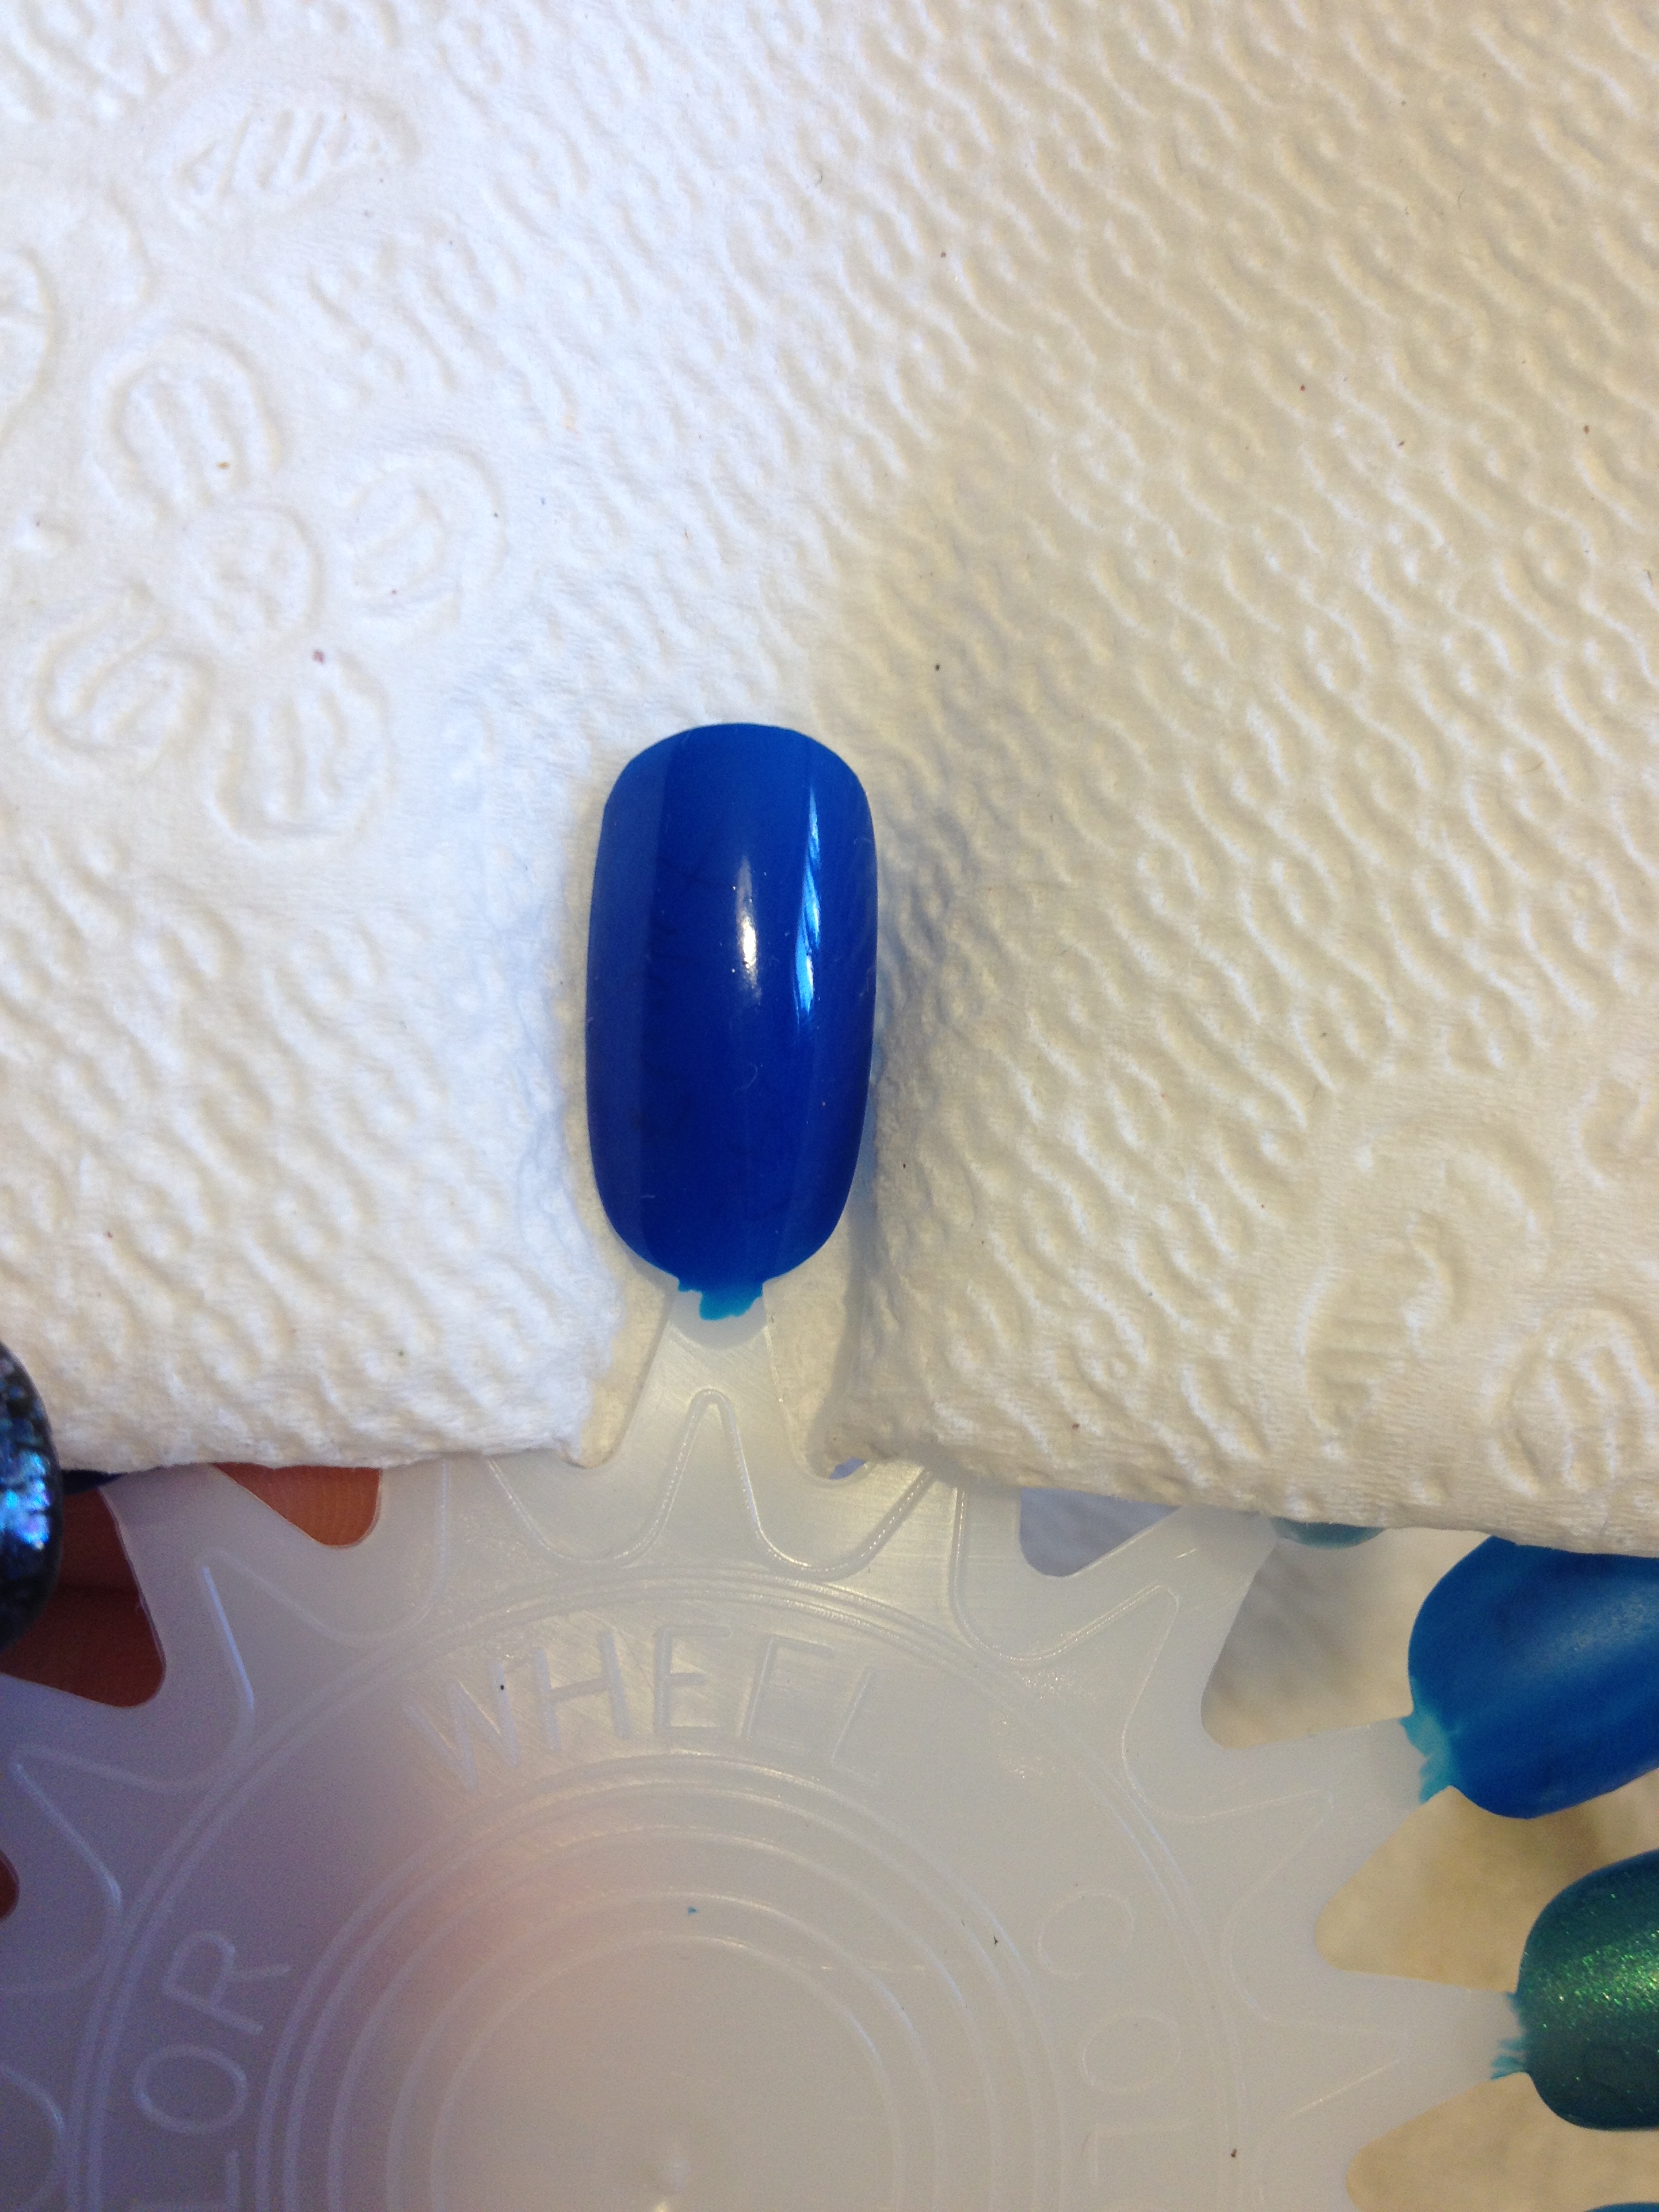
Then there’s Broadway Nails – Space Flight, a really deep blue jelly.

IMG_3335IMG_3321IMG_3262

I’ve actually got this on my nails right now, as you’ll see in a post later this week. This is an amazingly beautiful polish and it only costs $1!  You can find this at Dollar General.

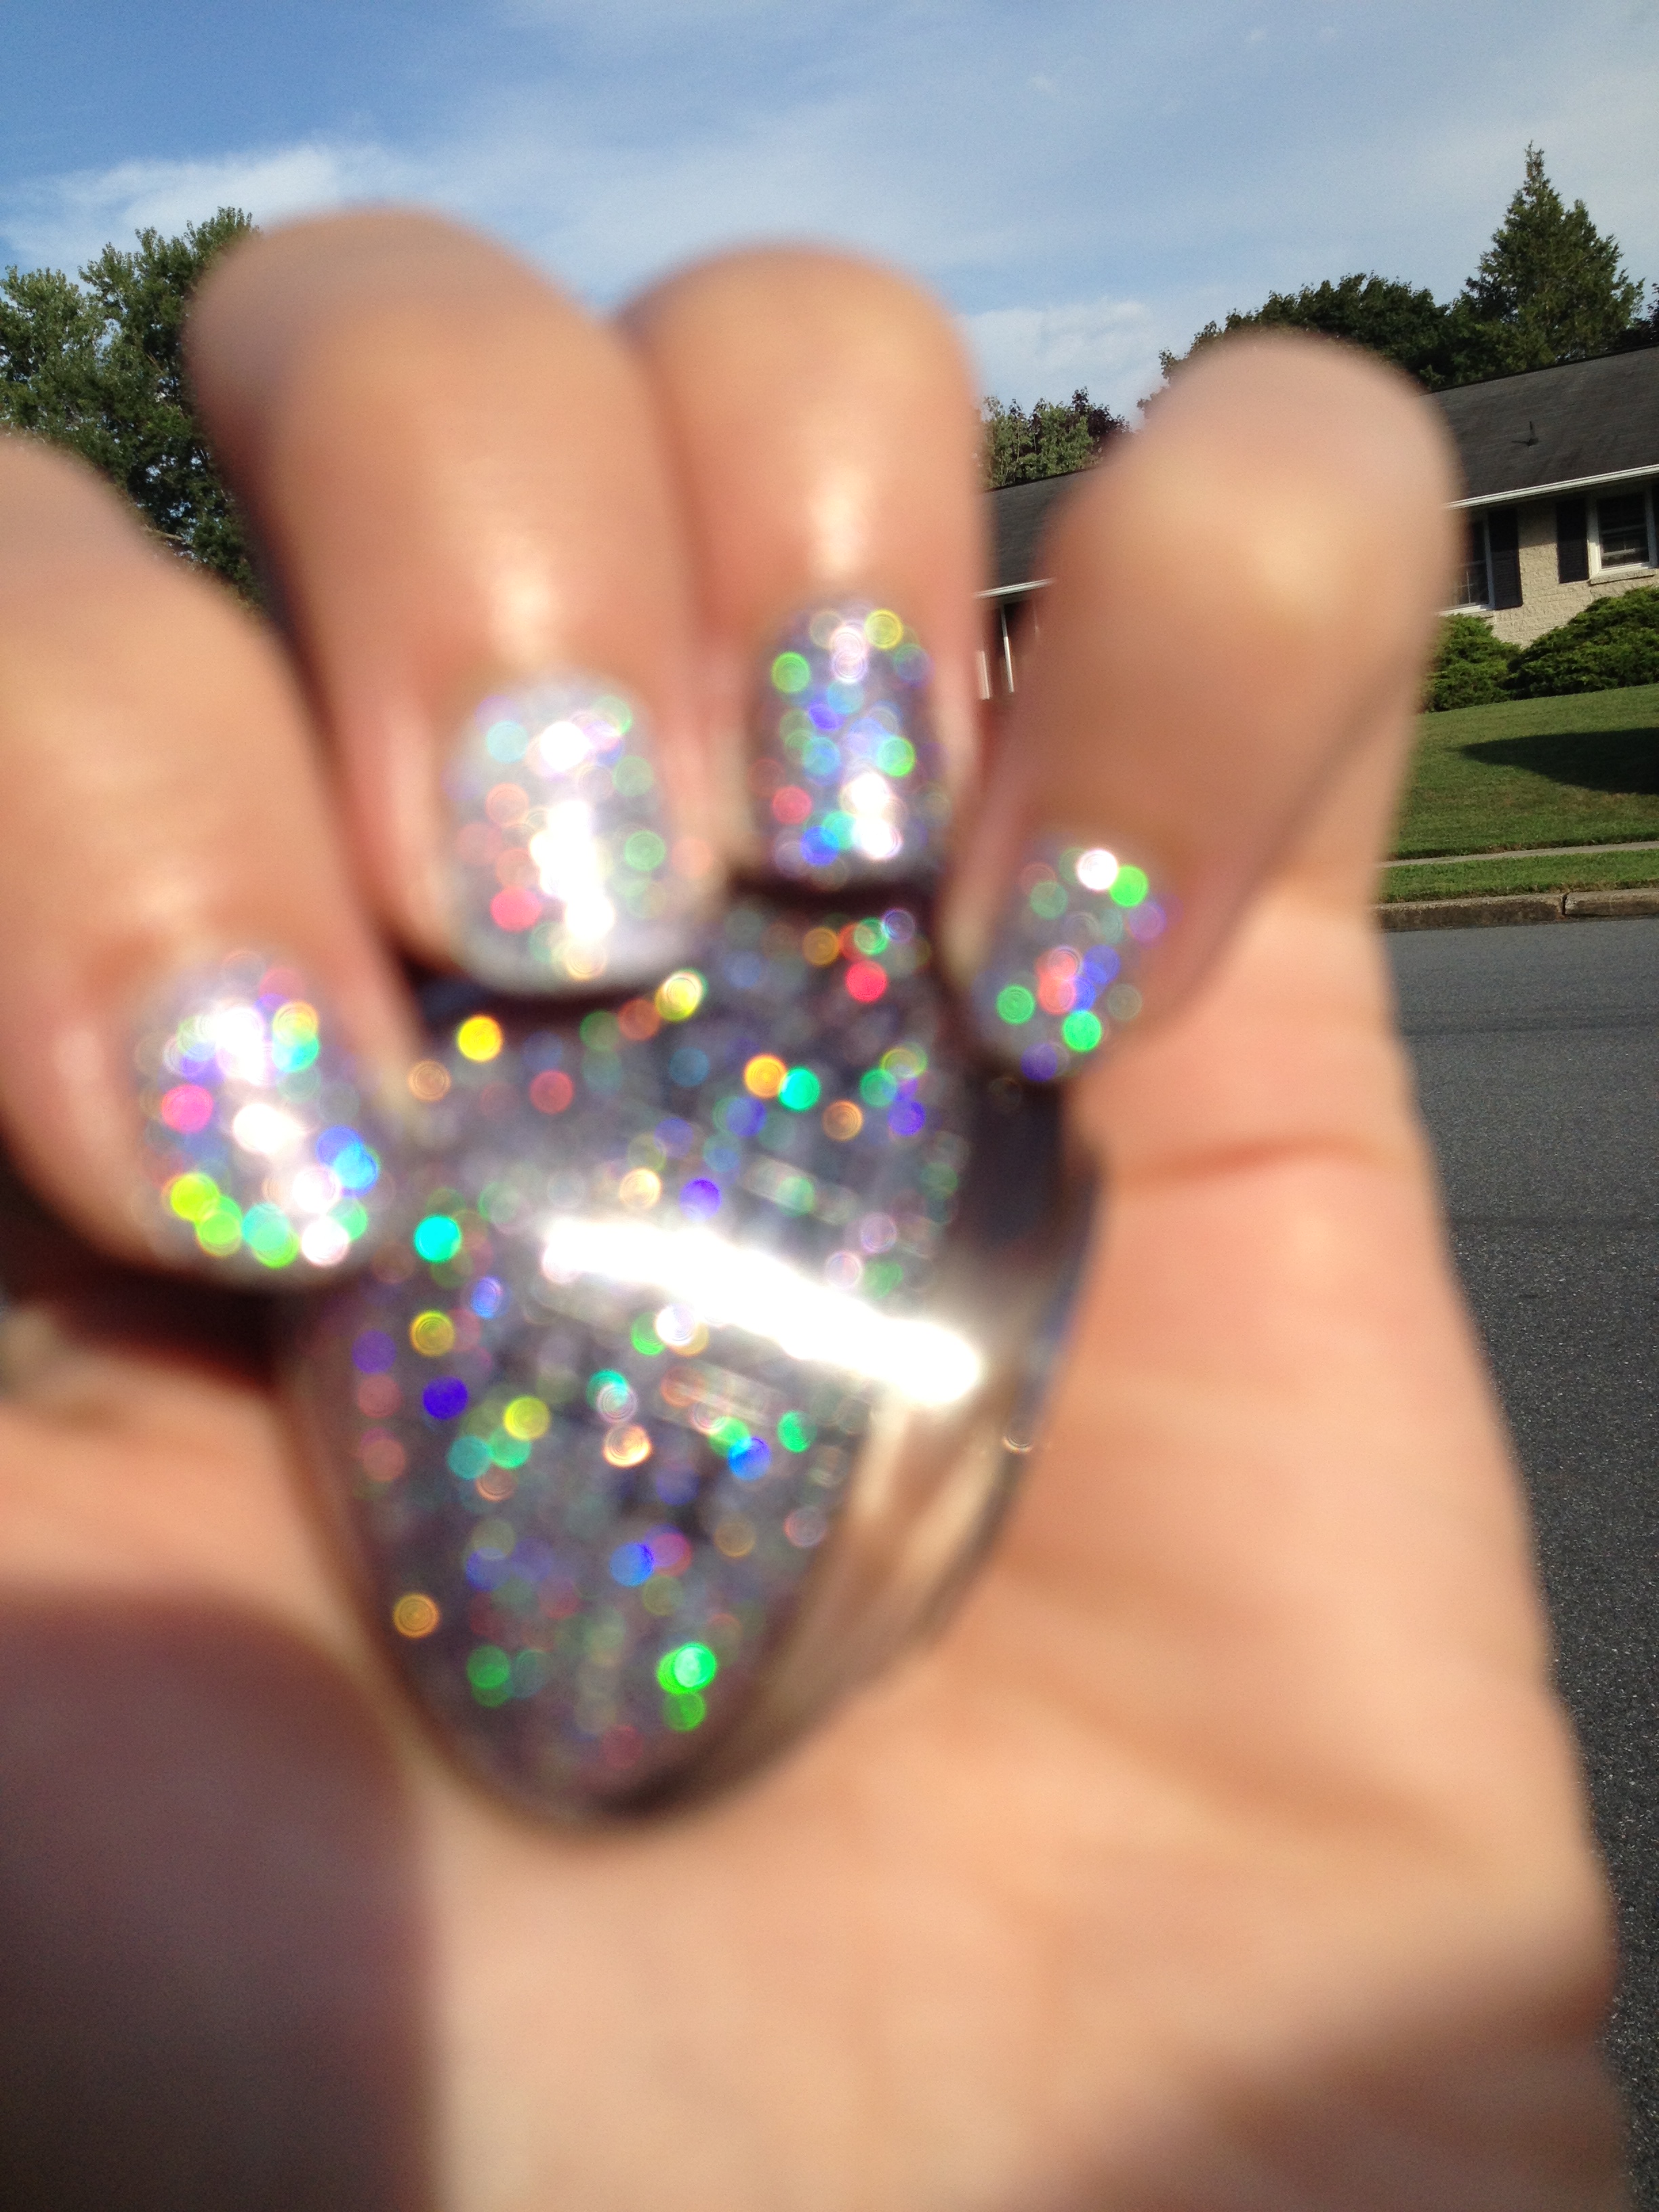
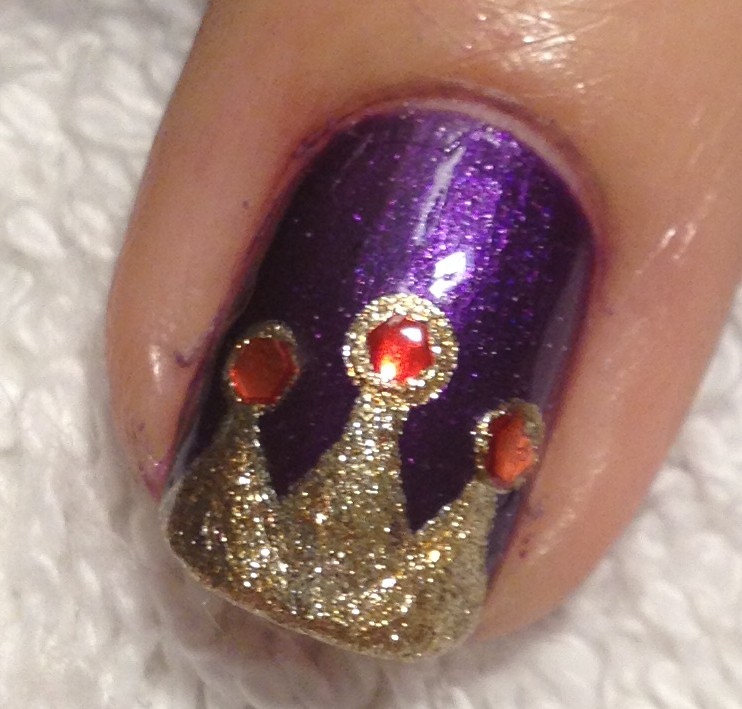
Now we come to the first indie polish that I ever owned: Valley Girl Lacquer – Fantasm.

IMG_21552014-02-03 21.23.44

Even in a really ugly jelly sandwich , I still love this polish:

001

This was my first exposure to the super huge round glitters that are pretty common in indie polishes and they really blew my mind when I first used them. Heck, they still blow my mind!

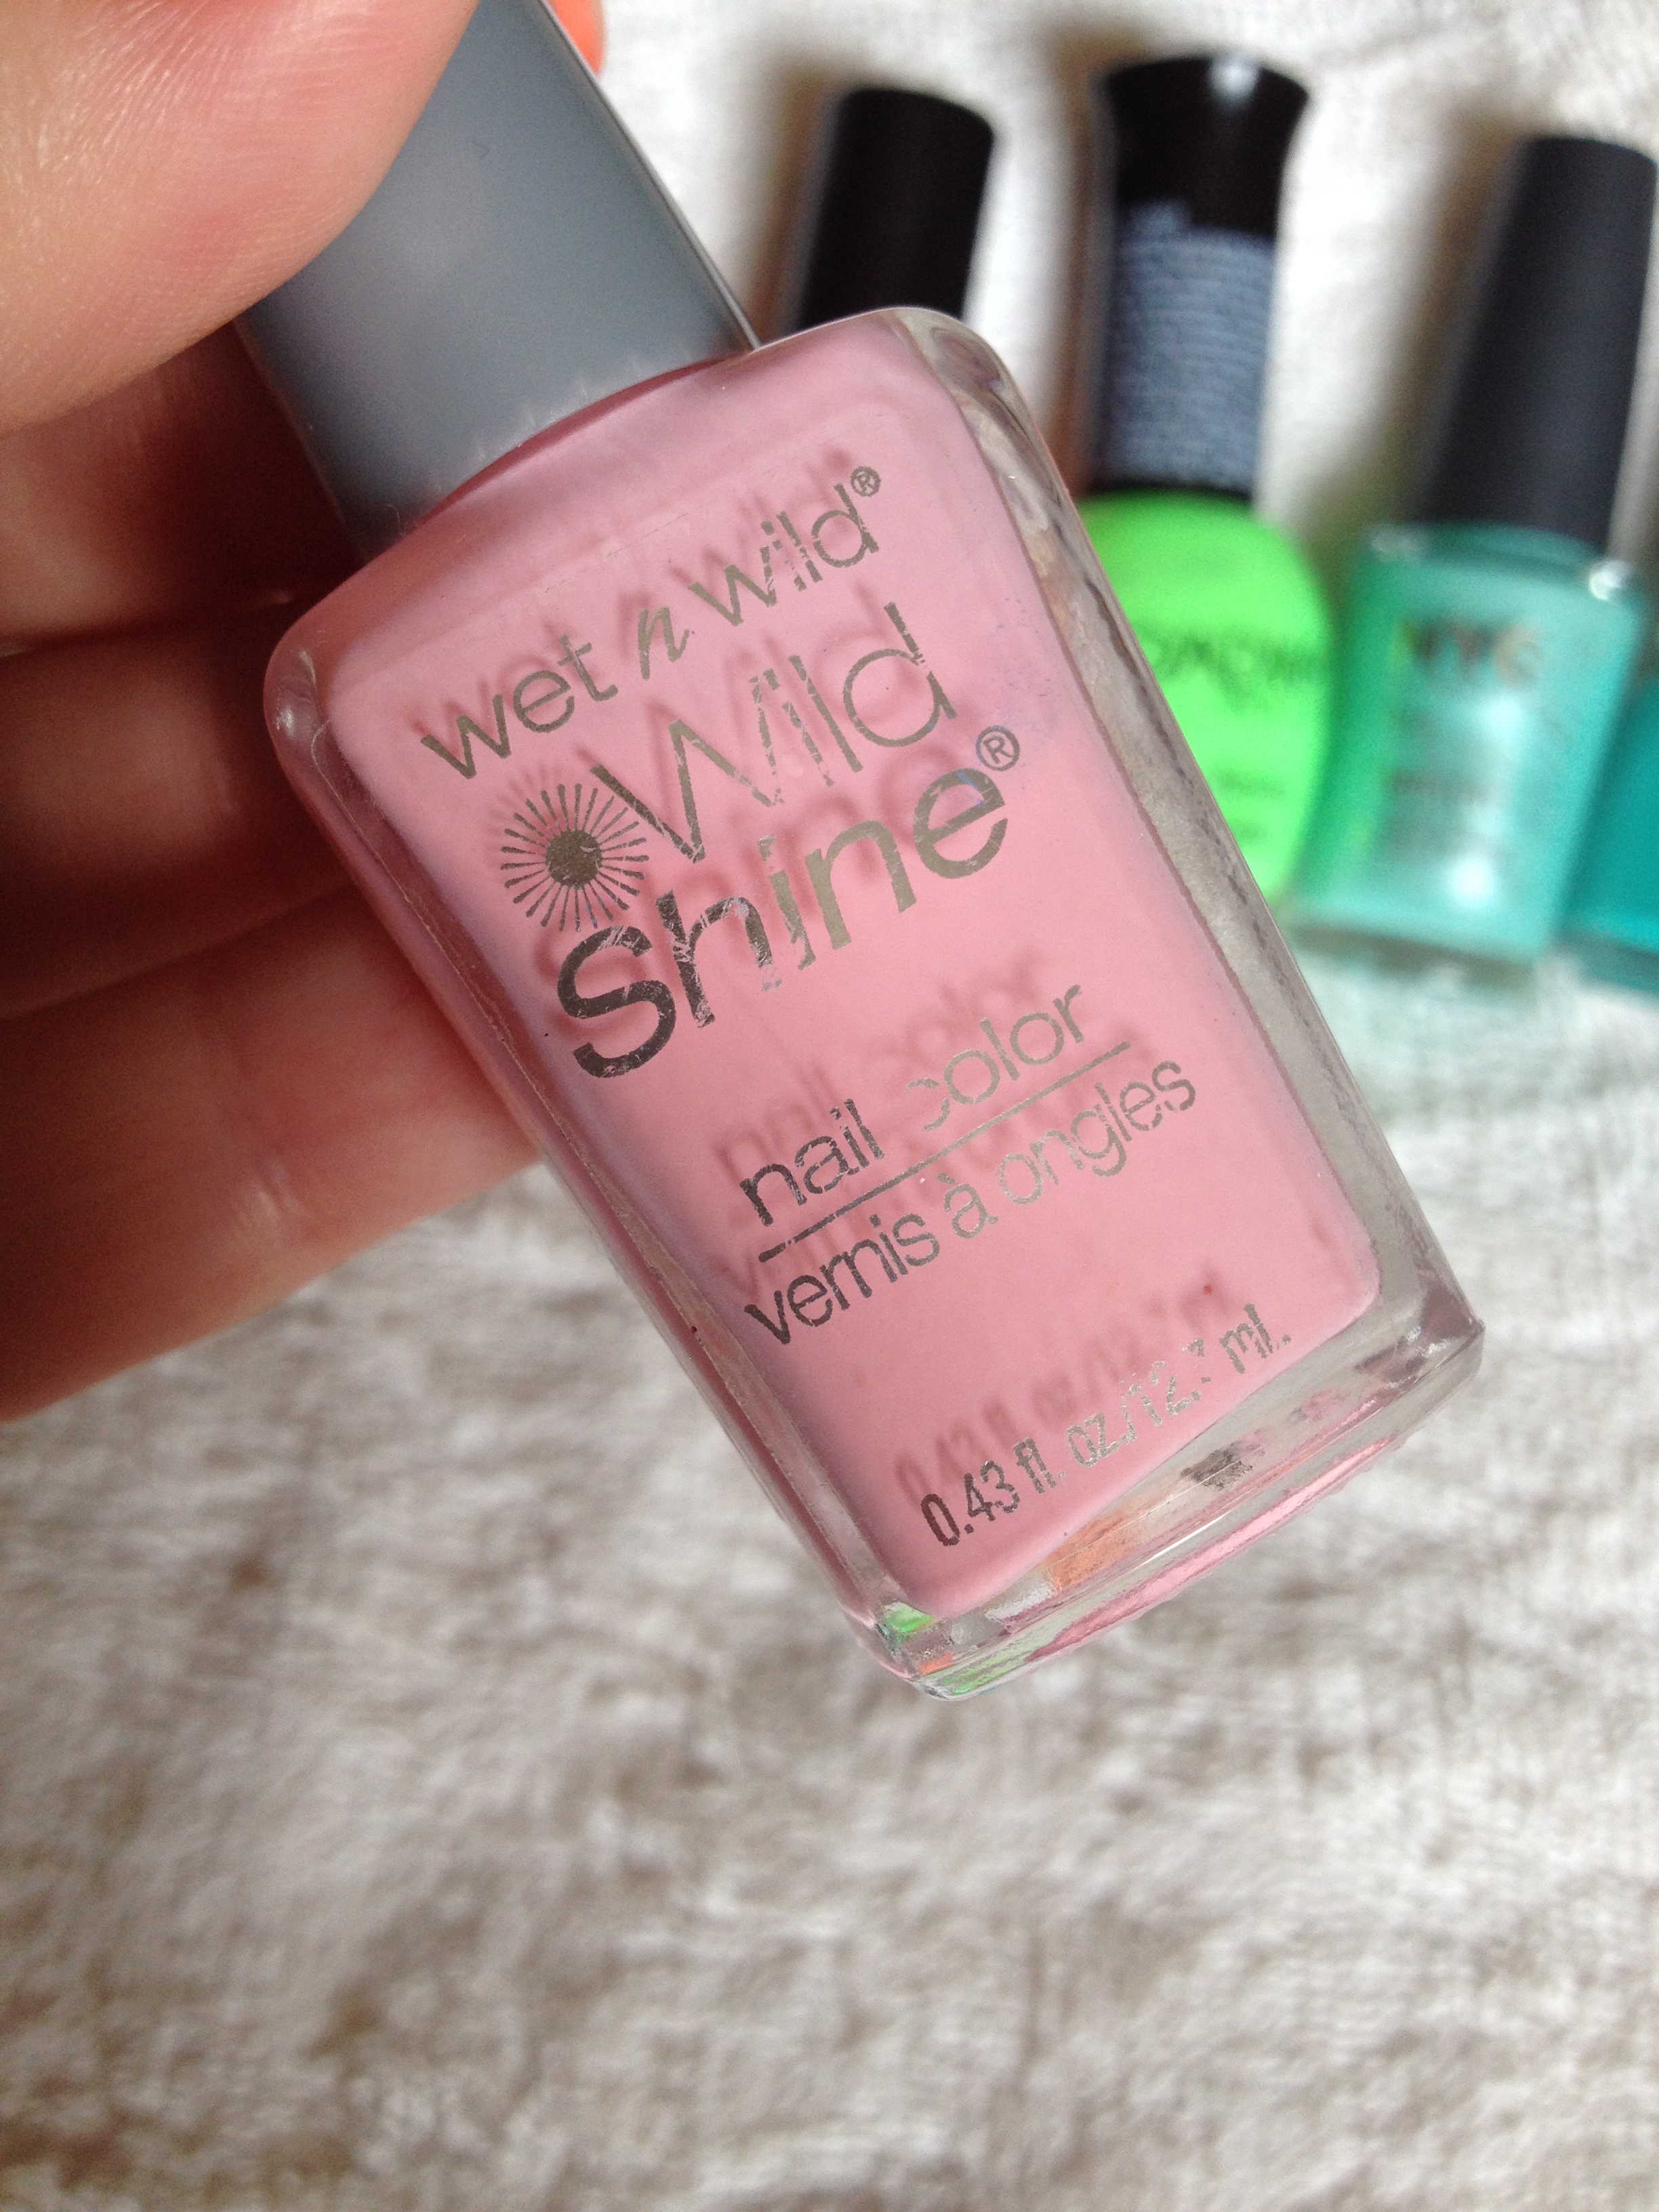
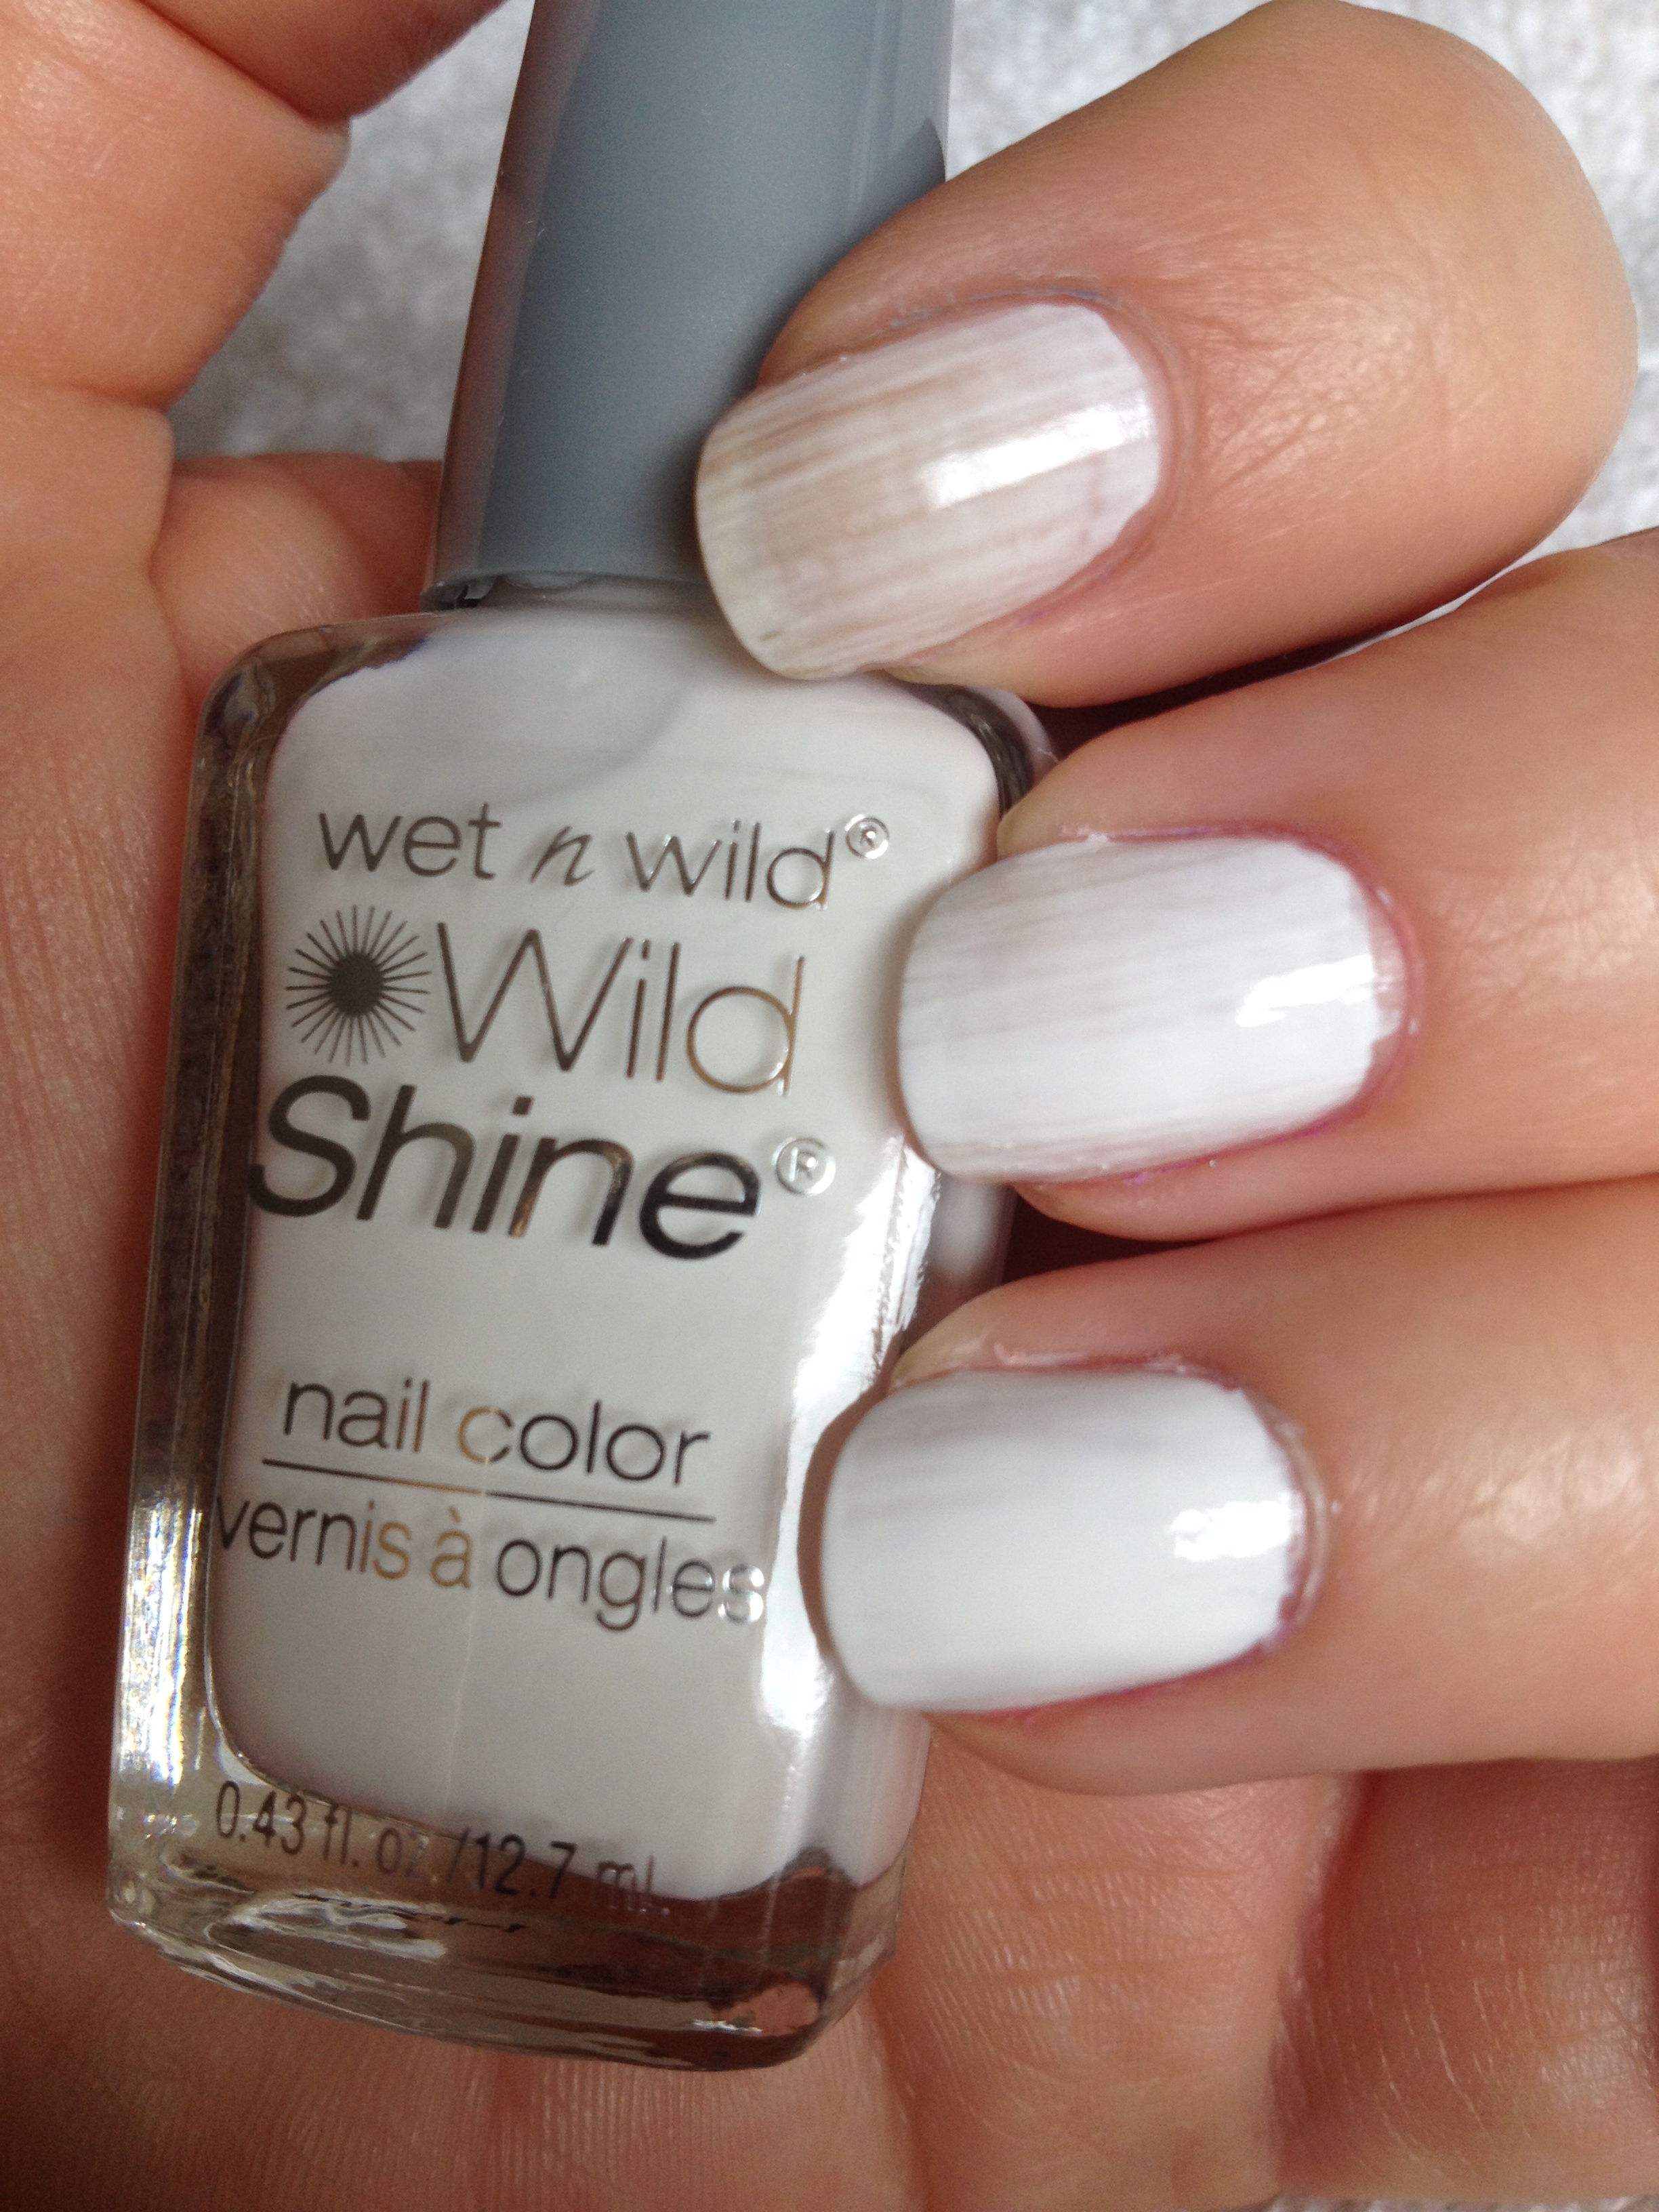
Next is Wet n Wild – Deception. This was my first really great jelly polish.

IMG_3111IMG_3384

This was in a limited edition collection from the spring, so I’m pretty sure you won’t be able to find this anywhere and I’m very sorry about that.  I’ve used about 1/4 of this bottle already, and I’m going to be heartbroken when it’s gone.This polish takes 5 or 6 coats to get that perfect jelly look, but it’s so worth it!

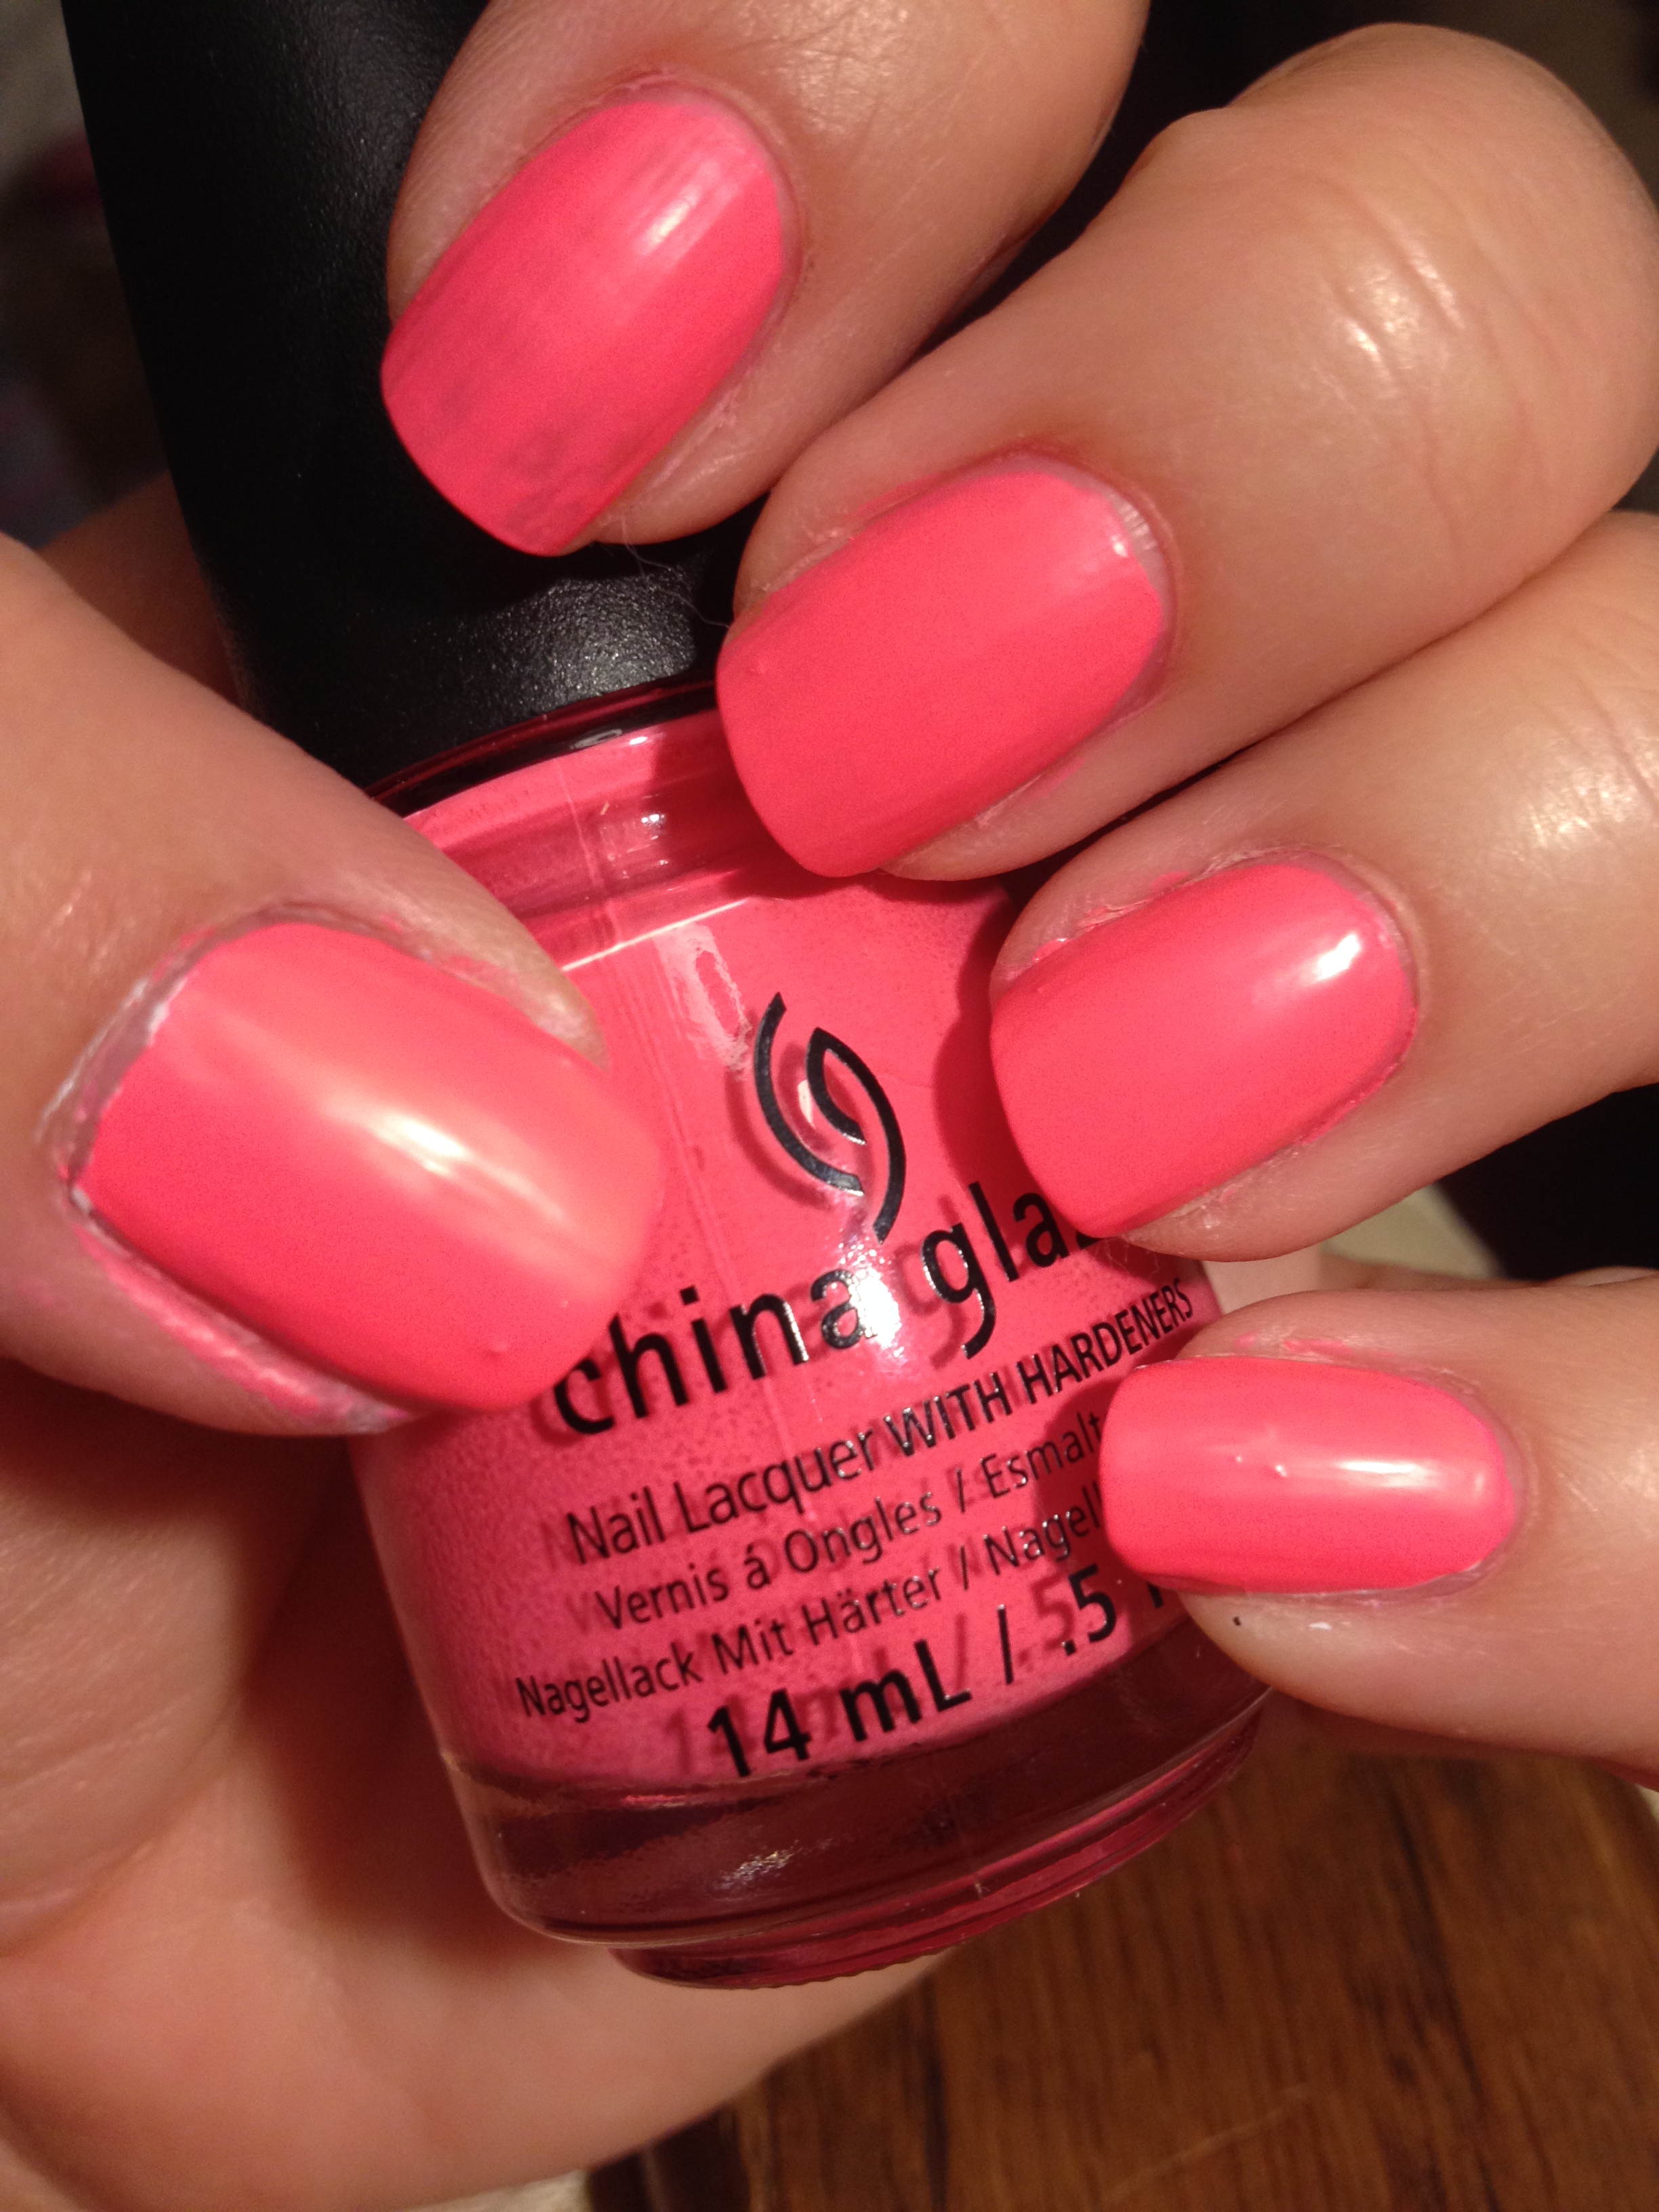
Next is China Glaze – Peonies & Park Ave from the 2014 spring collection.

IMG_3218IMG_3004

This almost neon pink really doesn’t seem like anything special, but it’s the pink that I reached for repeatedly back in the summer.  I feel like it works well with my fair skin.

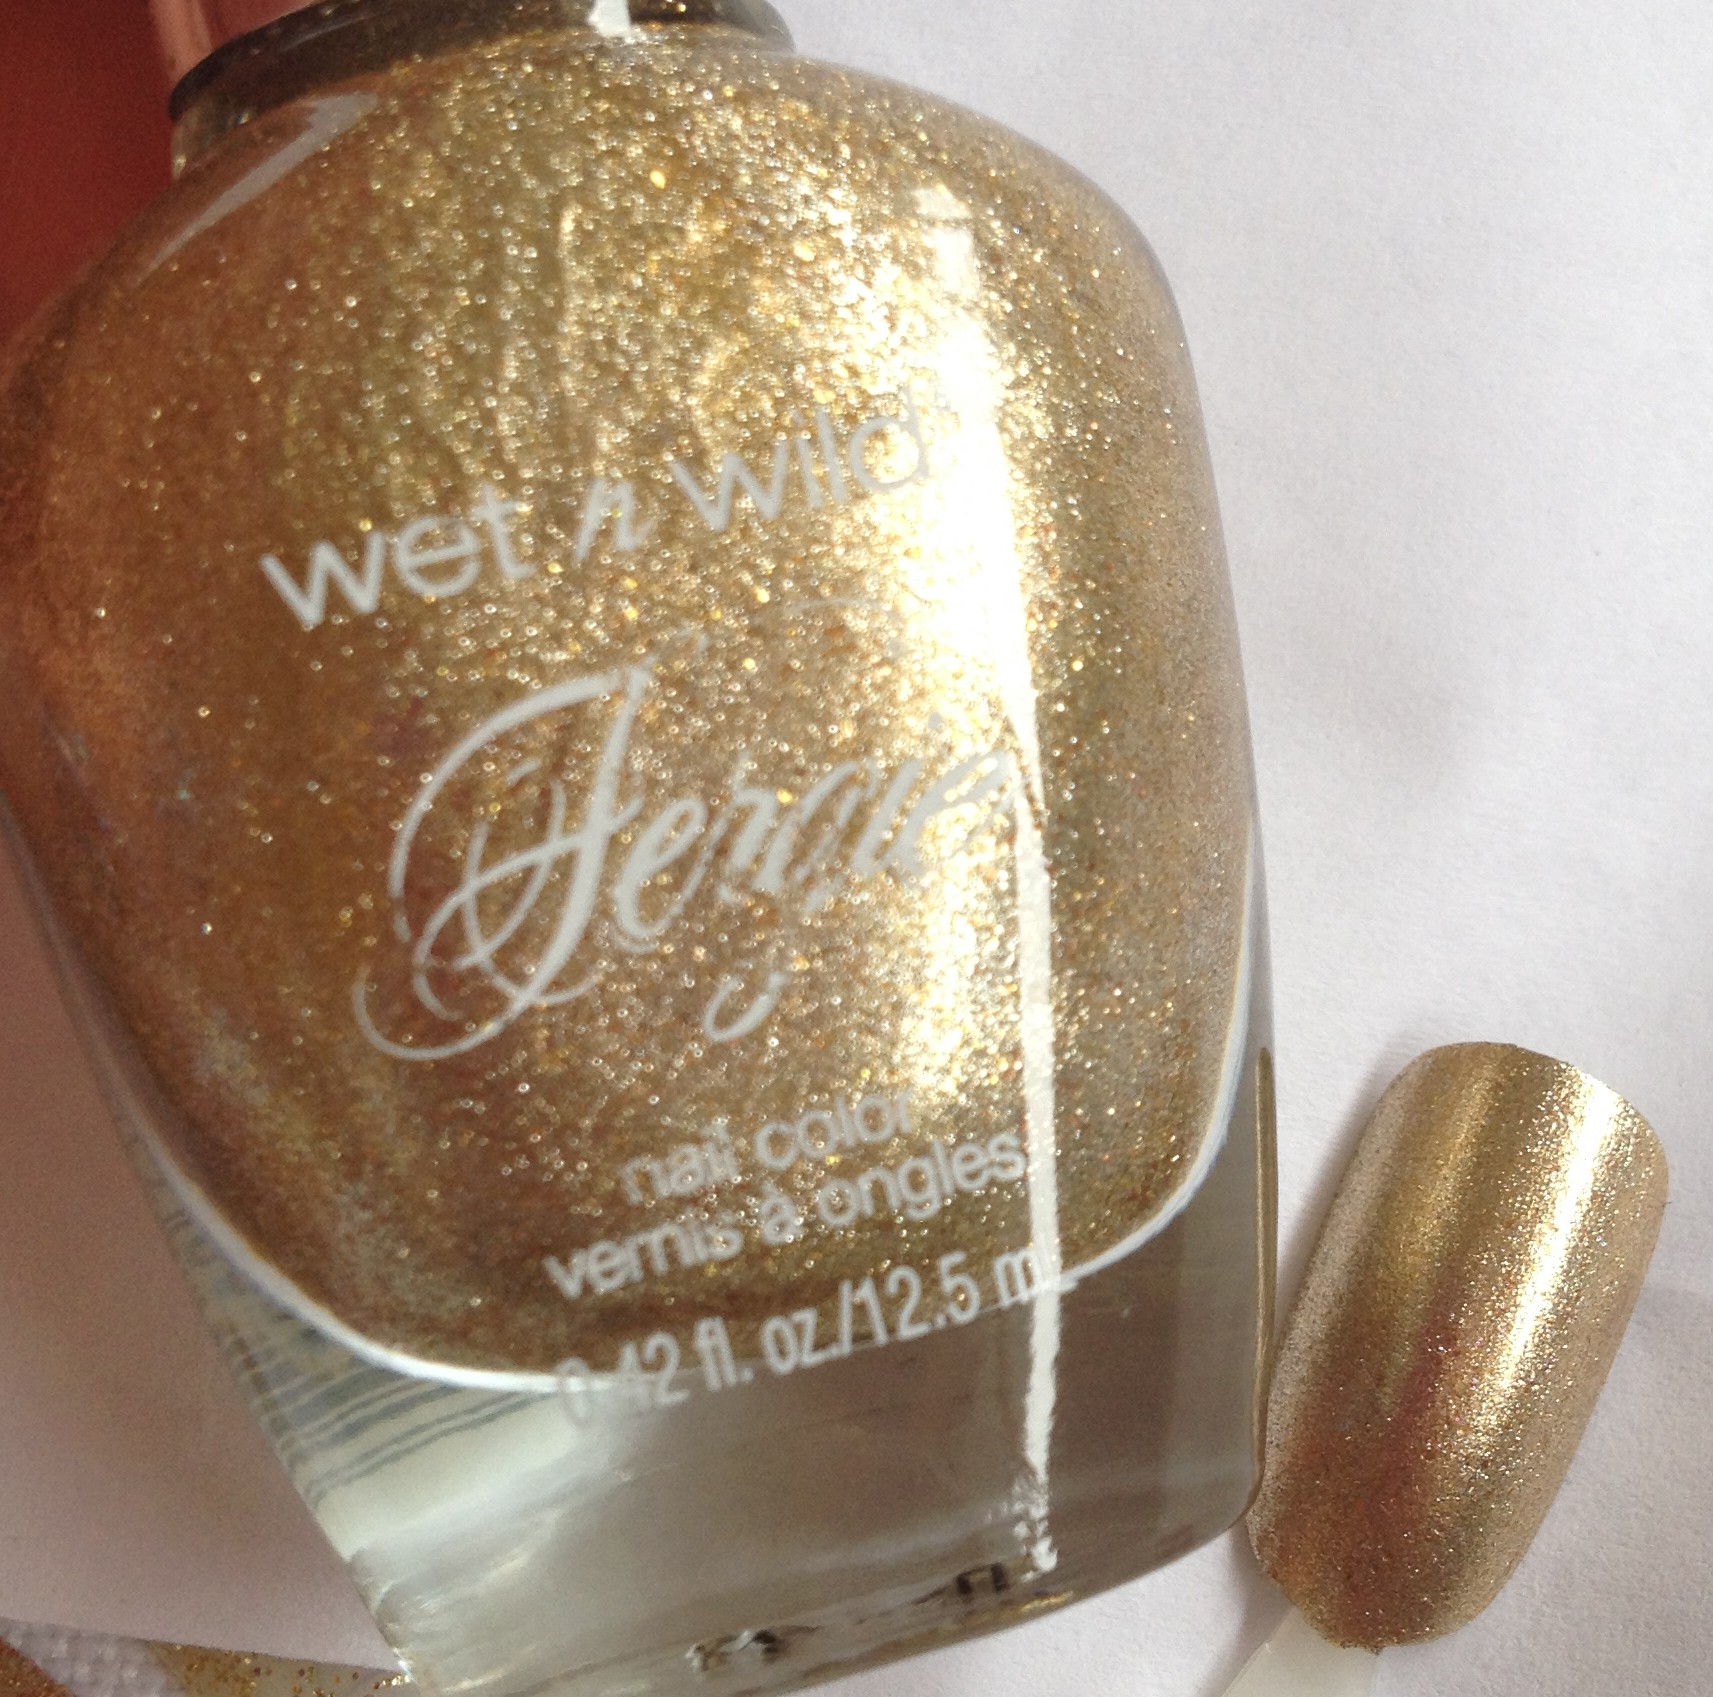
Next is a polish that I’ve talked about so many times: Wet n Wild Fergie – Gold Album.

IMG_3149IMG_4023

This is the best gold polish that I’ve ever used!   I love the stuff!  It’s perfect and beautiful every time.

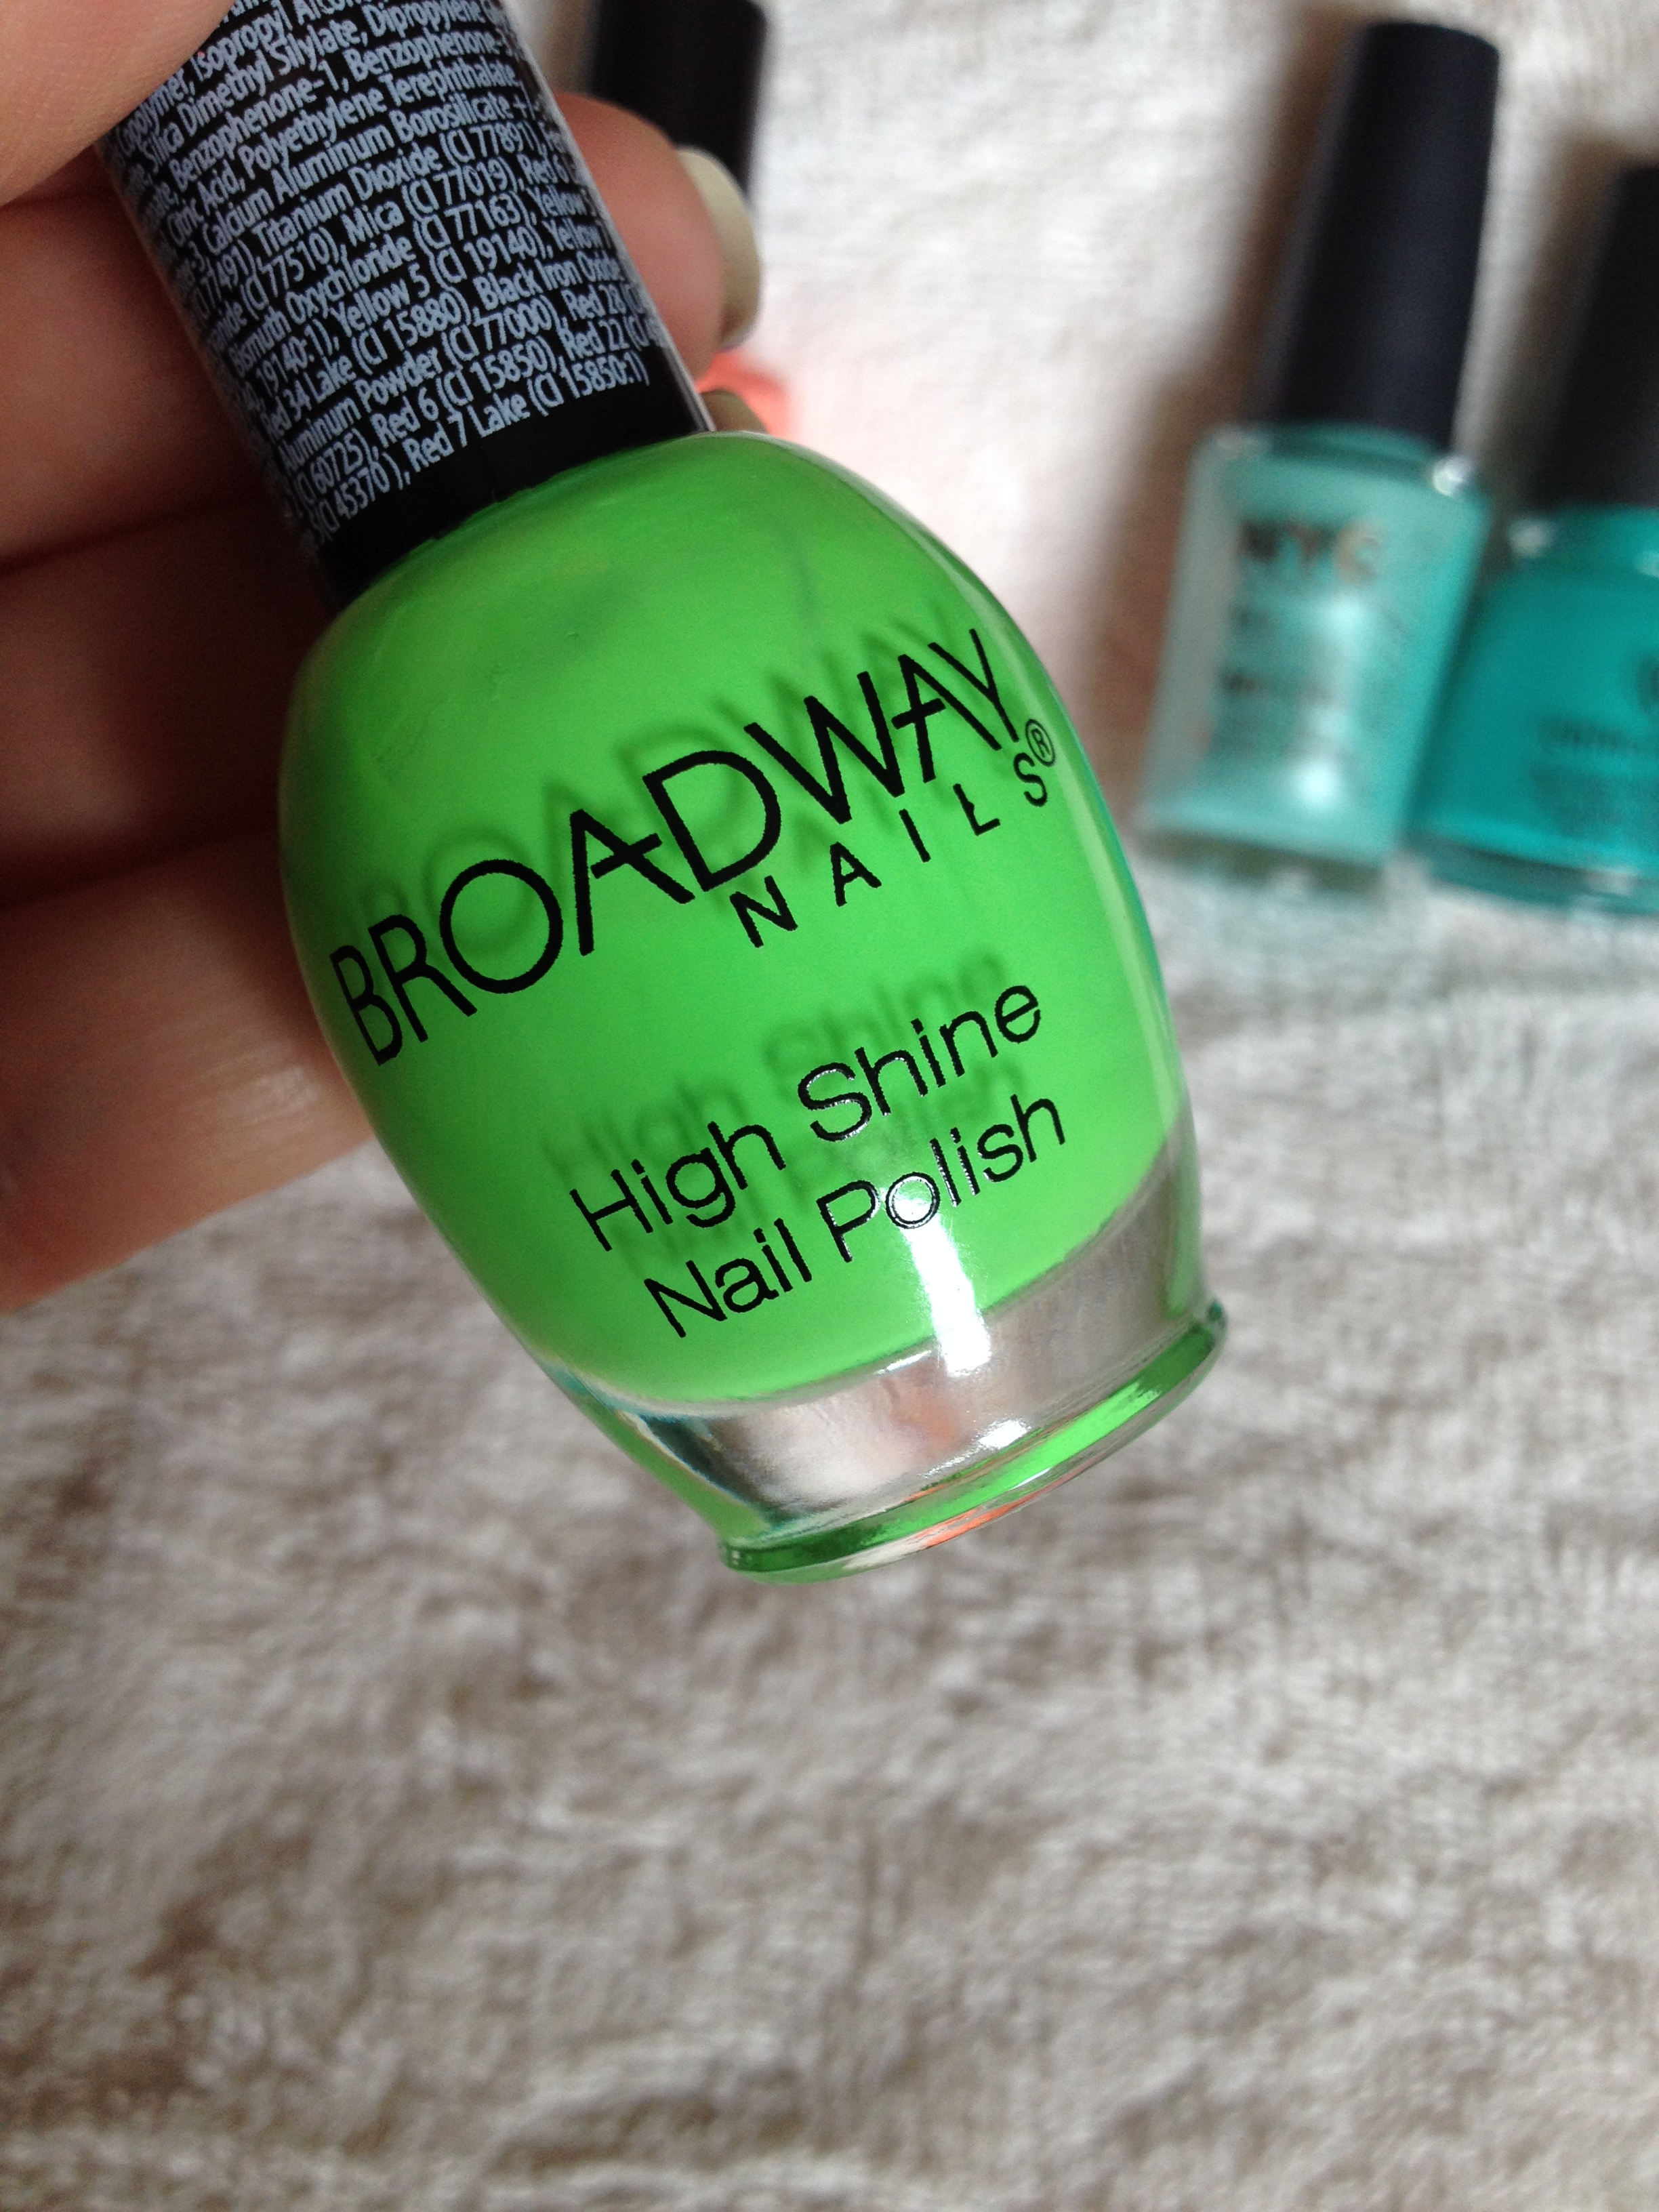
Next is Broadway Nails – Hot & Sexy.  This is a dupe for China Glaze – Ruby Pumps.

IMG_3986IMG_3988

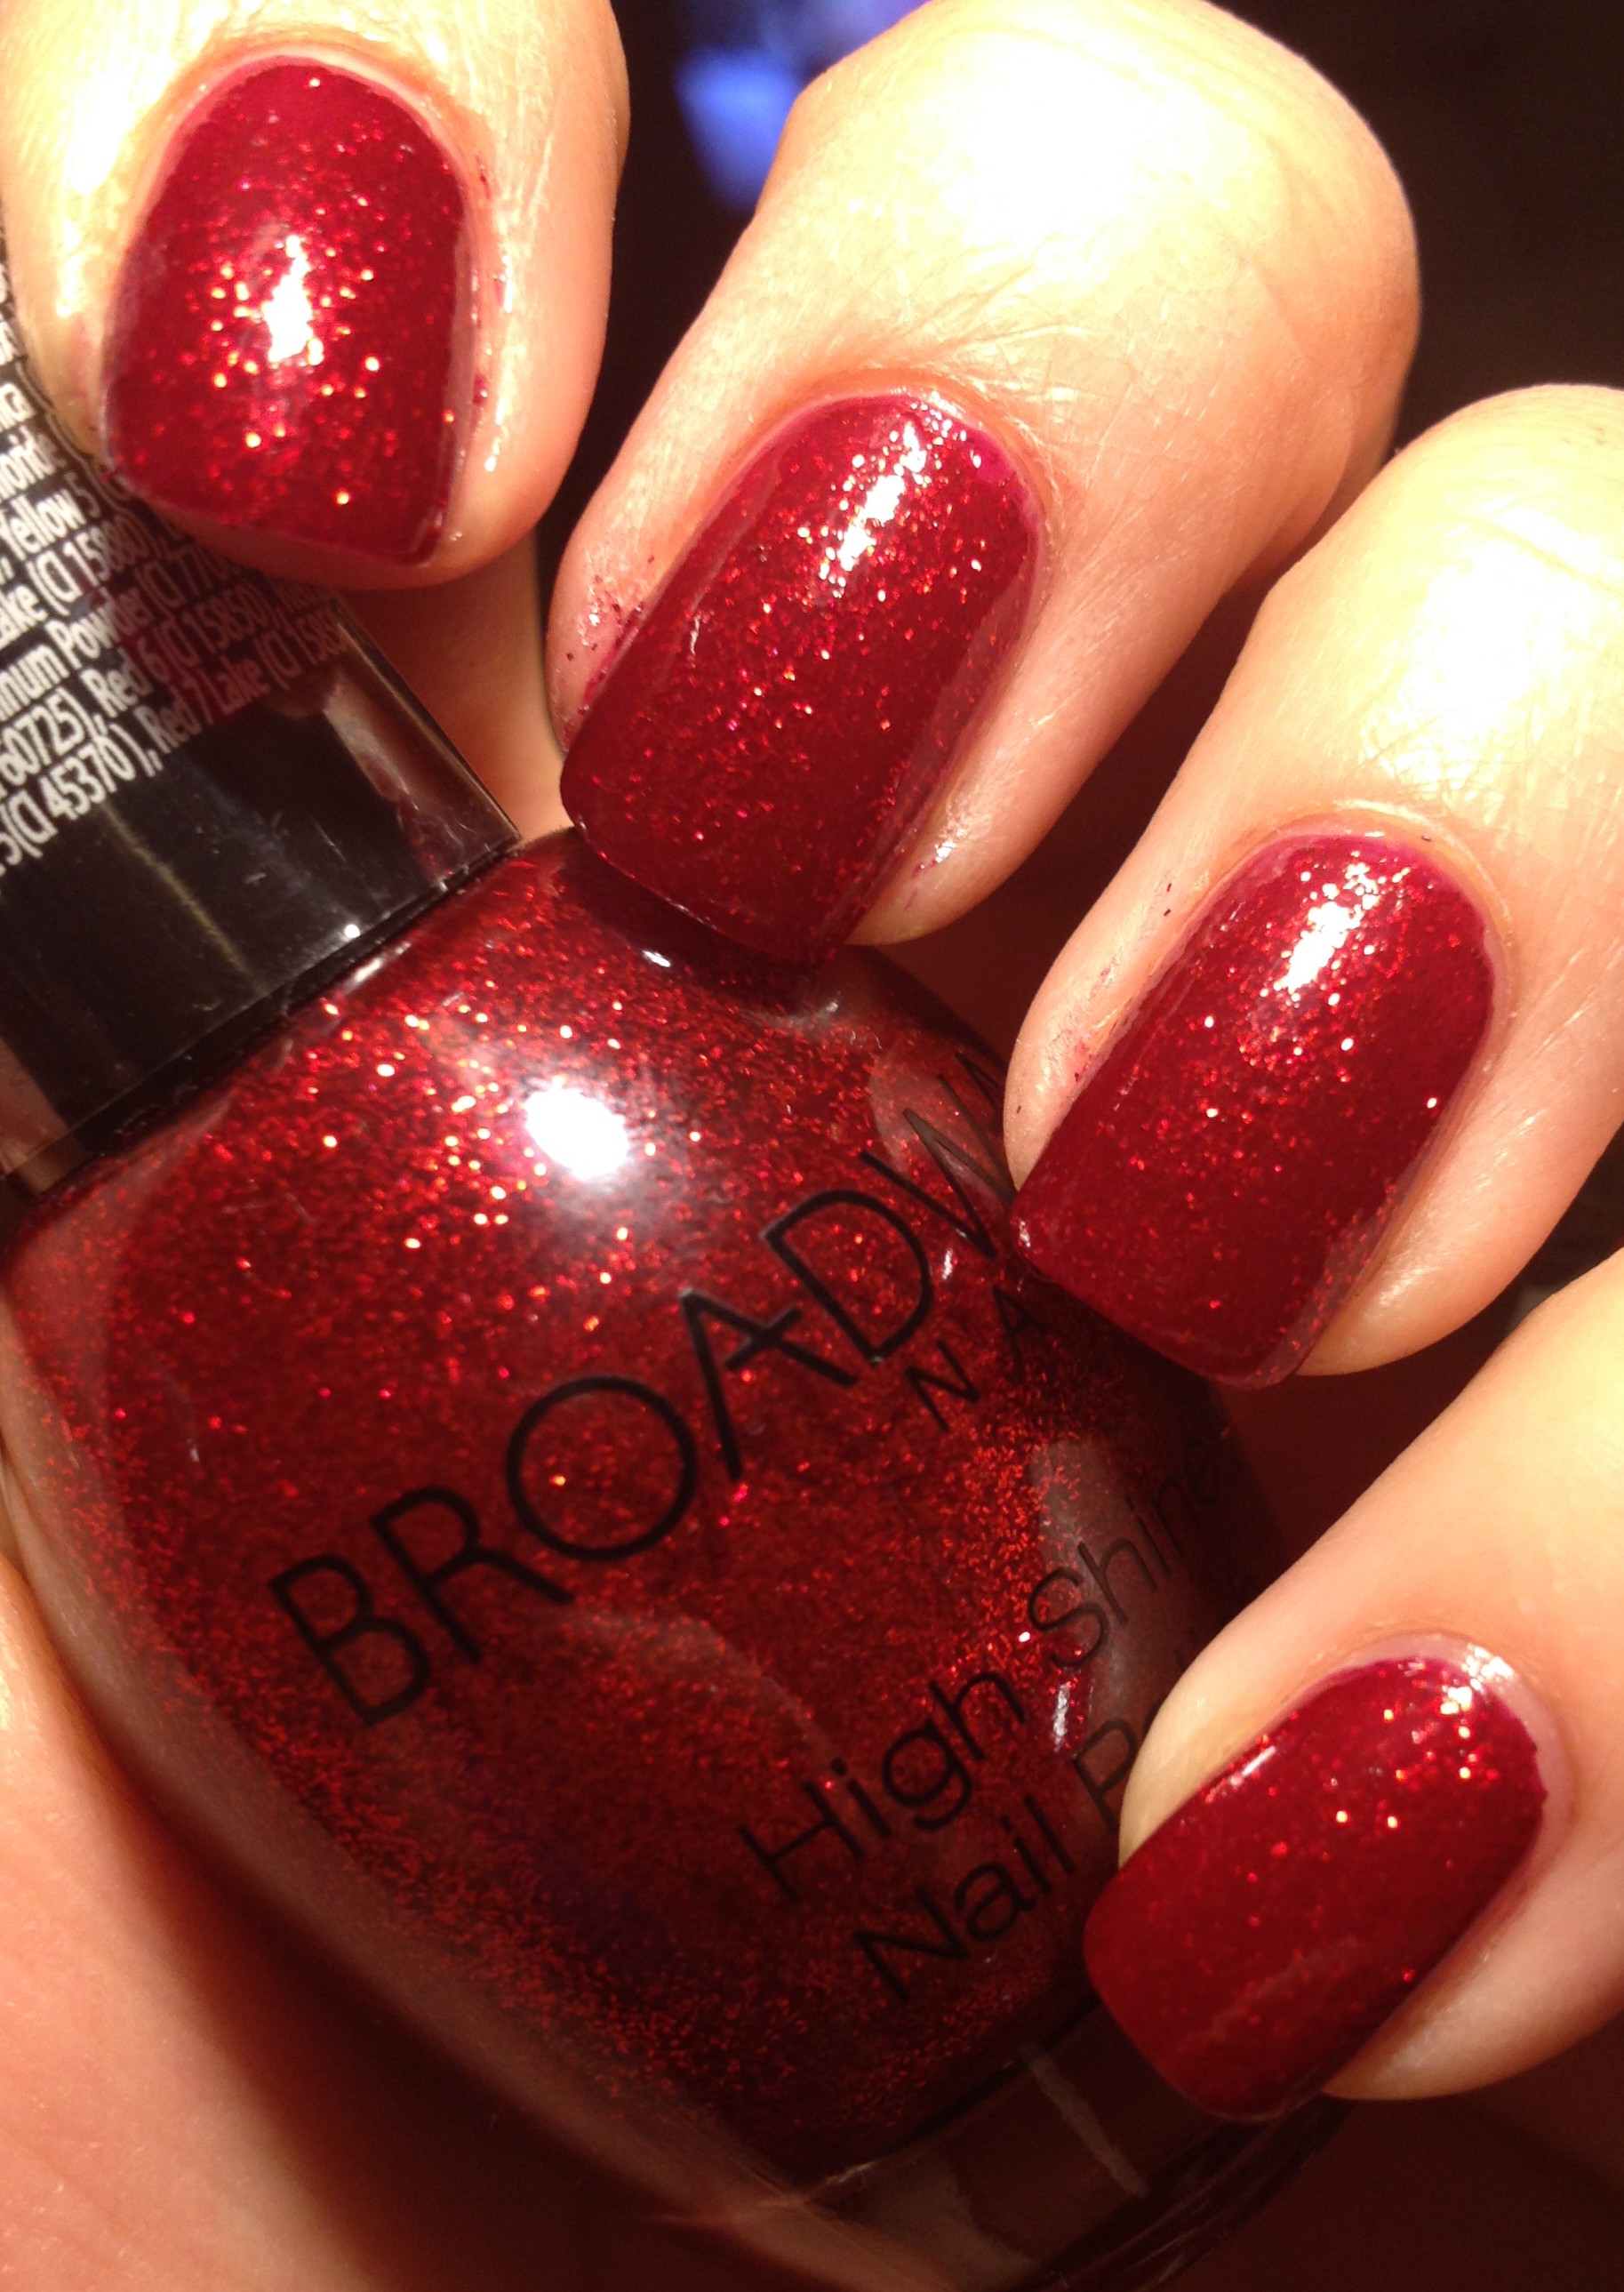
So beautiful and red and sparkly!  I stare at my nails a lot when I’m wearing this! Also available at Dollar General for $1.

Now we have the polish that I loved the most in the fall.  NYC – Royal Chic.  This was from a limited edition collection, but really, there are lots of great browns out there.

IMG_3867IMG_3895

Sadly, these pictures really don’t capture the chocolaty brown goodness that is this polish.  It’s just so pretty and rich looking on the nail.

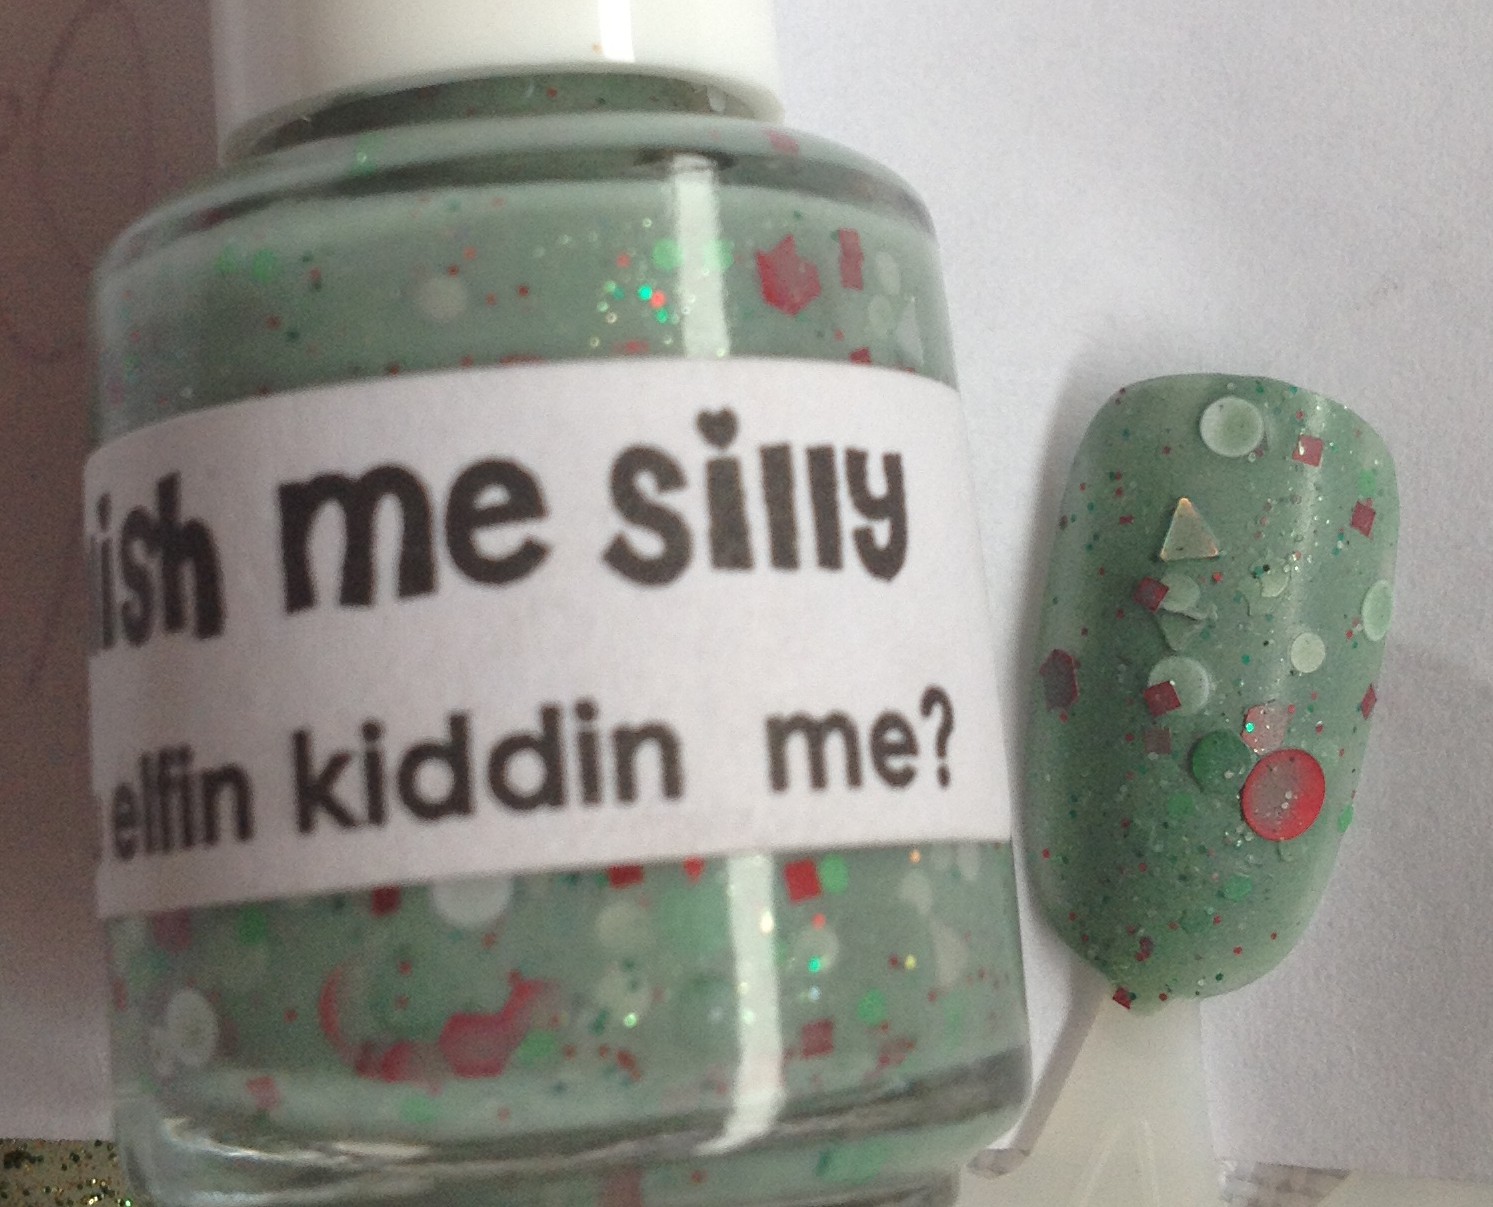
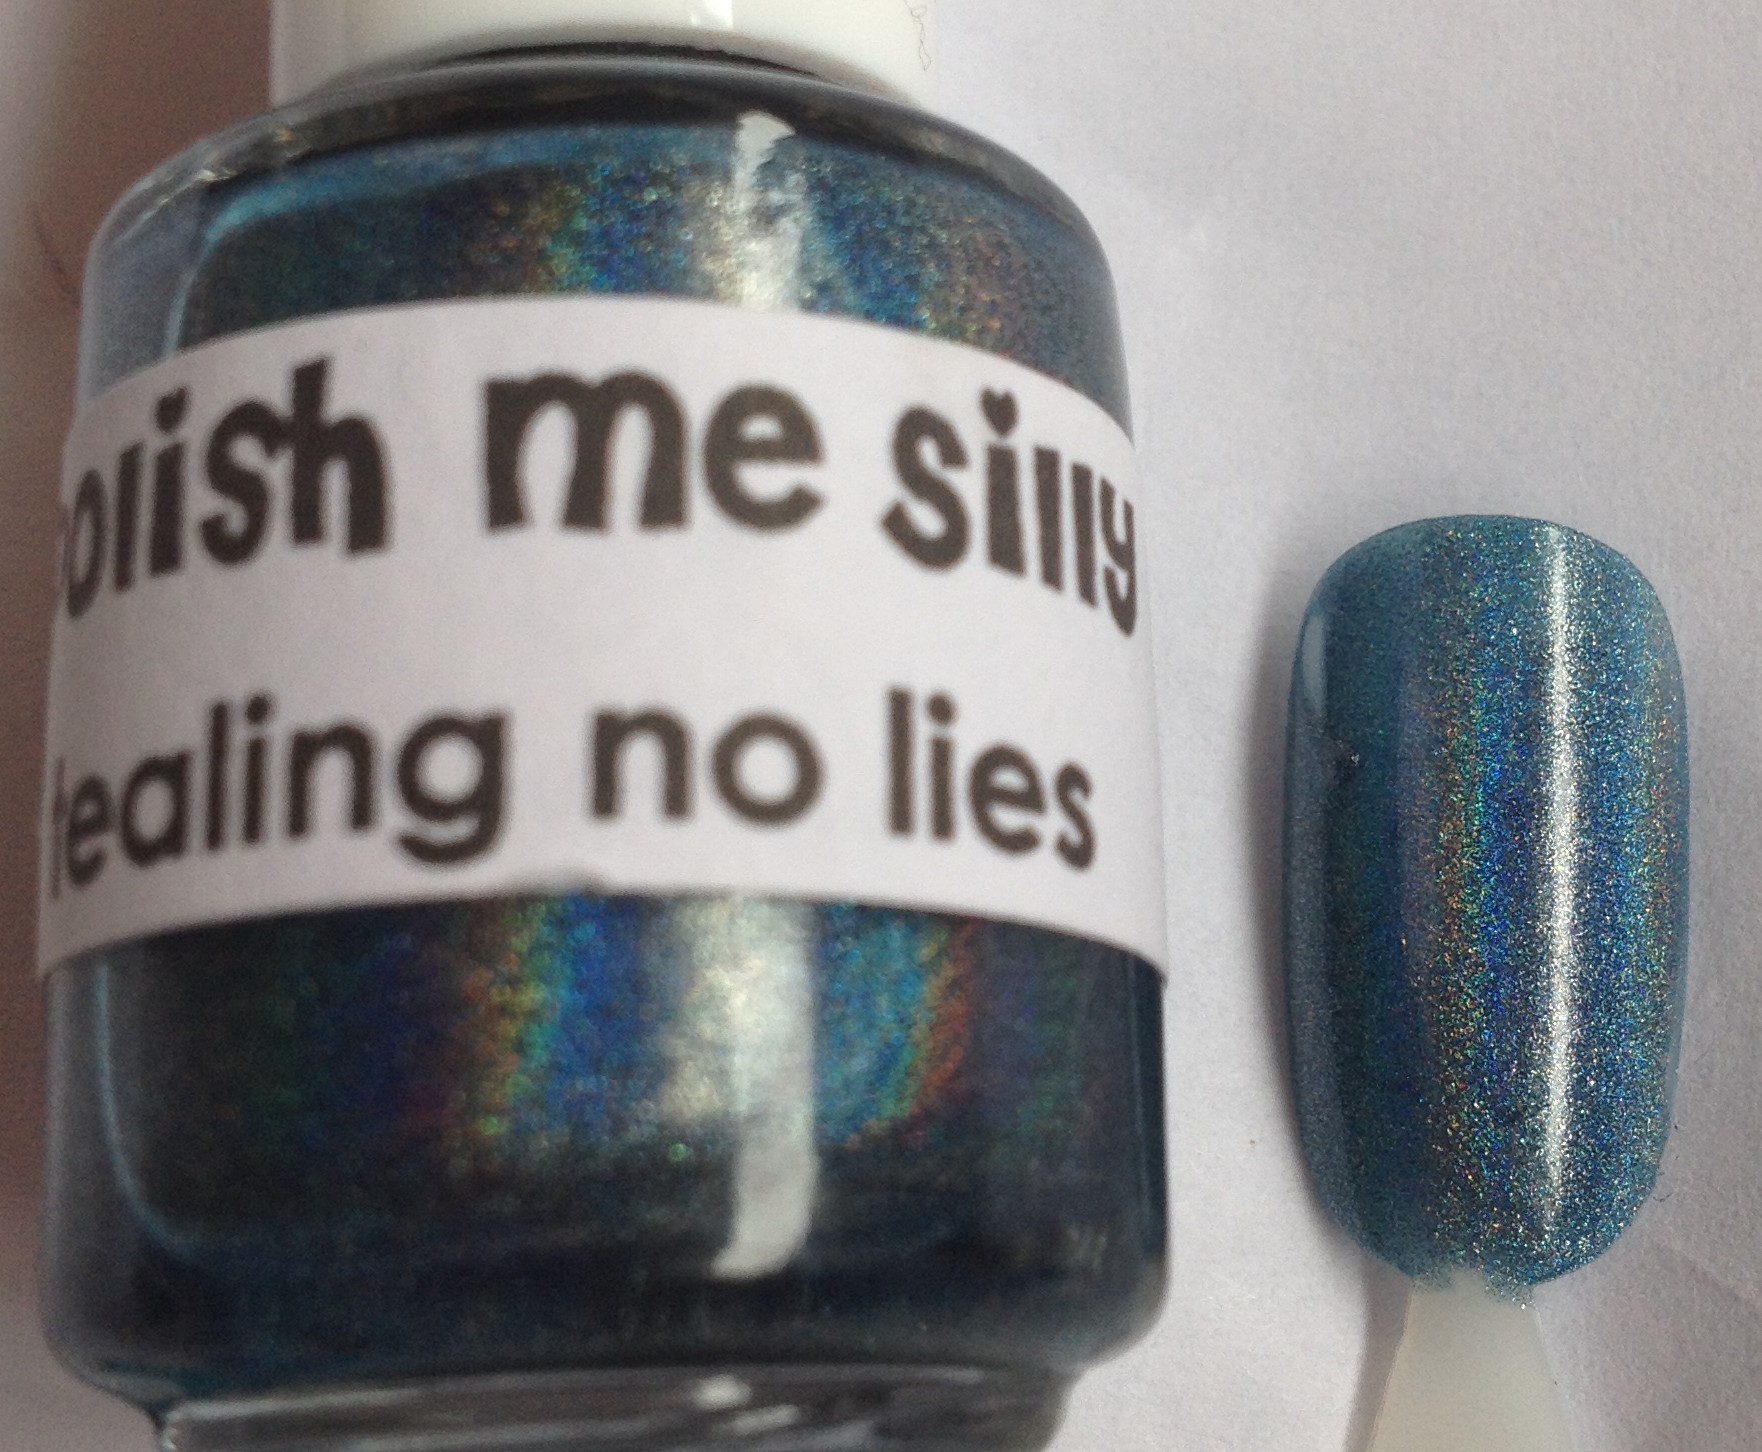
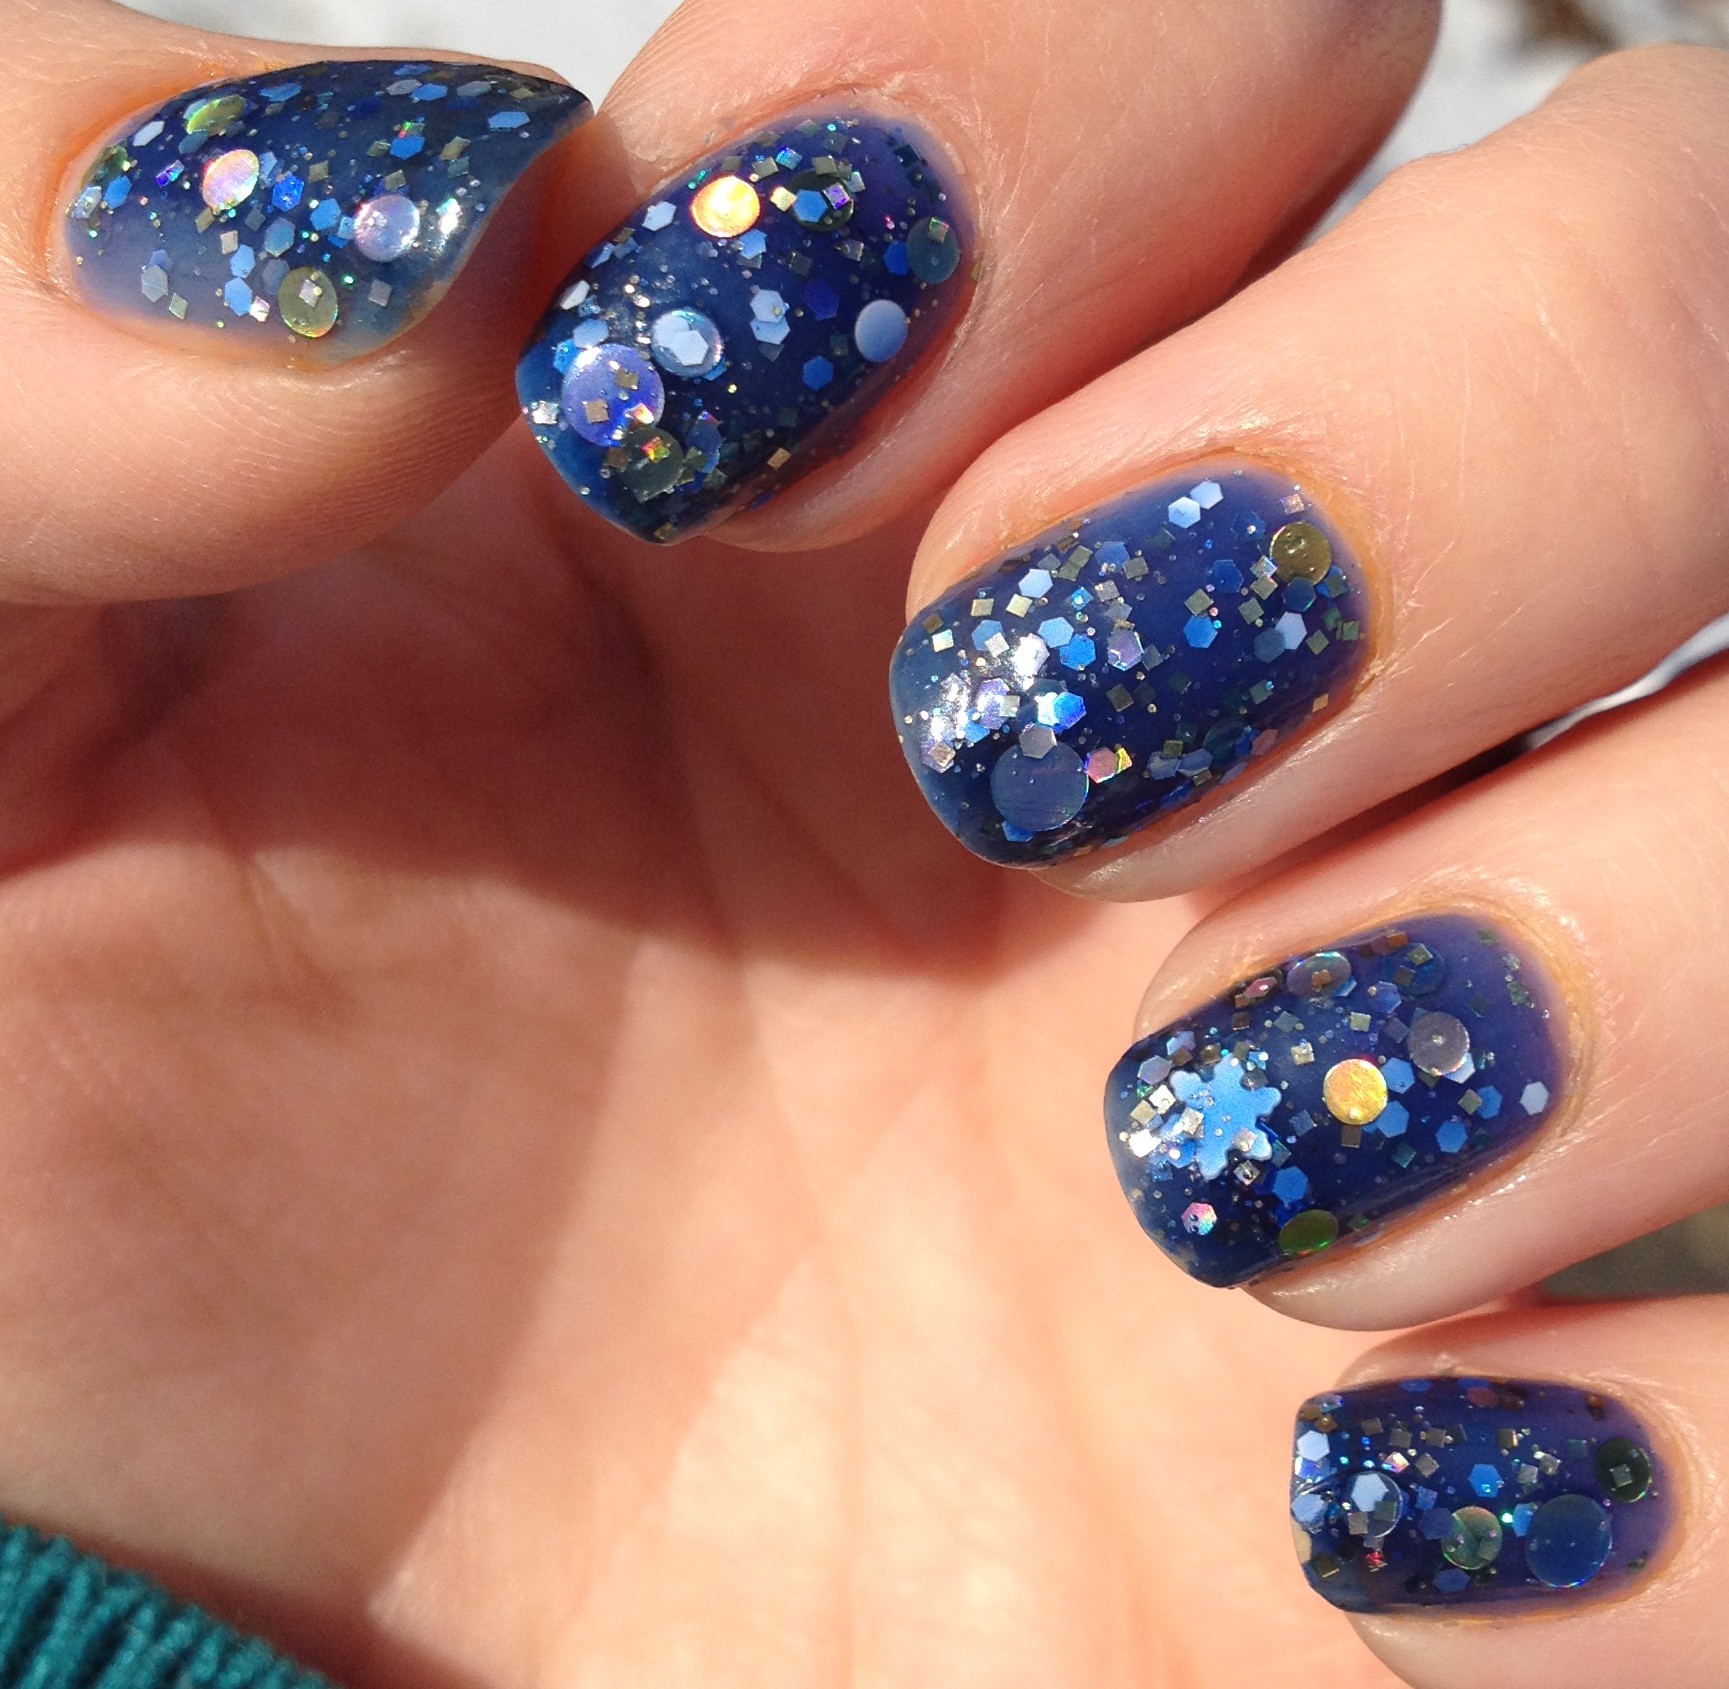
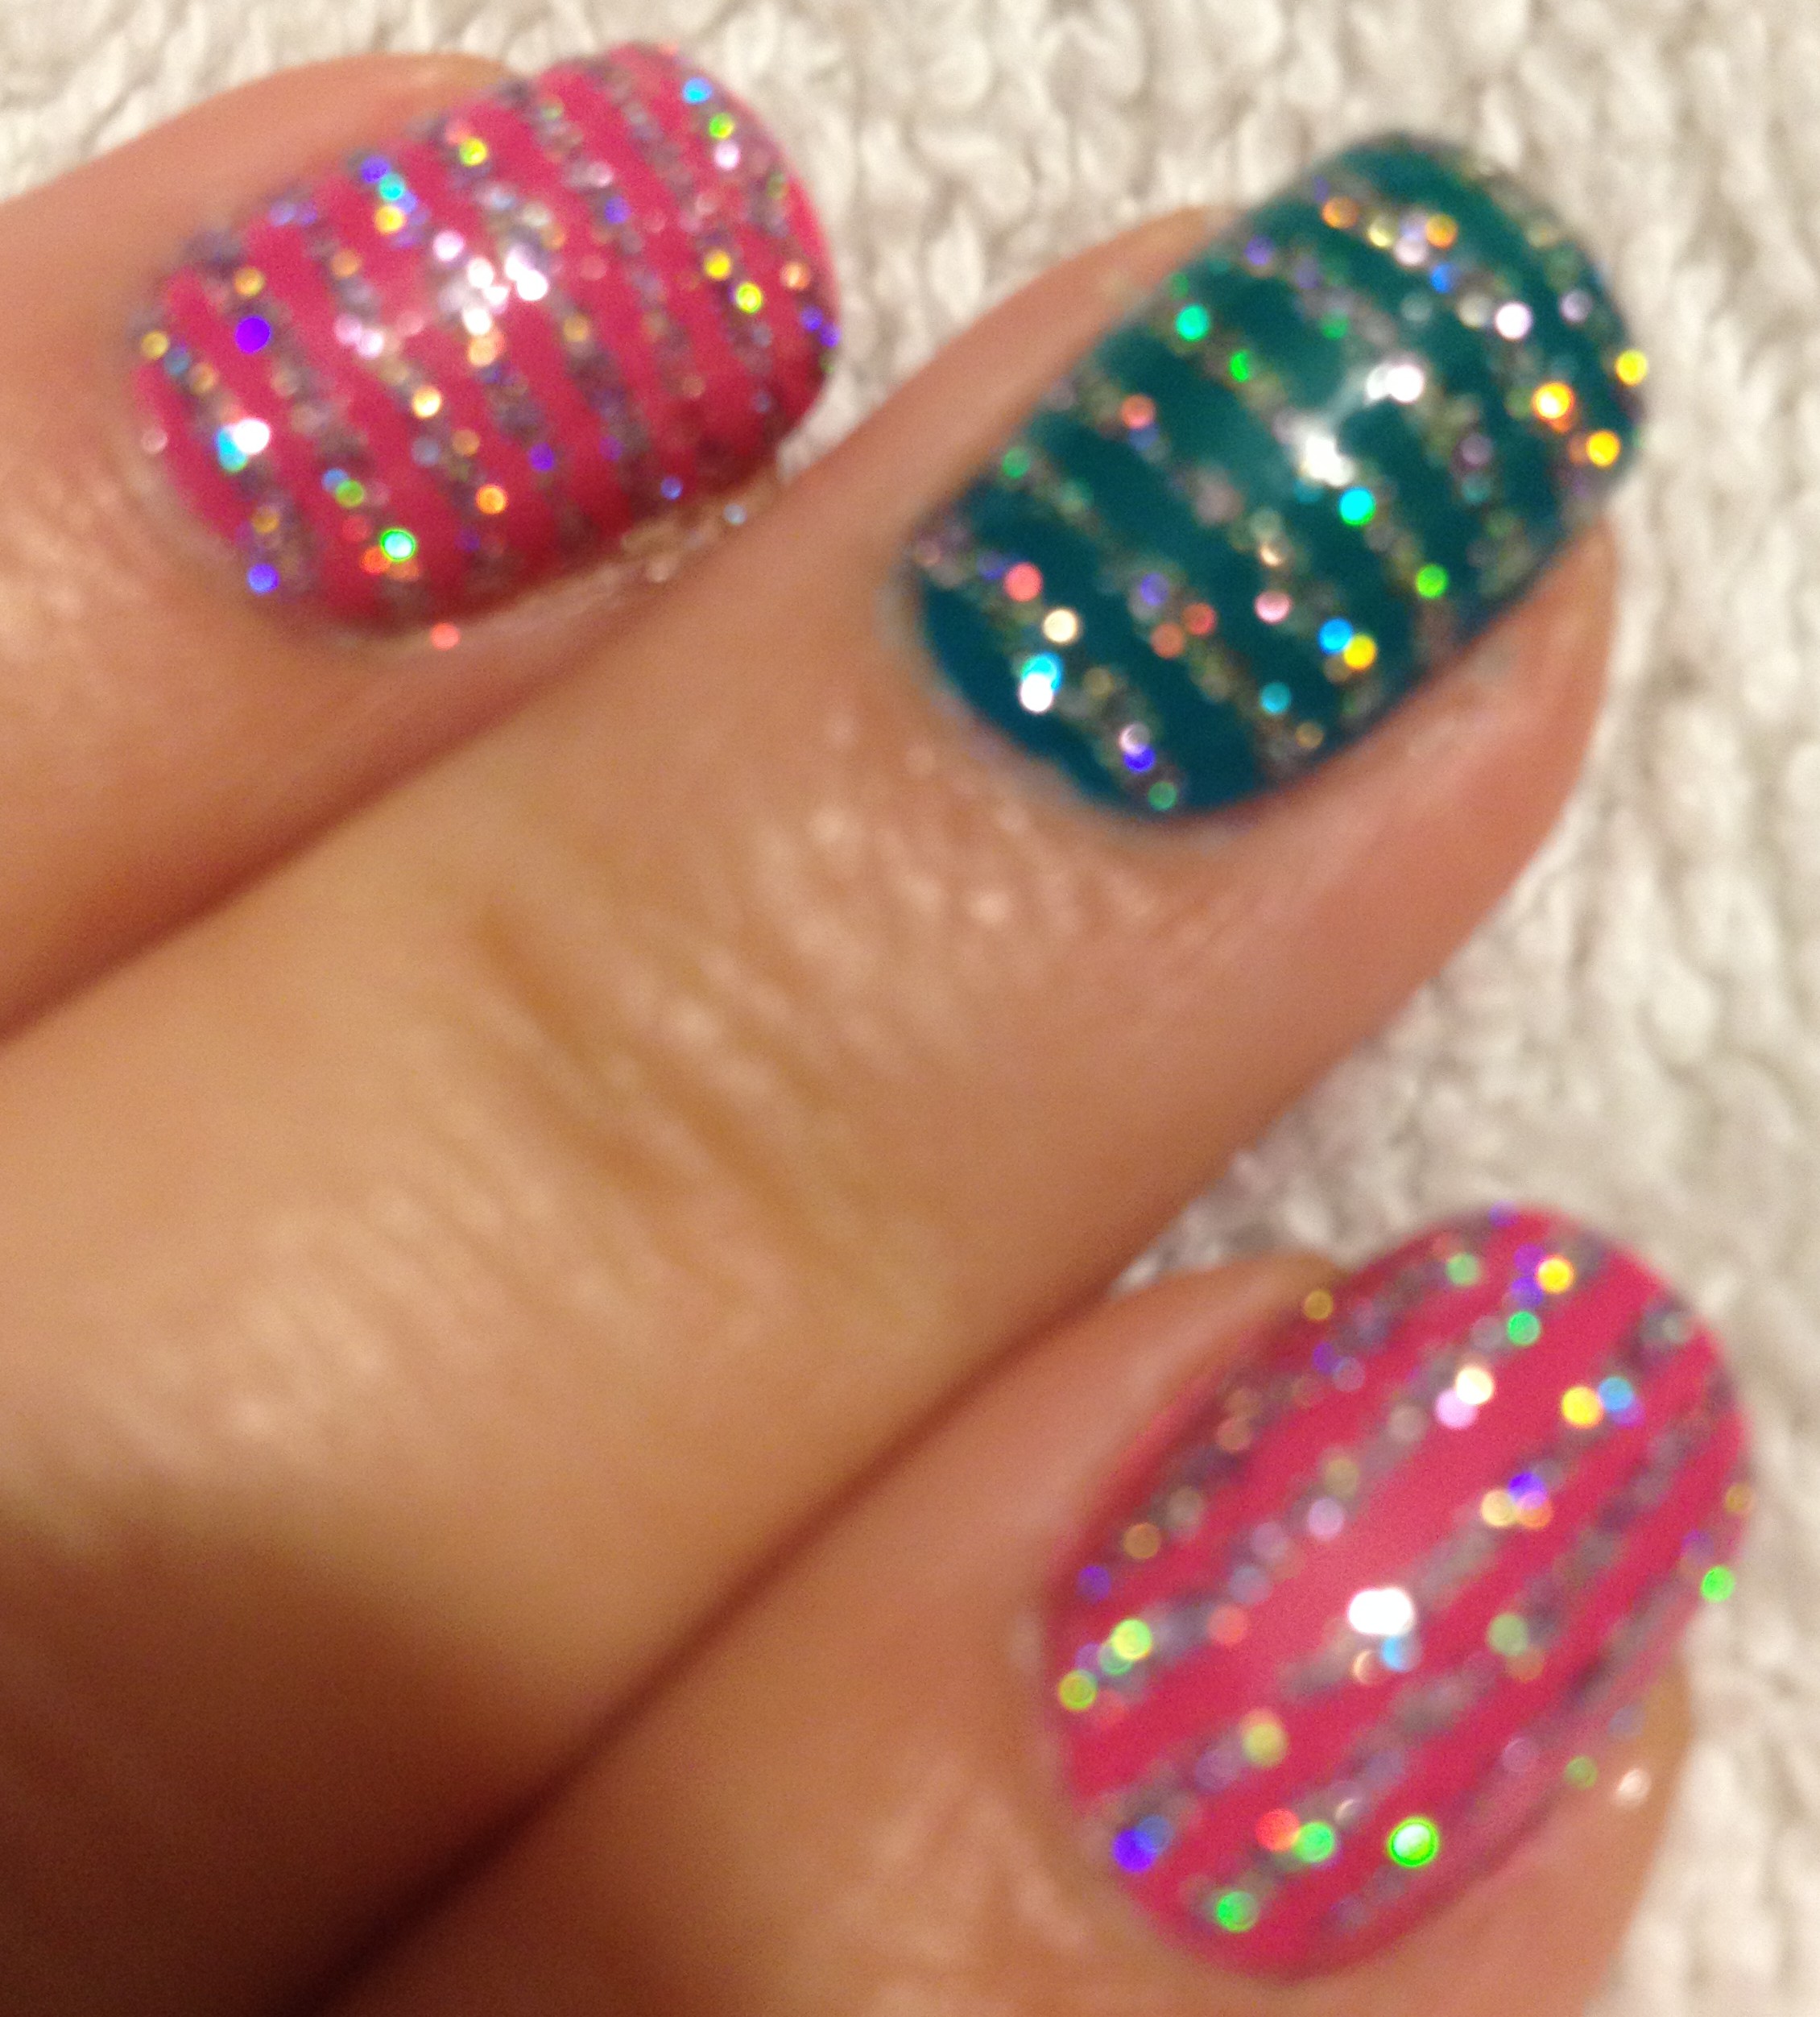
Last, but certainly not least is Polish me Silly – Tealing no lies.  This is my first indie holographic polish, and wow, it’s amazing.

IMG_4114

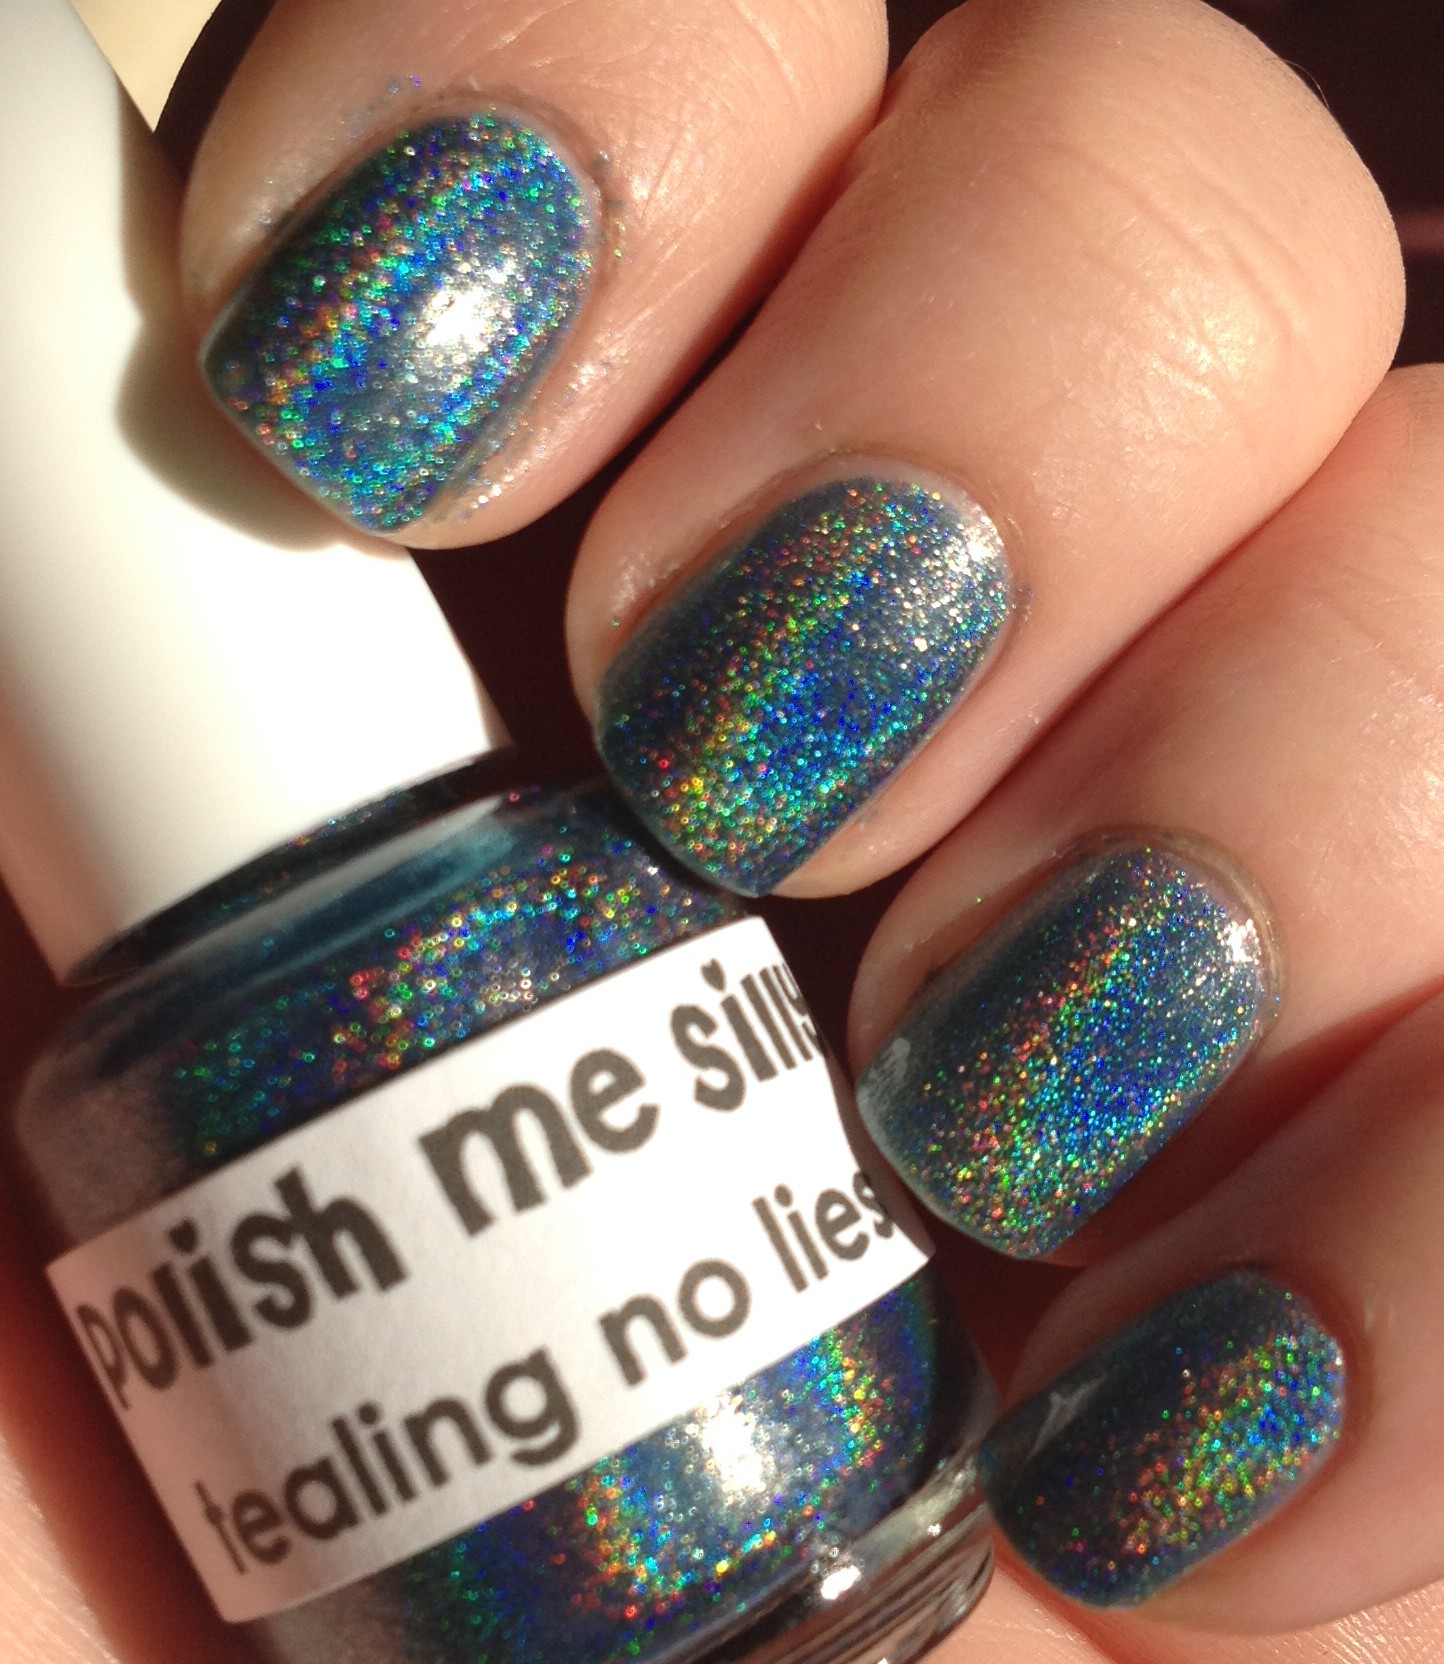
I just got this guy for Christmas, so I’ve only worn it once so far, but I pretty much couldn’t stop staring at my nails while it was on.  And I forced my husband to admire my nails so many times while I was wearing this.  It’s really, really amazing, especially in the sun.

So that’s it!  My 14 favorite polishes of the past year!  Thanks for reading!  What were some of your favorite polishes in 2014?  I’d love to know!

December Favorites

I’m finally getting around to my December favorites.  Ugh, I have so much catching up to do!  Not surprisingly, in December I loved all sorts of red and gold and glittery polishes.

IMG_4230

Let’s start with the top left.  This is Broadway Nails – Hot & Sexy.

IMG_4235I used this as my base color for my Sparkly Red Snowman Nails.  I just love this polish!  This is a great dupe for China Glaze – Ruby Slippers, and it only costs $1!  The only place I’ve seen these sold is at Dollar General. (You can read more about that here.)  This polish has a red jelly base with tons of red micro glitter.  And if I remember correctly, it’s easy to remove, unlike a lot of glitter polishes.  My little swatch isn’t doing this polish justice.  It’s super beautiful!

Next we’ve got Wet n Wild Fergie – Gold Album.

IMG_4236I’ve talked about this polish lots of times.  Every time I use it, I’m amazed and how beautiful and sparkly and shiny and GOLD it is.  I used this in December in my Advent manicure.  It’s pretty much a one coater, but but I tend to do two coats just to make sure it’s perfect.

Another favorite is Ulta – Joined at the Hippo.

IMG_4231

This was the base color for my Nativity Nails.  This is a beautiful deep blue cream polish.  The thing I love about it is that it is really dark blue, but it never looks black.  The formula is wonderfully easy to work with, also.

I also loved Pure Ice – Studette in December.

IMG_4237The bottle is a little fuzzy in the picture because I focused my camera on the nail swatch instead of the bottle.  This is a really dense micro glitter polish in a clear base that is about 98% gold and 2% red.  So cool!  I used this for my New Year’s Nails.  Really, if there’s ever a time that you can sport obnoxiously glittery nails, it’s New Year’s.  This one is a bugger to remove, but it’s worth it!

Next are my three new Polish Me Silly polishes!  I ordered these through Polish Me Silly’s Etsy shop, along with some polishes for my sister for Christmas.  Then I gave the polishes that I ordered for myself to my Hubby so that he could give them back to me on Christmas.  I know.  We’re weird.

IMG_4233IMG_4234IMG_4232

(Again, the bottles are a little fuzzy, but the swatches are clear.)

The first one is Are You Elfin Kiddin Me?  This is a thermal polish.  The color in the picture is the cold color, but then when it gets warm, the green base turns to white, which makes the dark green glitter really pop out.  It dries to kind of a semi-matte finish, but that’s fixable with a top coat.  (You can read more about what kind of top coat NOT to use with this polish here.)

The middle one is There’s Snow Place Like Home.  This is a dark blue jelly base with a ton, and I mean TON of gold, white and silver glitter in it.  All of that glitter makes it kind of a pain to apply, but the end results are like this:

IMG_4228

The sparkliness is over-the-top!  This is the polish that I’m currently wearing, and I’ve been asked about it so many times.

Tealing No Lies is my final polish.  This is amazingly holographic!

IMG_4114I can’t even tell you how many times I forced my husband to admire my nails while I was wearing this.  In bright sunlight it is so beautiful that it pretty much just makes you go numb with joy just looking at them.  This is definitely one of my favorite polishes of the year.  So amazing!

So, that’s all of my nail polish news, but I do have a little review for you in my new section that I’m calling….

Non-Nail News and Reviews

So, compliments of Influenster, I was sent this new antipersperant to try: Dove Dry Spray.  IMG_4218This is the stuff with the commercials with people touching their armpits and then snapping.  I know, it’s a little weird.  This products claims to be dry instantly.  I think it’s a little more accurate to say that it’s dry in 5-10 seconds.  It has really light sent, sort of like baby powder, but not quite. Pleasant.  It also claims to give 48 hour protection.  I’m not the type to go 2 days without a shower unless I’m in some sort of camping situation, but I will say that after 24 hours, my pits were still stank free.  That’s saying something, because usually I have a little bit of funk going on after 24 hours.  The coolest thing about this deodorant, though, is how it made my armpits feel to the touch.  Even after a full day, I couldn’t feel any weird residue or anything!  My armpit skin just felt clean and smooth and dry!  It was in that moment of touching my own armpit that I suddenly got those commercials with people touching their armpits and snapping.  After 3 days of testing this deodorant, I switched back to my old deodorant with the plan to use up the old stuff here in the colder months so that I can save my Dove Dry Spray for the warm months.  This stuff would be perfect for sleeveless outfits.  (Currently the windchill is below zero {Fahrenheit} and I’ve got three layers on, one of which is wool.  I think I’m a solid four months away from wearing anything sleeveless.  Come on, spring!)  This product is $5.47 at Walmart, and I saw in in Rite Aid for over $7, so it’s definitely a little pricy.  Definitely worth a try, though if you are in search of the perfect antiperspirant.

Thanks for reading!

An Actual Reason to Shop at Dollar General

Dollar general stores scare me a little bit.  It seems like you can always find at least one weirdo customer in there shopping at any given time, and I think the stores are always run by chain smoking 20-year-olds.  Seriously, the last time I was in a Dollar General, there were 2 young female employees talking about how much they loved to smoke.  The one was saying that she knew she should quite because she was having trouble breathing every morning.  Geez.  Yeah, maybe you should quit.

Anyway, there is one reason, and one reason only that I go into Dollar general stores: they’ve got nail polish.  Specifically today, I want to talk about Boadway Nails High Shine Nail Polish.  The only place I’ve ever seen this polish sold is at Dollar General Stores.  (If you’ve seen them any where else, please comment below!)  That means that if you want to try these polishes, you’re going to have to suck it up and actually go into a Dollar General store.  I promise you though, it’ll be worth it.

The in store display looks like this:

IMG_3566

Admittedly, this is not the greatest picture, but I sort of hate taking pictures of stuff in stores.  It makes me feel like a creep or something.  Anyway, do you see the little yellow price stickers?  That’s right, these little polishes are only $1 each!  As you can see, there are 4 tiers with 8 colors each.  (The middle tier has lip gloss.)  I don’t think there are any repeats, so that makes a grand total of 32 colors available.

So far I’ve purchase these seven:

IMG_3834

Here’s a little review of each along with a swatch.  Each swatch is 2 coats of the polish.

Starting with the upper left corner, we have Dark Night.

IMG_3847

This is a REALLY dark purple.  In person it’s not quite as dark as it appears in the photo.  I thought at first that this was going to be a jelly formula, but it’s actually really opaque in just two coats.  It applies really nicely.

Next is Sour Apple.

IMG_3848

This is a super pretty almost neon green.  I guess you could say it’s neon, but there are brighter greens out there.  This is mostly opaque in two good coats or 3 thin coats.  I really, really like this polish!  The formula is really good!  Like, surprisingly good for a $1 polish!  Here it is in action:

cropped-img_2497.jpg

Next is Space Flight.

IMG_3845

This is the prettiest blue jelly!  I used this for my glitter and my half moon manis during the 31 day challenge.  Like all jelly polishes, the color really deepens with each coat.

The first polish in the second row is Hot & Sexy.

IMG_3849

I bought this because I had been itching to get China Glaze – Ruby Pumps, but I hate spending $7 on one polish.  This is a fine red glitter in a red jelly base.  It’s just so pretty and sparkly!  Two coats gives good coverage and sparkle, but I think a third coat would make it even prettier!

Next is Snow White.  I originally got this to do a  white polish comparison.  Eh, its just okay.  Check out the link if you’d like more info.  I probably will actually use this one for some frankenpolishing down the road.  I don’t actually have swatches of my white polishes on a swatch wheel because… it’s just white.

Next is Base Coat.

IMG_3840

The dumb thing is it’s not an actual base coat.  It’s just a really sheer nude color.  Obviously it’s really sheer, because you can read “Base Coat” backwards through the polish.  (I write the names of the polish on the back of each of my swatches.)  I got this color to use as a base for french manis.  It’s not an exciting color, but it gets the job done.

Last we have Paradise Water.

IMG_3844

I was really hoping that this would be opaque on its own.  Obviously, it’s super glitter packed, but not quite enough to be opaque.  Oh well, for a dollar, I think it’s still worth it.  I haven’t really played with this one much, but I think I’ll have fun layering it over different colors.

If you decide to brave your local Dollar General for any of these polishes, please let me know what colors you get and what you think!  Thanks for reading!

September Favorites

Doing the 31 day challenge in September led me to use a lot of polishes in my collection that I either had never used much before or had sort of forgotten about.  And because I did my nails every single stinking day of September, my list of favorites for the month was really long!  As I put all of my favorites in a pile, I had 4 or 5 polishes that were in limited edition collections that are pretty tough to find now.  I pulled them out of the pile, because I thought it would be pretty mean to be like, “Oh, this is the most awesome polish ever!  You can’t get it anywhere, though.  Sorry about your luck.”

So here’s the pile of my favorites:

IMG_3536

They are left to right, starting with the top row: Wet n Wild – I Need a Refresh-Mint, NYC – High Line Green, Sinful Colors – Cinderella, Orly – Tropical Pop, Broadway Nails – Space Flight, Wet n Wild – Bubblegum Pop, Jordana – Boy Oh Boy.

I’m going to start with Orly – Tropical Pop.  This one kind of breaks my own rule because it was part of the Baked summer 2014 collection.  I still think you will be able to find this with a little bit of searching, though.  I used this orange as my base color for my Day 2: Orange Nails.  This color is such a fun, light neon orange.  It seemed a little shockingly bright at first, but it really grew on my as I wore it.

NYC – High Line Green is one of the very few polishes that I bought for a specific day of the challenge.  I used this color as the base for my Day 4: Green Nails.  It is just the prettiest “ugly” green!  I loved this color so much on its own that I was a little sad to cover it up with the camo pattern.  It’s a fun green for springtime, but I’m definitely going to wear in here in the fall, too.

The name of this next polish was actually the inspiration for my Fairy Godmother nails for  Day 5: Blue Nails.  Sinful Colors – Cinderella has this beautiful pinkish-gold micro shimmer that just makes my heart skip a beat.  It is SO BEAUTIFUL in the sun!  Love it!

Nails – Space Flight is a dark blue jelly polish that bought back in the summer.  It seemed to dark to use then, but once September rolled around, it finally seemed appropriate.  I used it for both Day 17: Glitter and Day 18:Half Moons even though they were back to back days.  My creativity was waning a little at that point, and I was more interested in just using a particular polish that coming up with some ground-breaking design.  I can’t wait to use this for some more jelly sandwiches in the future!  I’ve only ever seen this line of polish at old exclusively at Dollar General and Family Dollar stores.  They are generally in these stand-alone displays that are like big, tiered clear plastic bowls.

Wet n Wild – Bubblegum Pop is a cool pink color.  Cool as in “it leans blue”, not cool as in “awesome”.  Actually, it is a little bit awesome.  I used this polish for my Day 20: Water Marble. This polish actually marbled beautifully with Sally Hansen – Pacific Blue (original formula).  It made the whole process much less painful than I had anticipated.  Although the Wet n Wild Megalast line is available at most grocery stores and drug stores, this color (along with another 15 colors or so) are also sold exclusively at Dollar General and Family Dollar stores.  I know, that’s such a weird place to go for exclusive polishes.

Jordana – Boy Oh Boy is SO AMAZING!  Sigh.  It just makes my knees weak.  It’s this perfect turquoise color, it’s pretty much a one-coat polish, and it’s SO shiny.  Trust me, you need this polish in your life.  I used this polish for Day: 12 Stripes and Day 26: Inspired by a Pattern.  I know Jordana cosmetics are available at K-Mart.  I’m not sure where else you can get them.  I can tell you for sure that they are not available at Wal-Mart, Target, CVS, and Rite Aid stores, at least in south-central PA.   Jordana also makes some really pretty glitter polishes, too.

Okay, the last polish in my favorites is Wet n Wild – I Need a Refresh-Mint.  I used this polish as the base color for Day 15: Delicate Print and Day 23: Inspired by a Movie.  I also used it as the light blue on my ring finger for Day 27: Inspired by Artwork, but you can barely see it on those nails.  I’ve gotta say, I’m a sucker for this color.  Exhibit A:

IMG_3538

From left to right: Wet n Wild – I need a Refresh-Mint, Sinful Colors – Nice Stems, China Glaze – For Audrey.

I can usually justify owning similarly colored polishes, but even I can admit that nobody really needs all three of these.  For Audrey is a tiny hair darker than the other two, and Nice Stems has a barely discernible shimmer, but really… They’re pretty much the same.  All three polishes have a good formula that is opaque in 2 coats.  The Wet n Wild Megalast polishes come with a wider brush, which I like, but I know some people don’t.  You can pretty much get four Sinful Colors or Wet n Wild polishes for the cost of one China Glaze, so that sort of makes For Audrey totally not worth the price tag for me.

I have one last polish that I used pretty much every single day of the challenge: NYC – Grand Central Station.

IMG_3537

This polish is under $2 and it dries so quickly and leave such a great shine!   It’s just such a great quick-dry top coat for the price.  It doesn’t do that shrinkage thing that Seche Vite does, although I do think Seche Vite is just a hair more shiny.  I really can’t tell a difference in quality between NYC and Out the Door.  I still have not tried the HK Girl top coat, but until I get around to trying that, I think I’m going to stick with this stuff.  It’s just just a great value.  I think I’m on my 3rd or 4th bottle.  Can’t really remember.

That’s it for my September favorites!  Have you used any of these polishes?  What are your current favorites!  I love getting your feed back here, on facebook, and on instagram.  Thanks for reading!


July Favorites

Happy August!  I got really excited, probably irrationally excited, when I realized that July was over and I could do my first monthly favorites post.  I’ve always enjoyed checking out other bloggers monthly favorites, and for some reason, I just get a huge kick out of being able to do my own.

IMG_2822

So, here we go…

Wet n Wild  – Tickled Pink

IMG_2816

This is just the most beautiful baby pink.  It looks so pretty with a tan.  It’s the pink I used for this look. This is a polish that I’ve had for a year or so, but I just remembered this month how pretty it is!

Broadway Nails – Sour Apple

IMG_2818

This is such a great neon green!  The formula is a great and it only cost me $1!  The only place I’ve see these sold is at Dollar General / Family Dollar stores.  It’s the green I used here.

NYC – Amazon Green from the City Samba collection

IMG_2819

This polish is actually a little lighter and greener than it looks in this pic.  It’s got a lovely frosty finish and makes me feel like my nails are covered in mint chocolate chip ice cream, which of course is a good thing.  I haven’t seen this in stores for a little while, so it might be tough to find.  Sorry about that.

China Glaze – Turned Up Turquoise

IMG_2820

This color is just do deep and rich!  It’s also got a beautiful shimmer that I feel sometimes reflects blue, sometimes green.  This polish was promoted as being a summer neon, but I think it’s also part of the permanent line, so you shouldn’t have too much trouble finding it.  If you’re a sucker for turquoise polish, do yourself a favor and get this one asap.

NYC – Matte Me Crazy top coat.

IMG_2815

I used this top coat for this aforementioned look and I was really happy with how it held up! I actually bumped one of my nails before it was completely dry, but this top coat sort of plumped back up and fixed itself so that you couldn’t even see where I had bumped it!  Some matte finishes will start to get glossy after a few days, but this just held up really well.

Funky Fingers – Sand & Stilettos

IMG_2821

I already gushed over this polish in my Five Below Haul, but I just can’t get enough of this polish!  It’s just SO sparkly and SO holographic.  I had it on my toes for a while and I just felt like they were covered in little diamonds when I was in the sun.  I used this polish for the little dots on my thumb nail here.

Fresh Paint – Guava

IMG_2817

This is the current color on my fingers.  Pardon my nail growth.  I just love this color so much that I’ve left it on for a whole week, and that’s saying something!  This is the most beautiful neon peach / light coral, and it’s one of those neons that just sort of glows at dusk when you’re outside.  It’s a dupe for China Glaze – Flip Flop Fantasy and way cheaper.  I picked this color up in my Five Below Haul also.  I love this color.  I love it so much.  I need to stop saying that.

So those were my July favorites!  What polishes have you been loving so far this summer?

*To get updates via facebook, please “like” my Polish Me Snazzy page and “share” it!  You can also find Polish Me Snazzy on instagram. Thanks for your support!


White Nails Are A Thing

Did you know that white nails are a thing?  Well, they are.  I think they started showing up on the runway about 3 summers ago, so the time is about right for them to make their way here to Smalltown, USA.

White polish looks great with tan summer skin and it’s also makes a perfect blank canvas for all kinds of nail art.  It’s also can help your sheer neon polishes look extra bright.  White polish can be tricky, though.  Light polishes can sometimes be sheer, and light colors seem less forgiving than darker ones when it’s not quite perfect on the nail.  That’s why it’s important for every nail polish fan to own a good white polish.

I decided to do a little comparison between 6 different brands of nail polish, most of which have a pretty low price point.  Here are the polishes I tested:

IMG_2603

From left to right:

Wet n Wild – French White Creme, $1.00

Broadway Nails -Snow White, $1.00

NYC – French White Tip $1.00

Sinful Colors – Snow Me White, $2.00

Sally Hansen – White On, $2.50 – $3.00

Essie – Blanc, $7.00 – $9.00

For years I used the Wet n Wild white because well, it was cheap and easy to find in just about any store.  I felt like the formula was okay, but not great.  Then one day I found Essie Blanc on a good sale!  I really thought it was going to be this amazingly wonderful stuff because it was regularly 8 times more expensive than my normal Wet n Wild.  Sadly, that was not the case, but it did motivate me to go on a hunt to find a really good white polish.

Okay, less rambling and onto the results.  For each of these polishes, my first finger has 1 coat, my middle finger has 2 coats, and my ring finger has 3 coats.  Here we go:

Wet n Wild:  With 2 coats, you can see that it’s still a little shear, but with 3 coats it’s pretty much opaque.

IMG_2605

Broadway Nails: Pretty similar to Wet n Wild, but maybe a bit more sheer.

IMG_2607

NYC:  I think with two careful coats, this would be opaque.  You can see on my middle finger near the cuticle that I had a little trouble with the polish pulling up and leaving a bald spot.  Generally, that’s caused by going over the polish with the brush too many times, which causes the polish that is partially dry to pull up from the nail.  I think if you are able to apply a coat of polish in 3 strokes, this polish will look good with only 2 coats.

IMG_2606

Sinful Colors:  This polish looked great in 2 coats!  I did a third coat on my ring finger for consistency’s sake, but it really didn’t need it.

IMG_2609

Sally Hansen:  This one is my favorite!  It was perfect in 2 coats, and a third coat actually made it a little too thick.  Really, this is a smooth, perfect white polish.

IMG_2611

Essie Blanc:  This one really preforms about the same as the Broadway Nails polish.  It’s really not that great and a rip-off for the price.   And do you see the teeth marks on the cap?  Yeah, I had a little trouble getting it opened this one time.  Anyway, I disliked this polish enough that I used it to do a little Frankenpolishing.

IMG_2612

So, in the end I really feel like the Sally Hansen polish is the bet polish of this lot, and at $3 or less, it won’t break the bank.  If you can’t find the Sally Hansen or you want to save a buck, I don’t think you’ll be disappointing with the Sinful Colors polish.  The other 4 polishes are just okay.  They will work in a pinch, but they don’t really rock my world.

Have you tried any of these polishes?  What’s your favorite? Have you tried any whites that aren’t on my list?


All About The Neon

So we’re smack in the middle of summer.  Summer is great for many reasons, not the least of which is wearing neon nail polish!  Actually, summer is pretty much the only season in which you can wear neon polish without looking…  What’s a nice way to say “trashy”?  (You are entitled to disagree with me, but that’s how I feel.)  Anyway, since we are in the season of neon, I figured it was a good time to talk about how we can all sport the most eye-searingly neon nails as possible.

Have you ever purchased a beautifully bright bottle of neon polish that you just couldn’t wait to put on your fingers?  You didn’t want much, just for your nails to be as bright as the bottle of polish.  Then once you got it on your nails, it was disappointingly drab.  It was streaky and see-through, and matte and just didn’t look like anything in the bottle.  It was a sad day.

Well, I’m here to tell you that you CAN have nails that are just as brilliantly bright as the polish appears in the bottle, and for the most-part, there’s just one really important step that you need to take before you slather on the neon polish…(Drum roll, please.)… You need to paint your nails white first.  A lot of neon polish has a pretty shear formula.  Those “highlighter yellow” polishes almost always have a really transparent jelly formula.  Because of that, the only way to get the true color to show up is to make sure it’s on a white background.

And you need to take your time and paint your nails really nicely with the white polish.  Since the neon polish is tends to be shear, any streaks or missed spots in the white polish are going to show through the neon layer, too.  Generally, two good coats of white will make a great base for your neon polish.

There are other bloggers out there (many of whom I like a lot) that claim that painting your nails white first should not have to be a requirement, and the nail polish companies need to step up their game and make true neon polish that doesn’t require a white base.  I say that those sentiments are all well and good, but the truth is, your neon nails will generally be a heck of a lot brighter if you just take the extra 5 minutes to put down a nice white base.

So, let’s get to some examples.  Here are the polishes that I tested:

IMG_2602

I arranged them nicely in rainbow order and took this picture in natural light to try to show the colors as accurately as possible. Starting with the upper left, the colors are:

  • Sally Girl #812157
  • Sally Girl #812158
  • China Glaze – Thistle Do Nicely
  • LA Colors – Hottie
  • Sally Girl – Crazy
  • Spoiled – Did I Dye It Too Blonde?
  • Broadway – Sour Apple
  • China Glaze – Turned Up Turquoise
  • Nina – Blue Blaze
  • Sinful Colors – Dream On

One each hand I painted my:

  • First finger: 2 coats of neon polish on bare nail
  • Middle finger: 3 coats of neon polish on bare nail
  • Ring finger: 4 coats of neon polish on bare nail
  • Pinky: 1 coat of white polish followed by 2 coats of neon polish
  • Thumb: 2 coats of white polish followed by 2 coats of neon polish

I did all of these swatches while watching The Bachelorette.  In retrospect, I should have done them during the day so that I could have photographed them in natural light.   It’s really hard to capture neon colors on camera as it is, and I think artificial light makes it even worse.   I should also point out that I am fully aware that my paint job on some of my fingers is pretty crappy.  I was mostly concerned with getting them all done before Andi gave out her final rose.

Here we go…

Sally Girl #812157:

IMG_2580

This picture is really deceptive.  The color is a crazy bright pink, and with this particular color, it is SO much more vibrant over white.

Sally Girl #812158:

IMG_2583

This is a neon bubblegum pink.  This one is actually just fine without a white base, as long as you do at least 3 coats.

China Glaze – Thistle Do Nicely:

IMG_2584

A hot pinky-coral.  China Glaze makes some really great neon formulas, and this is one of them.  Three coats without a white base looks great.

LA Colors – Hottie:

IMG_2595

This  is actually a bright coral.  This may not be a true neon, because the formula dries glossy instead of matte.  Three coats of this looks good without white underneath.

Sally Girl – Crazy:

IMG_2585

Traffic cone orange.  This picture is a little deceptive.  Without white underneath, it remains a dingy orange.  A white base makes the color blinding!

Spoiled – Did I Dye It Too Blonde?:

IMG_2588

This highlighter yellow is the color that most obviously benefits from a white base underneath.  On the pinky, you can see that the streaks from the thin coat of white show through.  I love how this looks on the thumb!  You definitely need two coats of white under this and then 2 coats of yellow, but the trouble is SO worth it!  You can stop traffic with these nails!

Broadway – Sour Apple:

IMG_2591

This color sure looks neon to me, so I was surprised that it dried glossy.  An amazing formula for a polish that costs $1!  Three coats without white and you are good to go.

China Glaze – Turned Up Turquoise:

IMG_2594

I LOVE this color!  This formula is great, so you don’t need a white base.  This is not a typical neon color, but it is part of China Glaze’s neon collection.  This looks really cool with it’s matte finish, but there is a greenish shimmer in this polish that really shows up when you put a shiny top coat over it.  This color, along with the last two, are actually colors that you can get away with wearing year-round.  Did I mention that I love this color?

Nina – Blue Blaze:

IMG_2598

Again the color in this picture is really deceptive.  I decided to include this color, because like most neons, it dries matte and it really is a bright electric blue in person!  It’s sort of irritating, but this color applies much more smoothly when it is not over white, but the color is much brighter when it is over white.  I think I’ll have to play with this one a little more to get it just right.

Sinful Colors – Dream On:

IMG_2599

This neon purple looks okay if you do 4 coats on it’s own, but a white coat underneath just makes it pop.

And here’s my little trash can by the end of The Bachelorette:

IMG_2600

You can see some of my husband’s peanut shells underneath.  He feels that it is important to shell and eat peanuts while he watches baseball on TV.   So, as long has he doesn’t complain about the nail polish bottles that are strewn all over our house, I won’t complain about the peanut skins that land on the carpet.  The things you do for love.

What are your thoughts on applying a white base under neons?  And what are your favorite neon polishes?