February Favorites

I figure that if I get my monthly favorites posted within the first two weeks of the following month, they are not completely irrelevant yet.  That’s my logic and I’m sticking to it.

The last few months have been extra super busy for me because of my work schedule, and I am itching for life to settle down so that I can get back to posting regularly.  I can almost see the light at the end of the tunnel, as I’ve been told my work schedule will go back to normal in a few week. Yay!IMG_4566

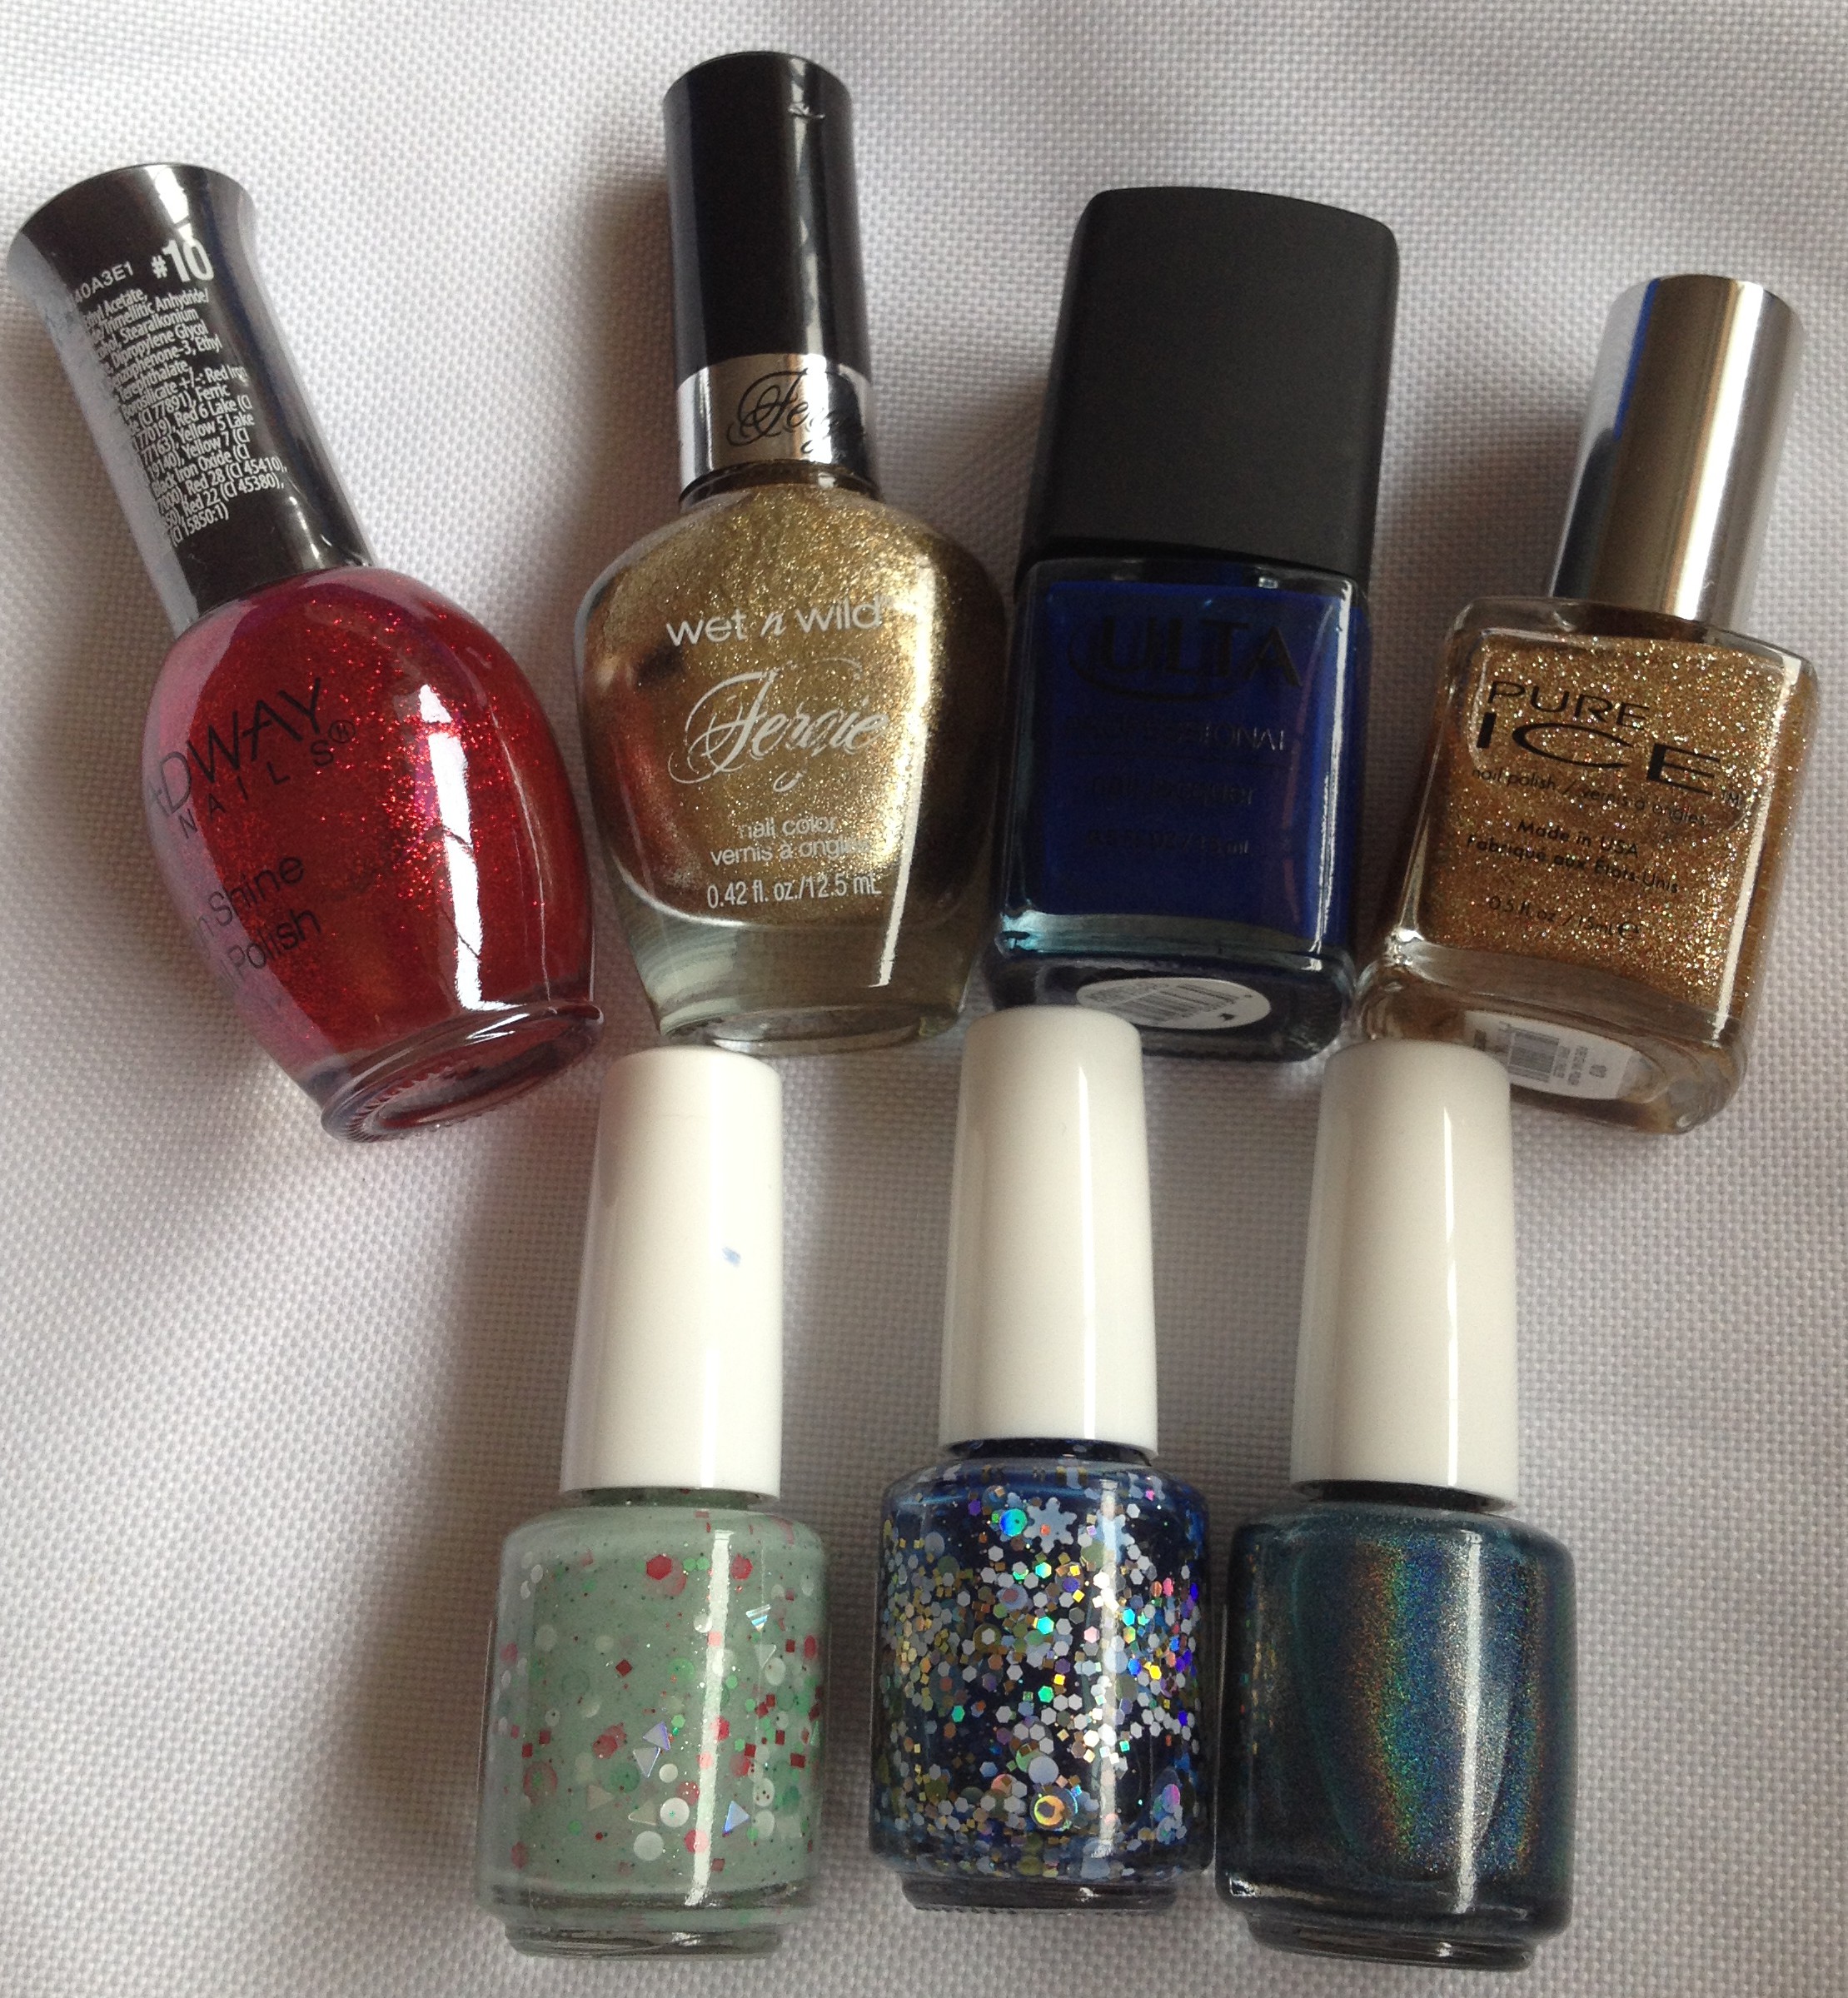
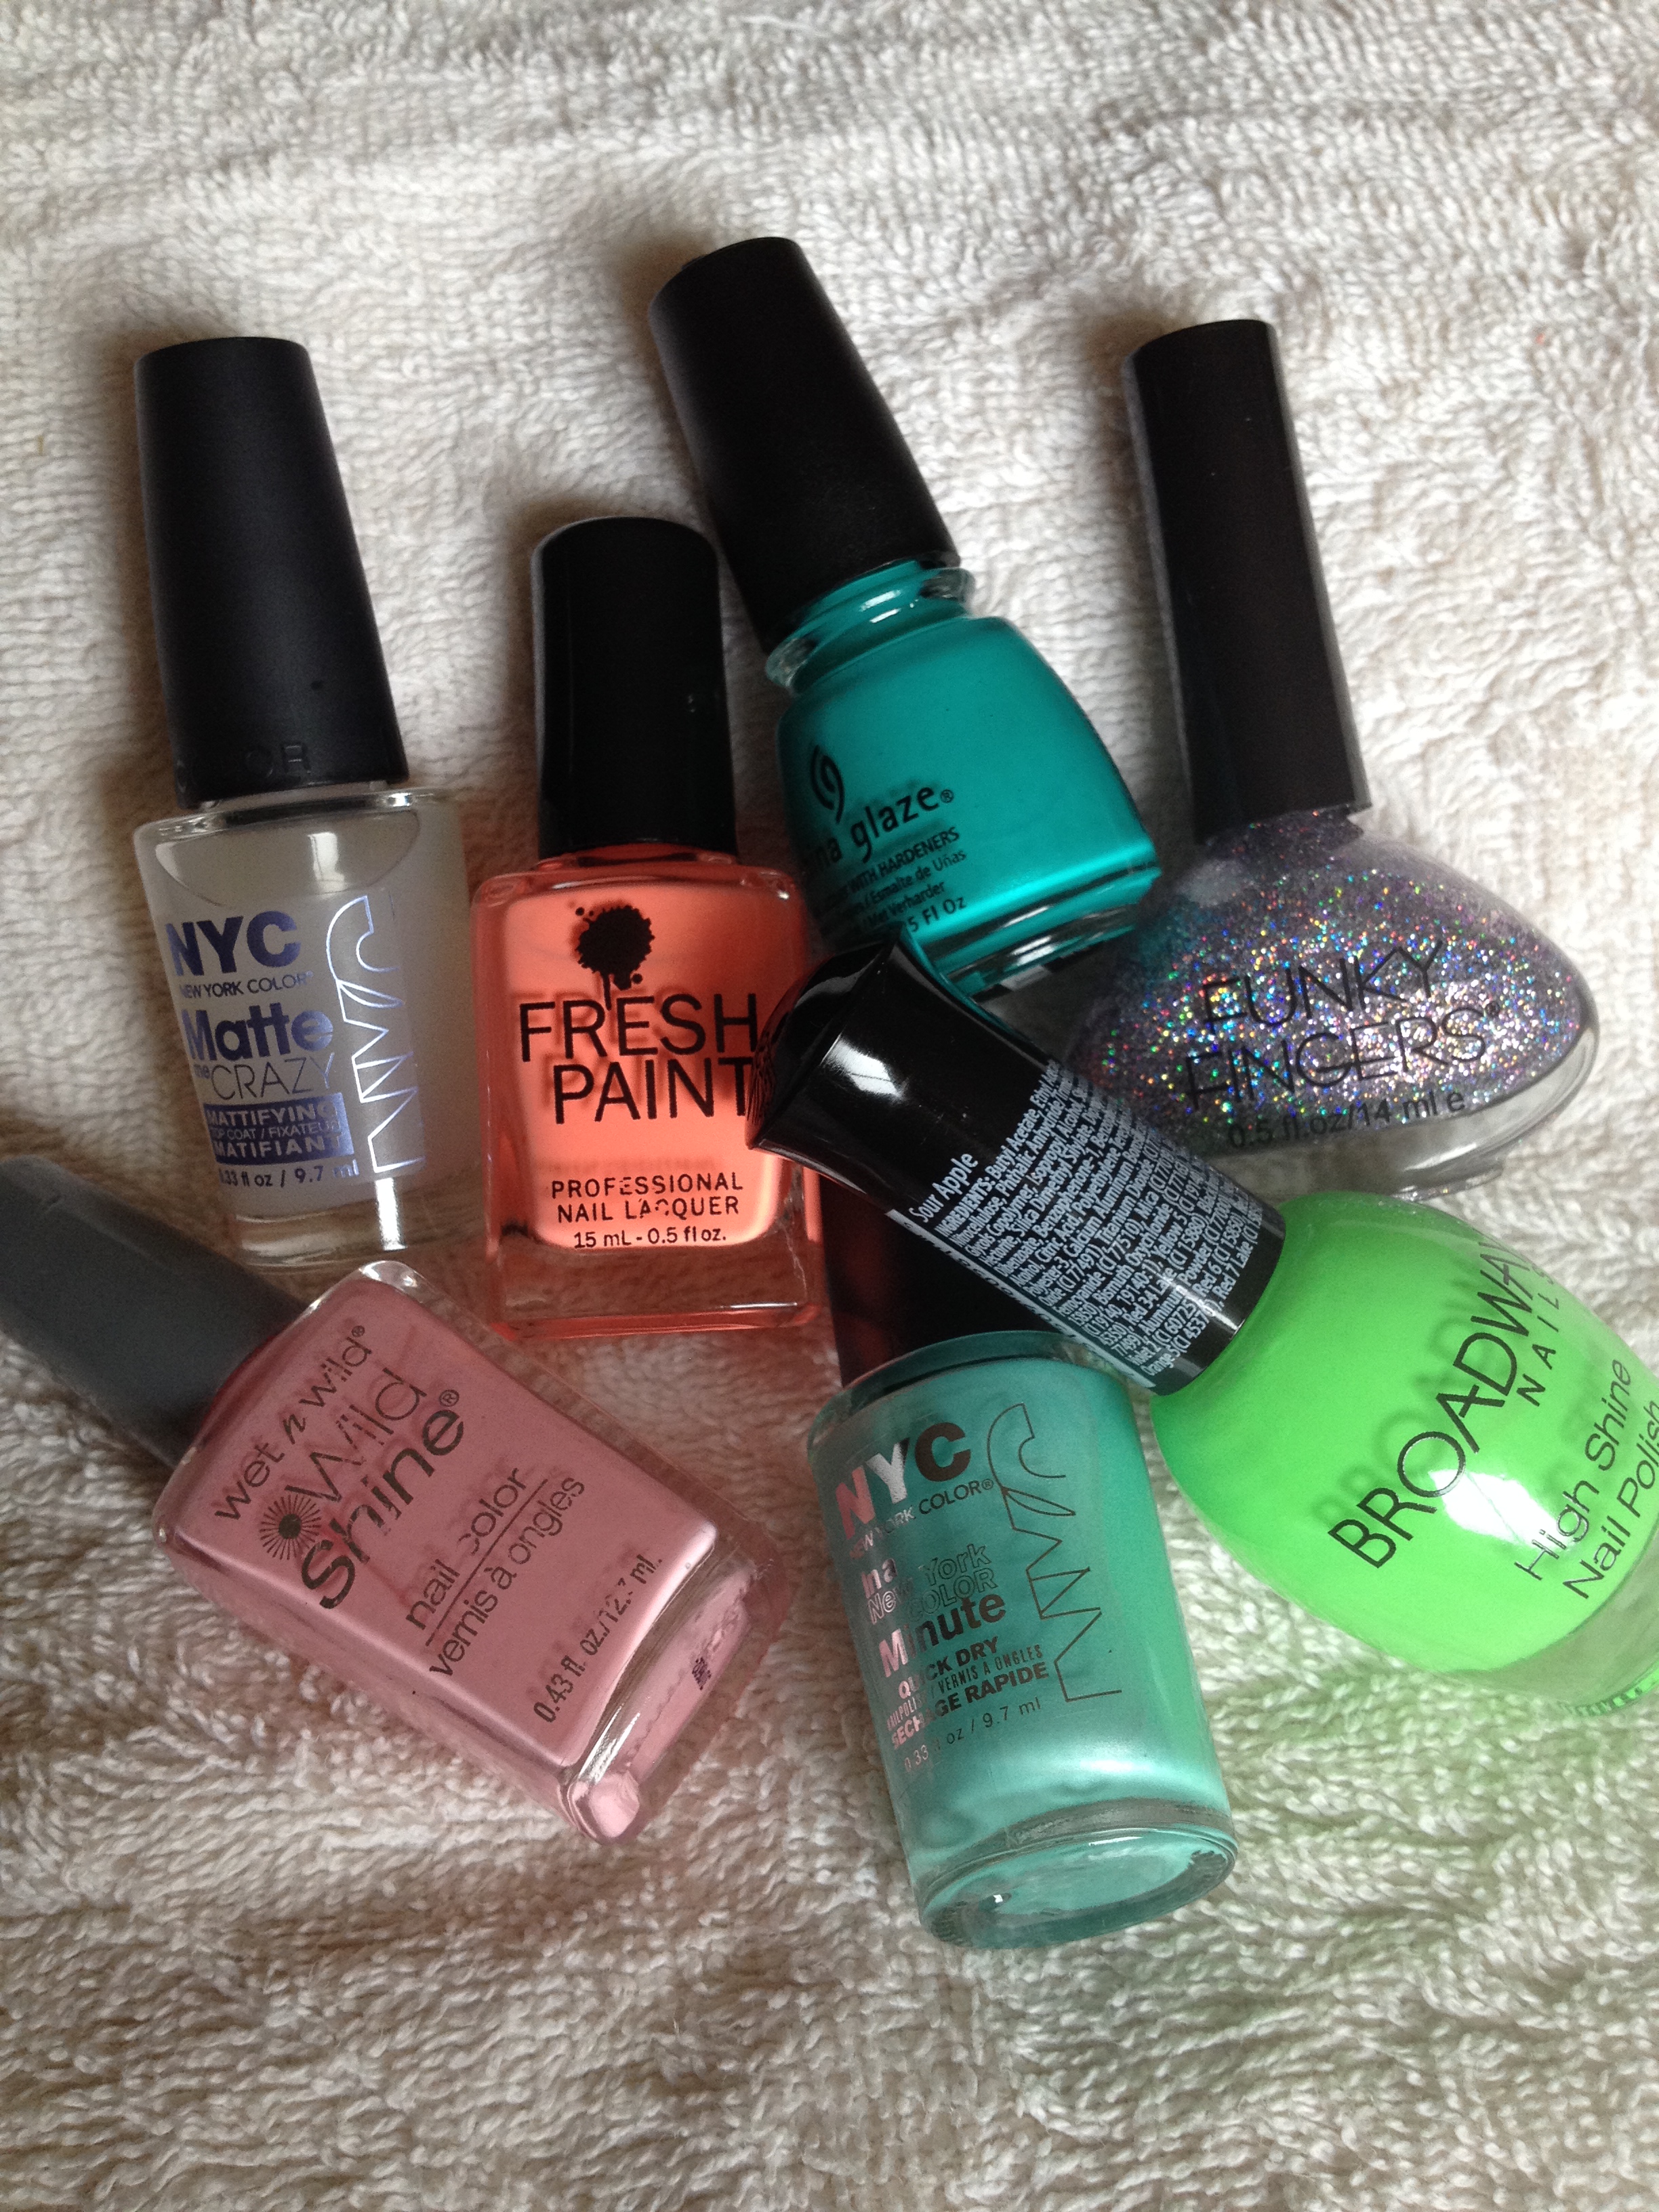
I did manage to come up with some favorites for the month of February.  And I thought the would look nice in a star formation.  Lets start at 12:00 and go clockwise….

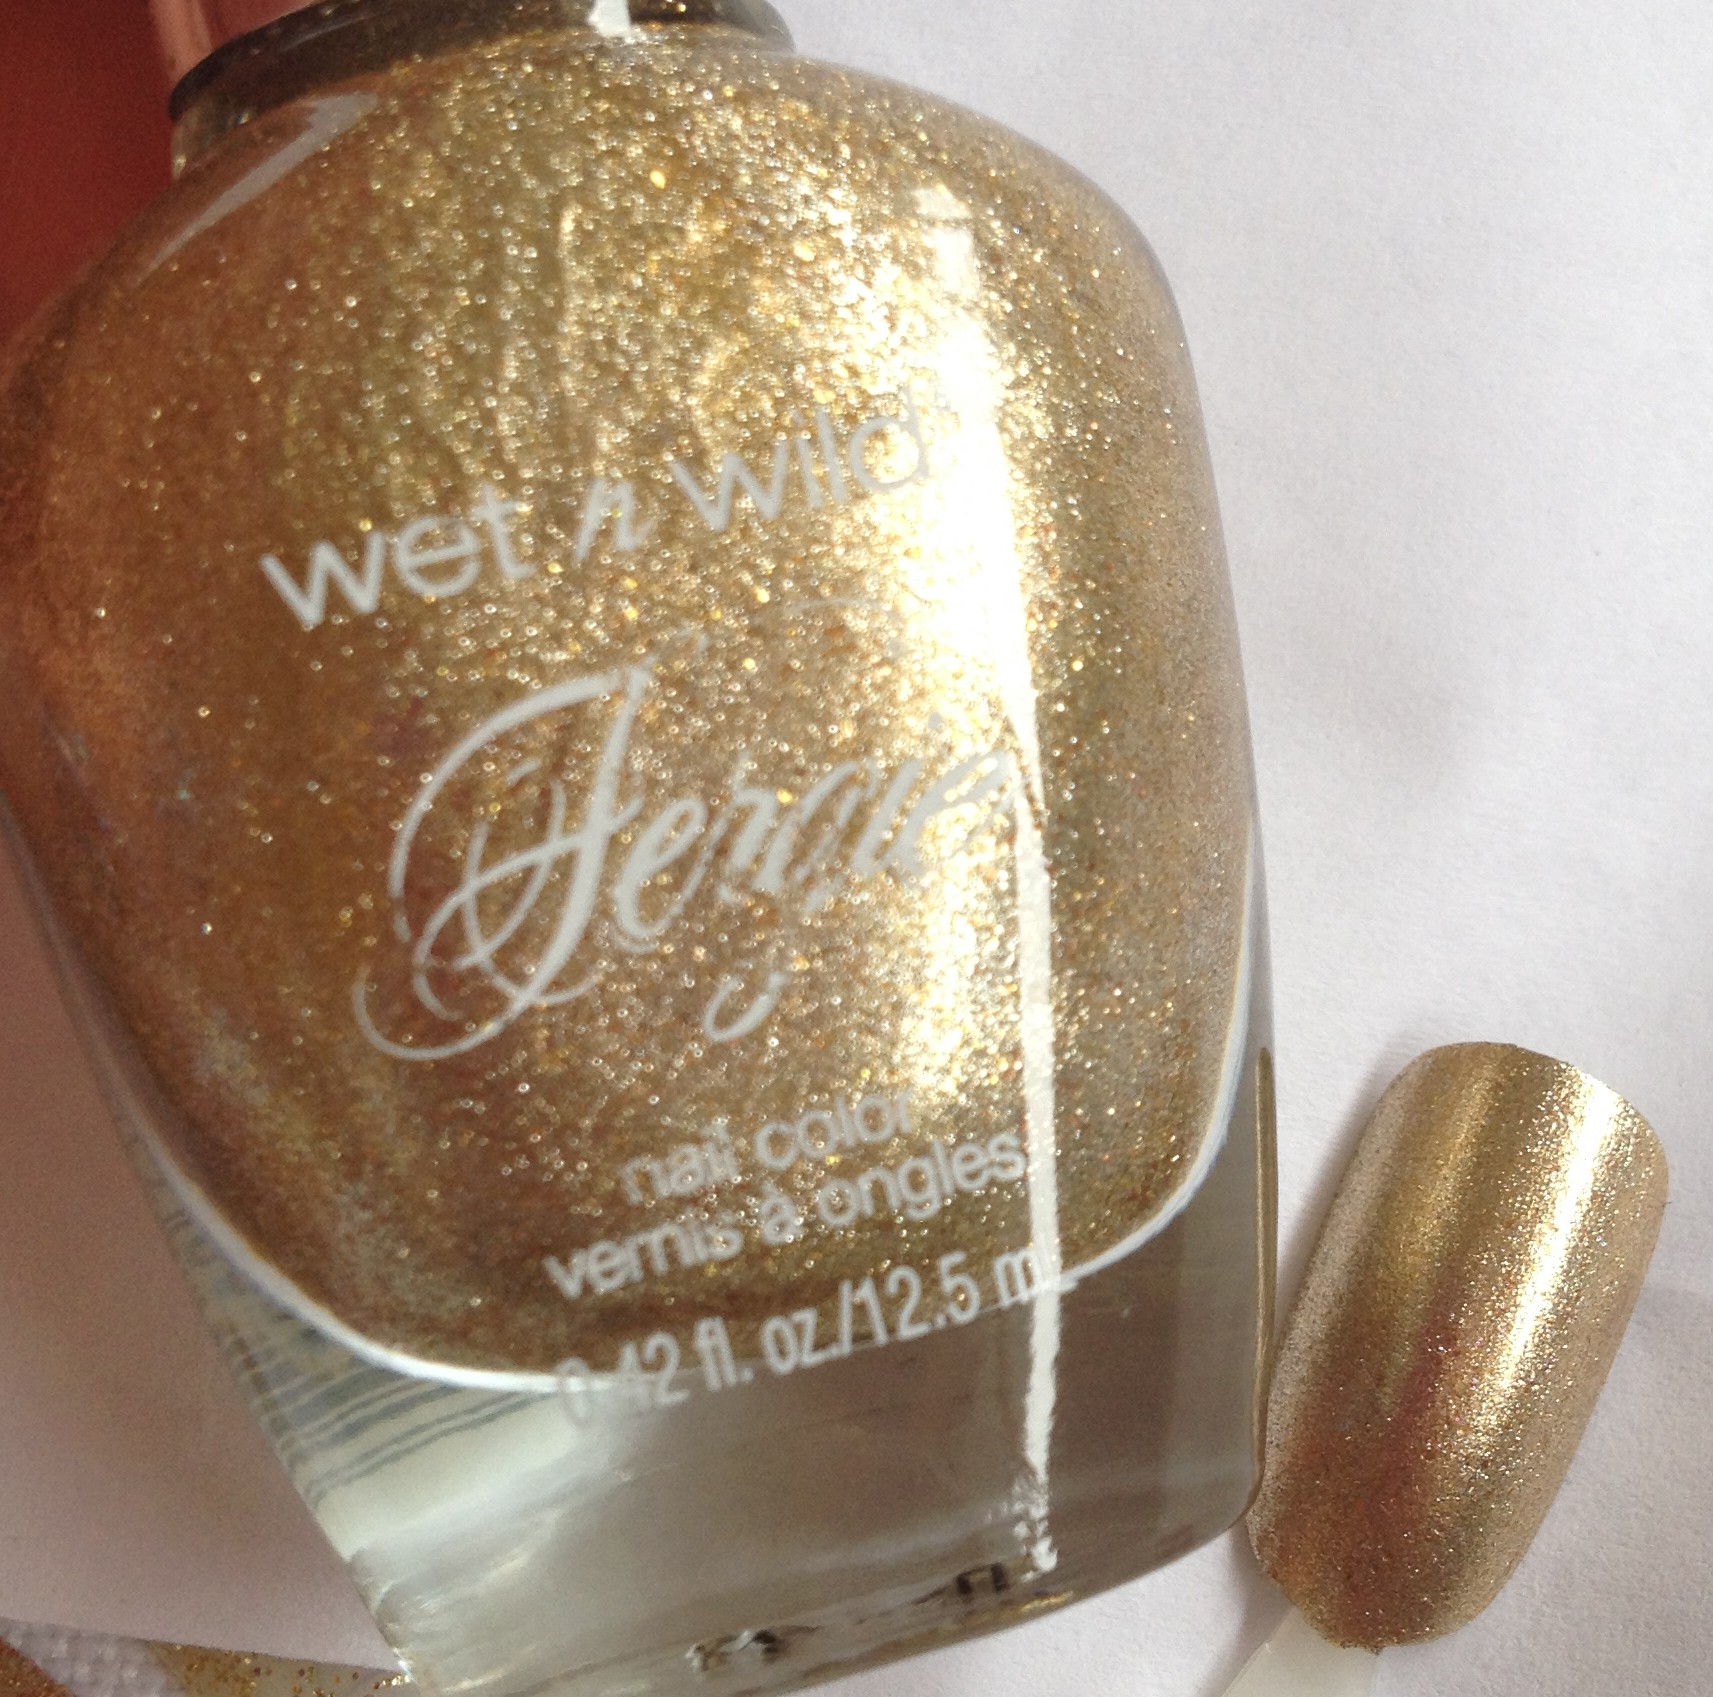
At noon we have Wet n Wild Fergie – Going Platinum.  This polish, is amazing!  It’s a foil finish, so it has a little more sparkle that just a straight metallic polish.  Also, metallic polishes tend to show brush strokes, but this doesn’t at all.  It’s opaque in two easy coats.

IMG_4517Really, this is just a great polish.  All of the stuff I just said also goes for Wet n Wild Fergie – Gold Album.  Gold album has the exact same formula and finish.  It’s just gold instead of platinum.  (That last sentence was probably unnecessary.)   Plus, they are only $3 per bottle!  I don’t love all of the Wet n Wild Fergie polishes, but Going Platinum and Gold album are definite winners.

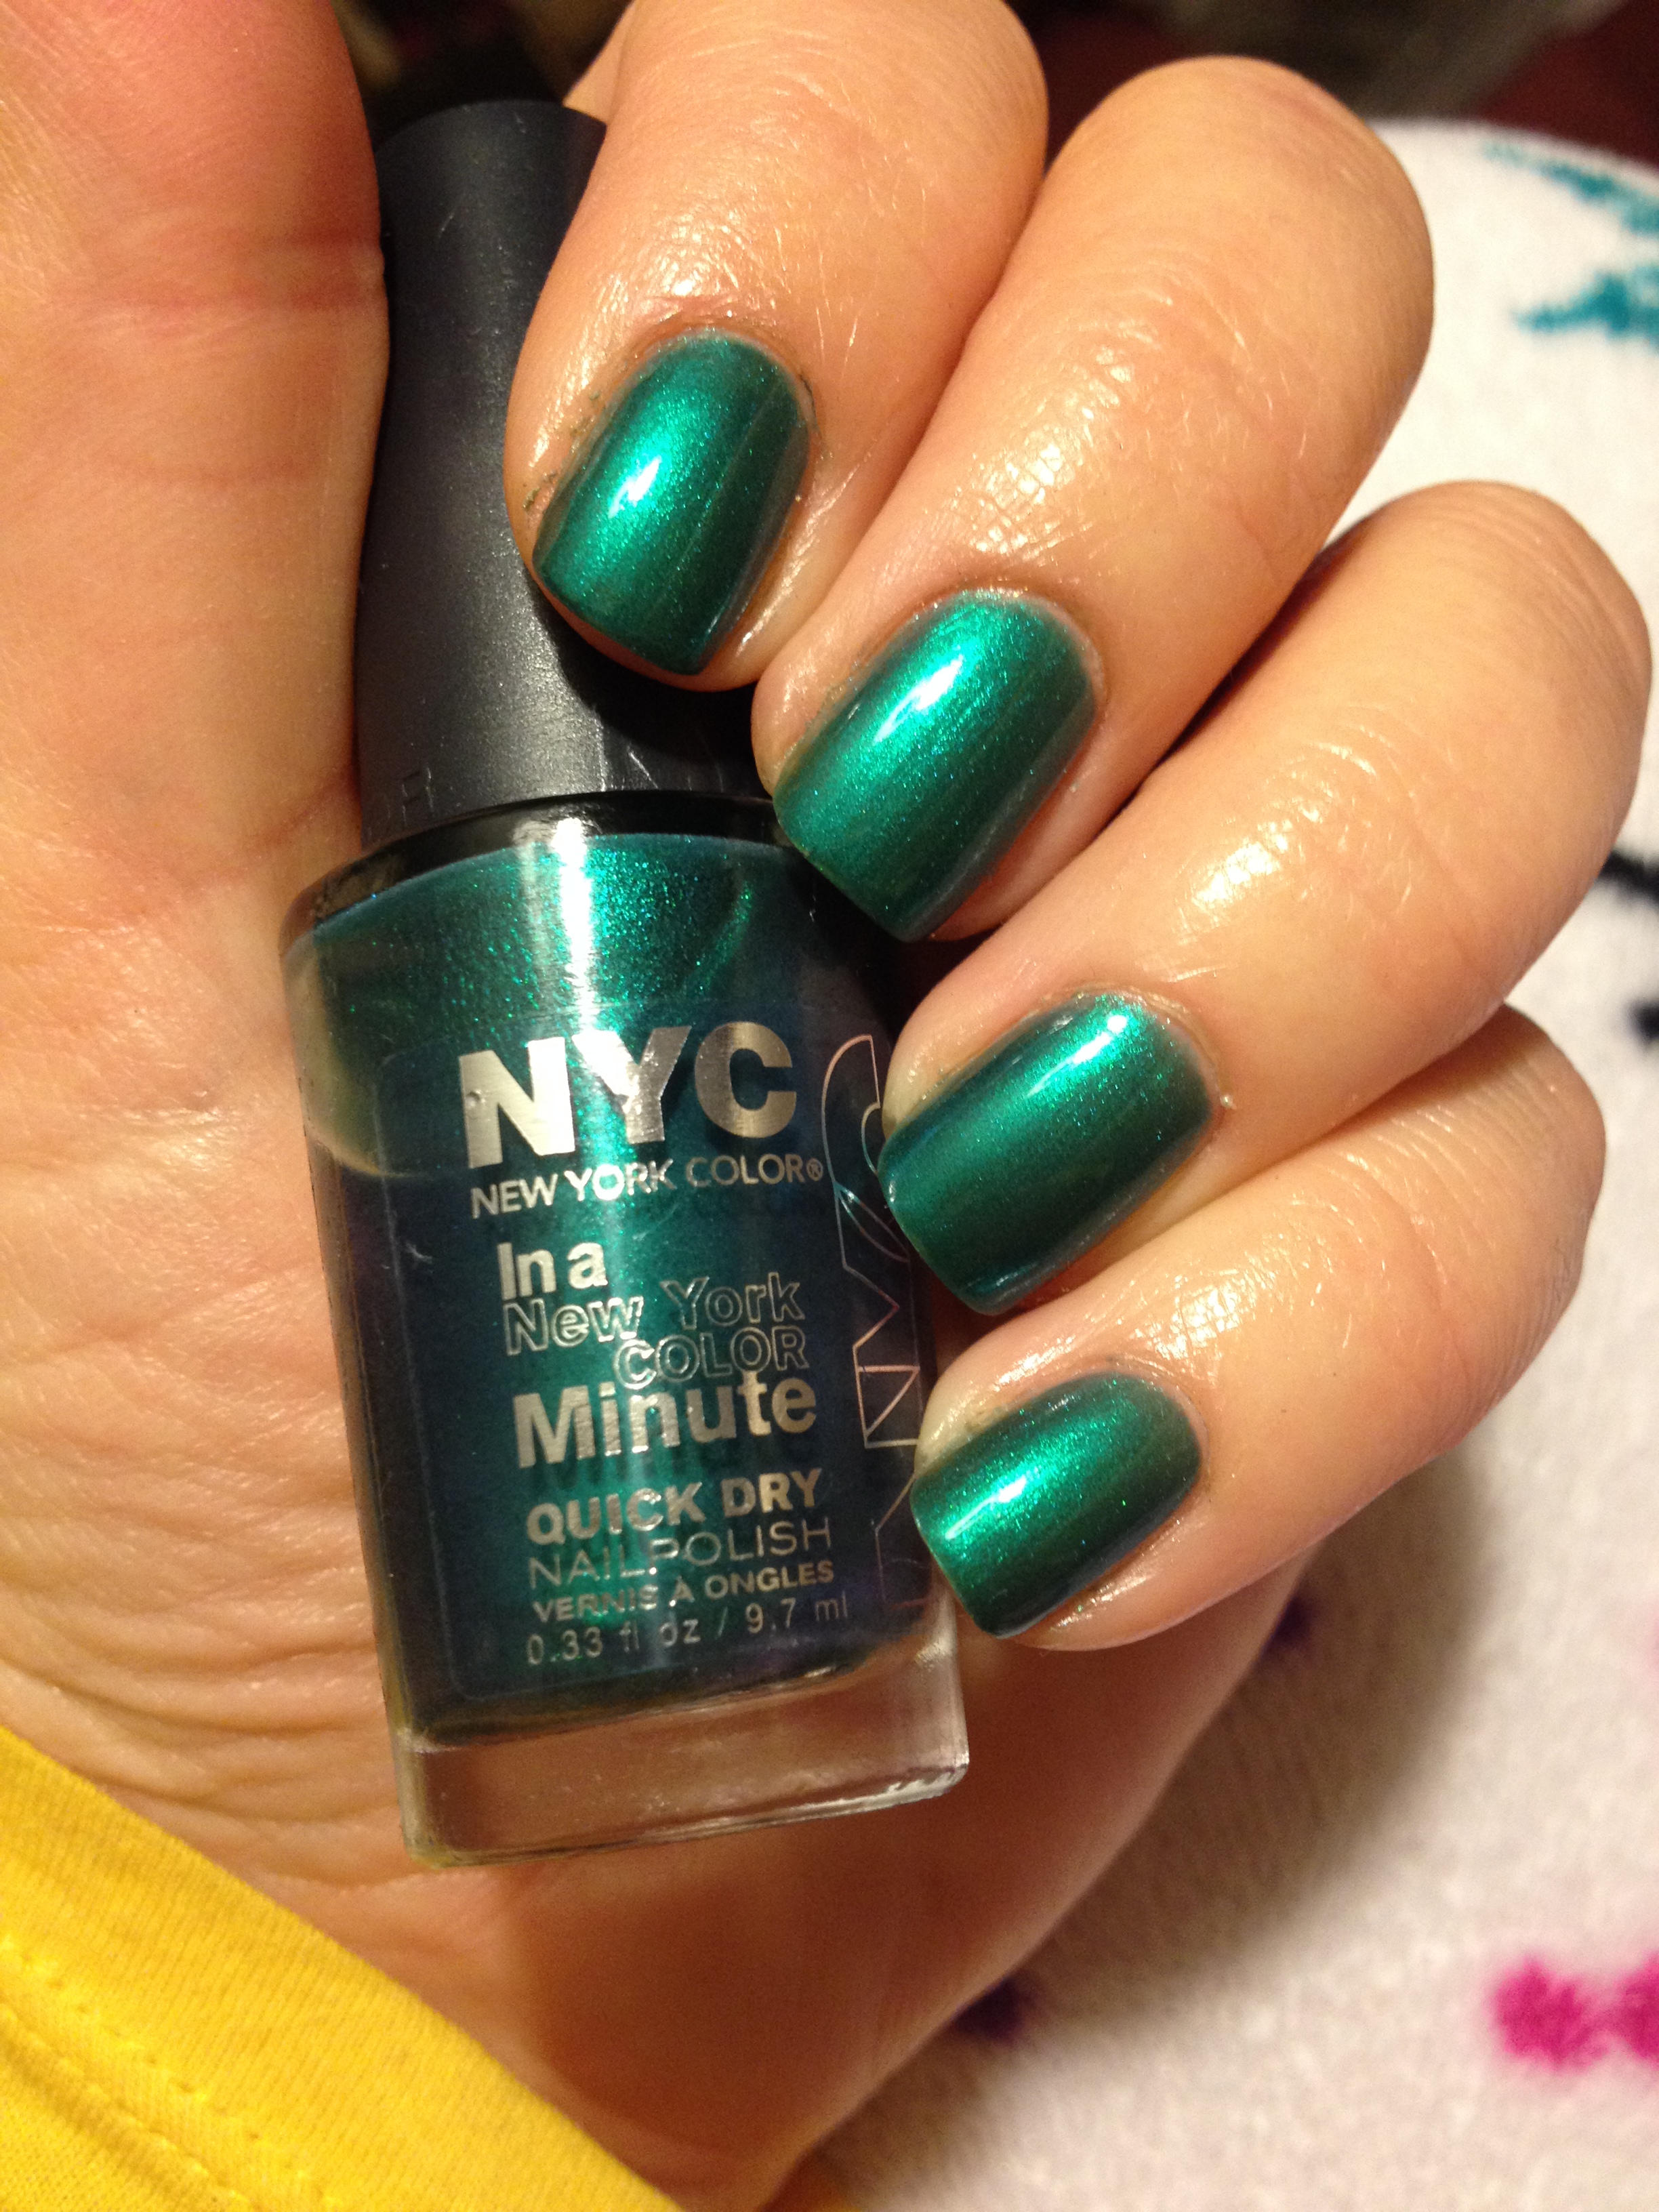
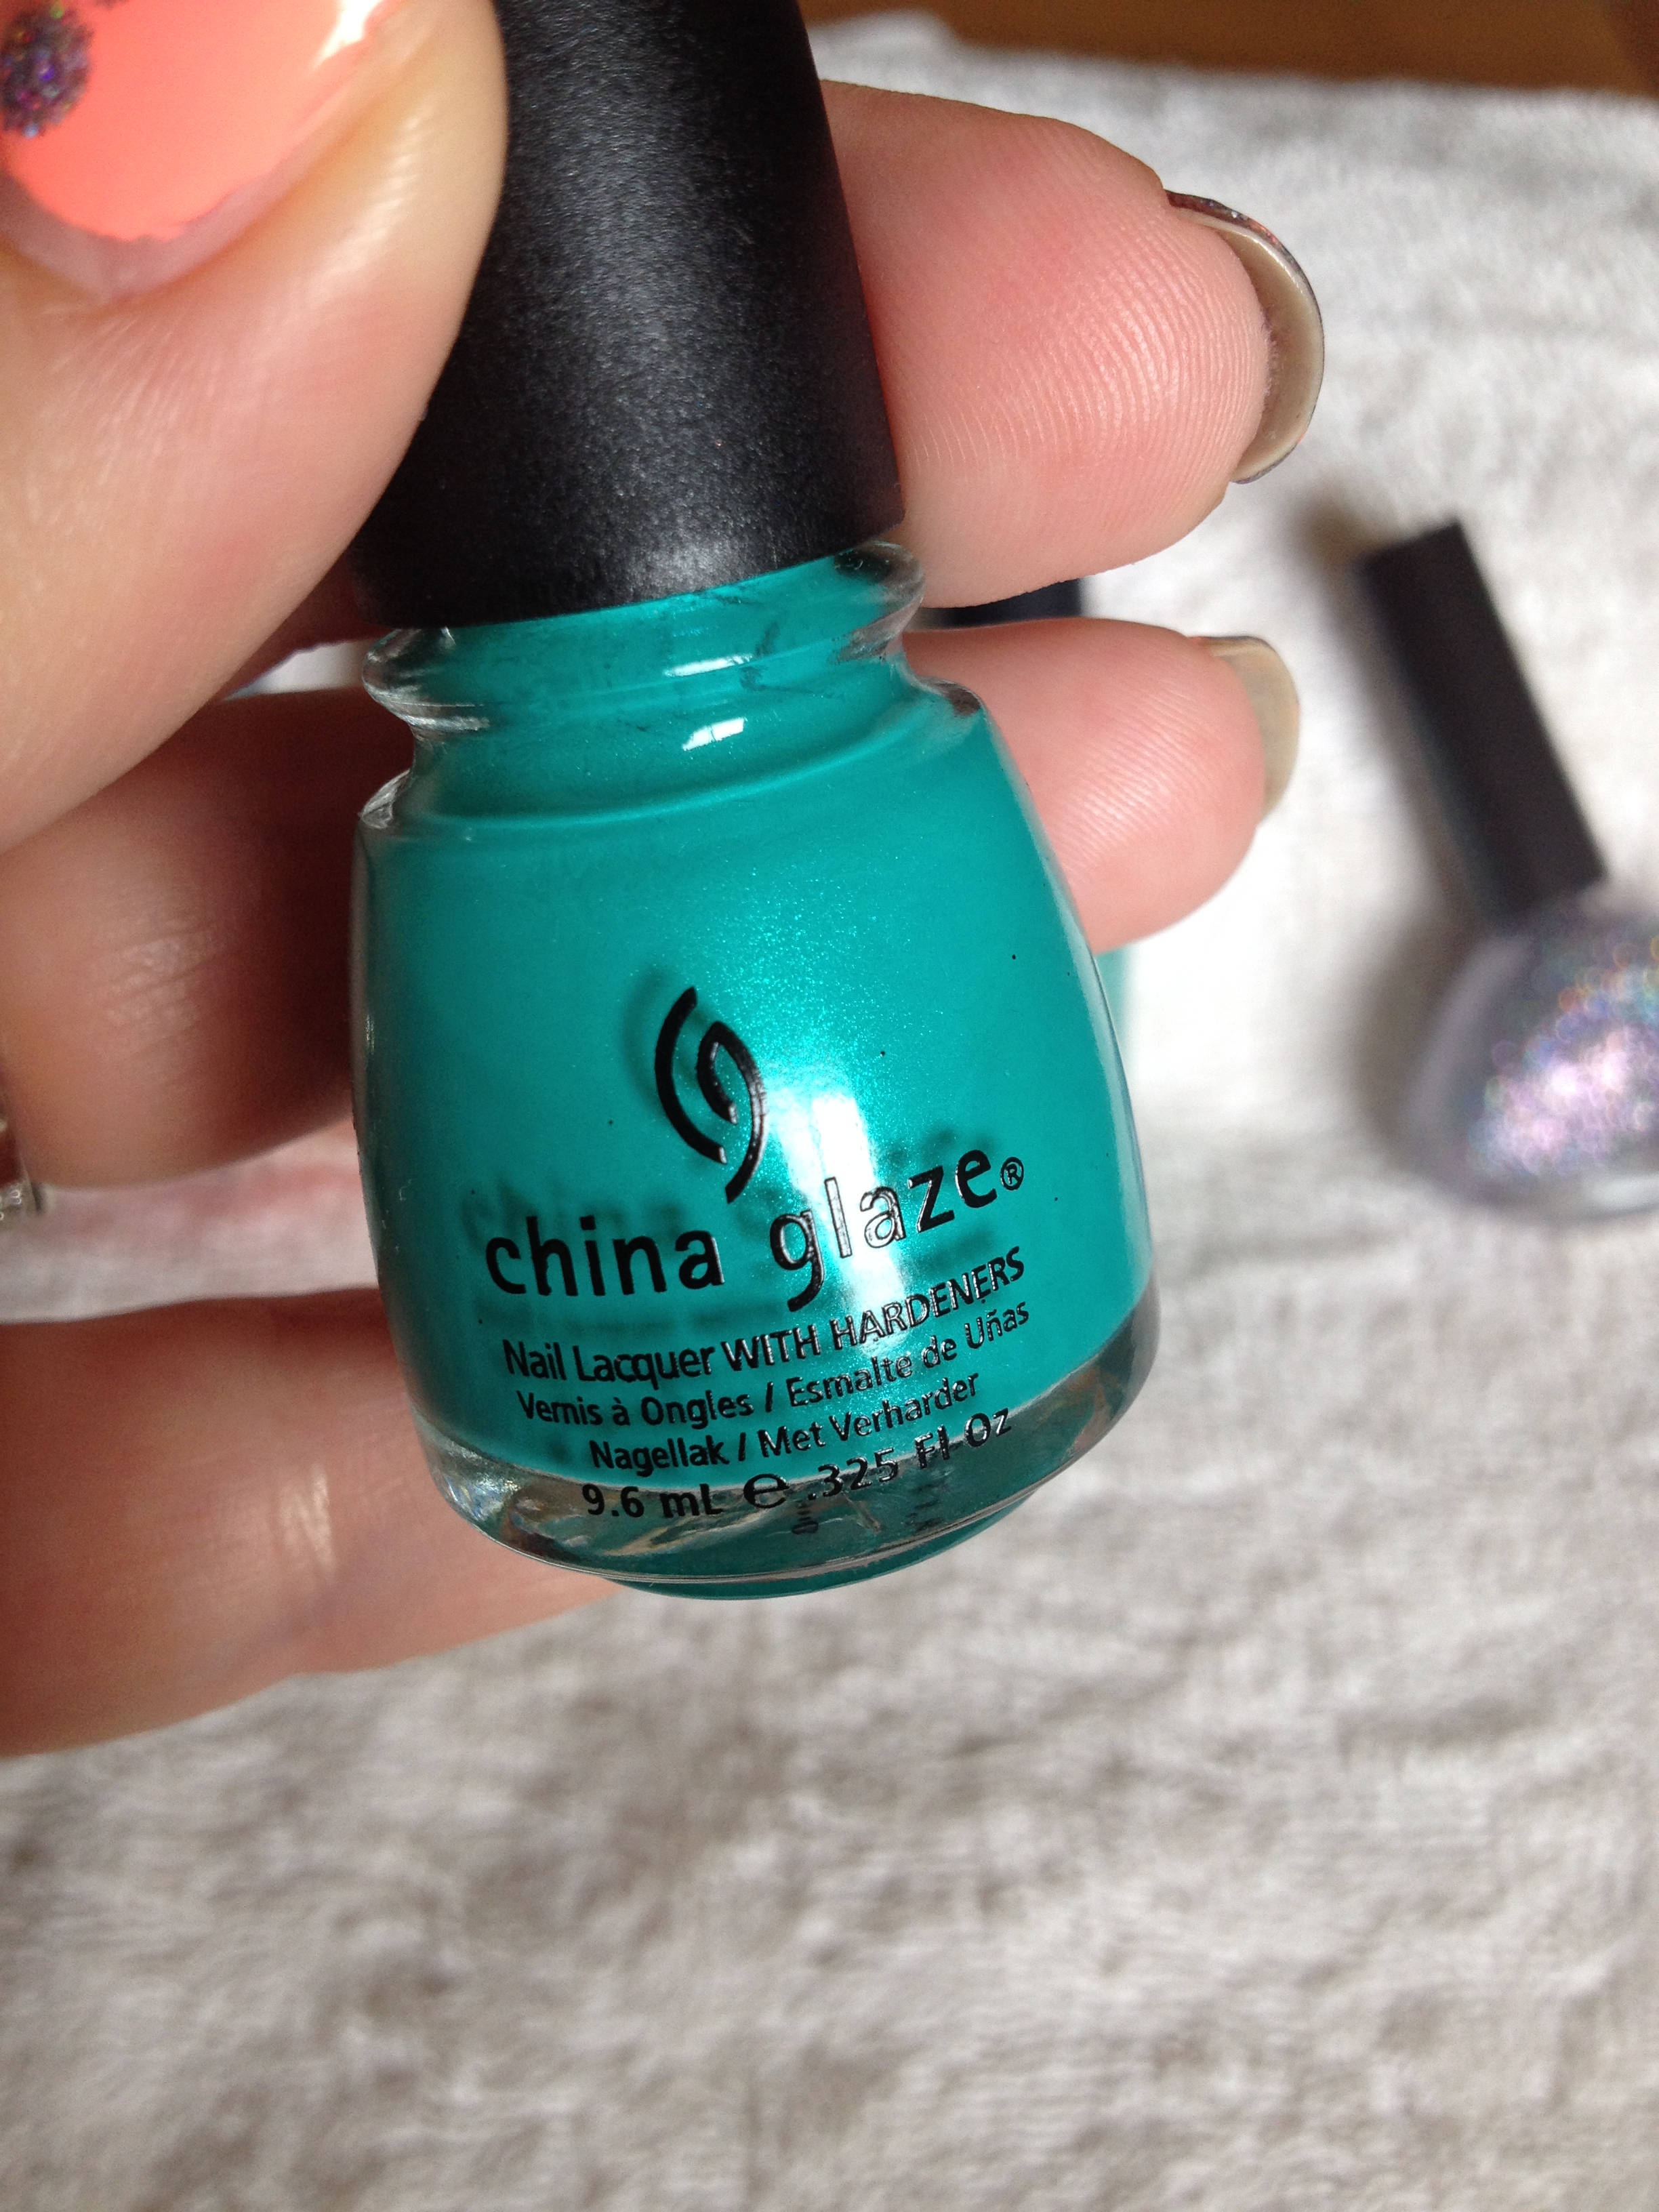
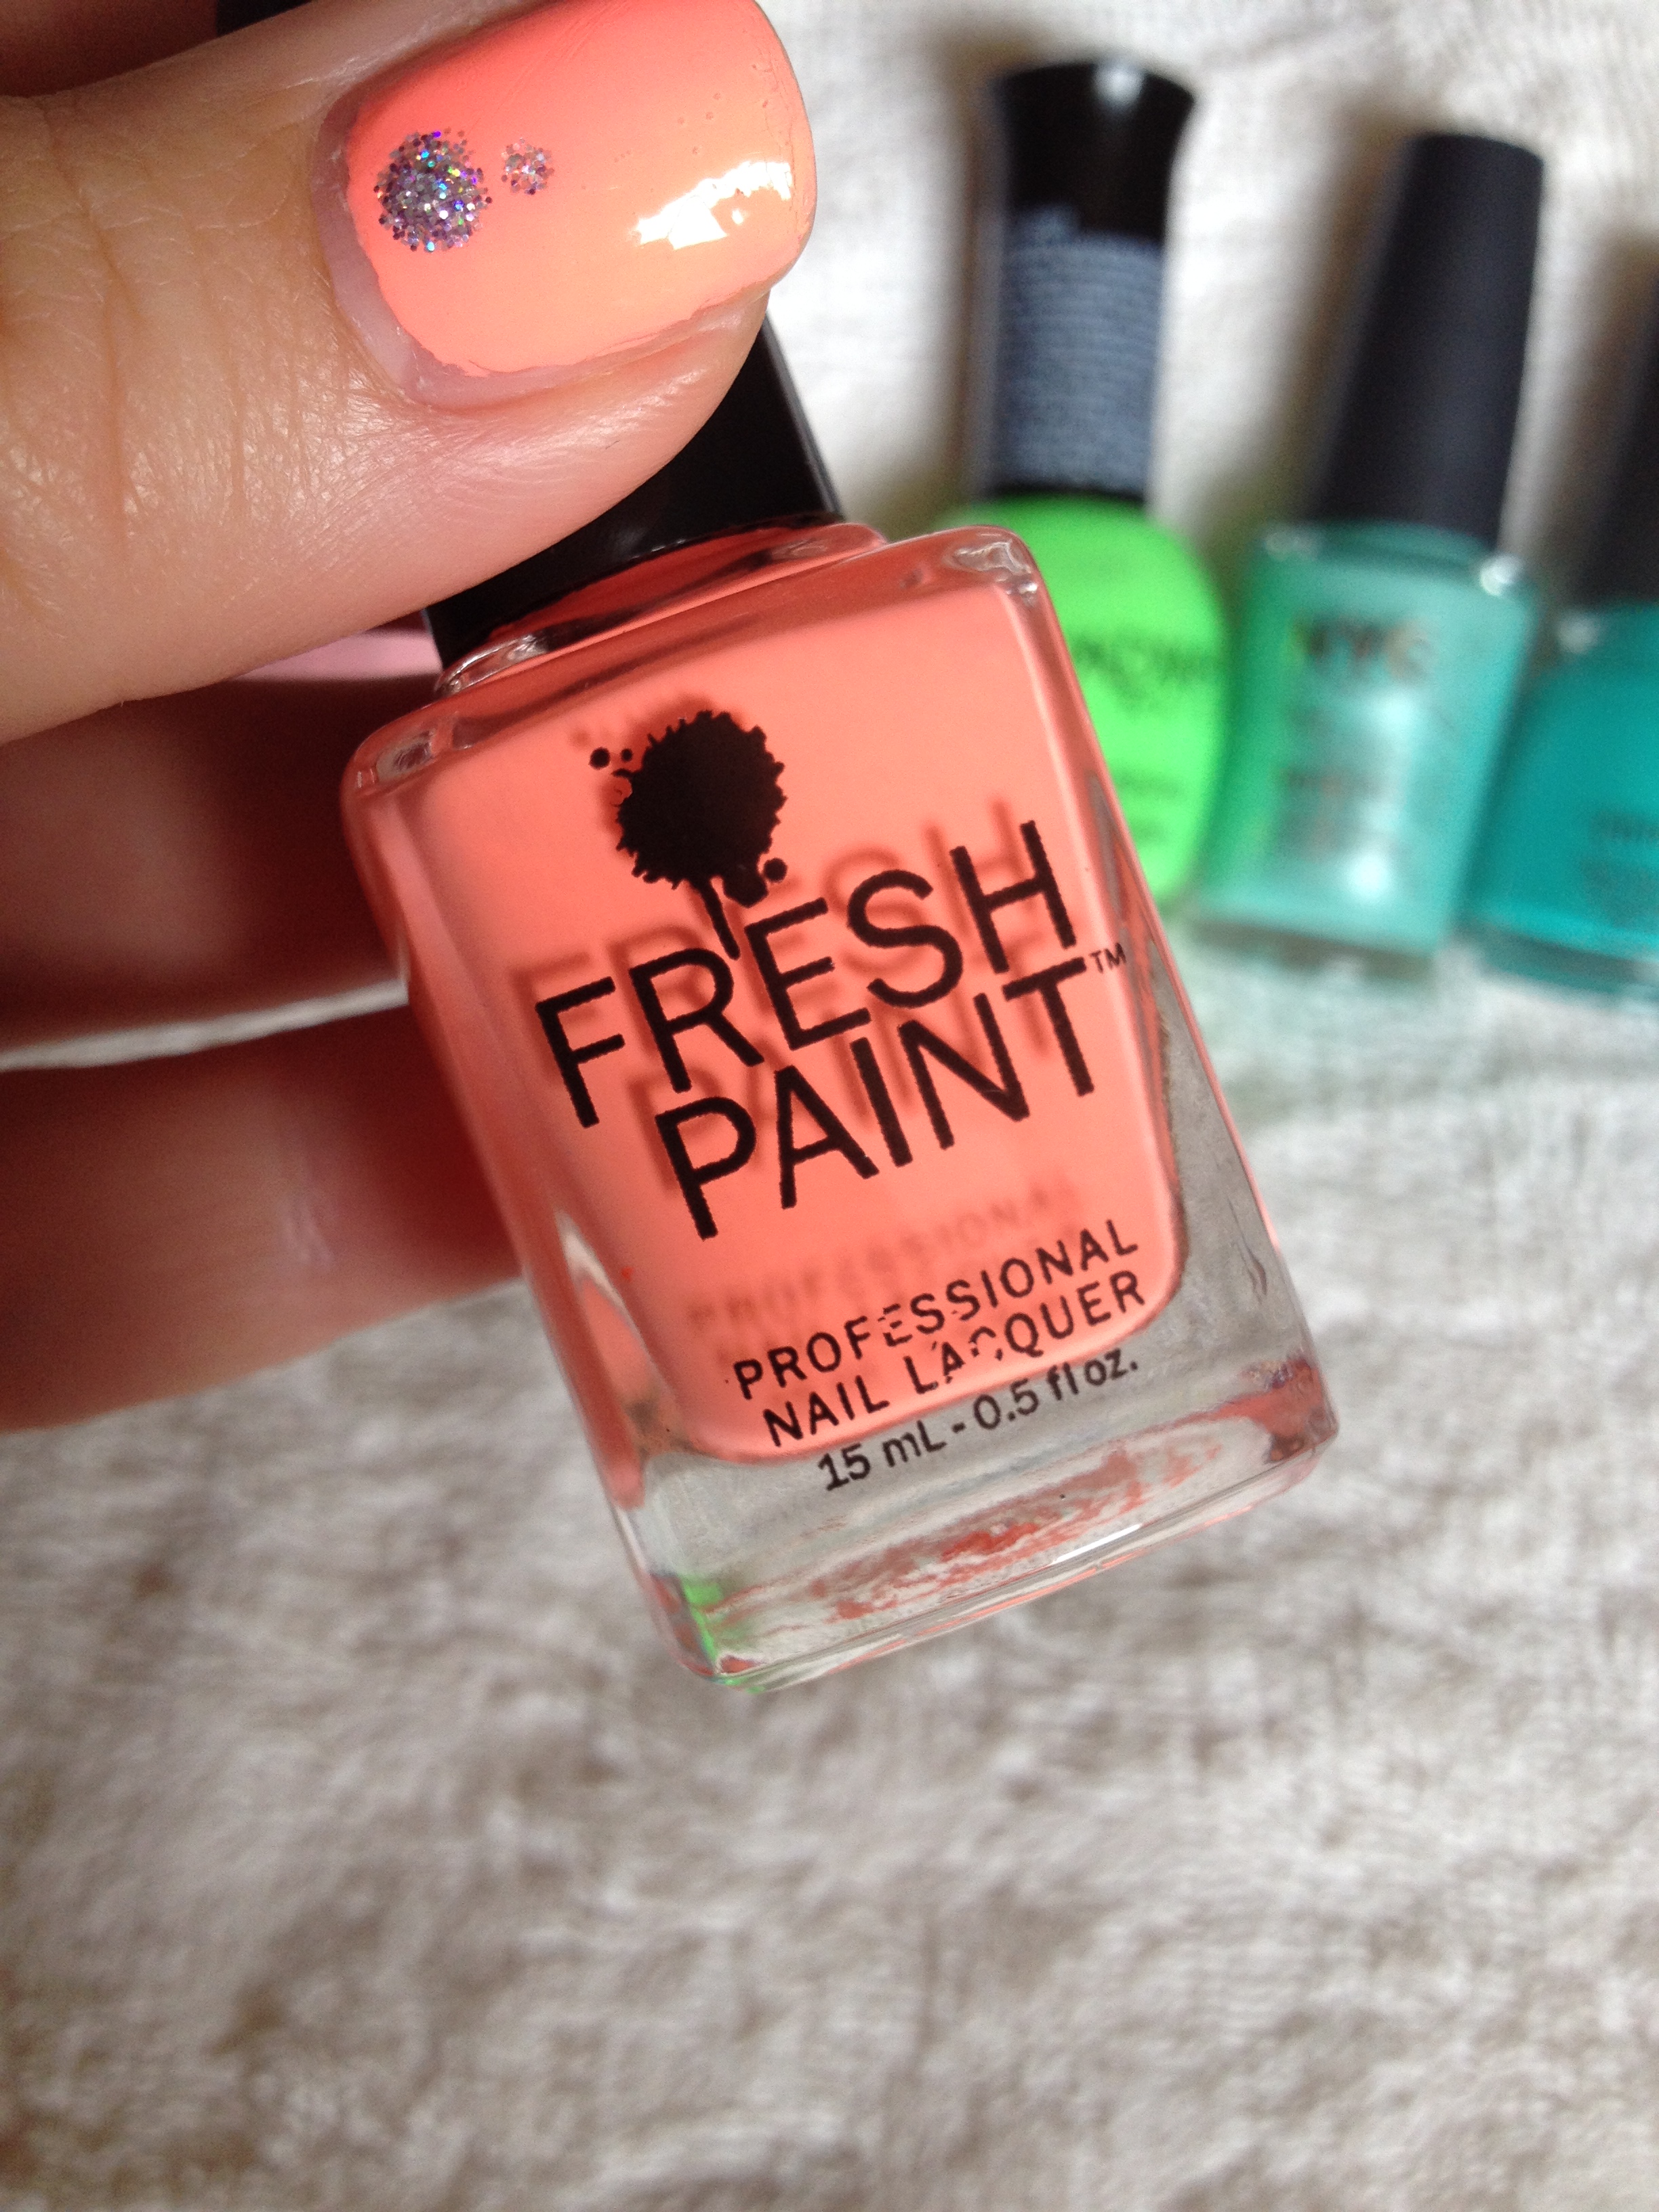
At 2:30 we have China Glaze – Thistle Do Nicely.  This is from the 2014 spring collection, so it’ll be tough to find in stores.  This is not a shockingly unique polish or anything.  It’s just a really pretty neon coral.  IMG_4516
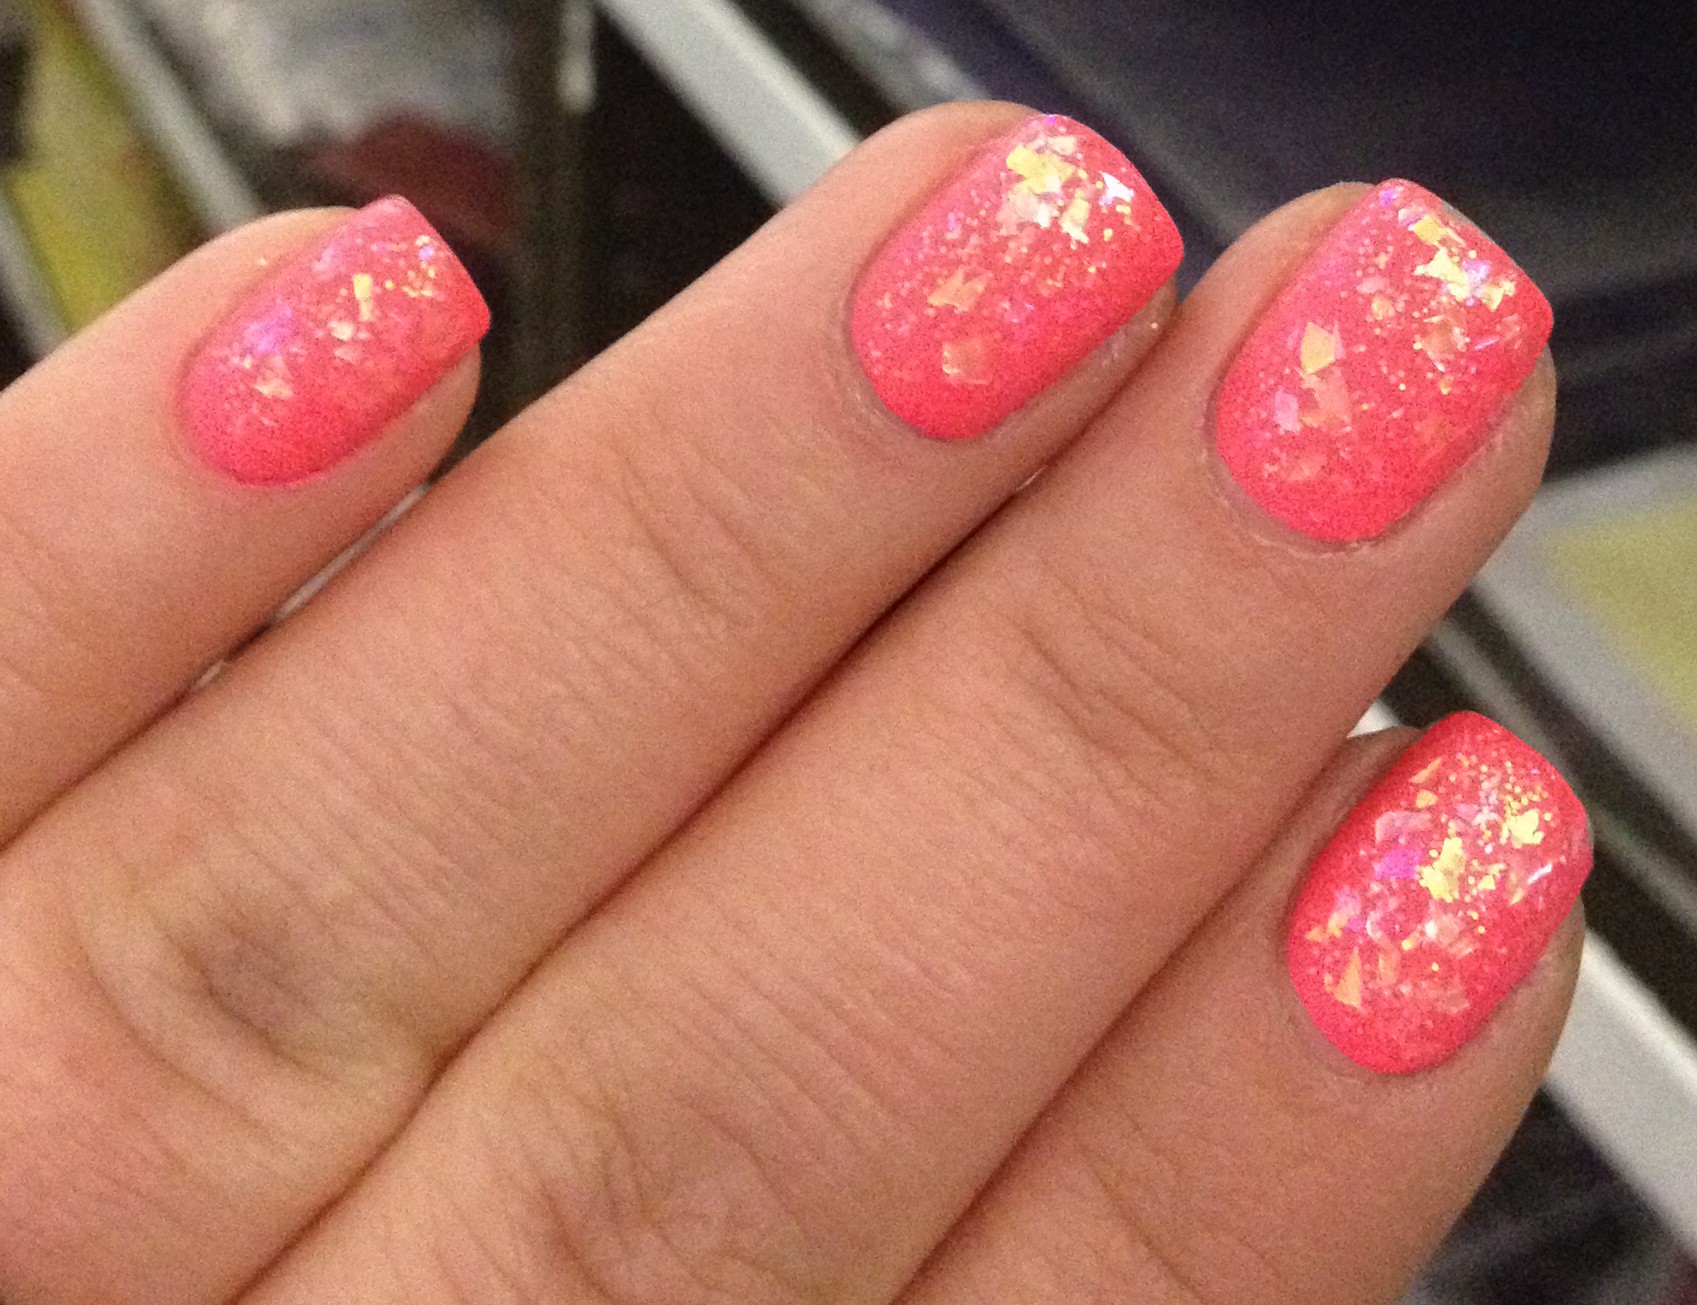
And while it’s not an eye-searing neon, it does do that cool thing where it looks like it’s glowing when the light is a little dim, like at dusk.  With the brutal February we had in PA (and pretty much every other state east of the Rockies) I was itching for something that felt like springtime.  This is a polish that just makes you feel happy inside when you wear it.

In this picture, I topped it with an shredded iridescent glitter which looks flaky-like.  I added a matte top coat for extra fun.
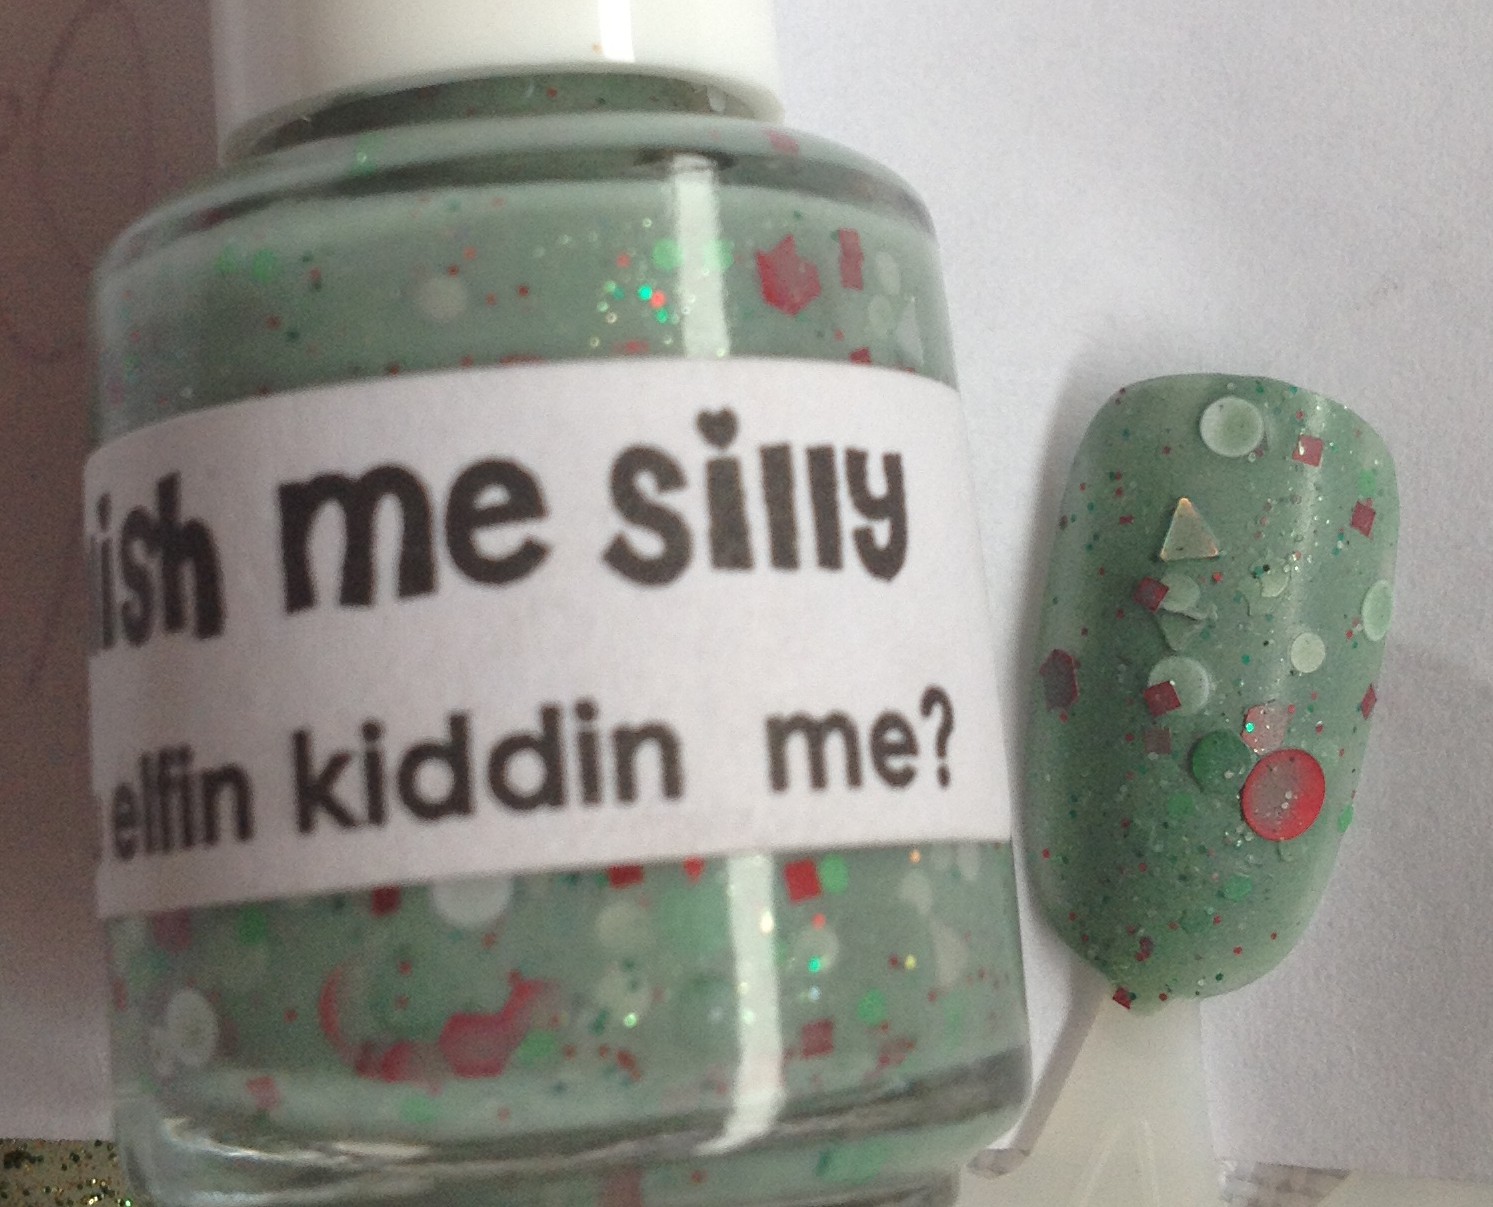
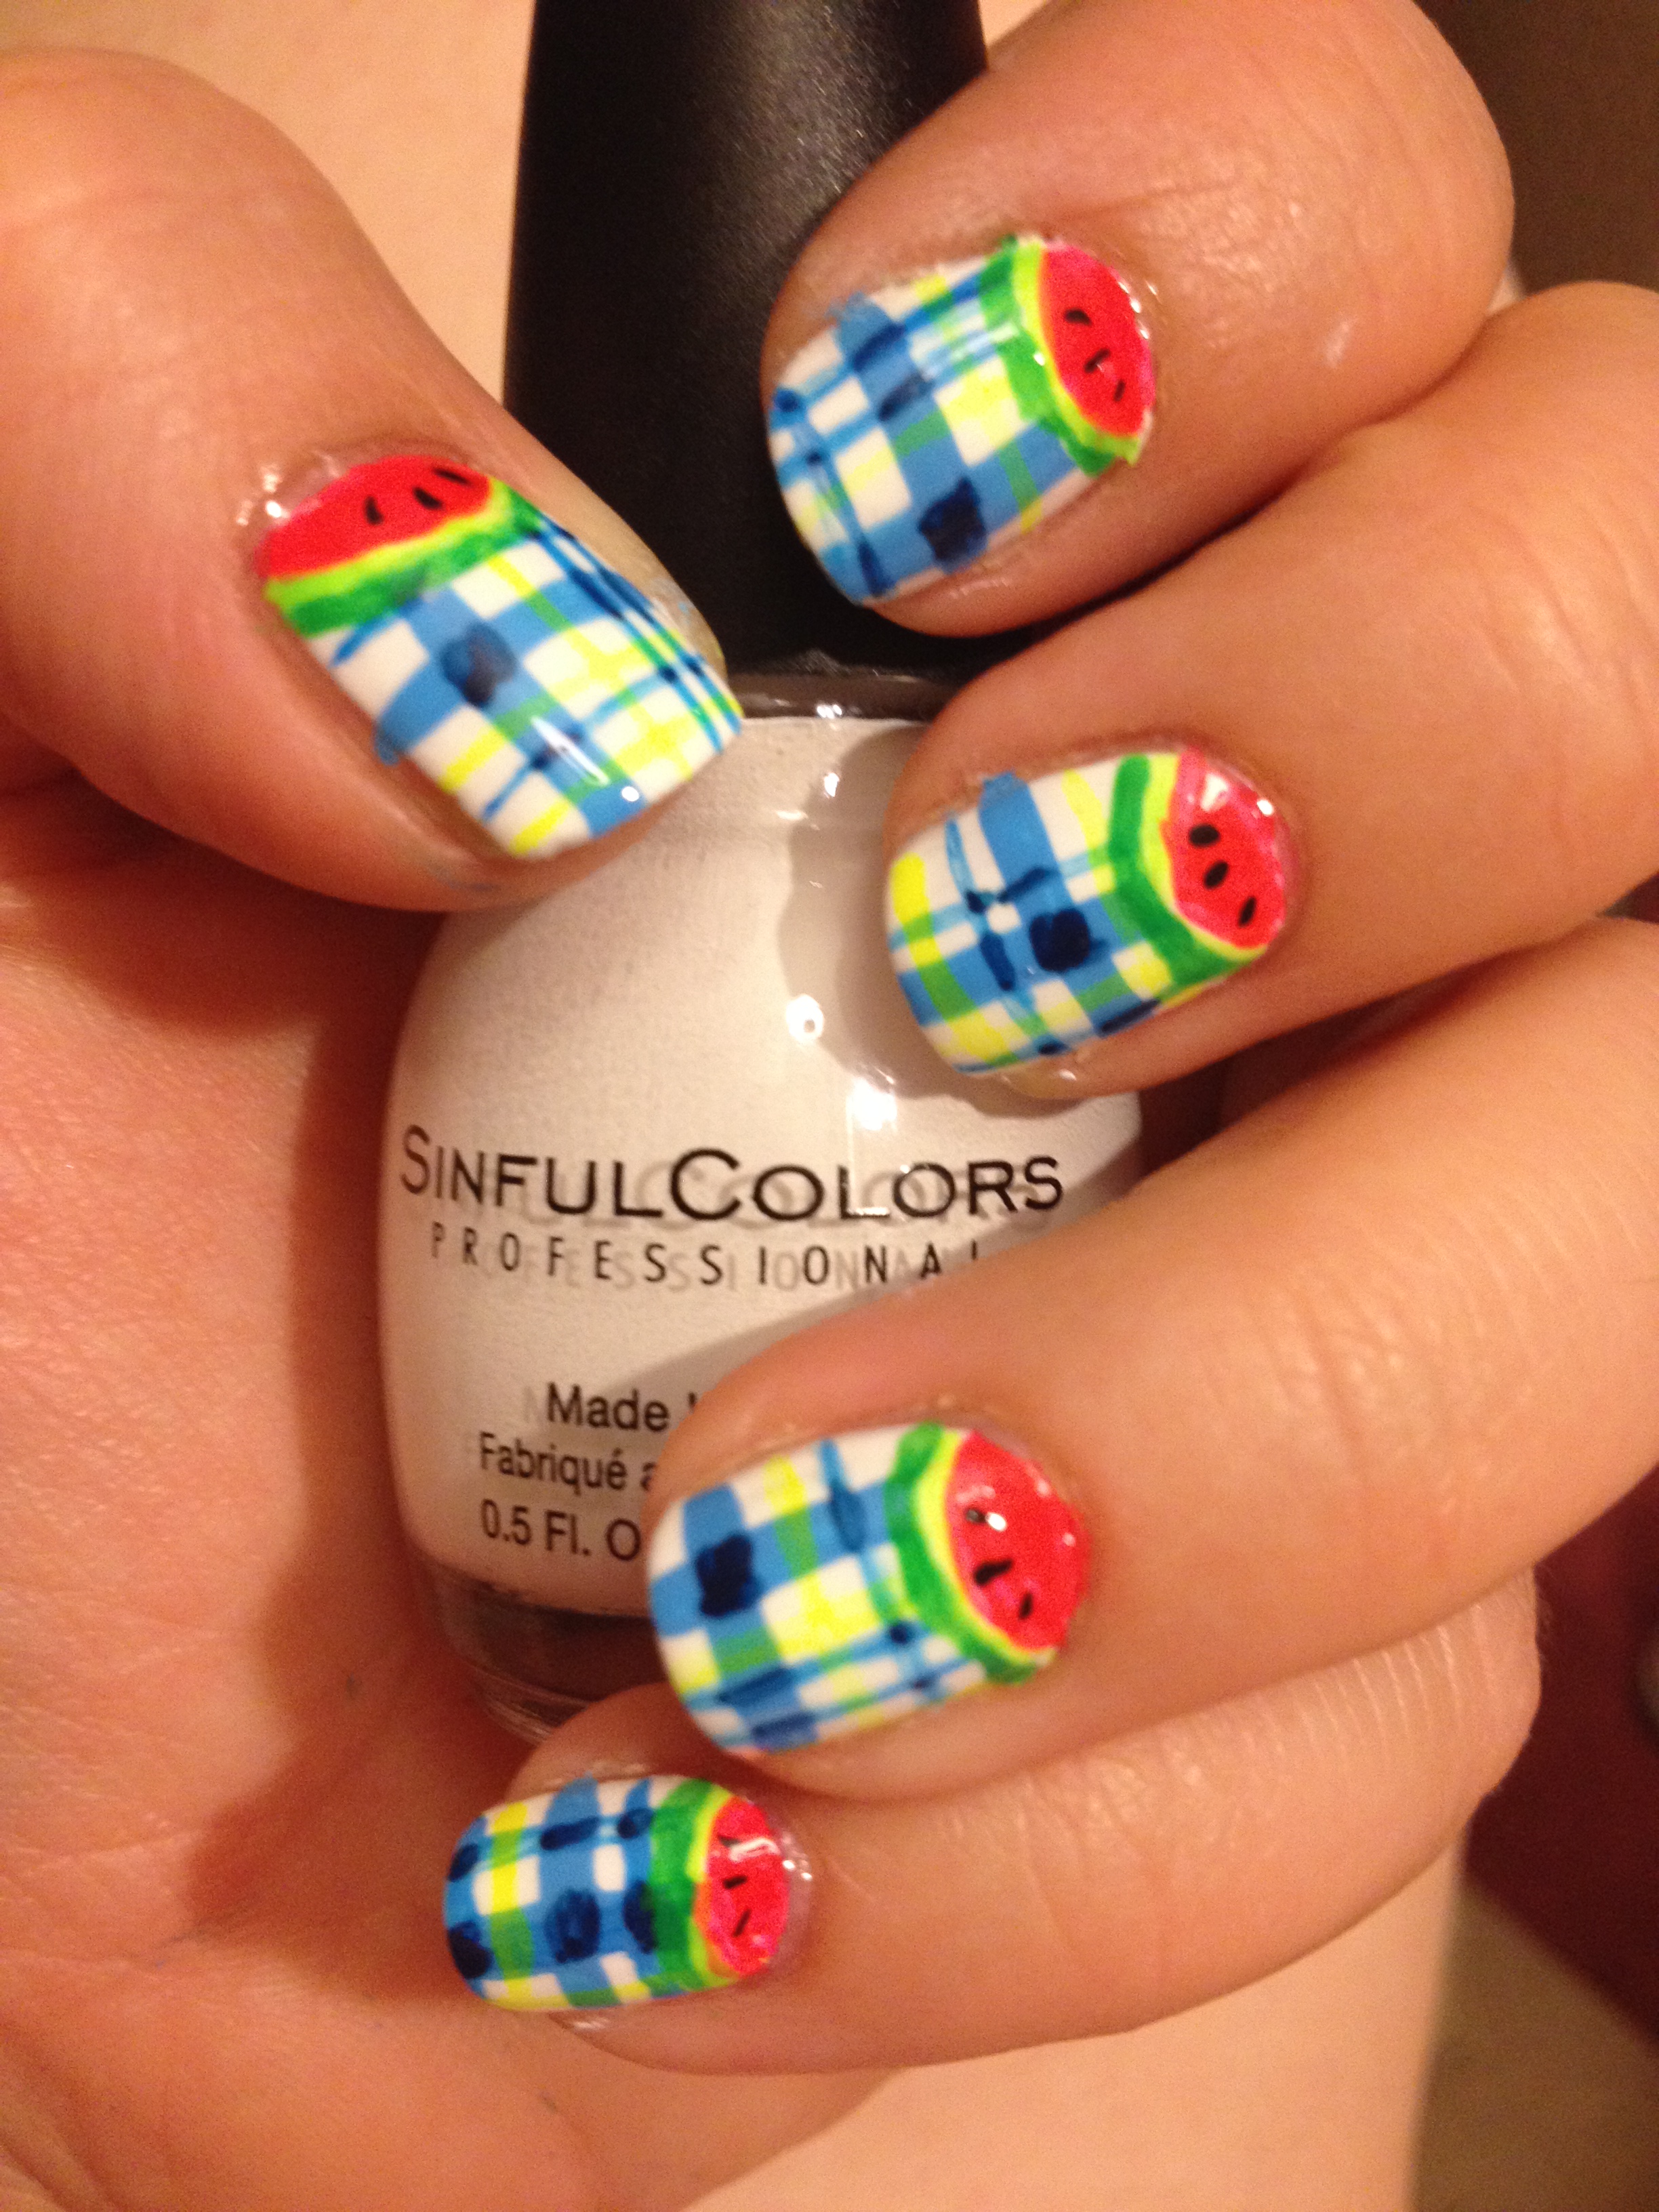
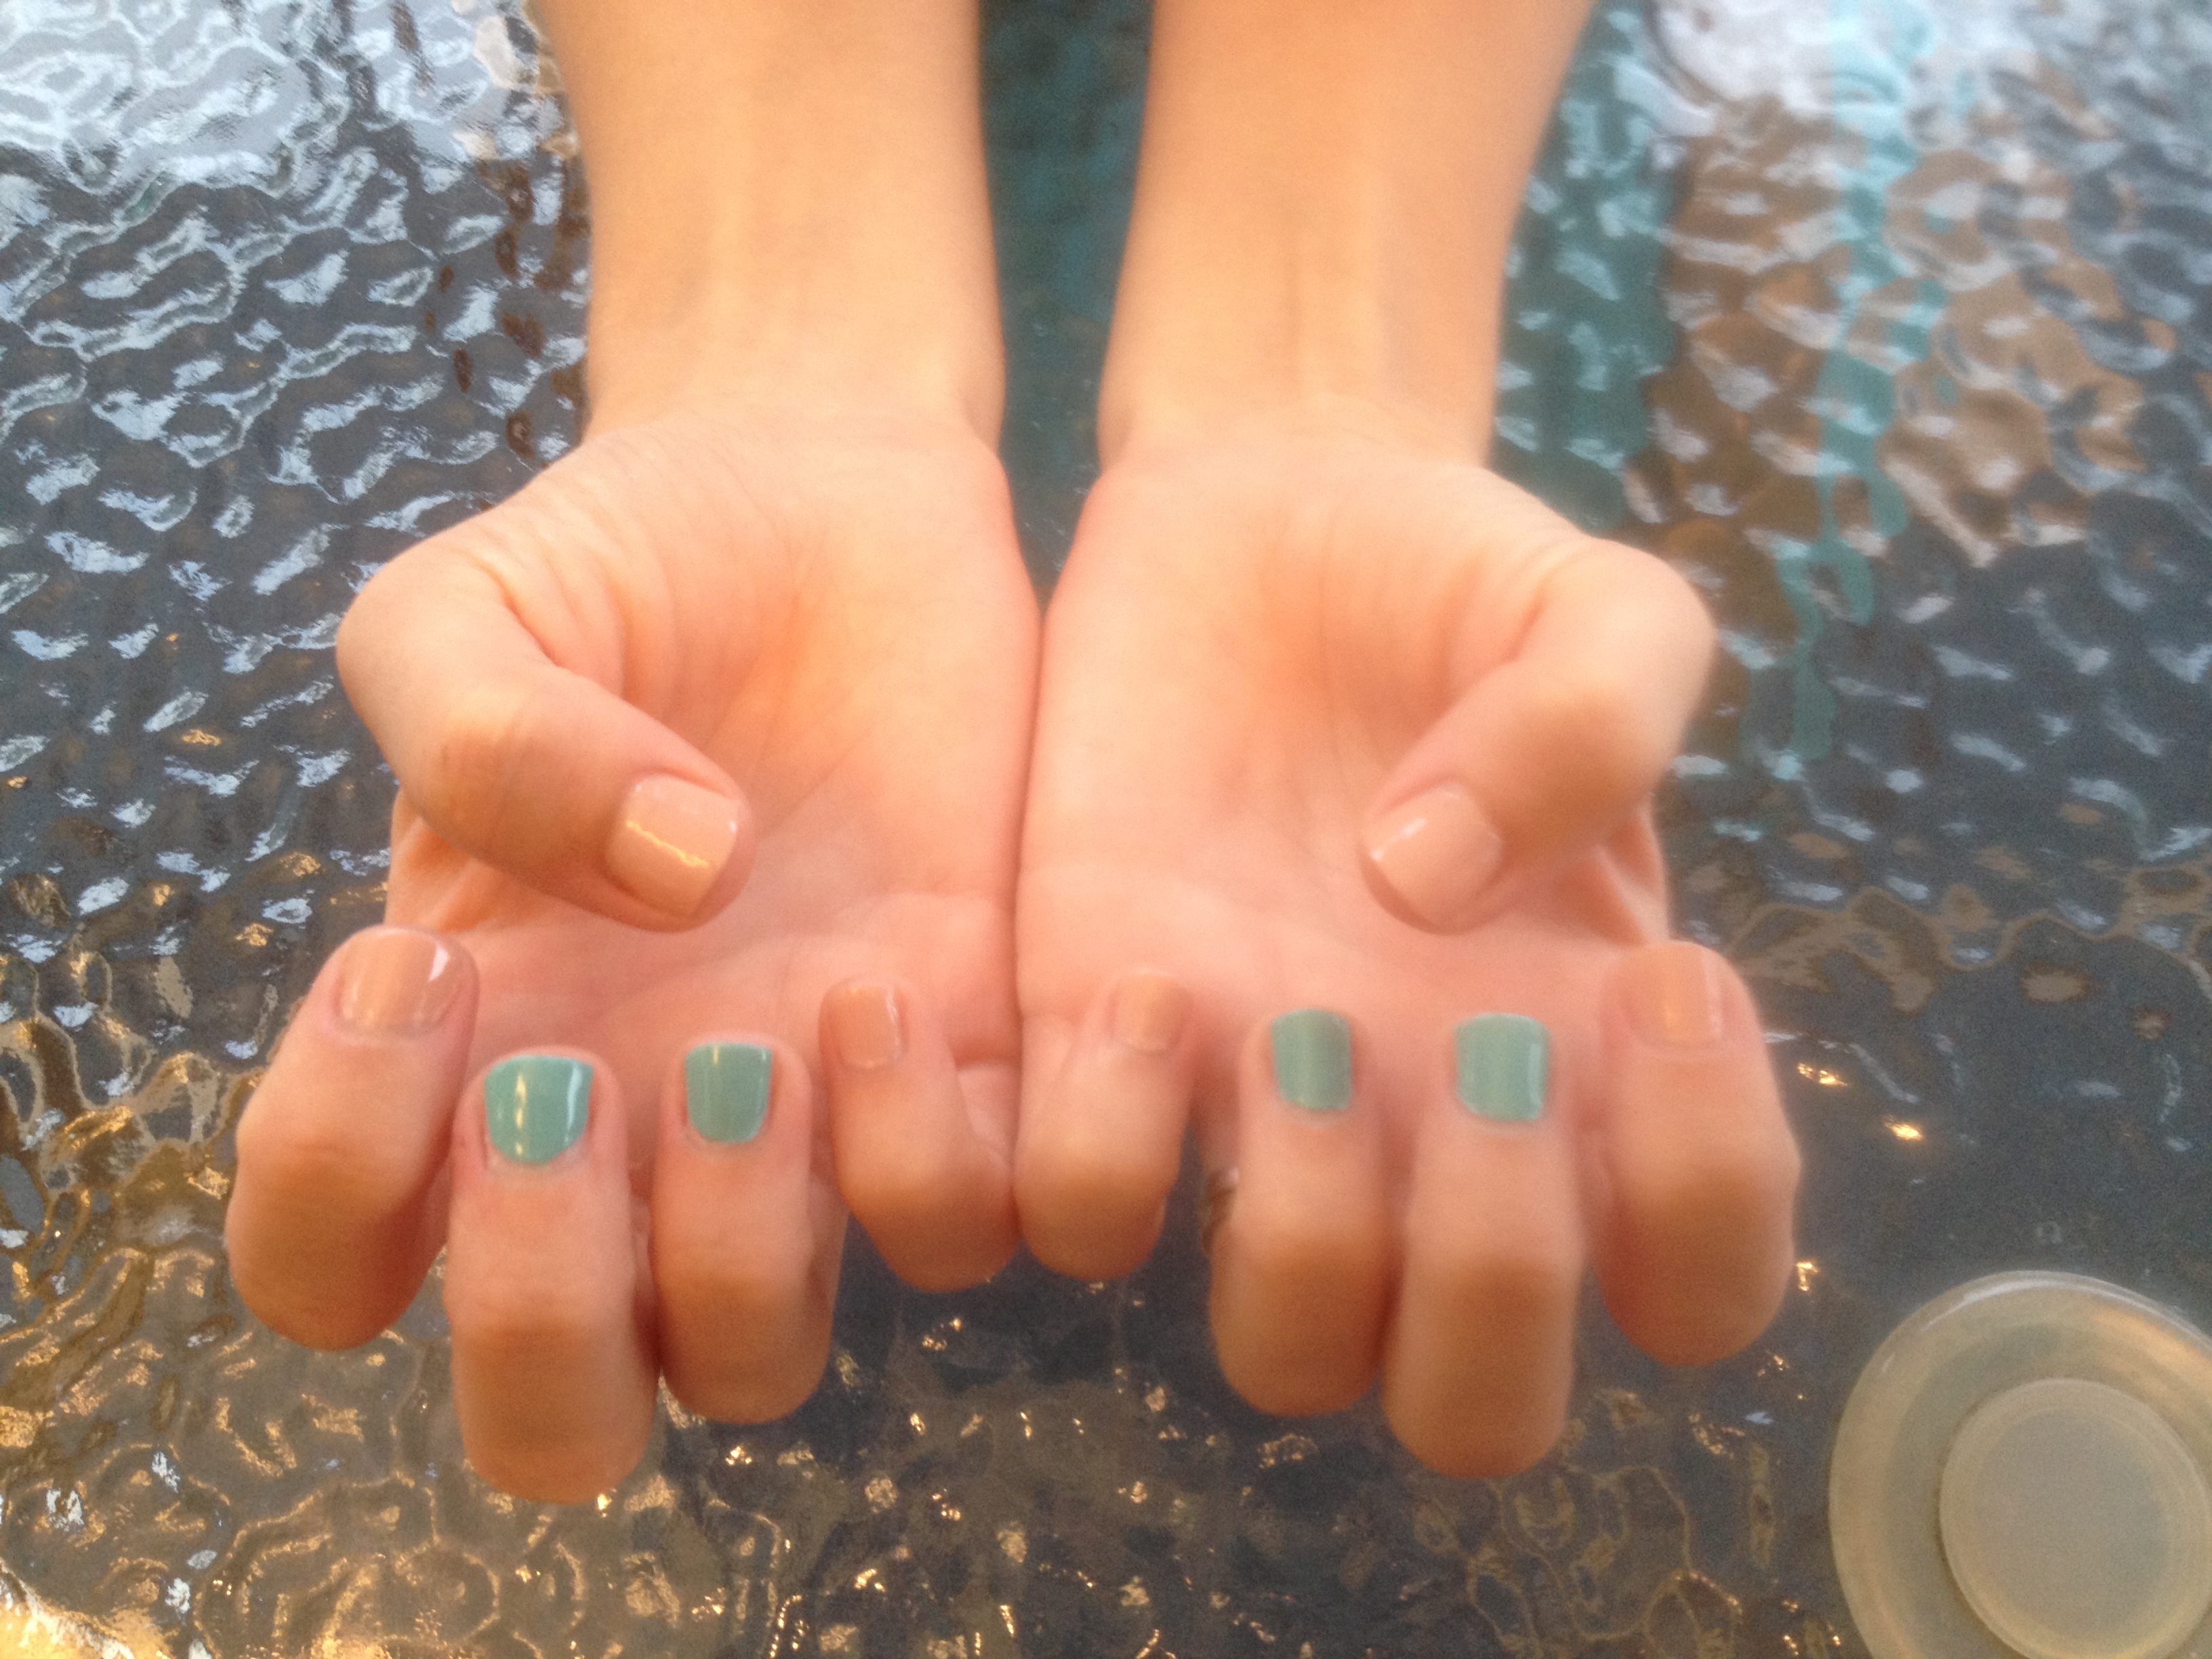
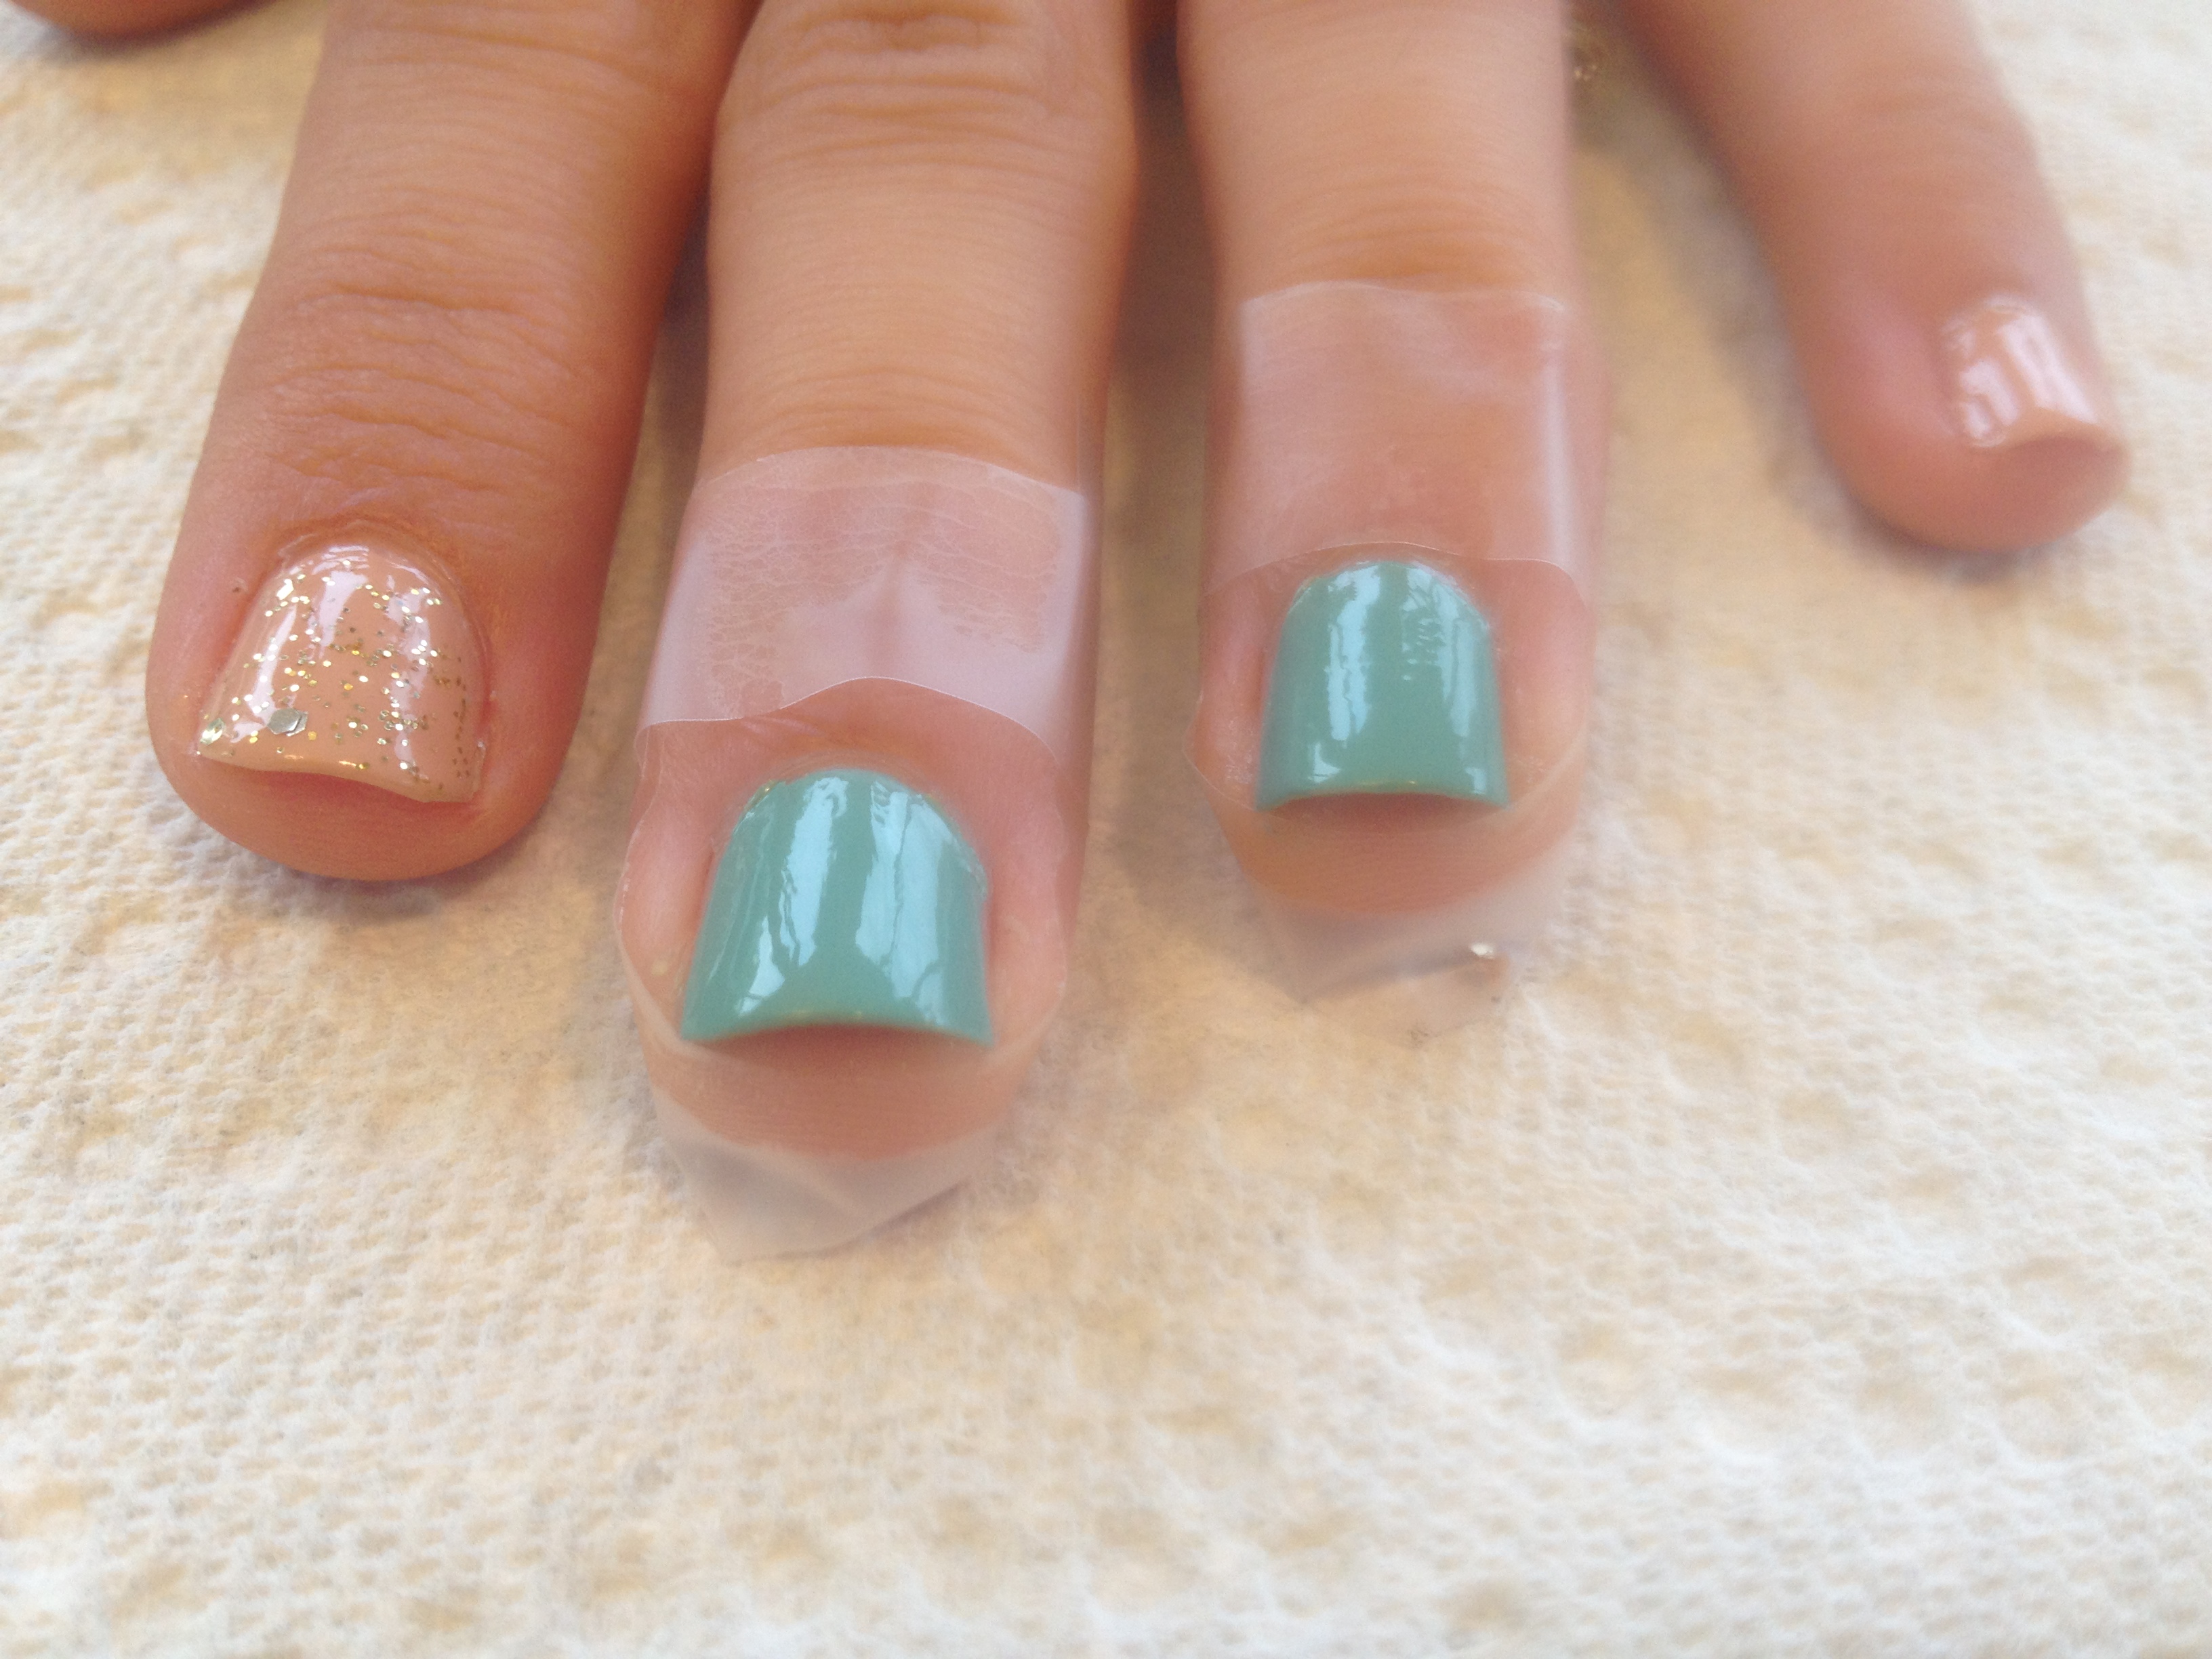
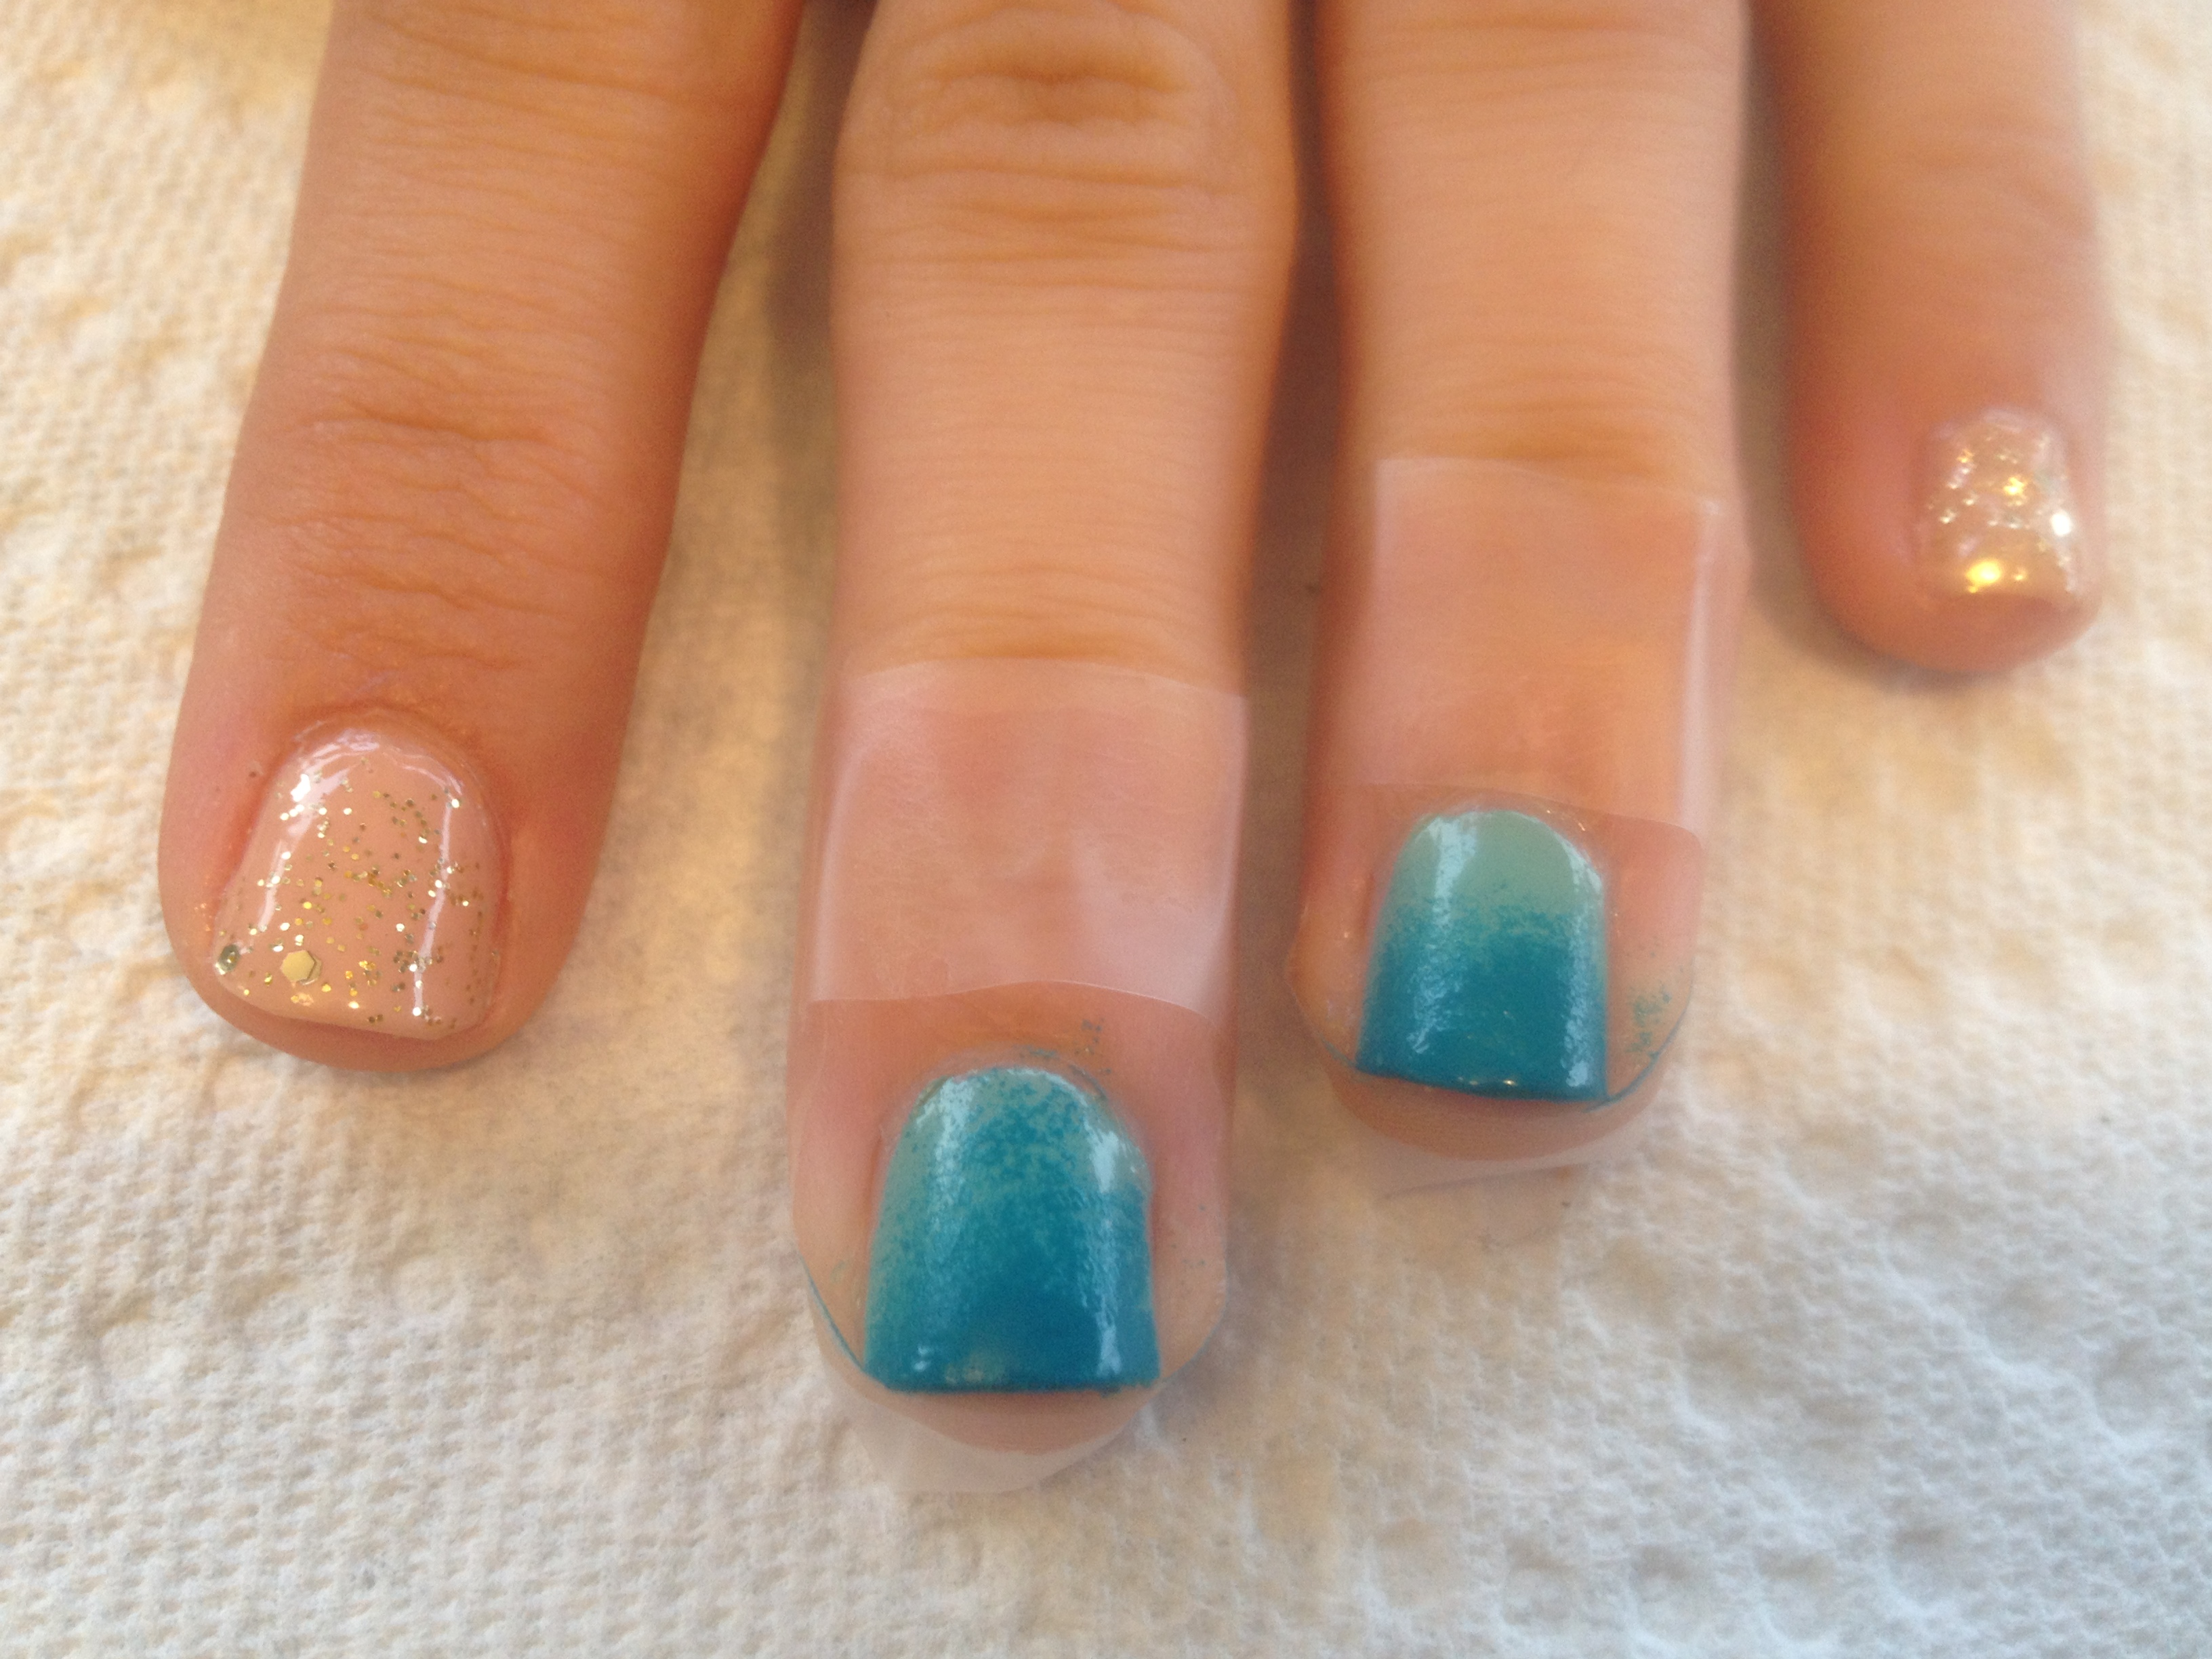
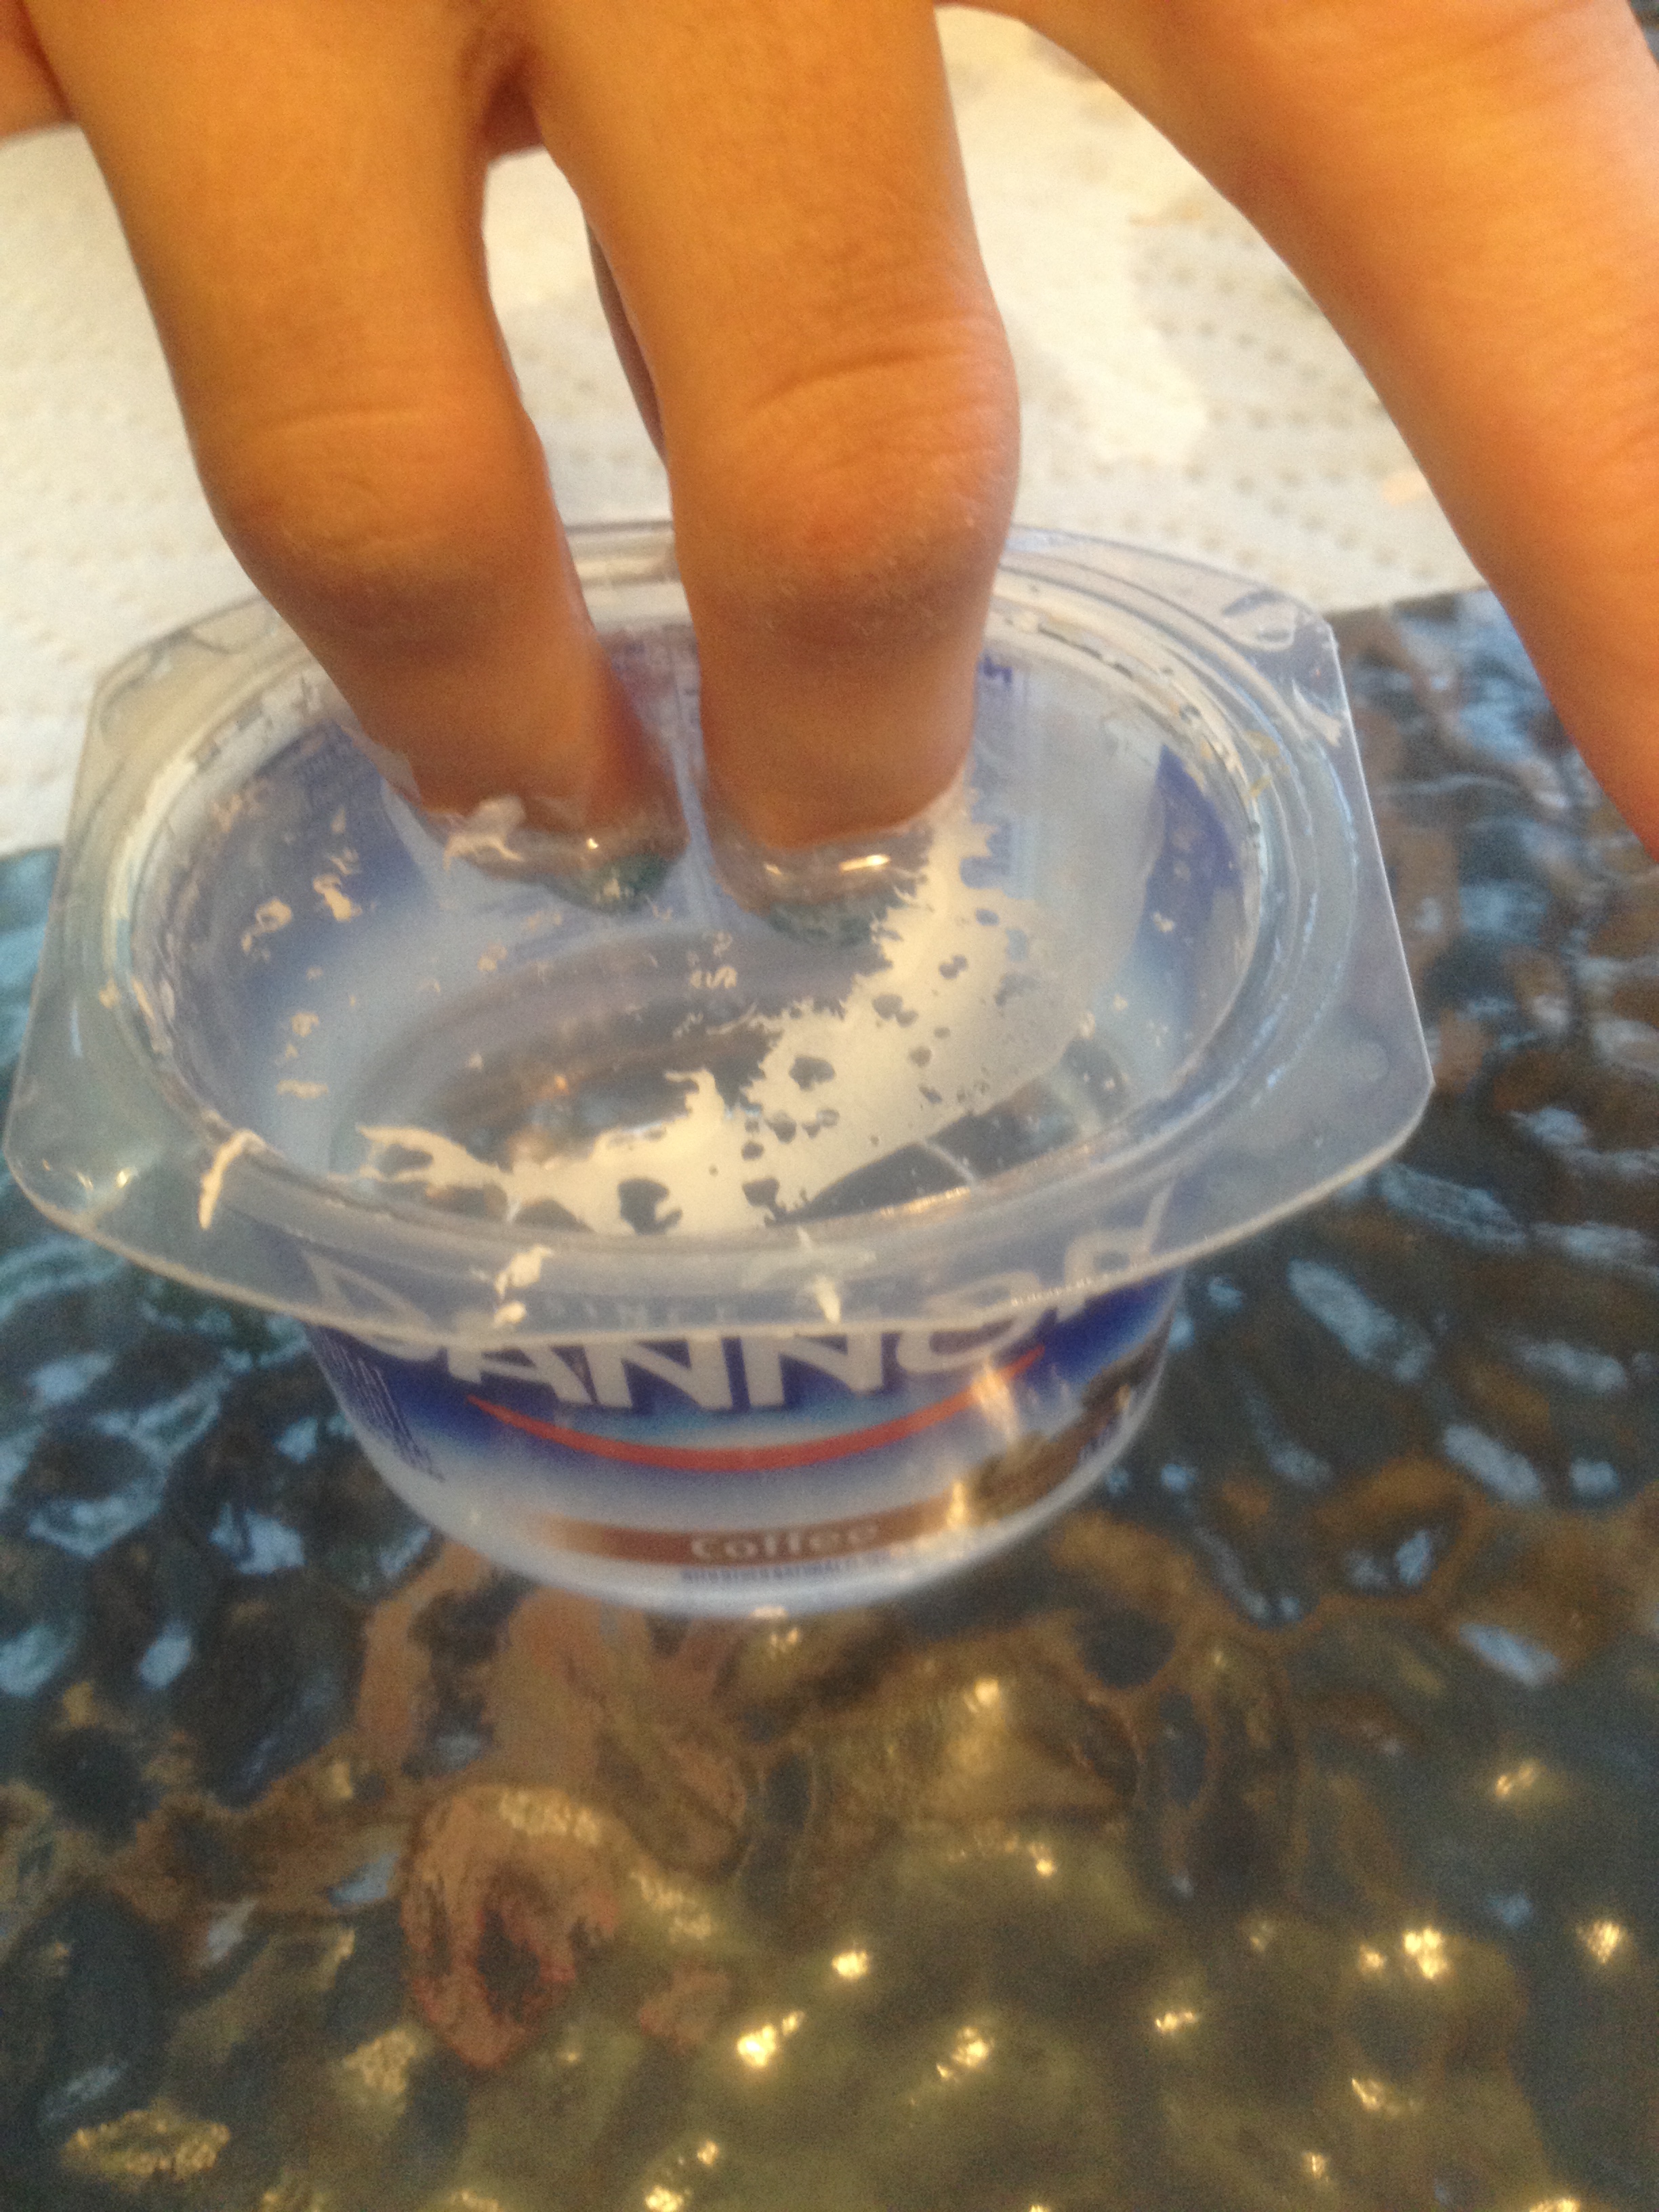
At 5:00, is Fresh Paint – Honeydew.  IMG_4341 This polish is a lovely light minty, springtime-y cream polish.   The formula is a tad on the thick side, but it’s almost a one-coater.  One of the reasons that I’m really loving this polish right now is because it works well for water marbling.  Someone on instagram (I can’t remember who, so I’m a little sad that I can’t give that instagramer proper credit) said that she had good success water marbling with Fresh Paint cream polishes, including Honeydew.  Well, that gave me the inspiration I needed to take another stab at water marbling… She was right!  I tested several fresh paint polishes and they all spread beautifully in the water and were easy to manipulate.  I’m so happy about that!  I hate using expensive polishes for water marbling, because I feel like so much is wasted.  Fresh Paint polishes are always 3 for $5 at Five Below, so… that’s awesome. IMG_4355

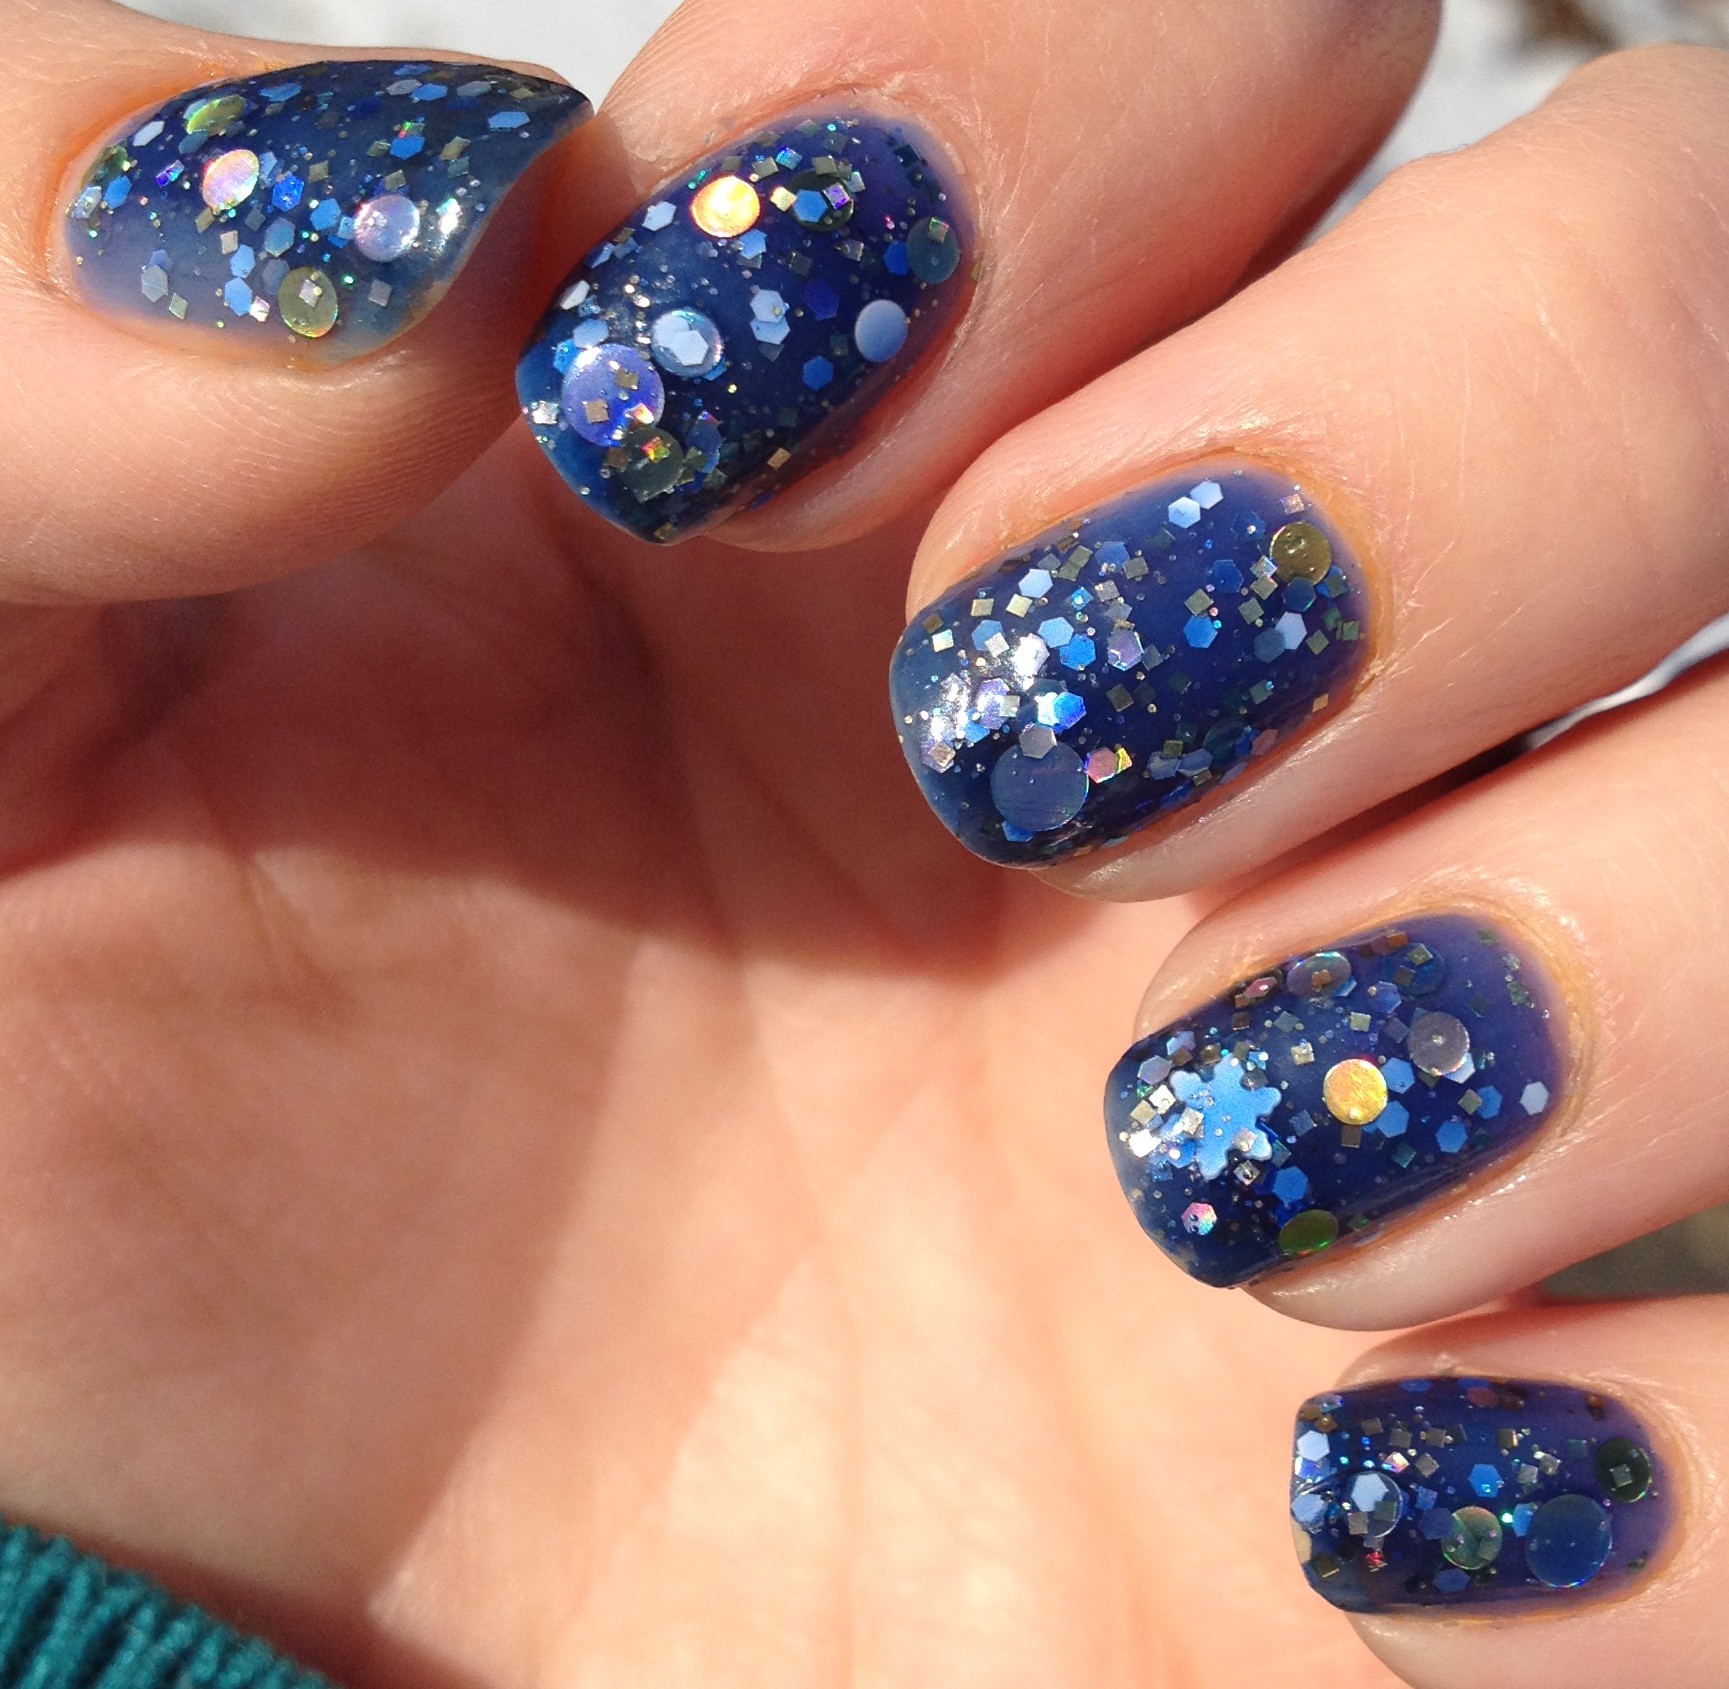
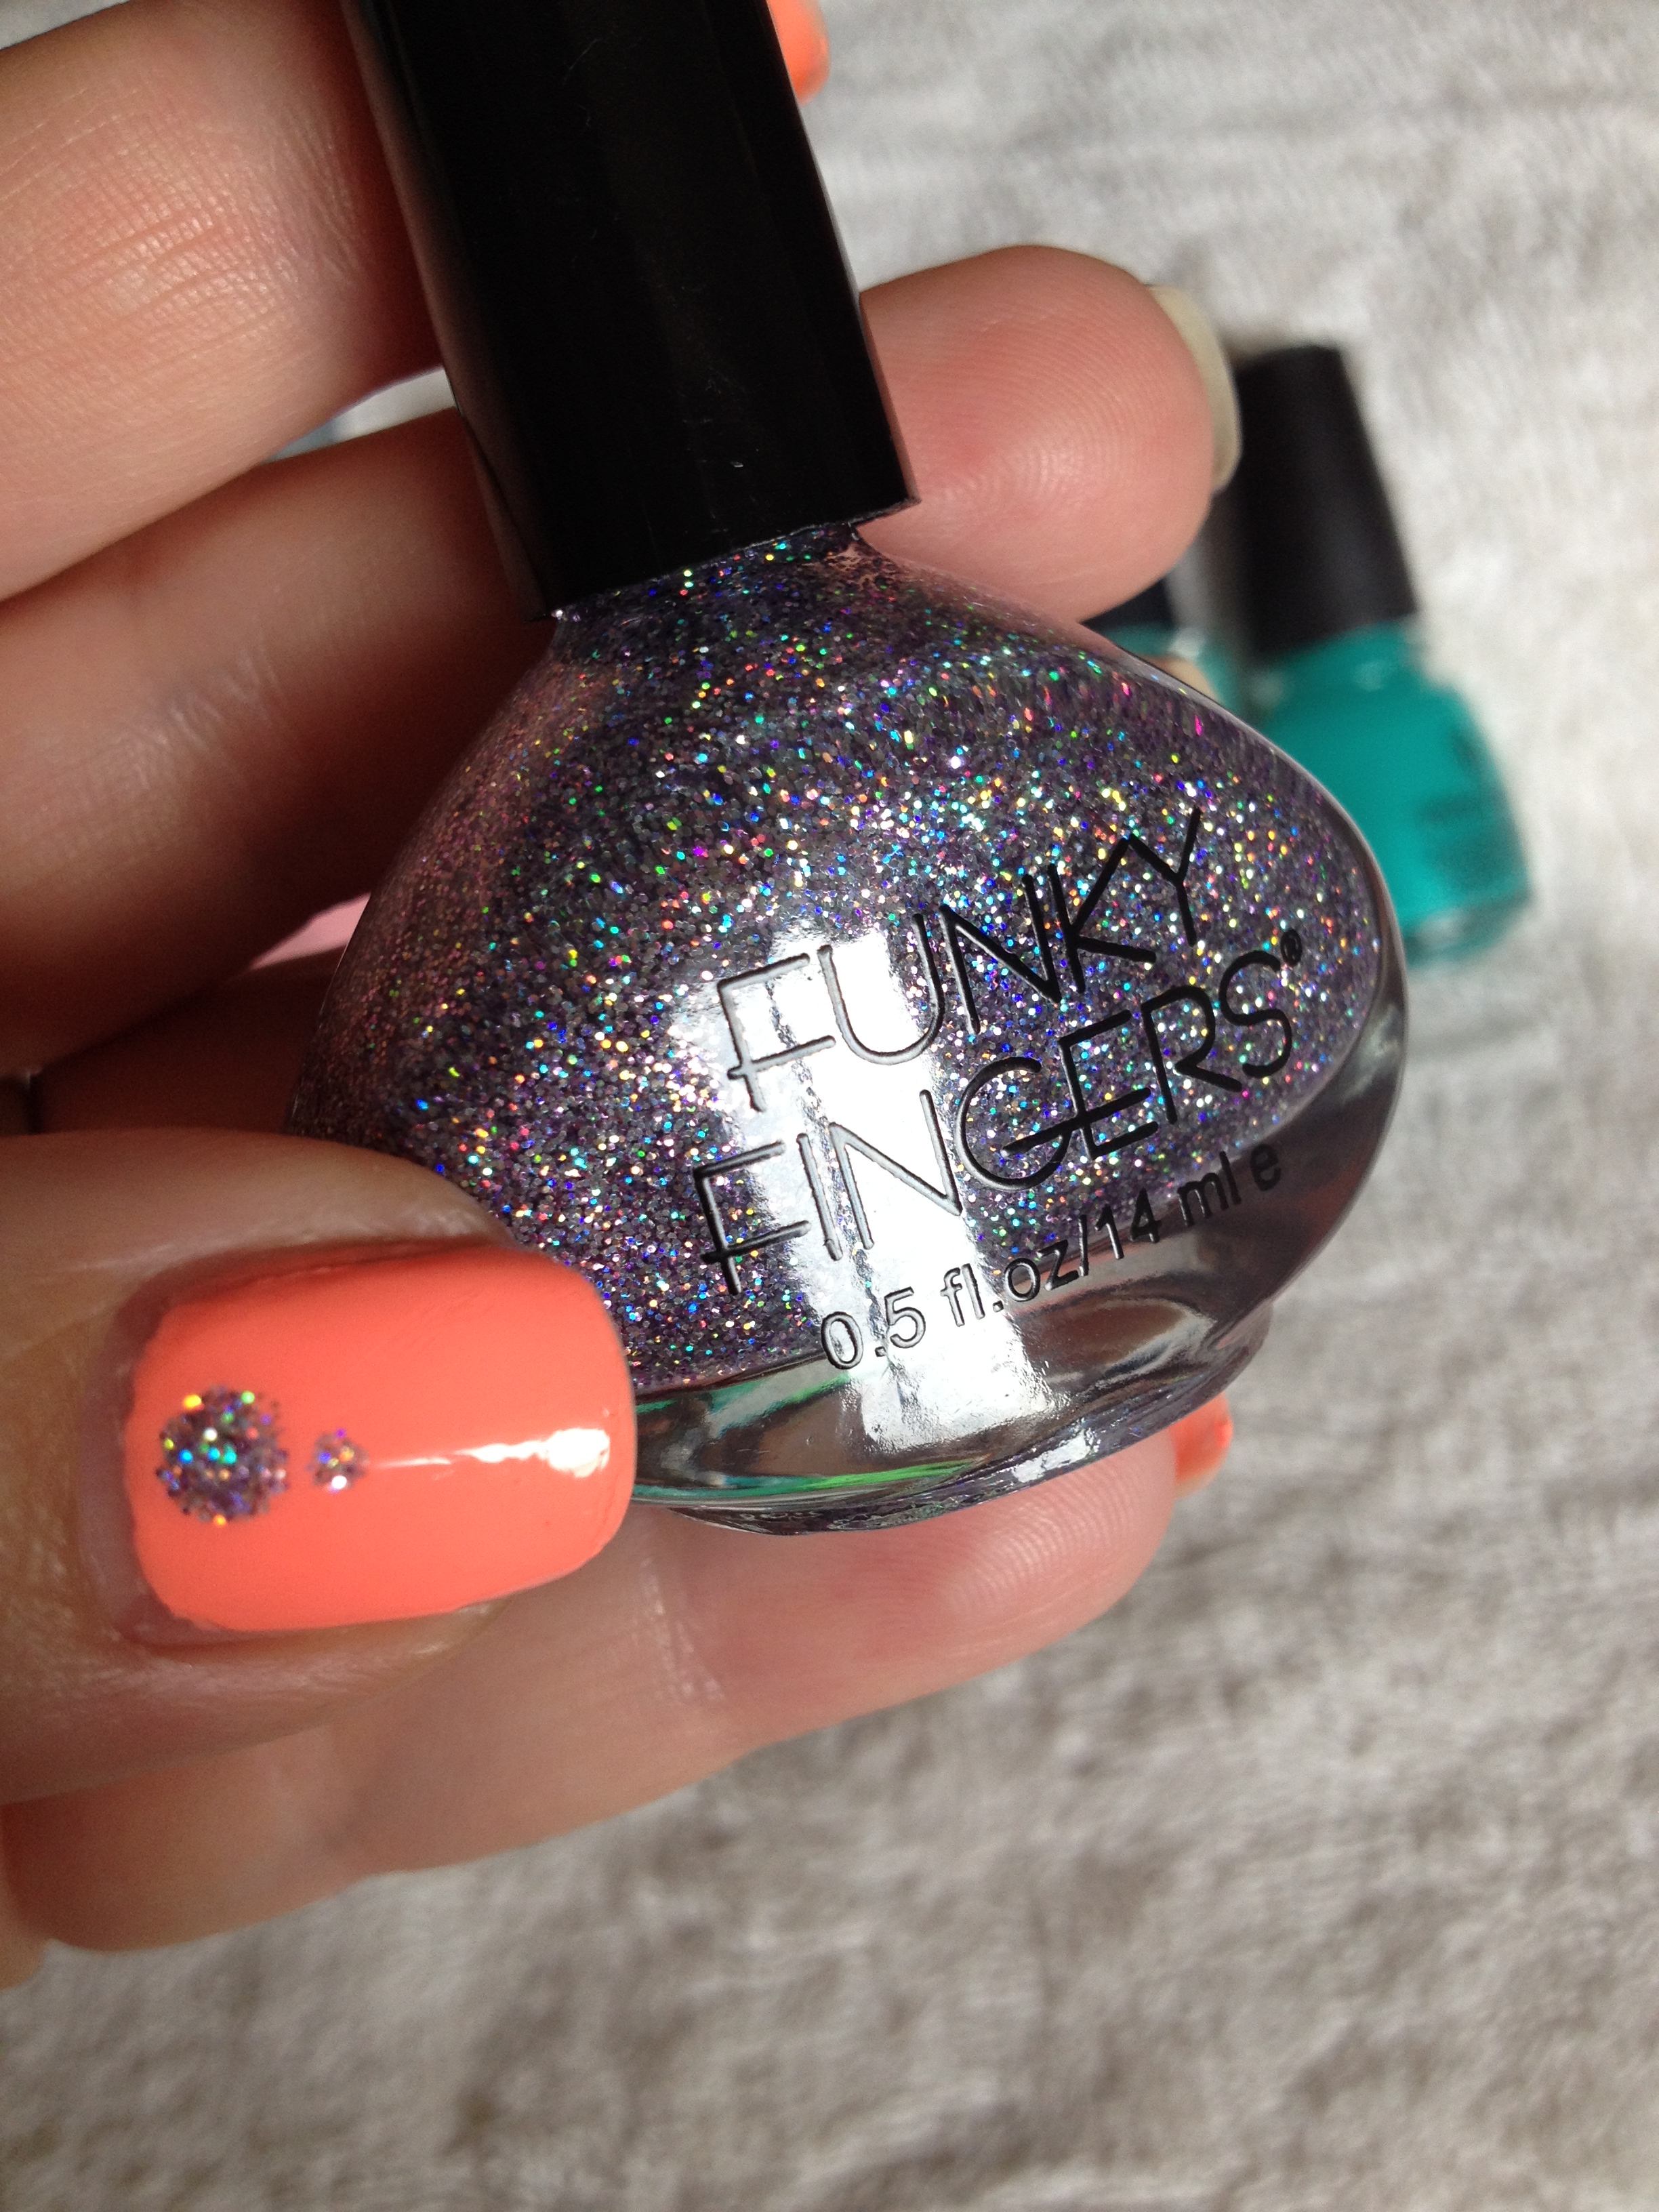
At 7:30 we have LA Colors – Candy Sprinkles.  This is such a fun polish!  It’s a rarity for a cheapo line of polish to have a crelly polish with awesome glitter like this.  I had been eyeballing this one for a little while before I finally picked it up.  This polish is sort of versatile, too.  You can do 2 or 3 coats of the polish on its own if you want a really dense glitter look, or you can just do one coat over pink or purple polish if you like your polish a little more sparse.  Very fun, and totally worth the $1.5Pictured is two coats of Candy Sprinkles over one coat of a pinky-lavender polish.

IMG_4468
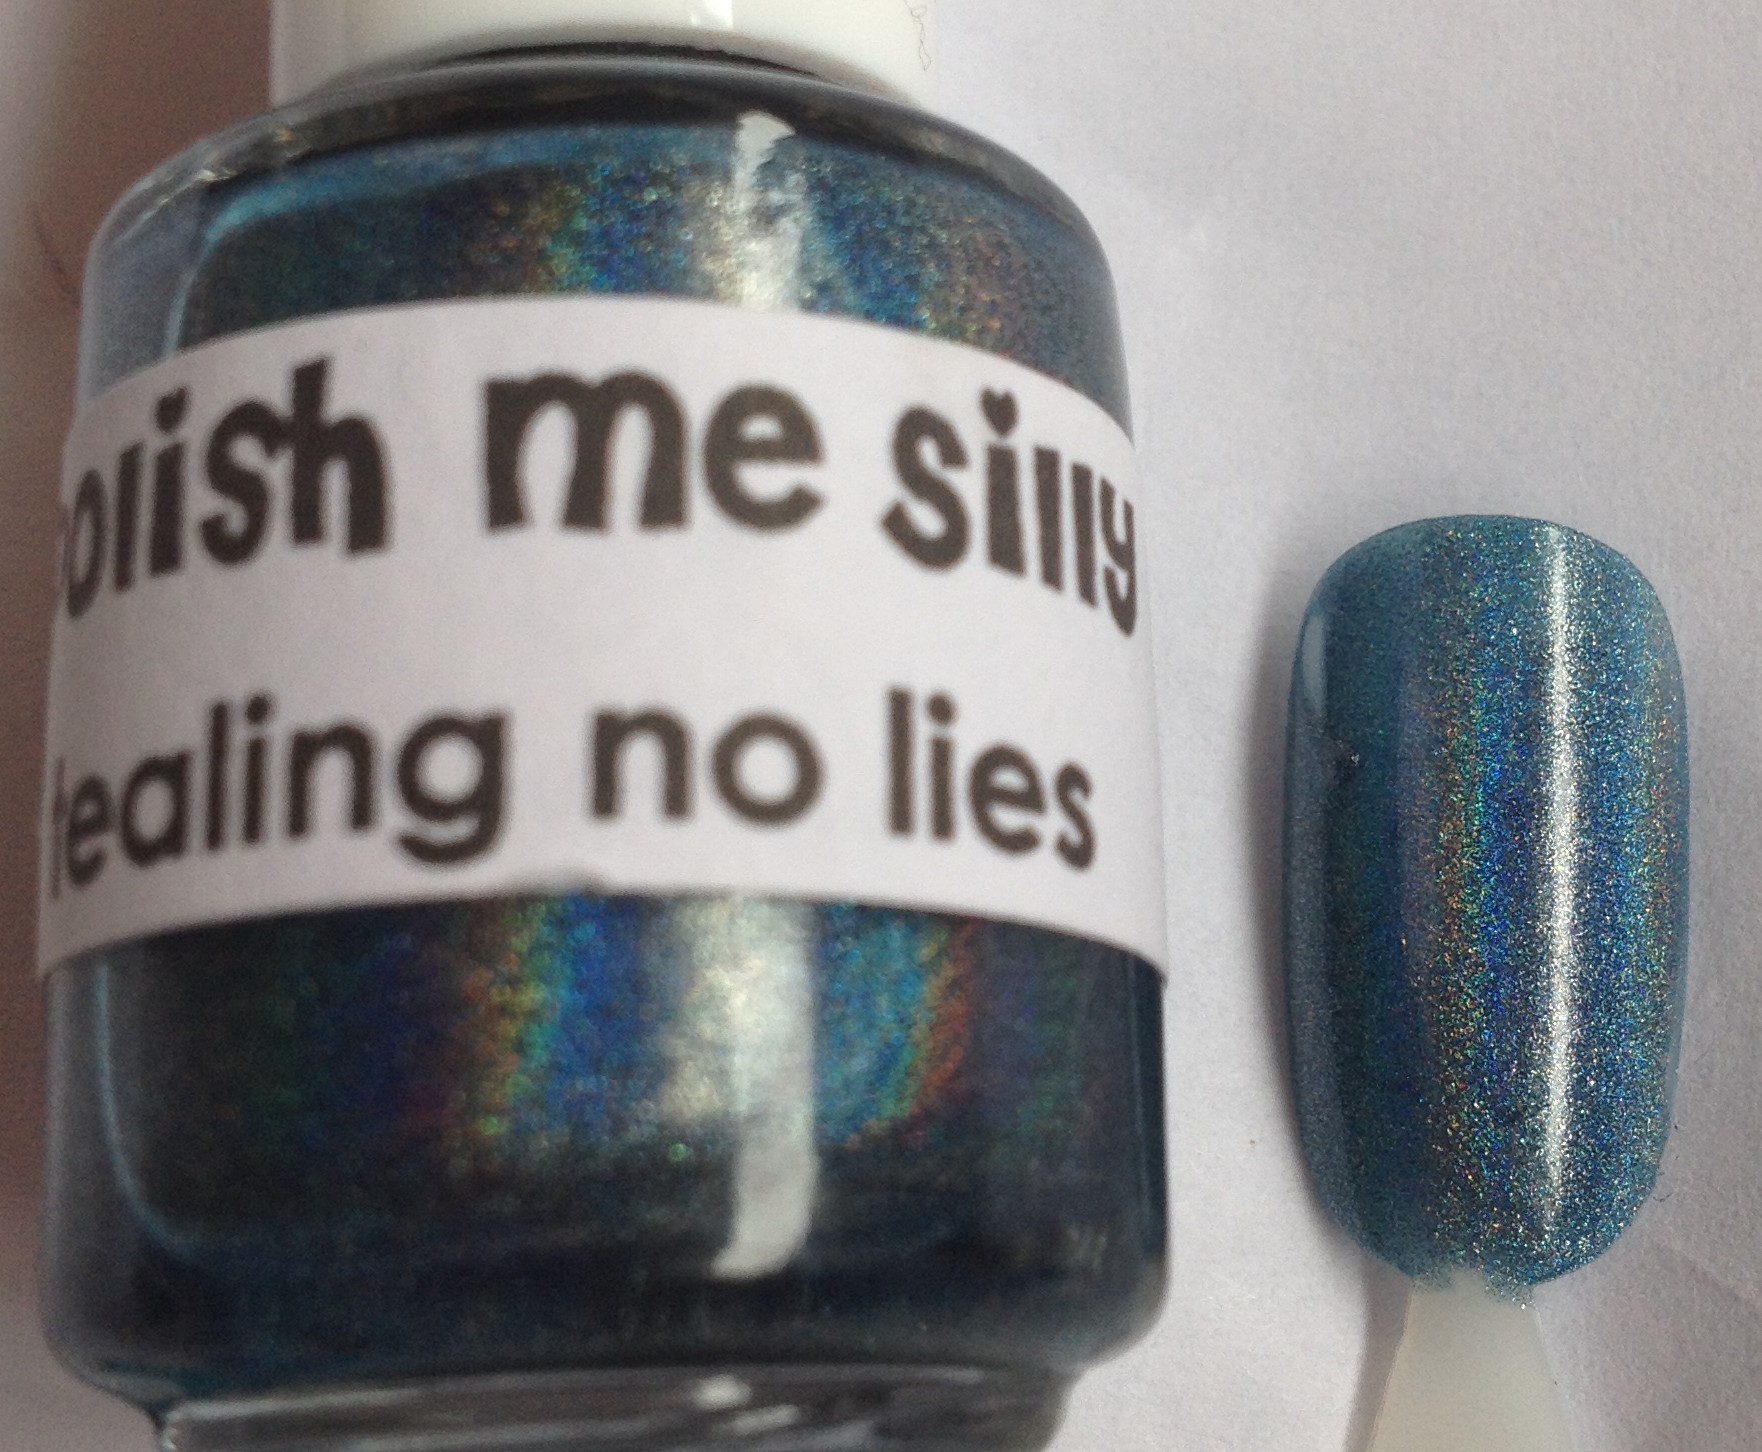
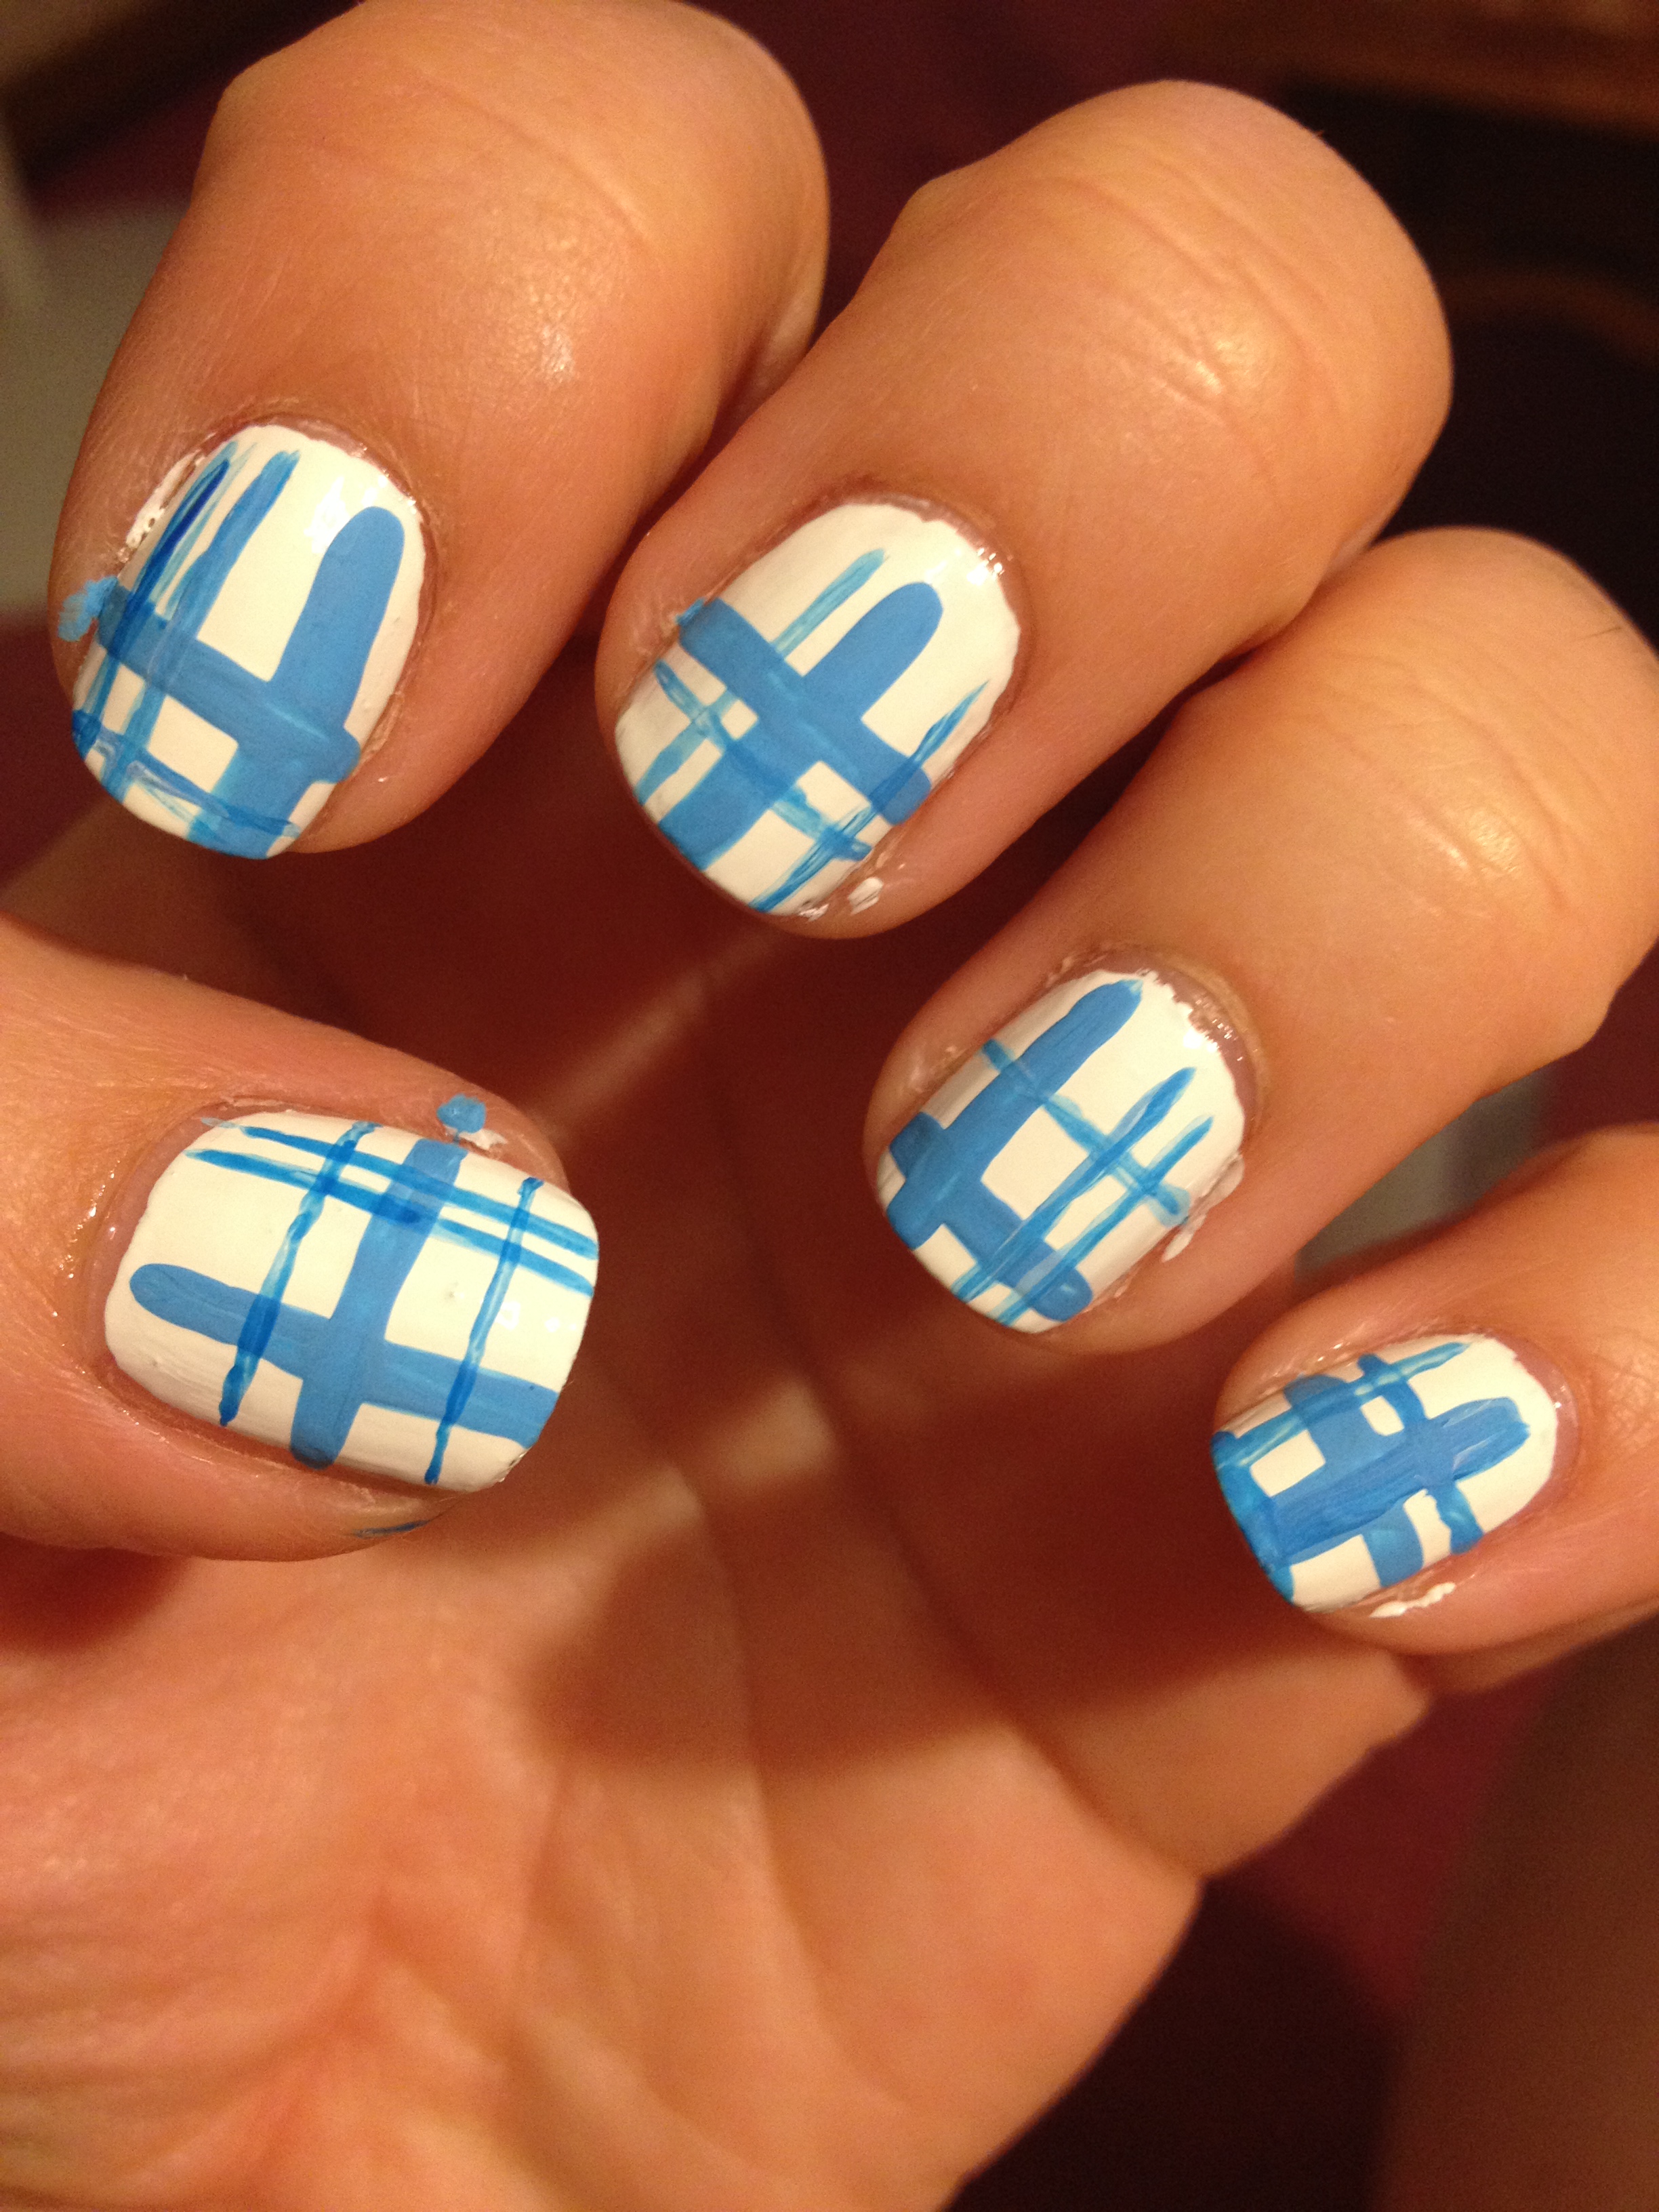
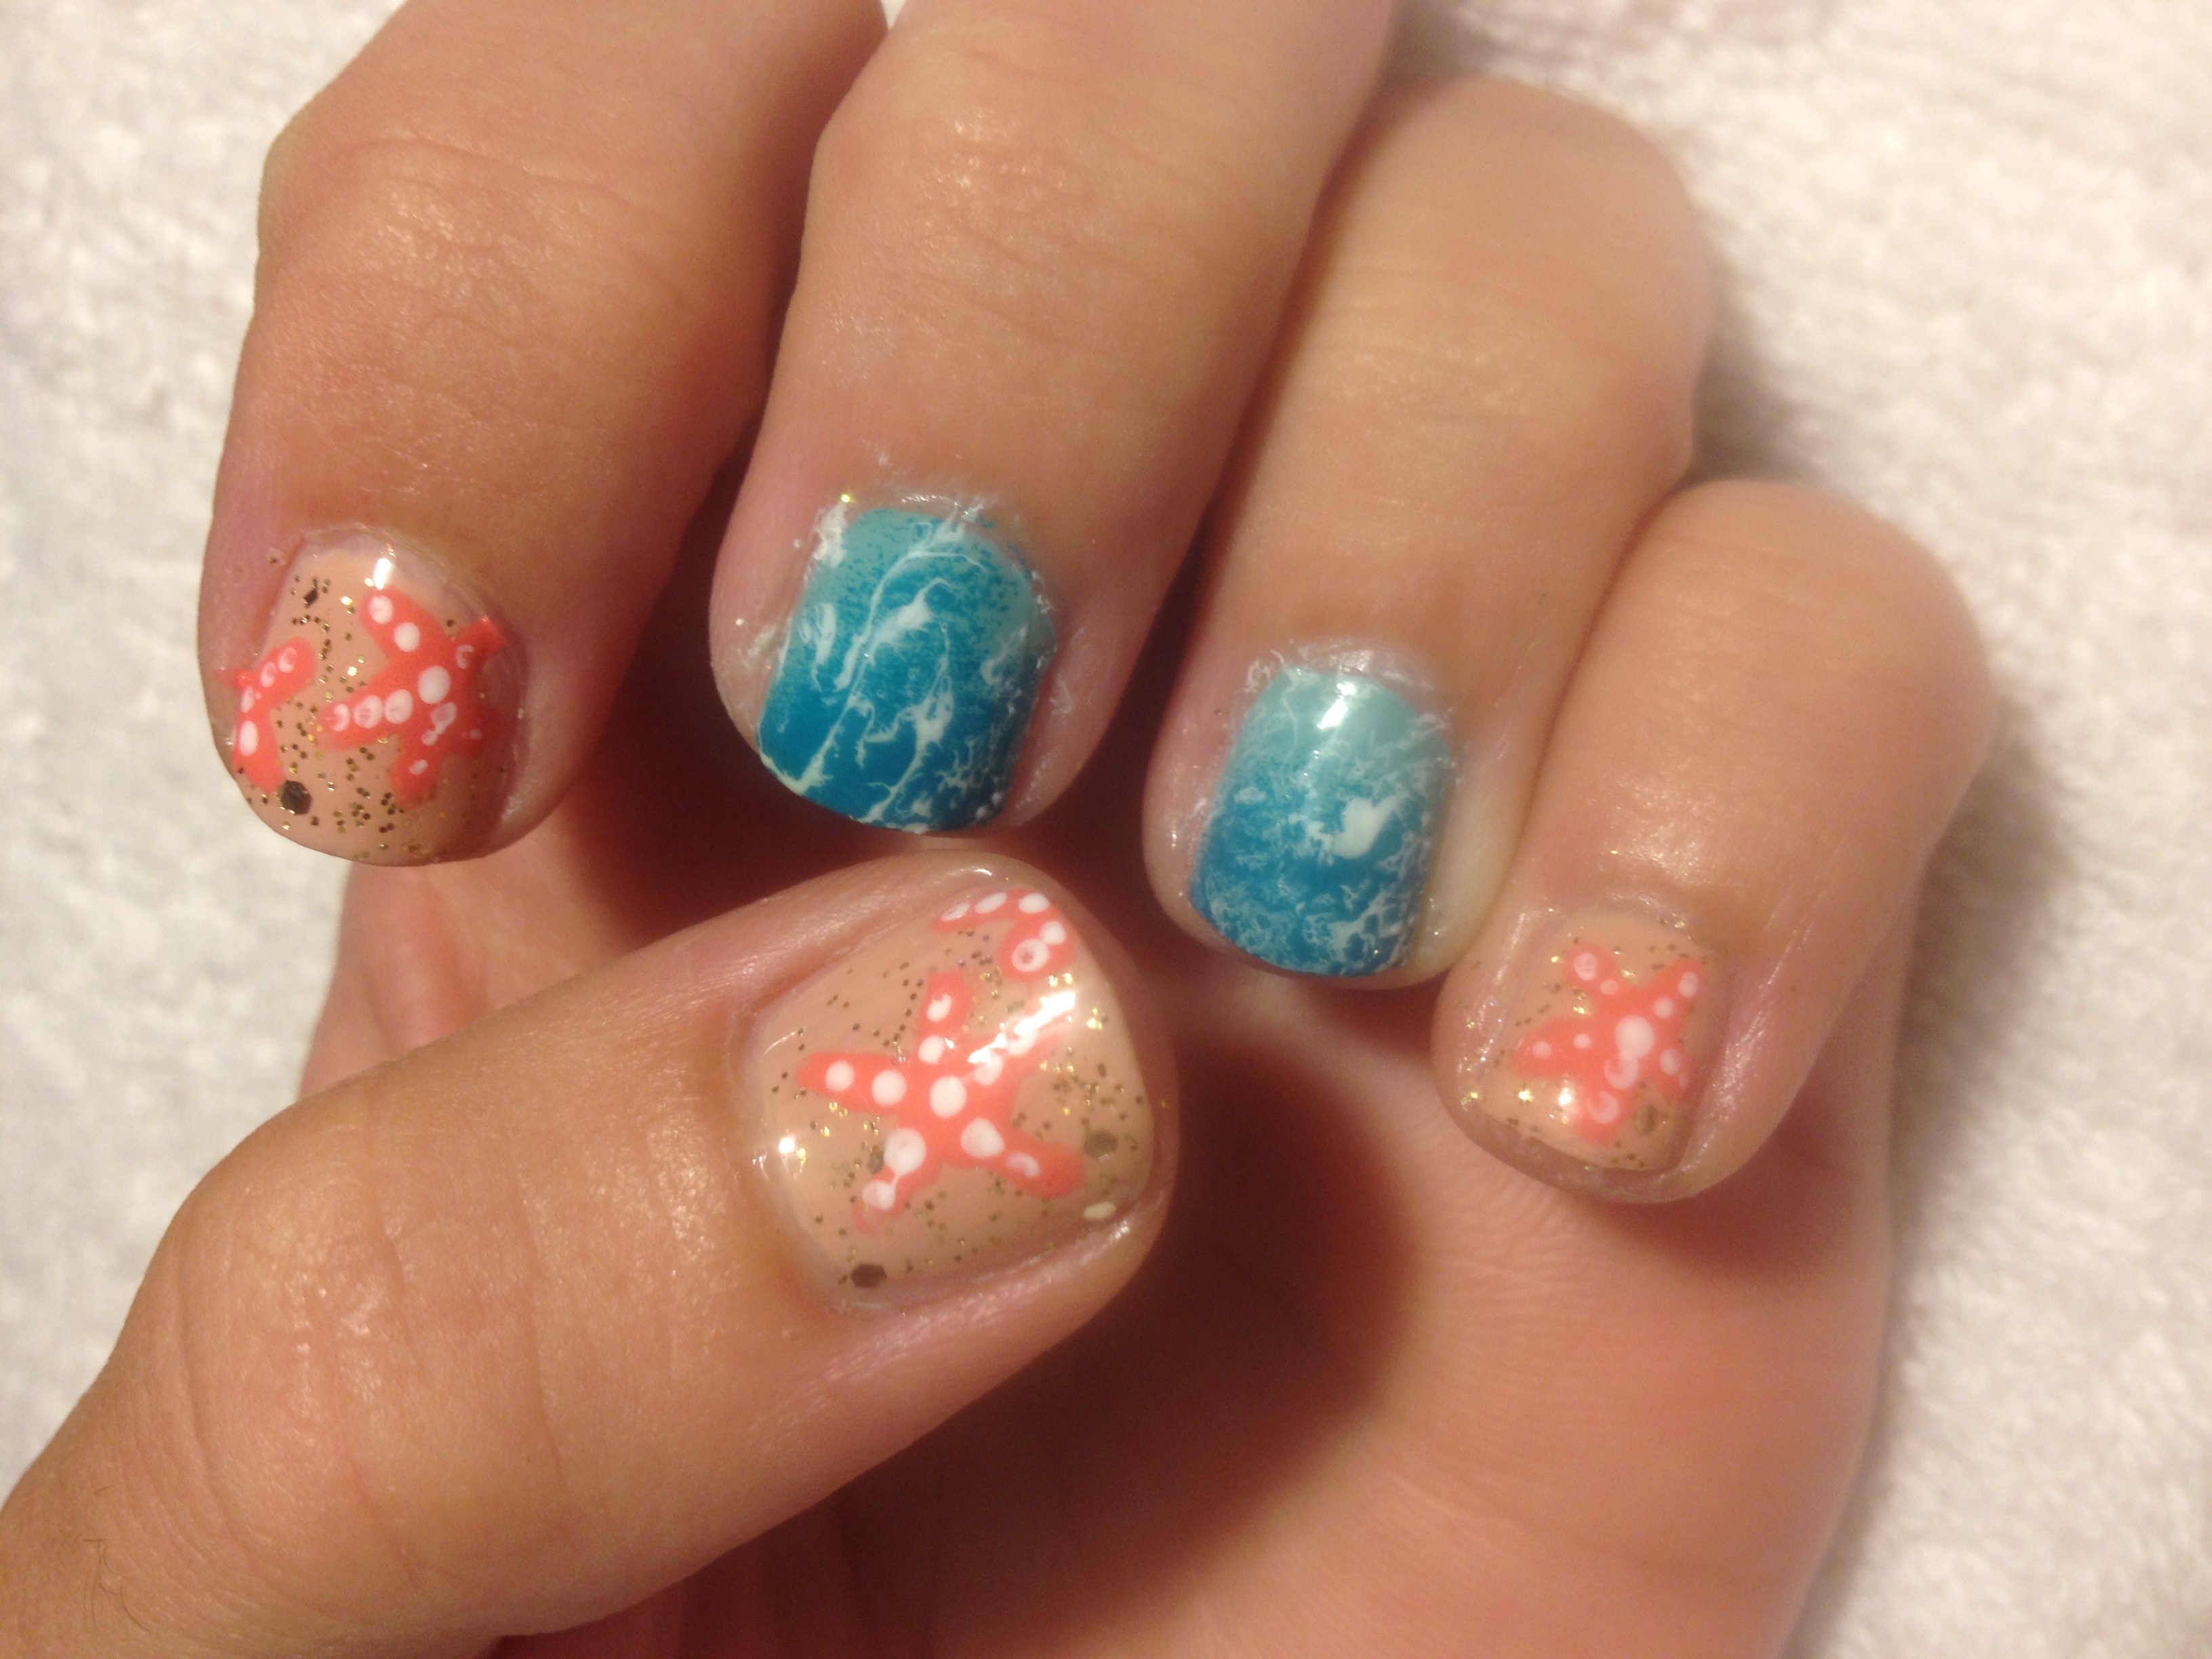
At 10:00, we have this beauty.  Such a classic.  Sally Hansen – Pacific Blue original formula.  And this picture is one coat.  I know, it’s amazing.  The nail polish world mourned when Sally Hansen reformulated this polish last summer, but I still see the occasional bottle of the original formulaon the shelf in drugstores.  Really, I just saw one at the Rite Aid in Middletown, PA like, four hours ago.  The new formula is a darker blue with a shimmer running through it.  The original is just this perfect cream color.  They both say “420 Pacific Blue” on the cap.  Stupid, sneaky Sally Hansen, thinking we wouldn’t notice.

So, those are my February favorites.  Do you have any of these polishes?  What have you been loving lately?  Thanks for reading, following, and liking both here and on instagram.  You people are the greatest!

December Favorites

I’m finally getting around to my December favorites.  Ugh, I have so much catching up to do!  Not surprisingly, in December I loved all sorts of red and gold and glittery polishes.

IMG_4230

Let’s start with the top left.  This is Broadway Nails – Hot & Sexy.

IMG_4235I used this as my base color for my Sparkly Red Snowman Nails.  I just love this polish!  This is a great dupe for China Glaze – Ruby Slippers, and it only costs $1!  The only place I’ve seen these sold is at Dollar General. (You can read more about that here.)  This polish has a red jelly base with tons of red micro glitter.  And if I remember correctly, it’s easy to remove, unlike a lot of glitter polishes.  My little swatch isn’t doing this polish justice.  It’s super beautiful!

Next we’ve got Wet n Wild Fergie – Gold Album.

IMG_4236I’ve talked about this polish lots of times.  Every time I use it, I’m amazed and how beautiful and sparkly and shiny and GOLD it is.  I used this in December in my Advent manicure.  It’s pretty much a one coater, but but I tend to do two coats just to make sure it’s perfect.

Another favorite is Ulta – Joined at the Hippo.

IMG_4231

This was the base color for my Nativity Nails.  This is a beautiful deep blue cream polish.  The thing I love about it is that it is really dark blue, but it never looks black.  The formula is wonderfully easy to work with, also.

I also loved Pure Ice – Studette in December.

IMG_4237The bottle is a little fuzzy in the picture because I focused my camera on the nail swatch instead of the bottle.  This is a really dense micro glitter polish in a clear base that is about 98% gold and 2% red.  So cool!  I used this for my New Year’s Nails.  Really, if there’s ever a time that you can sport obnoxiously glittery nails, it’s New Year’s.  This one is a bugger to remove, but it’s worth it!

Next are my three new Polish Me Silly polishes!  I ordered these through Polish Me Silly’s Etsy shop, along with some polishes for my sister for Christmas.  Then I gave the polishes that I ordered for myself to my Hubby so that he could give them back to me on Christmas.  I know.  We’re weird.

IMG_4233IMG_4234IMG_4232

(Again, the bottles are a little fuzzy, but the swatches are clear.)

The first one is Are You Elfin Kiddin Me?  This is a thermal polish.  The color in the picture is the cold color, but then when it gets warm, the green base turns to white, which makes the dark green glitter really pop out.  It dries to kind of a semi-matte finish, but that’s fixable with a top coat.  (You can read more about what kind of top coat NOT to use with this polish here.)

The middle one is There’s Snow Place Like Home.  This is a dark blue jelly base with a ton, and I mean TON of gold, white and silver glitter in it.  All of that glitter makes it kind of a pain to apply, but the end results are like this:

IMG_4228

The sparkliness is over-the-top!  This is the polish that I’m currently wearing, and I’ve been asked about it so many times.

Tealing No Lies is my final polish.  This is amazingly holographic!

IMG_4114I can’t even tell you how many times I forced my husband to admire my nails while I was wearing this.  In bright sunlight it is so beautiful that it pretty much just makes you go numb with joy just looking at them.  This is definitely one of my favorite polishes of the year.  So amazing!

So, that’s all of my nail polish news, but I do have a little review for you in my new section that I’m calling….

Non-Nail News and Reviews

So, compliments of Influenster, I was sent this new antipersperant to try: Dove Dry Spray.  IMG_4218This is the stuff with the commercials with people touching their armpits and then snapping.  I know, it’s a little weird.  This products claims to be dry instantly.  I think it’s a little more accurate to say that it’s dry in 5-10 seconds.  It has really light sent, sort of like baby powder, but not quite. Pleasant.  It also claims to give 48 hour protection.  I’m not the type to go 2 days without a shower unless I’m in some sort of camping situation, but I will say that after 24 hours, my pits were still stank free.  That’s saying something, because usually I have a little bit of funk going on after 24 hours.  The coolest thing about this deodorant, though, is how it made my armpits feel to the touch.  Even after a full day, I couldn’t feel any weird residue or anything!  My armpit skin just felt clean and smooth and dry!  It was in that moment of touching my own armpit that I suddenly got those commercials with people touching their armpits and snapping.  After 3 days of testing this deodorant, I switched back to my old deodorant with the plan to use up the old stuff here in the colder months so that I can save my Dove Dry Spray for the warm months.  This stuff would be perfect for sleeveless outfits.  (Currently the windchill is below zero {Fahrenheit} and I’ve got three layers on, one of which is wool.  I think I’m a solid four months away from wearing anything sleeveless.  Come on, spring!)  This product is $5.47 at Walmart, and I saw in in Rite Aid for over $7, so it’s definitely a little pricy.  Definitely worth a try, though if you are in search of the perfect antiperspirant.

Thanks for reading!

Happy New Year!

I have been a terrible blogger for the past few weeks.  Seriously, I haven’t posted anything since before Christmas, and that’s downright shameful.  Here are my excuses:

1. Christmas.  It’s just busy.  Lots of baking and cooking to be done, festivities to attend,… You know how it goes.

2. Myrtle Beach.  IMG_4155My parents’ Christmas gift to my three sibs and our spouses and kids was  trip to Myrtle beach, SC for the week after Christmas.  That’s a super affordable place to visit this time of year, and even though it’s not WARM warm, temps in the 50s and 60s feel pretty awesome compared to this below freezing nonsense that pretty much the entire midwest/mid-atlantic/north east of the US is dealing with now.

So, those are my excuses.  I have so many things I need to get caught up on.  I was sent my first Influenster box, so I need to review that product, and I also need to do my December favorites, plus, I’ve got at least one tutorial that I’ve done but haven’t posted.  I think I’m going to spread it out so that I don’t try to cover too many things in any one post.

For now, I’ll just leave you with a look at my super sparkly New Year’s Nails:

IMG_4156

Are you blinded by the sparkle?  The details on this polish will be in my next post, I promise!  Thanks for reading!

Peacocks, Gum Wrappers, and Crochet

I’ve turned two more of my “untrieds” into “trieds”.  I know, those aren’t even words.

Here’s NYC – Precious Peacock:

IMG_3940

This polish is pretty sheer, so it took either 3 or 4 coats to get it opaque like this, but it’s so pretty!  The color is just so rich!  Sometimes I felt like my nails were an emerald-y Christmas green, and other times I felt they looked more turquoise.  Such a good color for the cooler months!  My hubby even liked it, and as a rule, he hates anything that has to do with peacocks.

I’m sure you are all dying to know why my hubby, Mike hates peacocks, right?  Okay, I’ll tell you.  The first apartment we lived in after we were married was out in the country in redneck territory.  One particular redneck owned a peacock that he just let roam around the country side.  I don’t even know if that’s legal.  Anyway, the peacock, who our little-old-lady-landlord called “George” liked to sit in the tree right outside our bedroom window.  Well, every morning from April to August, George would sit in that tree at do his mating call, starting at about 4:00am.  Here’s a youtube clip of what it sounds like.  I’m a pretty sound sleeper, but Mike is not.  He assaulted George with tennis balls, golf balls, rocks, a super soaker,….  George would just hop to a branch that was out of Mike’s reach.  George would not be deterred.  Anyway, we moved from that apartment after about 3 year when we bought our home.  After we moved, we heard that George was hit by a car.  We were not sad.

Back to nail polish.  I played with my gum wrapper in church and came up with this:

IMG_3944

Did you know that you can actually peel the foil off of the paper part of the wrapper?  It takes a little bit of work, but then you are left with a really thin foil layer that has a little adhesive on the back.

Here’s another untried that I finally used:  L.A Colors – Berry Red

IMG_3945

This is a jelly formula.  This is four coats and you can still see my nail line a little bit, and the color is still not as rich as it is in the bottle.  It is nice and shiny and I’ve actually gotten multiple compliments on this one.  I think I’ll have to do some jelly sandwiching with this one in the future.

You may or may not be wondering why I have not been posting as much lately.   Well, I’ll tell you.  It’s crocheting season for me.  I mostly make hats.  I do a handful of craft fairs this time of year, and I’ve been working to bulk up my inventory a little bit.  Here’s one that I jut finished yesterday:

IMG_3951

The “hair” is a whole bunch of loops like a Cabbage Patch Kid!  And the eye patch is removable/adjustable.

I actually have a little etsy shop, but I don’t have any items listed for sale now since I’m offering them at craft fairs.  I’ll let you know when I have some items back up for sale in my shop, just in case any of you are interested.

Liebster Award

Today’s post is going be a little something different.  Hopefully you all won’t mind too much…

I was nominated by Pretty Drastic Moves for this little award!

liebster-award

Thanks for the nomination!  I found this post from Sopphy Says with a little information about the origin of the Liebster Award, if you care.  She gives a nice little history lesson.

Here are the rules :

•You must link back to the person who nominated you.
•Nominate 11 blogs to receive the award who have less than 1000 followers.
•Answer a list of 11 questions set by the person who nominated you.
•Set a list of 11 questions for the people you nominate to answer.
•Inform them that they have been nominated by commenting on their blog.

Now, onto the 11 questions I was given:

1. What is your favorite dessert?

-Anything chocolate.  I’m a huge sucker for anything that is chocolate and mint or chocolate and raspberry.

2. Where did your last kiss take place and with whom?

-My hubby this morning before he left for work.

3. If you could be anyone for a day, who would it be?

-Either someone who was in Jesus’ inner circle, like one of the disciples or Martha or Mary.  I think it would be crazy to see Him in action, eavesdrop on His casual converstaions, watch his mannerisms…  My second choice wold be Laura Ingalls Wilder.  I loved the Little House books as a kid!

4. Who is your favorite fictional couple?

-Mr Darcy and Miss Elizabeth Bennett.  “In vain have I struggled. It will not do. My feelings will not be repressed. You must allow me to tell you how ardently I admire and love you.”  So offensive and romantic at the same time.  And I know nobody asked, but I would like to say that I love Colin Firth covered in lake water.

5. What’s your favorite song of the moment?

-I’ll just go with the song that was stuck in my head last night: I’m a Rover by Great Big Sea.  Skip to 1:55. There’s way to much talking before they start singing.  I’m kind of a dork.  I pretty much only listen to WJTL (the local Christian station), musical soundtracks, and music that you would find at a renaissance fair.

6. What do you get complimented on the most?

-Either my nails or my facebook status updates.  When people tell me they enjoy seeing my status updates, it’s a weird reminder that I’m not just writing them for my own amusement.

7. What was the inspiration for your blog title?

-I just like the word “snazzy.”

8. Do you have any annoying habits? TELL ME! 🙂

-Oh my.  I’m messy.  And I procrastinate.  I’ll just leave you with those two.

9. Best Movie you’ve seen this year?

-I’m blanking on this one a little bit.  Maybe Grand Budapest Hotel.

10. What was the last formal event you attended?

-I don’t think I’ve been to a an actual formal event since I graduated from college in 2000.  Does wearing a bridesmaid dress count?  If so, then my youngest sister’s wedding on January 1, 2010.

AND…
11. What are your plans for Halloween??

-Probably to sit on the front porch, watch the neighborhood kids run around, and hand out candy.

Okay, my nominees are:

1. Finger Candy

2. WonderfulWolf

3. Seven Layer Charlotte

4. Cooking Amid Chaos

5. Inside the Miles

6. Spaghetti for Supper

7. Polished by Amy

8. Not Another Dumb Blond

9. Lacquered Lori

10. A Craft & A Half

11. Don’t Judge Me, Okay

And my 11 questions for my nominees are…

1. What is your birth order, and do you behave like a typical oldest/middle/youngest/only?

2. If a tourist were to visit your town, what advice would you give him on what he should see or do?

3. What is one thing on your bucket list?

4. What has been your favorite vacation ever?

5. Where is one place that you would love to visit?

6. What is your biggest pet peeve?

7. What is your guilty pleasure?

8. What is your favorite mode of transportation?

9. How are you different from how you were 10 years ago?

10.  What is your favorite season/time of year?

11.  Do you recycle?

Make sure you nominees all link back to me so that I can see your answers!  And take a little time to visit these blogs!  Thanks for reading!

Jelly Sandwich Time!

Jelly sandwiches are not really a new thing in the nail polish world, but I run into enough people who give me a blank stare when I use the term that I thought it warranted a post.  A jelly sandwich is a layer of glitter that is sandwiched between a few layer of a jelly polish. 

What is a jelly polish, you ask?  Thank you for asking.  A jelly polish is a sheer, colored polish that generally looks like a Jolly Rancher when it dries on your nail – colored, but still see-through and really shiny.  The appearance of wet jelly polish always reminds me of the paint you used to paint those plastic faux stained glass sun-catcher things as a kid.  Do you know what I’m talking about? 

Sometimes polish brands will release a collection of jellies, but I think most lines of polish have a few jellies in the mix already.  Sometimes you can tell a polish is a jelly just by looking at it in the bottle, but the best way to tell is to open up the bottle and look at the polish on the brush and around the neck of the bottle.  If you can see through it easily, you’ve got a jelly.  If you can just sort of see through it, you may have a “crelly” on your hands.

A crelly is somewhere between a cream polish and a jelly.  (I feel like it’s a dumb word, and I avoid using it if possible, but really, there’s no other word to describe polishes like this.)  Have you seen those glitter polishes that are in a light colored, milky sort of base?  That’s  a crelly base.  Crellies work well for jelly sandwiches too. 

Here is the first jelly sandwich I ever attempted:

001


Eh, it turned out okay.  I didn’t love it.  This was with a sheer nude polish from Avon called Barely There that I’ve had forever.  I would call this one a crelly.  The glitter polish I used is Fantasm from Valley Girl Lacquer.   (Valley Girl Lacquer is an indie polish company.  Check out their etsy shop.  They have some awesome glitter polishes!)

Just for reference, here’s what Fantasm looks like over black:

2014-02-03 21.23.44

you can definitely see how when you sandwich the glitter between the layers of “jelly” how it mutes the glitter effect. 

Here’s another jelly sandwich that I did using Fantasm and a purple limited edition polish called Deception from Wet n Wild.  I love this purple, and I’m sorry you can’t get it anymore. 

IMG_2155

I LOVED this manicure! Deception is so sheer that I think I used 2-3 coats of polish under the layer of glitter and then another 2-3 coats over the glitter, but gosh it was beautiful!  The way the glitter reflected light through the polish made my heart so happy. 

Here’s one final jelly sandwich:

IMG_2542

This is using Wet n Wild Megalast Bubblegum Pop and China Glaze Glitter Up.  (This Wet n Wild color is exclusive to Dollar General / Family Dollar as far as I know.)  This one I medium liked.  This pink is really fun but really… pink.

What are your thoughts about jelly sandwiches?  What are your favorite jelly polishes? 

Cow Toes!

I’ve been painting “cow toes” forever.  Not painting the toes on actual cows, (Do they even have toes?) painting cow print on my own toenails.  By “forever” I mean close to 20 years.  Back in olden times – the ’90s – I was a camp counselor during the summers. I definitely remember sporting cow-print toes a lot back then and also painting cow-print on my fellow female counselors’ toes. 

IMG_2954

This pattern is so easy that it doesn’t even really warrant a full tutorial.  You just paint your nails white, and then using either a dotting tool, tooth pick or just the brush that comes in the polish, make irregular black splotches on the nails.  Really, it’s that easy. 

If you want to paint a little cow face on your big toes like I did here, just start with a white nail then add a pink semicircle for the nose.  Add two black dots for nostrils and two black dots for eyes.  If you have a little brush and you want your cow to look a little more feminine, add eyelashes.  Then fill the space around the face with a few black splotches.  Here’s a fuzzy closeup of one of my big toes.  I know, toes are gross.

IMG_2955

And finally, here are my cow toes hanging out the window while going for a ride in the country.  It seemed appropriate.

IMG_2960

Seriously, this design is super easy and always get tons of positive comments from people.  Give ’em a try while we can still wear sandals!


Plaid Watermelon Nails

I’m not gotta lie; these took a long time.  While I did these nails plus my toes (which you’ll see on Wednesday), I watched almost the entire Blackfish documentary plus two episodes of Seinfeld.  (I needed to watch something a little lighter after Blackfish.) But aren’t they seriously cute?

IMG_2950

The first think I need to do is give Jaunty Juli credit for the design.  Her original version of this design is on her YouTube channel.  You should check her out.  She’s really good!

For this look, the only polish I used besides my base and top coat was a white. The rest of the color is actually acrylic craft paint.  Craft paint is easier to work with than polish, it washes off with water, and it’s really cheap, like $.65 per bottle.  Since they are water soluble, I just us a plate from my kitchen as a little pallet.  Works like a charm.  Just make sure you apply a top coat so you don’t wash your design off when you wash your hands.  That would be tragic.

Here’s how I did them….

First I started with 2 coats of white polish:

IMG_2933

Then I added thick crosses on each nail using light blue paint.  (I actually took some blue I had on hand and mixed it with a little white paint to get the color that I wanted.)  As you can see, I changed the placement of the lines on each nail just to sort of mix it up.  You don’t nee to paint them the whole way to your cuticle since we are going to be adding the watermelons later.

IMG_2934

I added some thin blue lines going vertically and horizontally wherever I had room.

IMG_2935

I then took a darker blue paint and my littlest brush and darkened the spots where the lines intersect.  This is what really makes the plaid look like plaid.

IMG_2936

I added a few neon yellow stripes with paint where I could fit them in.  In retrospect, I should have left a little more room for the yellow lines, but it’s all good. The yellow paint was pretty sheer, so it interacted nicely where it overlapped the blue to make a greenish shade.

IMG_2937

Next I started to add the red paint over my half moon area on my thumb, but I quickly realized the my neon red paint was not going to cover the blue polish near my cuticles.  I decided I needed to take white paint and cover up the blue paint where I wanted to paint the watermelons.  (I’m not showing  you my thumb, because it looked pretty messed up at this point.)

IMG_2938

Then I took my red paint and filled in most of the half moon area, leaving a little room for the rind.

IMG_2939

then I added a thin neon green stripe next to the red.

IMG_2940

Then I added a little black and green together to make a darker green and added a final thin stripe to make the rind.

IMG_2941

Can you tell I was using my palm to wipe my brush some at this point?  Anyway, with my littlest brush, I added in some black seeds and then applied a top coat.

Here’s what they looked like the next day in natural light where you can see the neon-ness a little better:

IMG_2951

Please let me know if you try these!  I’d love to see your recreations on facebook or instagram!  Oh, and check out Jaunty Juli on YouTube or instagram, too!


July Favorites

Happy August!  I got really excited, probably irrationally excited, when I realized that July was over and I could do my first monthly favorites post.  I’ve always enjoyed checking out other bloggers monthly favorites, and for some reason, I just get a huge kick out of being able to do my own.

IMG_2822

So, here we go…

Wet n Wild  – Tickled Pink

IMG_2816

This is just the most beautiful baby pink.  It looks so pretty with a tan.  It’s the pink I used for this look. This is a polish that I’ve had for a year or so, but I just remembered this month how pretty it is!

Broadway Nails – Sour Apple

IMG_2818

This is such a great neon green!  The formula is a great and it only cost me $1!  The only place I’ve see these sold is at Dollar General / Family Dollar stores.  It’s the green I used here.

NYC – Amazon Green from the City Samba collection

IMG_2819

This polish is actually a little lighter and greener than it looks in this pic.  It’s got a lovely frosty finish and makes me feel like my nails are covered in mint chocolate chip ice cream, which of course is a good thing.  I haven’t seen this in stores for a little while, so it might be tough to find.  Sorry about that.

China Glaze – Turned Up Turquoise

IMG_2820

This color is just do deep and rich!  It’s also got a beautiful shimmer that I feel sometimes reflects blue, sometimes green.  This polish was promoted as being a summer neon, but I think it’s also part of the permanent line, so you shouldn’t have too much trouble finding it.  If you’re a sucker for turquoise polish, do yourself a favor and get this one asap.

NYC – Matte Me Crazy top coat.

IMG_2815

I used this top coat for this aforementioned look and I was really happy with how it held up! I actually bumped one of my nails before it was completely dry, but this top coat sort of plumped back up and fixed itself so that you couldn’t even see where I had bumped it!  Some matte finishes will start to get glossy after a few days, but this just held up really well.

Funky Fingers – Sand & Stilettos

IMG_2821

I already gushed over this polish in my Five Below Haul, but I just can’t get enough of this polish!  It’s just SO sparkly and SO holographic.  I had it on my toes for a while and I just felt like they were covered in little diamonds when I was in the sun.  I used this polish for the little dots on my thumb nail here.

Fresh Paint – Guava

IMG_2817

This is the current color on my fingers.  Pardon my nail growth.  I just love this color so much that I’ve left it on for a whole week, and that’s saying something!  This is the most beautiful neon peach / light coral, and it’s one of those neons that just sort of glows at dusk when you’re outside.  It’s a dupe for China Glaze – Flip Flop Fantasy and way cheaper.  I picked this color up in my Five Below Haul also.  I love this color.  I love it so much.  I need to stop saying that.

So those were my July favorites!  What polishes have you been loving so far this summer?

*To get updates via facebook, please “like” my Polish Me Snazzy page and “share” it!  You can also find Polish Me Snazzy on instagram. Thanks for your support!


Beach Inspired Nail Art

Here in PA, we have about one more month to sport overtly beachy nails, so let’s get to it!  I am still digging my current mani, so I asked my little sis if I could borrow her nails for this little tutorial.  Here’s the finished product:

IMG_2790

For this look, you will need polishes in these colors: White, light blue, darker blue, coral, nude, gold glitter.

IMG_2795

Specifically, I used (left to right):  Wet N Wild -French White Creme, Wet n Wild Megalast – I Need a Refresh-Mint, Jordana – Boy Oh Boy, Wet n Wild – Blazed, NYC – Fashion Safari, La Colors – Dizzy.  (Yeah, my bottle of Blazed got into a fight with a bottle of grey polish inside my suitcase on a flight.  The grey bottle lost.)

You will also need a disposable plastic container like a yogurt cup, Q-tips, a dotting tool, a makeup sponge, acetone or nail polish remover, and a pitcher.   The first thing you want to do is fill the pitcher with a quart of water and let it come to room temperature.   Seriously, that’s a real step in this process, but more about that later.

To begin, paint the thumb, index, and pinky fingers with the nude color to look like sand.  Then paint the middle and ring fingers light blue:

IMG_2760

Let them dry for 5 or 10 minutes.  Then, in order to make clean up easy in the end, tape around the fingers with the blue polish.  You’ll need two pieces of tape per finger: one about 2 inches long, the other about one inch long.  Take the longer piece of tape and place the center of it across the tip of your finger (behind your nail) and then press it down along the sides of your finger.  Then take the shorter piece and wrap it around your finger just below your cuticle.

IMG_2761

Then apply a coat of the glitter polish to your sand-colored nails.

The next thing you’re going to do is give your blue nails an ombre/gradient effect.  Take a makeup sponge and apply some of the darker blue polish to it.

IMG_2762

Then start dabbing the sponge lightly at the very tip of the light blue nails.  As the polish begins to dry on the sponge, continue dabbing about halfway up the nail.  Work carefully and don’t get too crazy here.  It’s easy to add more dark blue polish to the nail if you need to, but if you sponge too vigorously and get too much dark blue polish on the nail, there’s not much you can do to fix it.  Here’s what it should look like after this step:

IMG_2763

Pretty, right?

Next, take your small disposable container and fill it with your room temperature water.  I just pulled a yogurt container out of my recycling bin.   (What you do not want to use is a Styrofoam cup.   Nail polish will eat through Styrofoam and  leave you with a big mess.)

Then, take your white polish and drop a drop of polish onto the surface of the water.  It should spread out like this:

IMG_2766

If your drop of polish falls to the bottom of the container, you are holding your brush too far above the surface of the water.  If your polish doesn’t spread out like this, the problem is either the water or the polish.  If your water is too warm or too cool, the polish won’t spread.  Also, I just used tap water, but I know that some people claim that bottled water works better for this technique because it doesn’t have that extra stuff that can be in tap water.  There’s also a possibility that your polish just doesn’t want to spread.  Different formulas do spread on the water differently.  Any sort of quick dry polish is going to dry on the surface of the water too quickly for you to be able to work with it.  My $1 Wet n Wild worked well, so get yourself a bottle of that.

Now, spritz the polish that is floating on the water with an alcohol based spray from a distance of about 8 inches.  I used some old Bath & Body works stuff.  As you can (hopefully) see (in my crappy picture), this will cause the polish to break up.

IMG_2770

Next, dip your two blue fingers into the container and just hold them there.   I need to mention that this all needs to be done quickly.  The polish will begin to dry really quickly as soon as it spreads out on the water, so as soon as it spreads out, spray it, and within a few seconds of spraying the polish, dip your fingers in there.

IMG_2767

While your fingers are still underwater, blow on the surface of the water to dry the remaining nail polish.  Then while your fingers are still underwater, take a Q-tip and gather up all of the polish that’s still floating on the surface of the water.  You will be able to just sort of spin your Q-tip in the water and it will collect the polish.  Now it’s safe to pull your fingers out.

IMG_2776

Now you can see the reason for the tape.  It’s to keep all of that extra polish for sticking to your fingers, which will make cleanup a lot easier.

Just a little side note: If this whole messing with water thing just seems a little overwhelming, the middle and ring fingers would also look great with some blue, white, or sliver glitter polish instead.

Now it’s time to deal with our sand colored nails.  Take a dotting tool or toothpick dipped in your coral polish and make some starfish.  Use a stippling motion as you make each of the five starfish legs.   Starfish are sort of lumpy and irregular looking, so don’t worry if they don’t look perfect.  When the coral polish dries, go back and add some tiny white dots down each of the legs.

IMG_2771

Now that you’ve given your fingers a little time to dry, carefully take the tape off of your  Tweezers may help here.

Top everything off with a good, shiny quick dry top coat like Seche Vite.  After your nails have had a minute or so to dry, it’s time to clean up the extra white polish around your middle and ring fingers.  I like to use a little brush dipped in acetone.  Pure acetone is strong stuff, and it’s really drying to your hands and nails, but it gets the job done.

IMG_2780

The little brush I use is the e.l.f. concealer brush.  It works really well and it only costs $1.  In a pinch you can use a Q-tip, but it’s harder to get in really close to the edge of the nail.

And here’s the finished look!

IMG_2793

If you give this a try, I’d LOVE to see your recreations!  You can post a picture on our Polish Me Snazzy facebook page, or use the hashtag #polishmesnazzy on instagram so I can see your work!  Thanks for reading!