Cow Toes!

I’ve been painting “cow toes” forever.  Not painting the toes on actual cows, (Do they even have toes?) painting cow print on my own toenails.  By “forever” I mean close to 20 years.  Back in olden times – the ’90s – I was a camp counselor during the summers. I definitely remember sporting cow-print toes a lot back then and also painting cow-print on my fellow female counselors’ toes. 

IMG_2954

This pattern is so easy that it doesn’t even really warrant a full tutorial.  You just paint your nails white, and then using either a dotting tool, tooth pick or just the brush that comes in the polish, make irregular black splotches on the nails.  Really, it’s that easy. 

If you want to paint a little cow face on your big toes like I did here, just start with a white nail then add a pink semicircle for the nose.  Add two black dots for nostrils and two black dots for eyes.  If you have a little brush and you want your cow to look a little more feminine, add eyelashes.  Then fill the space around the face with a few black splotches.  Here’s a fuzzy closeup of one of my big toes.  I know, toes are gross.

IMG_2955

And finally, here are my cow toes hanging out the window while going for a ride in the country.  It seemed appropriate.

IMG_2960

Seriously, this design is super easy and always get tons of positive comments from people.  Give ’em a try while we can still wear sandals!


Plaid Watermelon Nails

I’m not gotta lie; these took a long time.  While I did these nails plus my toes (which you’ll see on Wednesday), I watched almost the entire Blackfish documentary plus two episodes of Seinfeld.  (I needed to watch something a little lighter after Blackfish.) But aren’t they seriously cute?

IMG_2950

The first think I need to do is give Jaunty Juli credit for the design.  Her original version of this design is on her YouTube channel.  You should check her out.  She’s really good!

For this look, the only polish I used besides my base and top coat was a white. The rest of the color is actually acrylic craft paint.  Craft paint is easier to work with than polish, it washes off with water, and it’s really cheap, like $.65 per bottle.  Since they are water soluble, I just us a plate from my kitchen as a little pallet.  Works like a charm.  Just make sure you apply a top coat so you don’t wash your design off when you wash your hands.  That would be tragic.

Here’s how I did them….

First I started with 2 coats of white polish:

IMG_2933

Then I added thick crosses on each nail using light blue paint.  (I actually took some blue I had on hand and mixed it with a little white paint to get the color that I wanted.)  As you can see, I changed the placement of the lines on each nail just to sort of mix it up.  You don’t nee to paint them the whole way to your cuticle since we are going to be adding the watermelons later.

IMG_2934

I added some thin blue lines going vertically and horizontally wherever I had room.

IMG_2935

I then took a darker blue paint and my littlest brush and darkened the spots where the lines intersect.  This is what really makes the plaid look like plaid.

IMG_2936

I added a few neon yellow stripes with paint where I could fit them in.  In retrospect, I should have left a little more room for the yellow lines, but it’s all good. The yellow paint was pretty sheer, so it interacted nicely where it overlapped the blue to make a greenish shade.

IMG_2937

Next I started to add the red paint over my half moon area on my thumb, but I quickly realized the my neon red paint was not going to cover the blue polish near my cuticles.  I decided I needed to take white paint and cover up the blue paint where I wanted to paint the watermelons.  (I’m not showing  you my thumb, because it looked pretty messed up at this point.)

IMG_2938

Then I took my red paint and filled in most of the half moon area, leaving a little room for the rind.

IMG_2939

then I added a thin neon green stripe next to the red.

IMG_2940

Then I added a little black and green together to make a darker green and added a final thin stripe to make the rind.

IMG_2941

Can you tell I was using my palm to wipe my brush some at this point?  Anyway, with my littlest brush, I added in some black seeds and then applied a top coat.

Here’s what they looked like the next day in natural light where you can see the neon-ness a little better:

IMG_2951

Please let me know if you try these!  I’d love to see your recreations on facebook or instagram!  Oh, and check out Jaunty Juli on YouTube or instagram, too!


Mannequin Hands… And Then I Added Stuff.

I while back, I went on a quest to find my perfect “mannequin hands” polish.  By that I mean a polish that was as close to a perfect match to my skin as I could find.  I had heard that Deborah Lippmann had a polish called Naked that was a good match for a lot of people who are fair like me, so I checked it out at Sephora.  Yep, it’s a great nude shade that was a really close match to my skin, but you know what?  Deborah Lippmann polishes cost $20 and I absolutely refuse to spend $20 on a single polish.  Nope, I’m never going to do it.  I can’t imagine any possible scenario in which I would spend $20 on a single polish.  If I’m spending $20 on polish, you’d better believe that I’m going to be getting like, 10 bottles for that price.  Okay, let me get back on track…

So, this one time I was at Kmart and I spotted a color that I had never noticed before from NCY from the In A New York Minute line called Fashion Safari.  I did that thing that you’re not supposed to do (even though everyone does it) and opened up the bottle in the store.  I had polish on my nails already, so I just brushed a tiny bit of the polish onto the back of my hand and it blended right in!  best of all, it cost under $2!  I feel bad for the suckers who buy Deborah Lippmann Naked when there’s NYC Fashion Safari in the world.  Anyway, here it is with a matte top coat:

IMG_2919IMG_2918

Fun, right?  My hand really almost looks like a mannequin’s, right?  By the way, this is the color I used for the sand colored nails in my Beach Inspired Nail Art. In that tutorial, I actually painted my sister’s nails and her skin is definitely a shade or two darker than mine.  It’s a little hard to tell in the picture, but in person, you could definitely see that Fashion Safari was lighter than my sister’s skin.  I also used it in my Real Seashell Nails with a pearly color shifting polish over top.

Well, my mannequin hands fascinated me for about 24 hours, and then I decided that I needed to add something to them.  I opted for some of the chunky glitter that is Funky Fingers Pep Rally and I ended up with this look:

IMG_2923IMG_2922

I didn’t actually just brush the glitter onto my nails.  I used a little dotting tool to pick the individual pieces of glitter off the brush and placed them where I wanted them.  It’s a little time consuming, but not very hard.  I also opted to top them with Sech Vite, since it’s thick enough to smooth out this really chunky glitter. 

That’s it for today!  As always, thank you for liking, following, and sharing!  Come find me on instagram and facebook!

Frankenpolish Strikes Again!

Lately I’ve been seeing a lot of cute nail art around that starts with a base that is sort of a light nude color.  You know, not as dark as a “mannequin hands” nude, but definitely not white.  I didn’t have a color like this, but I’m trying (although my hubby may not believe it) to not buy unnecessary nail polish.  

Then I remembered that I bought a bunch of white polish so that I could compare them, and really, who needs 5 bottles of white?  You know what that means?  Frankenpolish time! 

My initial plan was to add some of NYC – Fashion Safari to NYC – French White Tip.

IMG_2876

I realized pretty quickly that I was going to have to add a ton of Fashion Safari to get my desired shade, so I raided my nail polish rack and found these two:

IMG_2921

Wet n Wild Megalast – Haze of Love is a beautiful brownish-reddish-raisinish color that I love to wear in the fall.  Spoiled – Permission to Proceed is just a true green.  I knew if I just added Haze of Love to the white, it would end up being too pink, so added some Permission to Proceed just to mellow out the pinkness. I didn’t really keep track of how much of each I added to the white.  I would just add some and then shake-shake-shake the bottle, assess the color and then add some more of the colored polish as needed. 

In the end, I wound up with the color on my middle finger:

IMG_2913

(Sinful Colors – Snow Me White is on my first finger, and Fashion Safari is on my ring finger.)

So, I think I’m pretty happy with how it turned out!  Sometimes when I look at it, I think it might still be a little too pink.  Maybe I’ll add a few more drops of green polish to it.  Not sure yet.

Do any of you have any Frankenpolish stories?   I’d seriously love to hear them!

It’s Not Exactly Polish, But You Might Need It Anyway

My usually part-time job is going to be closer to full-time this week, but I still plan to post things on my promised Monday-Wednesday-Friday schedule.  I apologize in advance if my posts end up being a little skimpy, though. 

Today I thought I’d highlight a few of my favorite nail products that are not nail polish.  Let’s start with these little guys:

IMG_2910

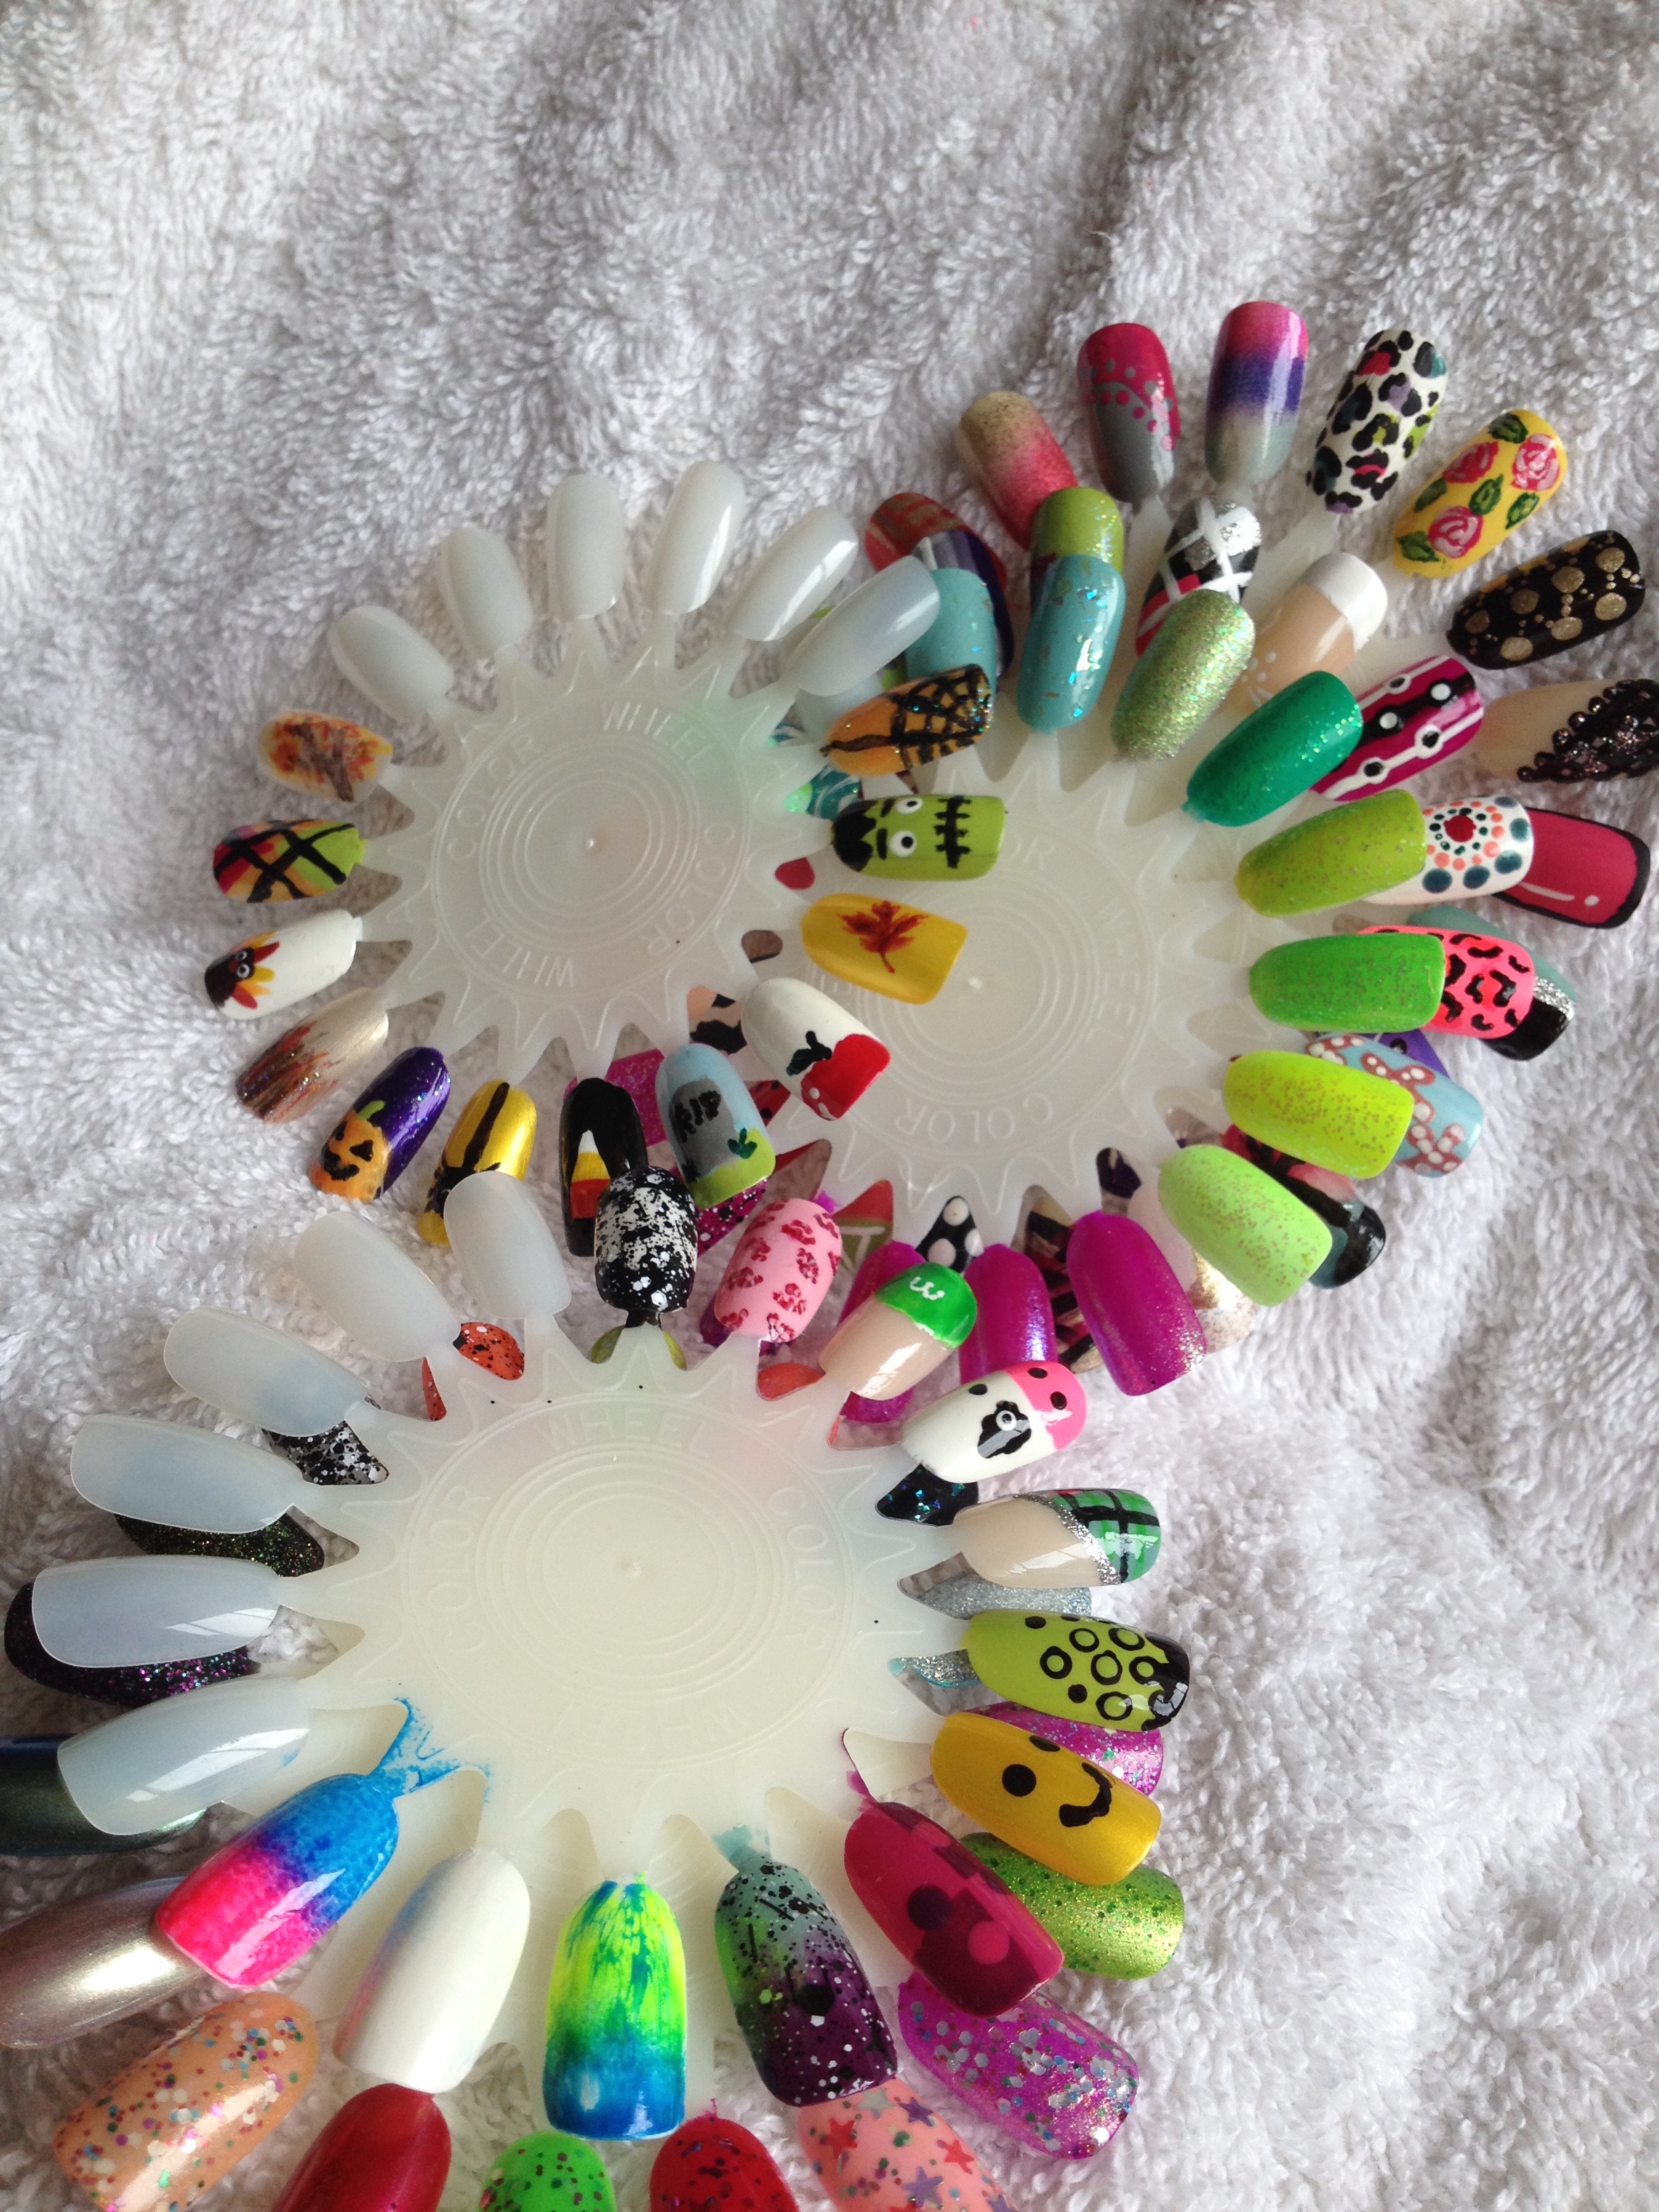
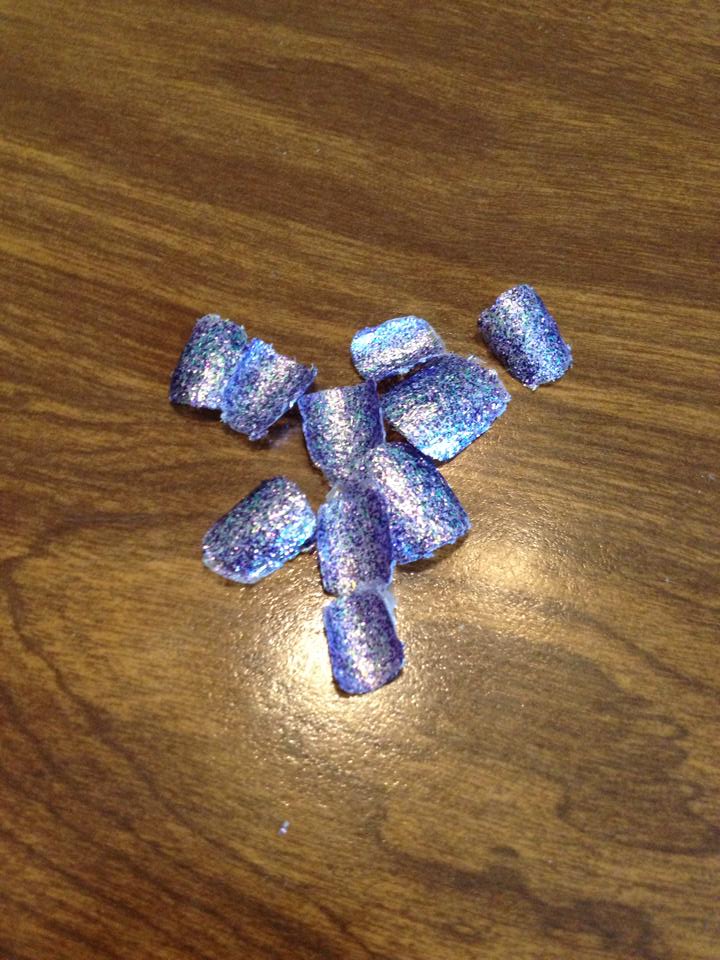
These are nail wheels that I got at Sally Beauty Supply.  I think they were around $7 for a pack of 10 wheels.   These are great for several things.

I love to use these to practice nail art.  They are a great way to organize your nail art ideas or recreations.  I find that when I do other people’s nails, they come in really handy in helping people determine what they actually want done on their nails. 

These wheels are also a great place to just simply try out your new polishes.  Often when I get a new polish, I will wonder how it will look with a specific topper (glitter, iridescent top coat,…) over it, and this is a great way to test it out.  

I also like this stuff:

IMG_2907

This is a really nice cuticle oil that will last me a really long time and it was under $3 (I think).  I like to use this after doing my nails, when the polish is dry or on days between polish jobs.  It will really keep your cuticles from looking ragged and crusty.    Truth be told, though, almost any oil that you have around the house will work just as well – olive, vegetable, …  Lately, I’ve been using coconut oil on my hands and cuticles right before bed, so I haven’t been using my actual cuticle oil as much.

I use these little guys ALL the time:

IMG_2909

The thing on the left is a cuticle pusher that I got at Sally Beauty Supply for like, $.69 or something really cheap.  The red end is a softer plastic that is great for gently pushing back your cuticles.  The other end is a tapered harder plastic which I end up using for all sorts of stuff, like scraping stubborn glitter off my nails during the polish removal process. 

The little brush on the right is a $1 concealer brush from e.l.f. cosmetics.  I dip it in acetone and use this to clean up any polish that accidentally gets on my skin after I do my nails.  It works like a charm!  Any brush with really stiff short bristles should work well as a clean-up brush.  I know a lot of people use a Q-tip dipped in acetone to do their clean-up, but a little brush allows you to be so much more precise.
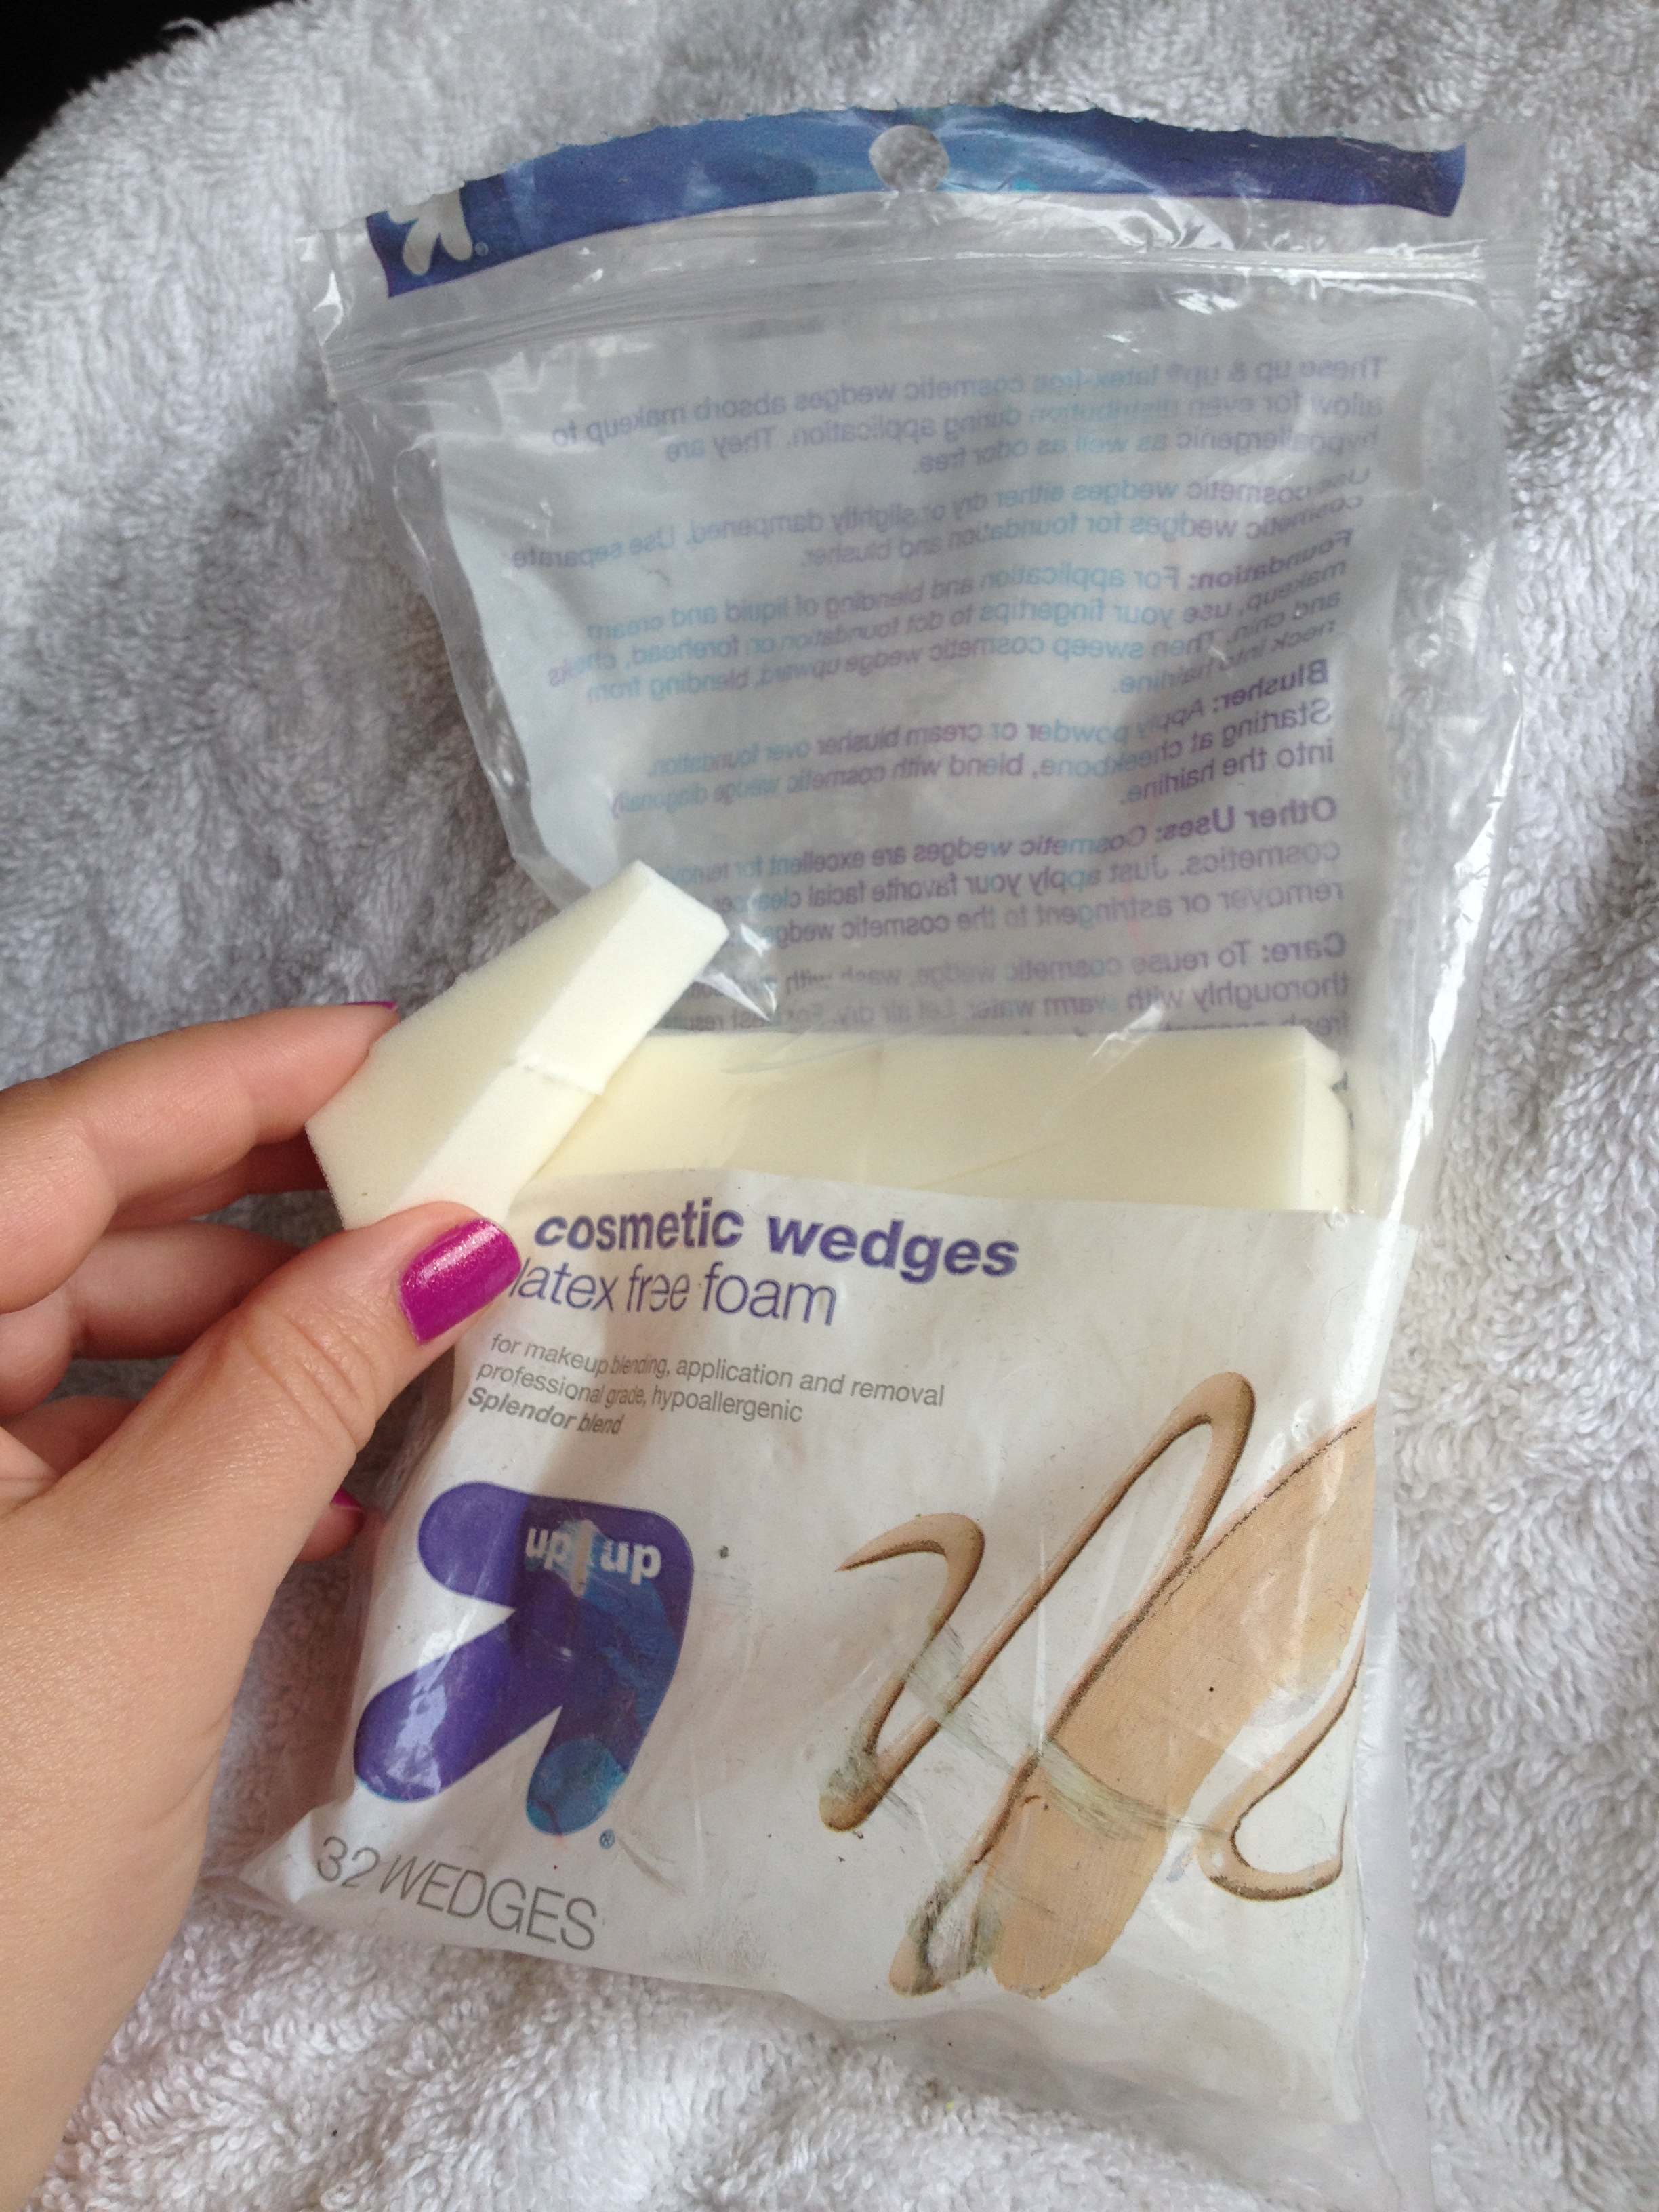
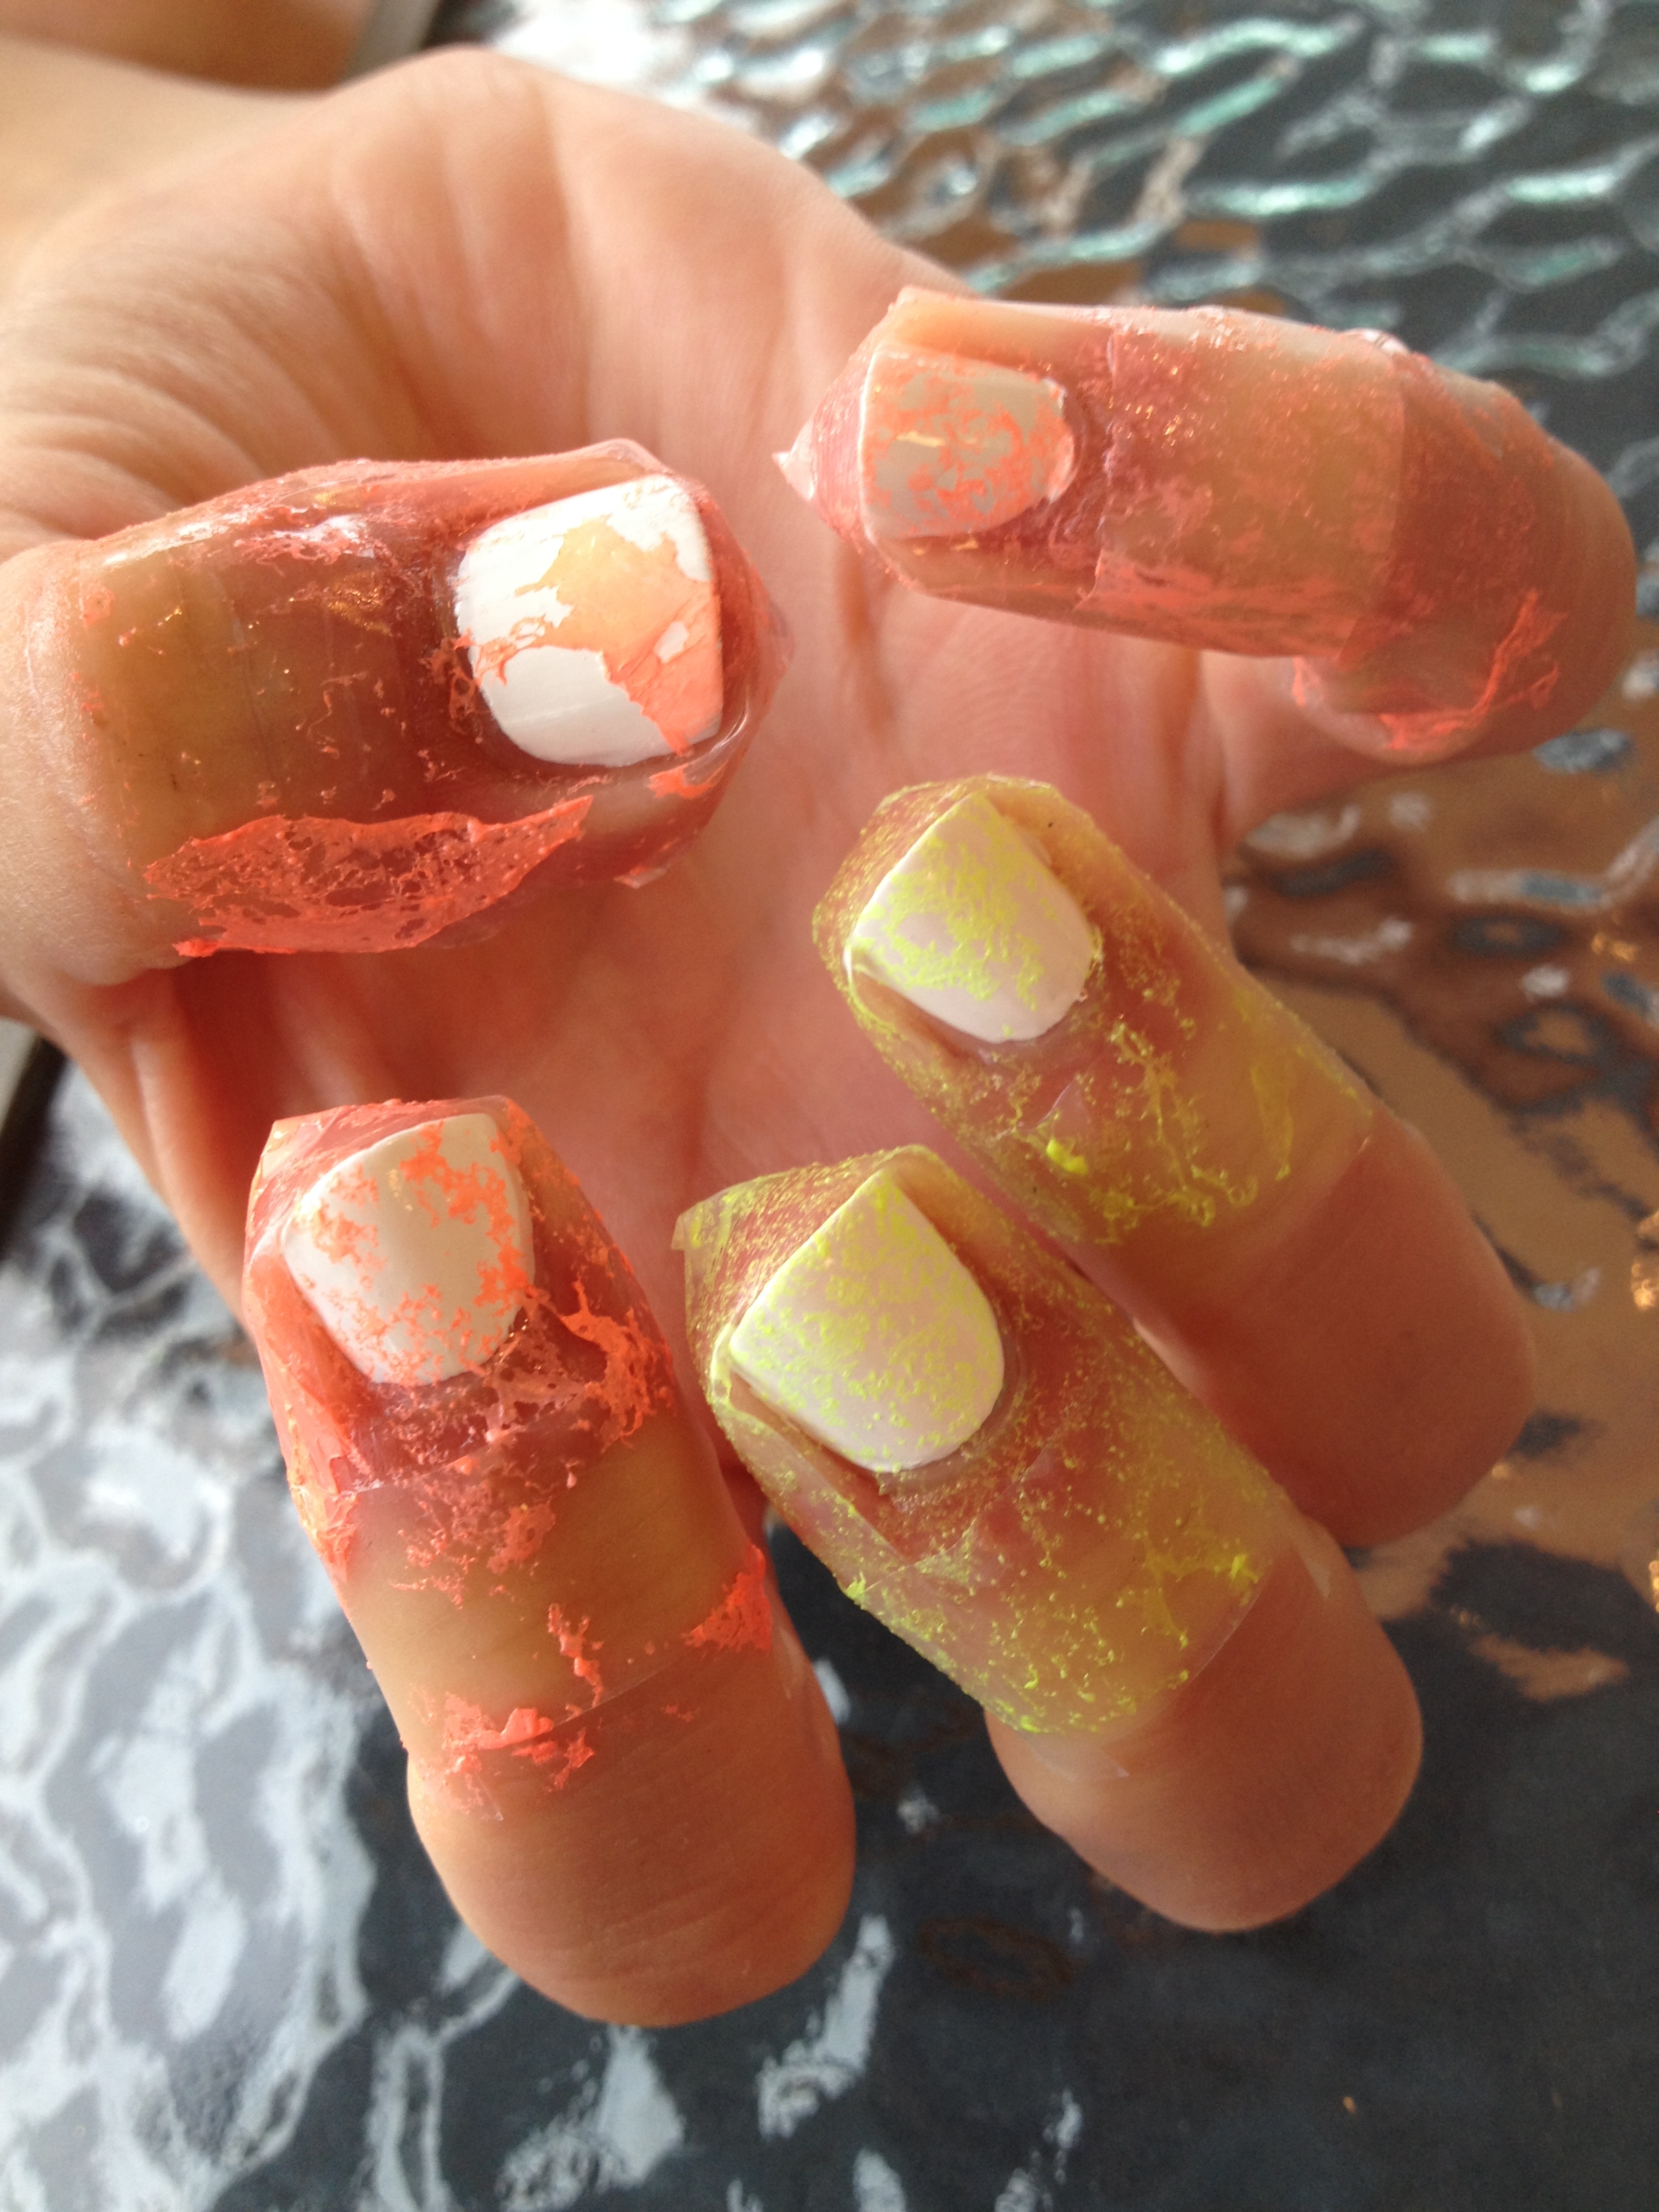
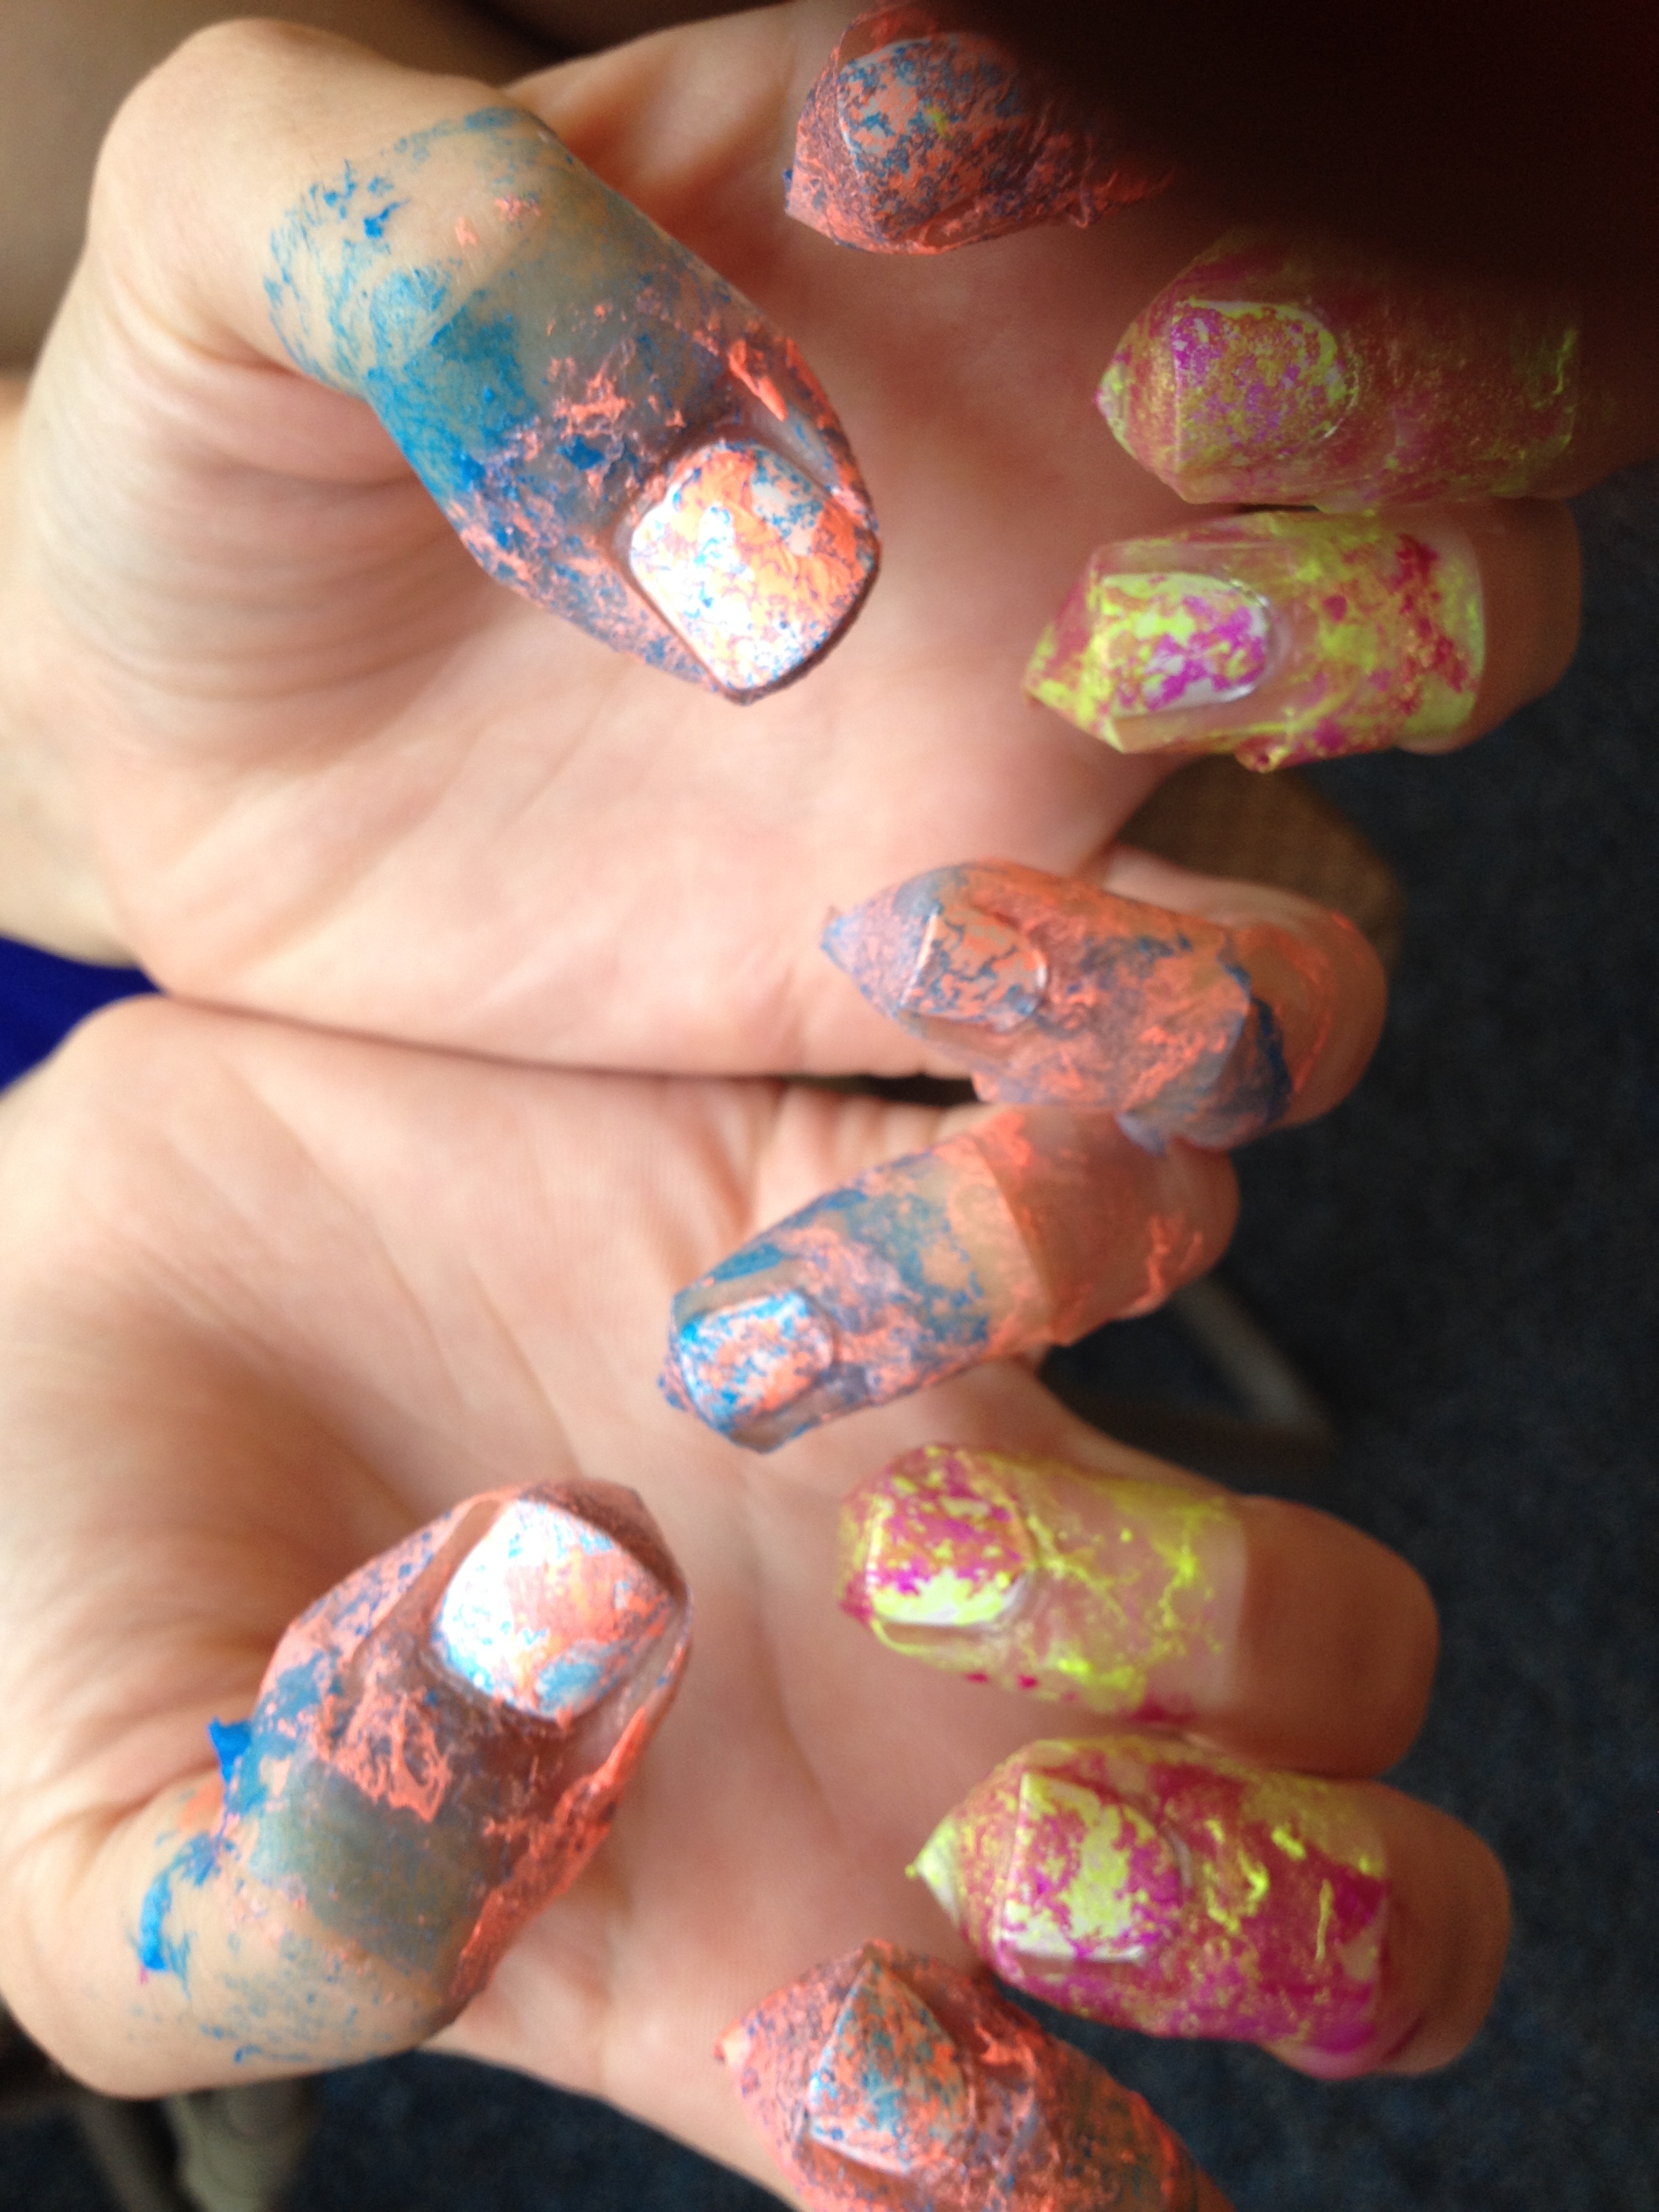
Make-up sponges!

IMG_2911   

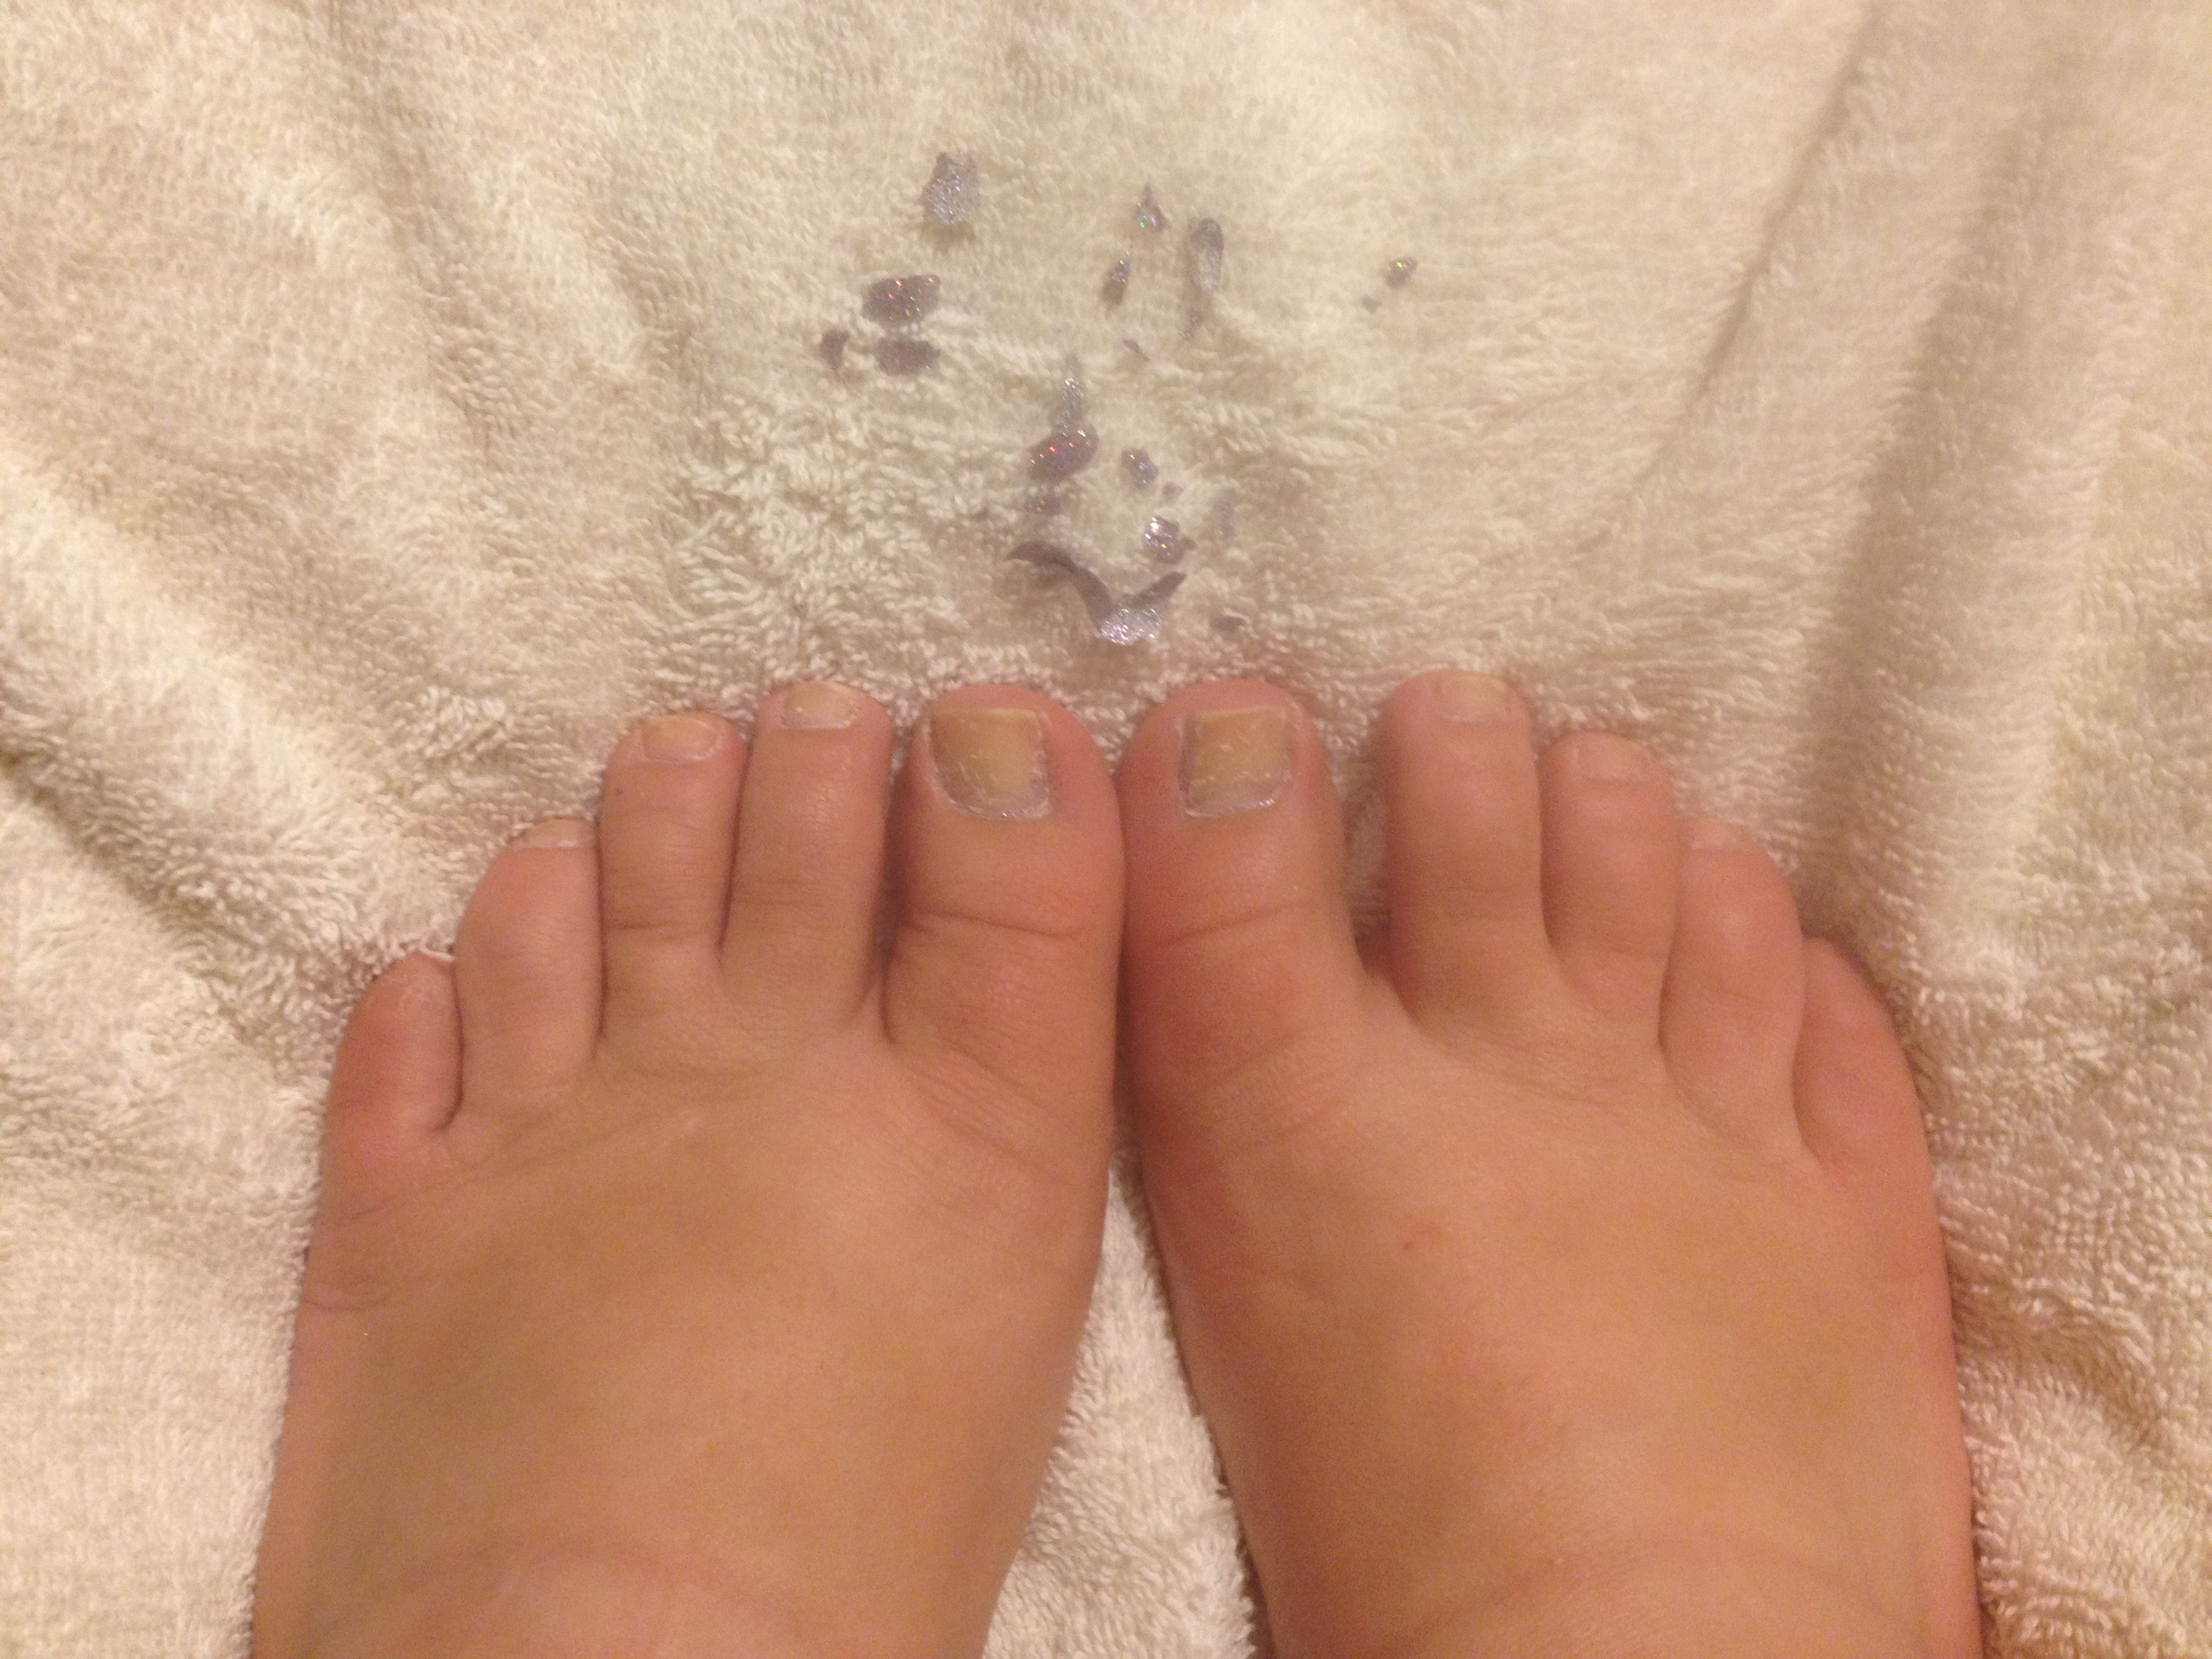
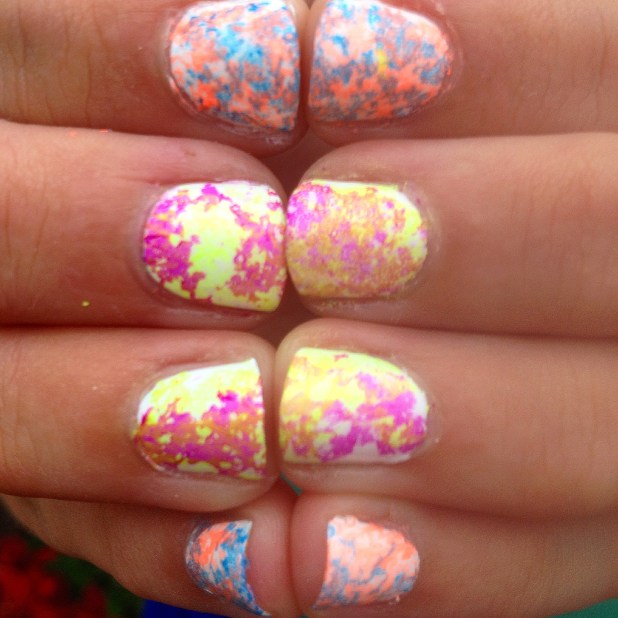
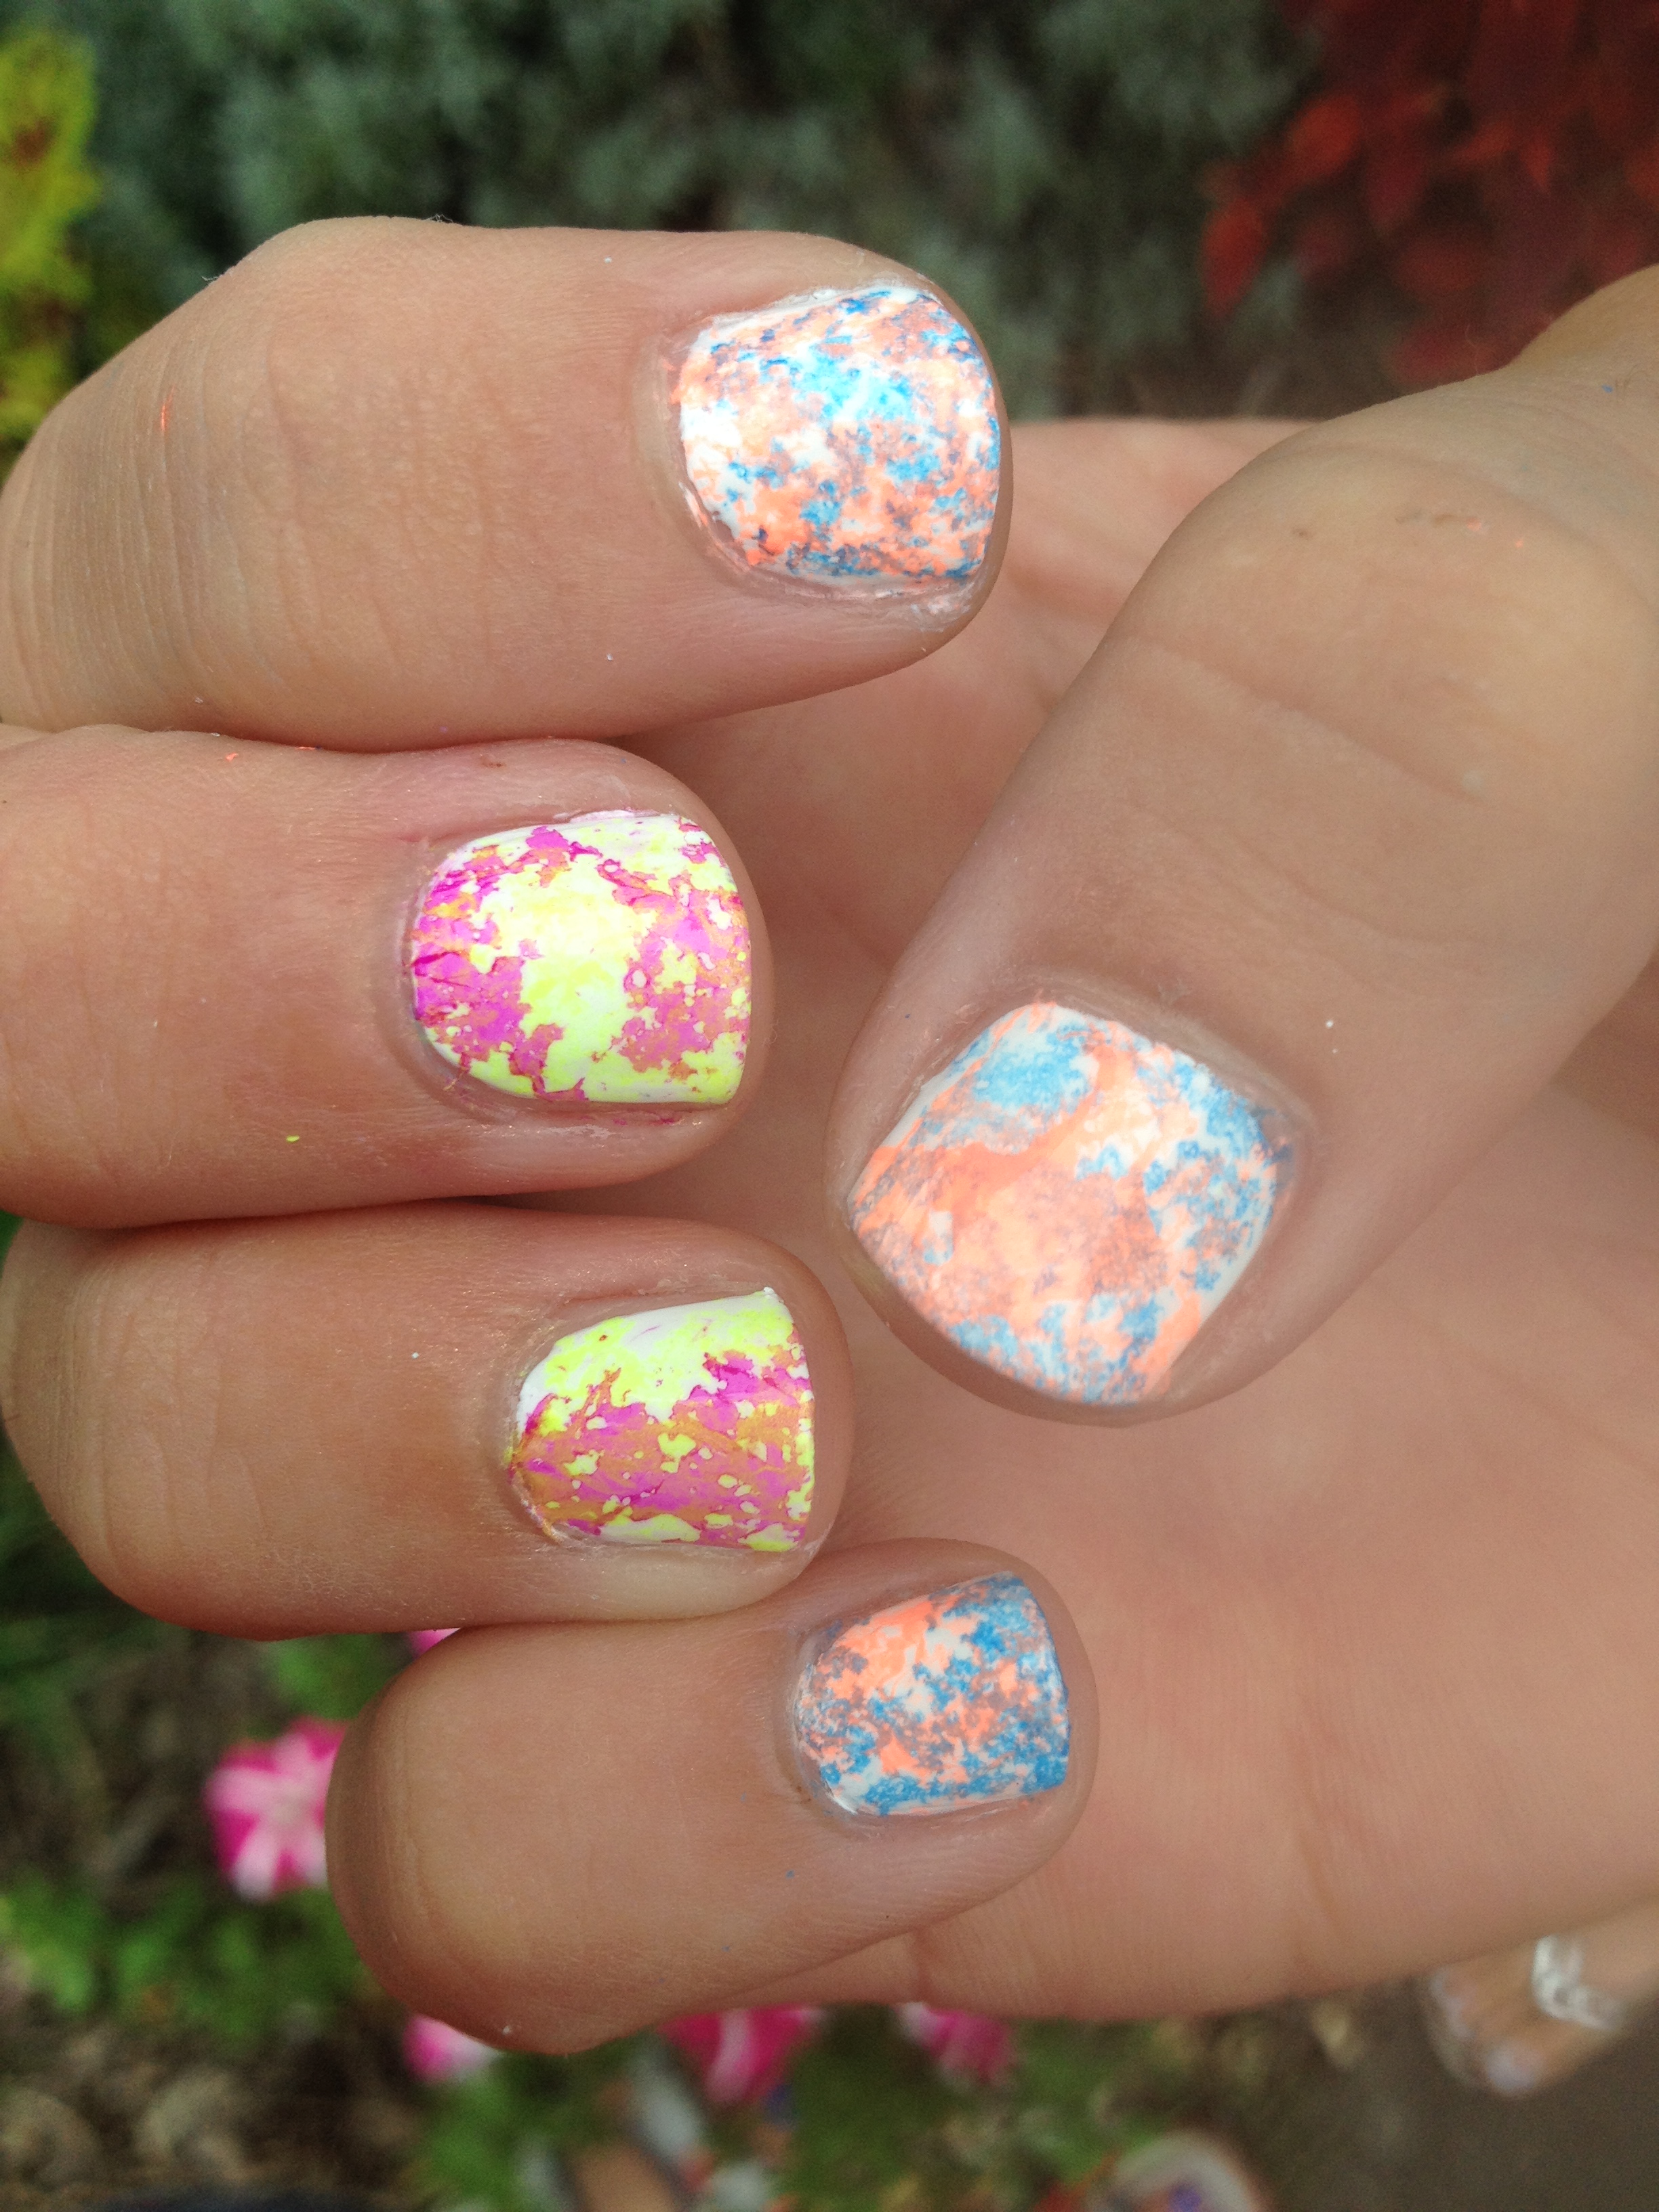
I guess they are technically called “cosmetic wedges”, but there’s really make-up sponges.  These are great for certain glitter application techniques (like the gold glitter here) as well as gradient or “ombre” looks (like I did on the blue fingers here).  And they’re cheap.  This bag of 32 sponges was under $3.

OK, I confess that I’m mostly including this last item because I just got it and I think it’s super cute:

IMG_2908

It’s the Revlon Crazy Shine Nail Buffer!  Isn’t that the cutest buffer you ever saw?  And PA folks, it’s on sale at Giant this week for $1.09, regularly $3.09!  Buffers are great for shining up your polish if it starts to dull after a few days.  (Truthfully, I just usually slap on another layer of top coat, but if you don’t want to mess with that, a buffer is a great option.)  Buffers are also a great way to shine up natural nails without any polish or chemicals, perfect for people in the medical field or any other job in which you can’t wear polish. 

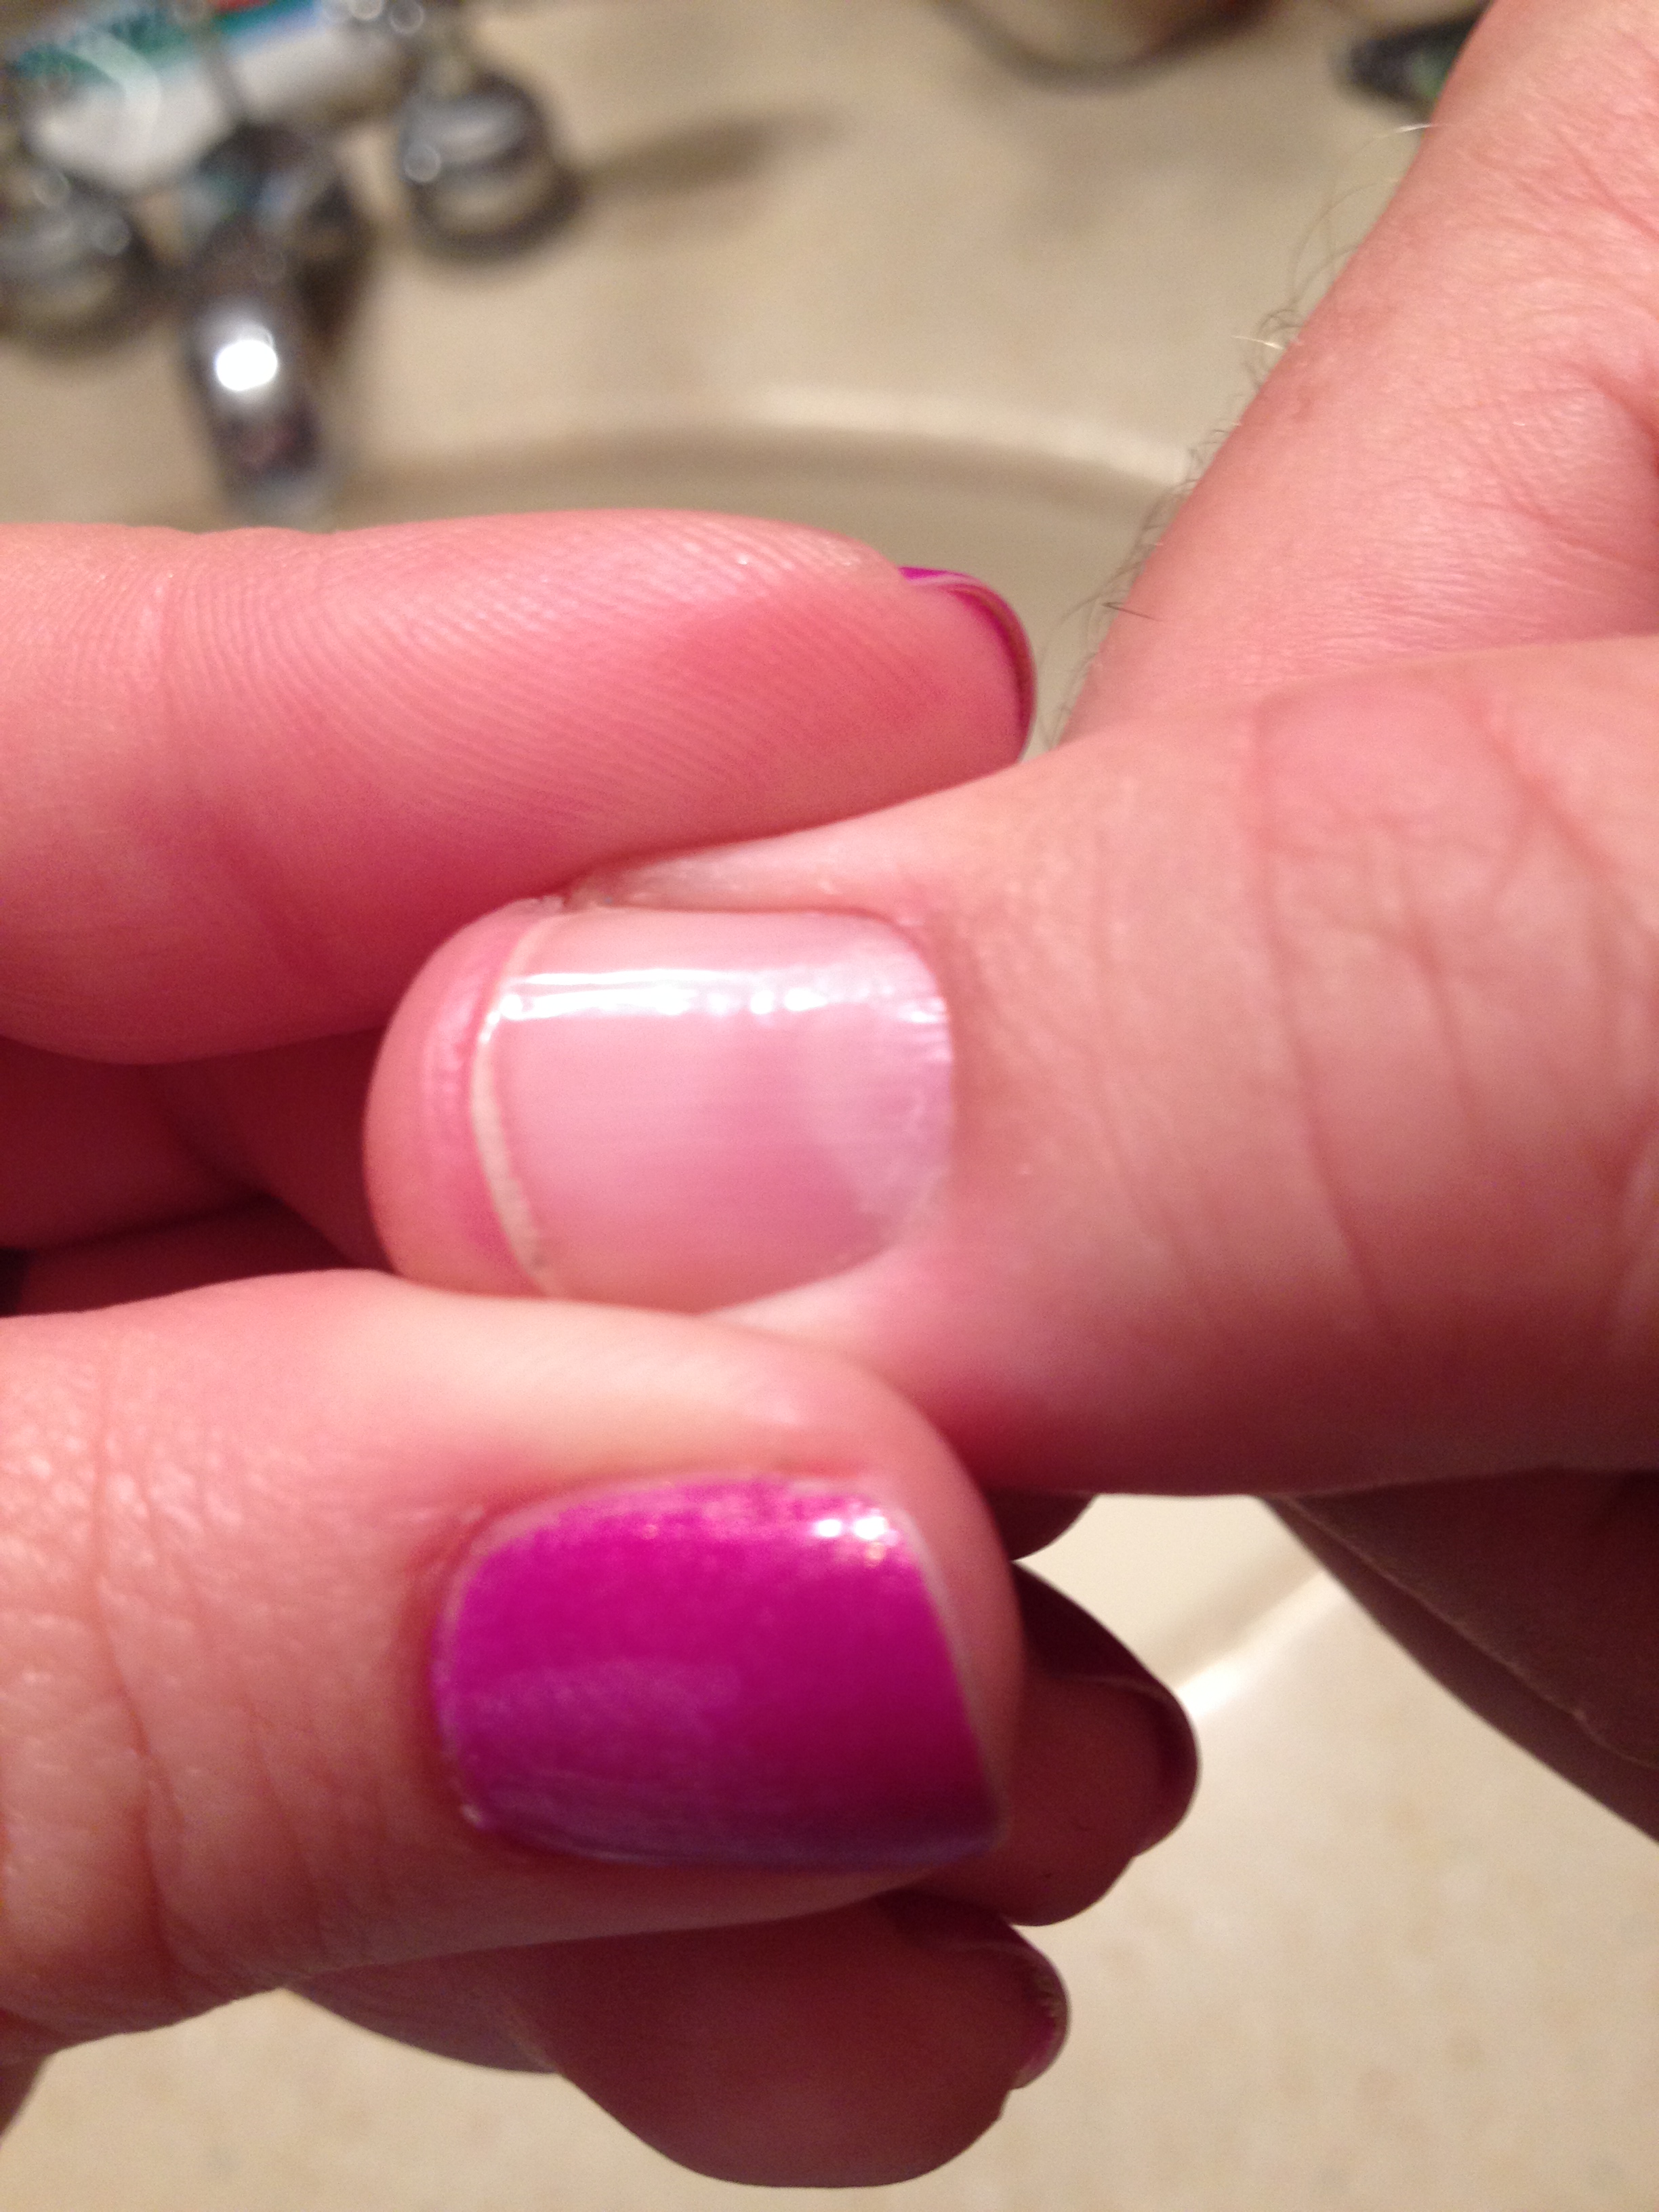
By husband (begrudgingly) let me buff his thumbnail:

IMG_2906

It’s so shiny that it looks like it’s got a coat of clear polish on it! 

OK, that’s it for today.  As always, I love hearing your comments and ideas!  Thanks for reading!

Real Seashell Nails

By now you’ve probably seen those little kits that you can use to create a seashell manicure that include the little bottles of dyed and crushed seashells.  They are pretty cute, but I don’t like paying for stuff if I don’t have to. 

A few weeks ago, we did a day trip to the beach and I took it upon myself to collect a bunch of these really thin shells. 

IMG_2853

I’m sure they have a name, but I don’t know what it is.  They are the kind of shells that you can just easily break with your fingers, and they are really plentiful along the mid-Atlantic coast.

I broke them up into little pieces that were about 1/4 inch or smaller  (That’s about 1/2 cm for those of you in the rest of the world.)

IMG_2855

Then I painted all of my nails with a few coats of NYC – Fashion Safari.  I topped my index finger, pinky and thumb with a coat of Orly – Sky Blue-Pink to mimic the iridescence of a seashell.

IMG_2860

Then, I applied one more layer of Fashion Safari to my middle and ring fingers, and while they were still wet, I sprinkled my crushed up shells onto them.  I tapped off the excess and then patted down the shells that were stuck to the nail.   I then topped it with several layers of top coat in order to make it (sort of) smooth.  Here are my results:

IMG_2861

I didn’t LOVE-love them, but they were okay.  The nails with the shells were pretty thick, and after 4 or 4 days, they started to pull away from the nail.  I do want to try it again, but I think next time I will use a dotting tool dipped into clear polish to pick up the pieces of shell and place them on my nail like a mosaic.  Obviously, this will be a little more difficult, but I think the results will be better. 

Please let me know if you attempt anything similar and how it turns out for you!  As usual, tag me on instagram or facebook  or use the hashtag #polishmesnazzy so I can see your recreations!

Adventures with Elmer’s Glue

Glitter polish.  I love it as much as the next person.  (Actually, I think it’s safe to say that I love it more than the next person, since at any give time there’s a good chance that my husband is the “next person” to me.)  It sure is a bugger to remove, though.  Even when using straight acetone, it can still be a pain to remove completely.  

Then one day, someone somewhere had the brilliant idea of applying a base coat of Elmer’s School Glue on the nails before applying glitter polish so that you could just literally peel the polish of when you were ready to remove it.  When I first heard about this, I just about fell over.  I’m pretty sure that I went out that same day to buy some glue.   

Attempt #1:  I applied a medium-thick coat of glue to my bare nail with a little brush and let it dry completely.  I then applied a few coats of a really dense glitter polish.  It really seemed like everything was going well until I woke up the next morning and found that one of my one of my nails had just fallen off while I was sleeping!  (Well, the nail didn’t actually fall off, but the polish did and it looked just like a press-on nail.)  By the time I was done making breakfast, four more nails had fallen off, so I just easily popped the rest of them off, too.  This all happenbed pre-blog for me, but I actually did take a picture of it at the time:

polish fell off

So, Attempt #1 was a fail.

Attempt #2:  After lamenting about how my beautiful polish just fell off on facebook, someone suggested that I apply a base coat first, then apply the glue, then the polish.  So, that’s what I did.  The good news was that the polish did not fall off.  The bad news was that it was really, really hard to get the polish off without nail polish remover, and I actually did a little damage to the top layer of my nails when I ripped the polish off.  So, Attempt #2 was another fail.

Attempt #3:  Somebody – and I forget who, so if it was you, let me know so that I can give you credit – suggested that I water down the glue before applying it, so that’s what I did.  I mixed together roughly equal parts water and glue and brushed it only my toenails.  Adding the water made it easy to apply a really thin coat of glue.  I let it dry completely and then painted my toes with my currently favorite glitter polish, Funky Fingers – Sand & Stilettos.  Well, the next morning, none of my toenails had fallen off, so that was a good thing.  The polish actually survived 6 days, including a day at the beach until I noticed that the polish had popped off of my middle toenail on my right foot. 

IMG_2799 

(Yes, I’m fully aware that I have stubby toes, so you don’t need to tell me that in the comments or anything.)  Well, since one of the nails was bare, I decided that I might as well take the polish off the rest of the toes.  I took a little bit of picking around the edges with tweezers, but all of the polish on the little toes came off in one chunk.  The polish on the big toes came off in a 4 or 5 chunks.

IMG_2801

In the end, all of the polish came off pretty easily with little to no damage to the nail!

IMG_2804

I just gave my toenails a quick wipe-down with some acetone to remove a few stubborn pieces of glitter, but that was all I had to do!  Attempt #3 was a Success!  (And there was much rejoicing, yay.) 

So, I haven’t actually tried the watered down glue on my fingernails yet, and I know they take a lot more abuse than toenails, but someday I will and I’ll let you know how it goes.  And if you give it a try, please let me know how it works for you!

Splotchy Neon Nails

Splotchy Neon Nails is what I’m calling these, because I can’t think of a better name, although I’m sure there is one:

IMG_2848

Again, these are my sister’s nails.  She felt she needed something cute and beach-appropriate for her trip to Cancun.  Here’s how we got this look…

First, I started with two coats of white polish.  Specifically, I used Sinful Colors – Snow Me White.  Then I put tape around the nails to make clean up easier at the end. 

IMG_2830IMG_2831

I’m hoping you can see the tape that is over the top of the nail, and around the finger at the base of the cuticle. 

I used these four polishes for the colored part:

IMG_2866

L-R: Nina – Blue Blaze, Fresh Paint – Guava, Funky Fingers – Glow Stick, Sinful Colors – Dream On. 

From here on out, the technique was pretty much exactly the same as it was for the white polish for my Beach Inspired Nail Art.  (Check it out for a more detailed description of this technique).  Basically, I took a disposable plastic container, filled it with room-temperature filtered water, dropped nail polish on the surface of the water, and sprayed it with some alcohol-based body spray to get the polish to break up.  Then I had my sister dunk her fingers in the water, which allowed the polish that’s floating on the surface to adhere to her nails.  While her fingers were still in the water, I used a Q-tip to pull the remaining polish off the surface of the water.  It’s hard to do more than about 2 fingers at a time, so you will need to repeat this process quite a few times.  There is a bit of a learning curve, but it’s really not too hard, just a little time-consuming.

We did Guava on the index finger, pinky, and thumb, and Glow Stick on the other two fingers. 

IMG_2832

Then we repeated the steps with Blue Blaze over the Guava nails, and Dream On over the Glow Stick nails.

IMG_2834

Then, one more time we did Guava on the index finger, pinky, and thumb, and Glow Stick on the other two fingers, just to make sure that those lighter colors were showing up well enough on the nail. 

At this point, it was a little hard to appreciate the designs on her nails since there was so much polish all over her fingers.  My sister was an enthusiastic finger dunker so she had polish pretty far up her fingers. 

From here we took off the tape and topped the nails with Seche Vite, a quick dry top coat.  Then using a Q-tip dipped in acetone as well as a little brush dipped in acetone, I cleaned up all of the excess polish.  

Here’s our end result!

IMG_2852

Fun and cute, right?  If you give this look a try, I’d love to see your recreations on either facebook or instagram.  Just make sure you tag Polish Me Snazzy or use the hashtag #polishmesnazzy so that I can see it.  Thanks for reading!

Nails of the Day

I guess this post should actually be called “Nails of Last Week” since that’s more accurate.  I just realized that I never officially posted a pick of this really easy “doticure”.  No artsy skills required, just a few different size dotting tools. 

IMG_2727

These are two of the polished that I picked up in my Five Below Haul a few weeks ago.  These colors just make me so happy!  I loved this manicure so much that I kept it on for 8 days, and even when I took it off, I was tempted to just paint my nails again with these colors.  

Thanks for reading!  I’ll be back with a more substantial post on Monday!


July Favorites

Happy August!  I got really excited, probably irrationally excited, when I realized that July was over and I could do my first monthly favorites post.  I’ve always enjoyed checking out other bloggers monthly favorites, and for some reason, I just get a huge kick out of being able to do my own.

IMG_2822

So, here we go…

Wet n Wild  – Tickled Pink

IMG_2816

This is just the most beautiful baby pink.  It looks so pretty with a tan.  It’s the pink I used for this look. This is a polish that I’ve had for a year or so, but I just remembered this month how pretty it is!

Broadway Nails – Sour Apple

IMG_2818

This is such a great neon green!  The formula is a great and it only cost me $1!  The only place I’ve see these sold is at Dollar General / Family Dollar stores.  It’s the green I used here.

NYC – Amazon Green from the City Samba collection

IMG_2819

This polish is actually a little lighter and greener than it looks in this pic.  It’s got a lovely frosty finish and makes me feel like my nails are covered in mint chocolate chip ice cream, which of course is a good thing.  I haven’t seen this in stores for a little while, so it might be tough to find.  Sorry about that.

China Glaze – Turned Up Turquoise

IMG_2820

This color is just do deep and rich!  It’s also got a beautiful shimmer that I feel sometimes reflects blue, sometimes green.  This polish was promoted as being a summer neon, but I think it’s also part of the permanent line, so you shouldn’t have too much trouble finding it.  If you’re a sucker for turquoise polish, do yourself a favor and get this one asap.

NYC – Matte Me Crazy top coat.

IMG_2815

I used this top coat for this aforementioned look and I was really happy with how it held up! I actually bumped one of my nails before it was completely dry, but this top coat sort of plumped back up and fixed itself so that you couldn’t even see where I had bumped it!  Some matte finishes will start to get glossy after a few days, but this just held up really well.

Funky Fingers – Sand & Stilettos

IMG_2821

I already gushed over this polish in my Five Below Haul, but I just can’t get enough of this polish!  It’s just SO sparkly and SO holographic.  I had it on my toes for a while and I just felt like they were covered in little diamonds when I was in the sun.  I used this polish for the little dots on my thumb nail here.

Fresh Paint – Guava

IMG_2817

This is the current color on my fingers.  Pardon my nail growth.  I just love this color so much that I’ve left it on for a whole week, and that’s saying something!  This is the most beautiful neon peach / light coral, and it’s one of those neons that just sort of glows at dusk when you’re outside.  It’s a dupe for China Glaze – Flip Flop Fantasy and way cheaper.  I picked this color up in my Five Below Haul also.  I love this color.  I love it so much.  I need to stop saying that.

So those were my July favorites!  What polishes have you been loving so far this summer?

*To get updates via facebook, please “like” my Polish Me Snazzy page and “share” it!  You can also find Polish Me Snazzy on instagram. Thanks for your support!