Mannequin Hands… And Then I Added Stuff.

I while back, I went on a quest to find my perfect “mannequin hands” polish.  By that I mean a polish that was as close to a perfect match to my skin as I could find.  I had heard that Deborah Lippmann had a polish called Naked that was a good match for a lot of people who are fair like me, so I checked it out at Sephora.  Yep, it’s a great nude shade that was a really close match to my skin, but you know what?  Deborah Lippmann polishes cost $20 and I absolutely refuse to spend $20 on a single polish.  Nope, I’m never going to do it.  I can’t imagine any possible scenario in which I would spend $20 on a single polish.  If I’m spending $20 on polish, you’d better believe that I’m going to be getting like, 10 bottles for that price.  Okay, let me get back on track…

So, this one time I was at Kmart and I spotted a color that I had never noticed before from NCY from the In A New York Minute line called Fashion Safari.  I did that thing that you’re not supposed to do (even though everyone does it) and opened up the bottle in the store.  I had polish on my nails already, so I just brushed a tiny bit of the polish onto the back of my hand and it blended right in!  best of all, it cost under $2!  I feel bad for the suckers who buy Deborah Lippmann Naked when there’s NYC Fashion Safari in the world.  Anyway, here it is with a matte top coat:

IMG_2919IMG_2918

Fun, right?  My hand really almost looks like a mannequin’s, right?  By the way, this is the color I used for the sand colored nails in my Beach Inspired Nail Art. In that tutorial, I actually painted my sister’s nails and her skin is definitely a shade or two darker than mine.  It’s a little hard to tell in the picture, but in person, you could definitely see that Fashion Safari was lighter than my sister’s skin.  I also used it in my Real Seashell Nails with a pearly color shifting polish over top.

Well, my mannequin hands fascinated me for about 24 hours, and then I decided that I needed to add something to them.  I opted for some of the chunky glitter that is Funky Fingers Pep Rally and I ended up with this look:

IMG_2923IMG_2922

I didn’t actually just brush the glitter onto my nails.  I used a little dotting tool to pick the individual pieces of glitter off the brush and placed them where I wanted them.  It’s a little time consuming, but not very hard.  I also opted to top them with Sech Vite, since it’s thick enough to smooth out this really chunky glitter. 

That’s it for today!  As always, thank you for liking, following, and sharing!  Come find me on instagram and facebook!

Frankenpolish Strikes Again!

Lately I’ve been seeing a lot of cute nail art around that starts with a base that is sort of a light nude color.  You know, not as dark as a “mannequin hands” nude, but definitely not white.  I didn’t have a color like this, but I’m trying (although my hubby may not believe it) to not buy unnecessary nail polish.  

Then I remembered that I bought a bunch of white polish so that I could compare them, and really, who needs 5 bottles of white?  You know what that means?  Frankenpolish time! 

My initial plan was to add some of NYC – Fashion Safari to NYC – French White Tip.

IMG_2876

I realized pretty quickly that I was going to have to add a ton of Fashion Safari to get my desired shade, so I raided my nail polish rack and found these two:

IMG_2921

Wet n Wild Megalast – Haze of Love is a beautiful brownish-reddish-raisinish color that I love to wear in the fall.  Spoiled – Permission to Proceed is just a true green.  I knew if I just added Haze of Love to the white, it would end up being too pink, so added some Permission to Proceed just to mellow out the pinkness. I didn’t really keep track of how much of each I added to the white.  I would just add some and then shake-shake-shake the bottle, assess the color and then add some more of the colored polish as needed. 

In the end, I wound up with the color on my middle finger:

IMG_2913

(Sinful Colors – Snow Me White is on my first finger, and Fashion Safari is on my ring finger.)

So, I think I’m pretty happy with how it turned out!  Sometimes when I look at it, I think it might still be a little too pink.  Maybe I’ll add a few more drops of green polish to it.  Not sure yet.

Do any of you have any Frankenpolish stories?   I’d seriously love to hear them!

Real Seashell Nails

By now you’ve probably seen those little kits that you can use to create a seashell manicure that include the little bottles of dyed and crushed seashells.  They are pretty cute, but I don’t like paying for stuff if I don’t have to. 

A few weeks ago, we did a day trip to the beach and I took it upon myself to collect a bunch of these really thin shells. 

IMG_2853

I’m sure they have a name, but I don’t know what it is.  They are the kind of shells that you can just easily break with your fingers, and they are really plentiful along the mid-Atlantic coast.

I broke them up into little pieces that were about 1/4 inch or smaller  (That’s about 1/2 cm for those of you in the rest of the world.)

IMG_2855

Then I painted all of my nails with a few coats of NYC – Fashion Safari.  I topped my index finger, pinky and thumb with a coat of Orly – Sky Blue-Pink to mimic the iridescence of a seashell.

IMG_2860

Then, I applied one more layer of Fashion Safari to my middle and ring fingers, and while they were still wet, I sprinkled my crushed up shells onto them.  I tapped off the excess and then patted down the shells that were stuck to the nail.   I then topped it with several layers of top coat in order to make it (sort of) smooth.  Here are my results:

IMG_2861

I didn’t LOVE-love them, but they were okay.  The nails with the shells were pretty thick, and after 4 or 4 days, they started to pull away from the nail.  I do want to try it again, but I think next time I will use a dotting tool dipped into clear polish to pick up the pieces of shell and place them on my nail like a mosaic.  Obviously, this will be a little more difficult, but I think the results will be better. 

Please let me know if you attempt anything similar and how it turns out for you!  As usual, tag me on instagram or facebook  or use the hashtag #polishmesnazzy so I can see your recreations!

Splotchy Neon Nails

Splotchy Neon Nails is what I’m calling these, because I can’t think of a better name, although I’m sure there is one:

IMG_2848

Again, these are my sister’s nails.  She felt she needed something cute and beach-appropriate for her trip to Cancun.  Here’s how we got this look…

First, I started with two coats of white polish.  Specifically, I used Sinful Colors – Snow Me White.  Then I put tape around the nails to make clean up easier at the end. 

IMG_2830IMG_2831

I’m hoping you can see the tape that is over the top of the nail, and around the finger at the base of the cuticle. 

I used these four polishes for the colored part:

IMG_2866

L-R: Nina – Blue Blaze, Fresh Paint – Guava, Funky Fingers – Glow Stick, Sinful Colors – Dream On. 

From here on out, the technique was pretty much exactly the same as it was for the white polish for my Beach Inspired Nail Art.  (Check it out for a more detailed description of this technique).  Basically, I took a disposable plastic container, filled it with room-temperature filtered water, dropped nail polish on the surface of the water, and sprayed it with some alcohol-based body spray to get the polish to break up.  Then I had my sister dunk her fingers in the water, which allowed the polish that’s floating on the surface to adhere to her nails.  While her fingers were still in the water, I used a Q-tip to pull the remaining polish off the surface of the water.  It’s hard to do more than about 2 fingers at a time, so you will need to repeat this process quite a few times.  There is a bit of a learning curve, but it’s really not too hard, just a little time-consuming.

We did Guava on the index finger, pinky, and thumb, and Glow Stick on the other two fingers. 

IMG_2832

Then we repeated the steps with Blue Blaze over the Guava nails, and Dream On over the Glow Stick nails.

IMG_2834

Then, one more time we did Guava on the index finger, pinky, and thumb, and Glow Stick on the other two fingers, just to make sure that those lighter colors were showing up well enough on the nail. 

At this point, it was a little hard to appreciate the designs on her nails since there was so much polish all over her fingers.  My sister was an enthusiastic finger dunker so she had polish pretty far up her fingers. 

From here we took off the tape and topped the nails with Seche Vite, a quick dry top coat.  Then using a Q-tip dipped in acetone as well as a little brush dipped in acetone, I cleaned up all of the excess polish.  

Here’s our end result!

IMG_2852

Fun and cute, right?  If you give this look a try, I’d love to see your recreations on either facebook or instagram.  Just make sure you tag Polish Me Snazzy or use the hashtag #polishmesnazzy so that I can see it.  Thanks for reading!

Nails of the Day

I guess this post should actually be called “Nails of Last Week” since that’s more accurate.  I just realized that I never officially posted a pick of this really easy “doticure”.  No artsy skills required, just a few different size dotting tools. 

IMG_2727

These are two of the polished that I picked up in my Five Below Haul a few weeks ago.  These colors just make me so happy!  I loved this manicure so much that I kept it on for 8 days, and even when I took it off, I was tempted to just paint my nails again with these colors.  

Thanks for reading!  I’ll be back with a more substantial post on Monday!


Beach Inspired Nail Art

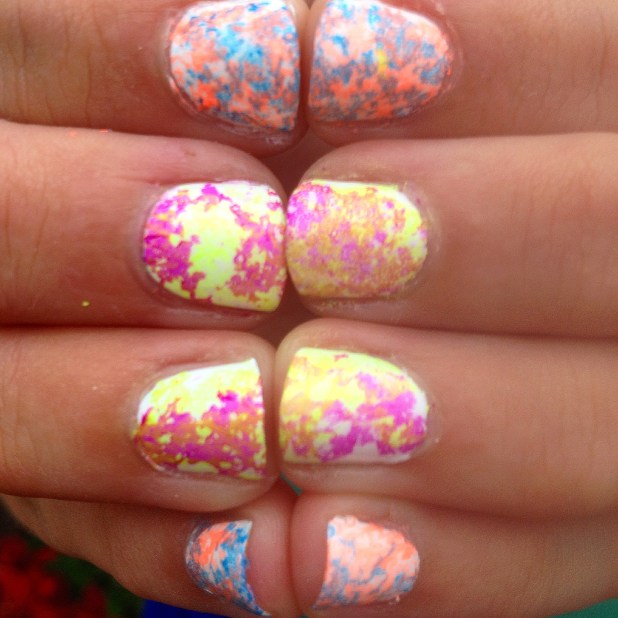
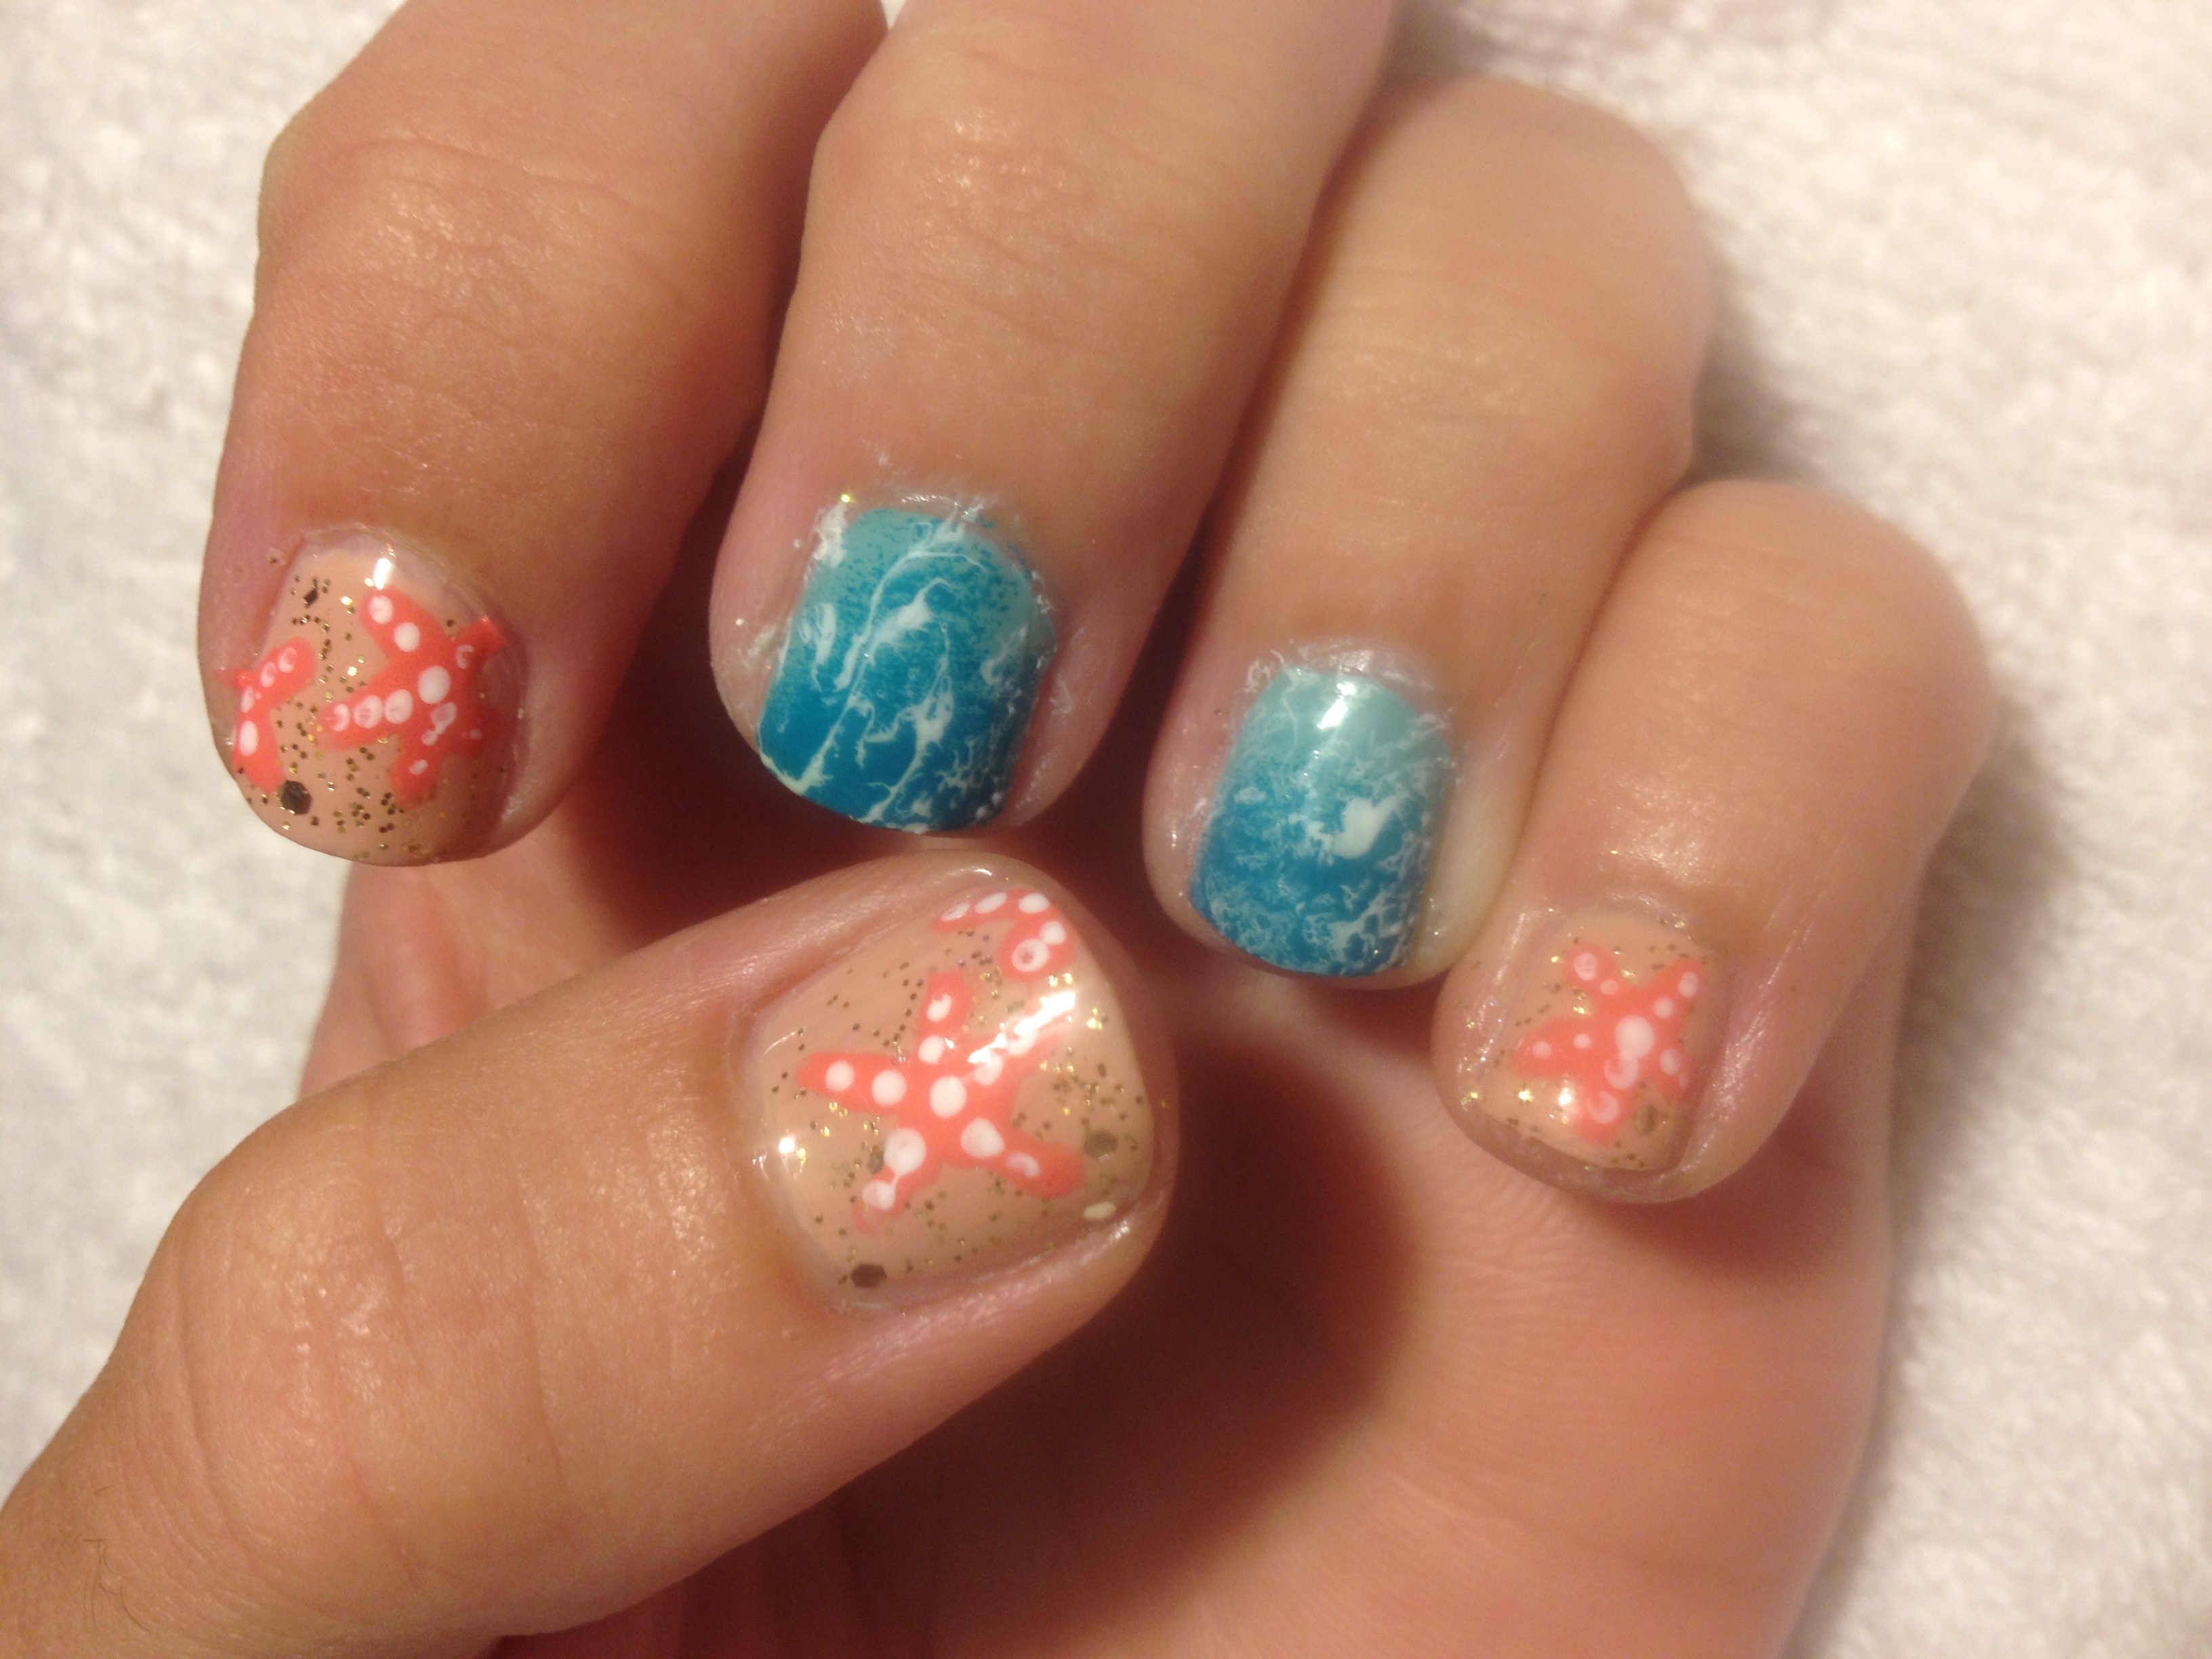
Here in PA, we have about one more month to sport overtly beachy nails, so let’s get to it!  I am still digging my current mani, so I asked my little sis if I could borrow her nails for this little tutorial.  Here’s the finished product:

IMG_2790

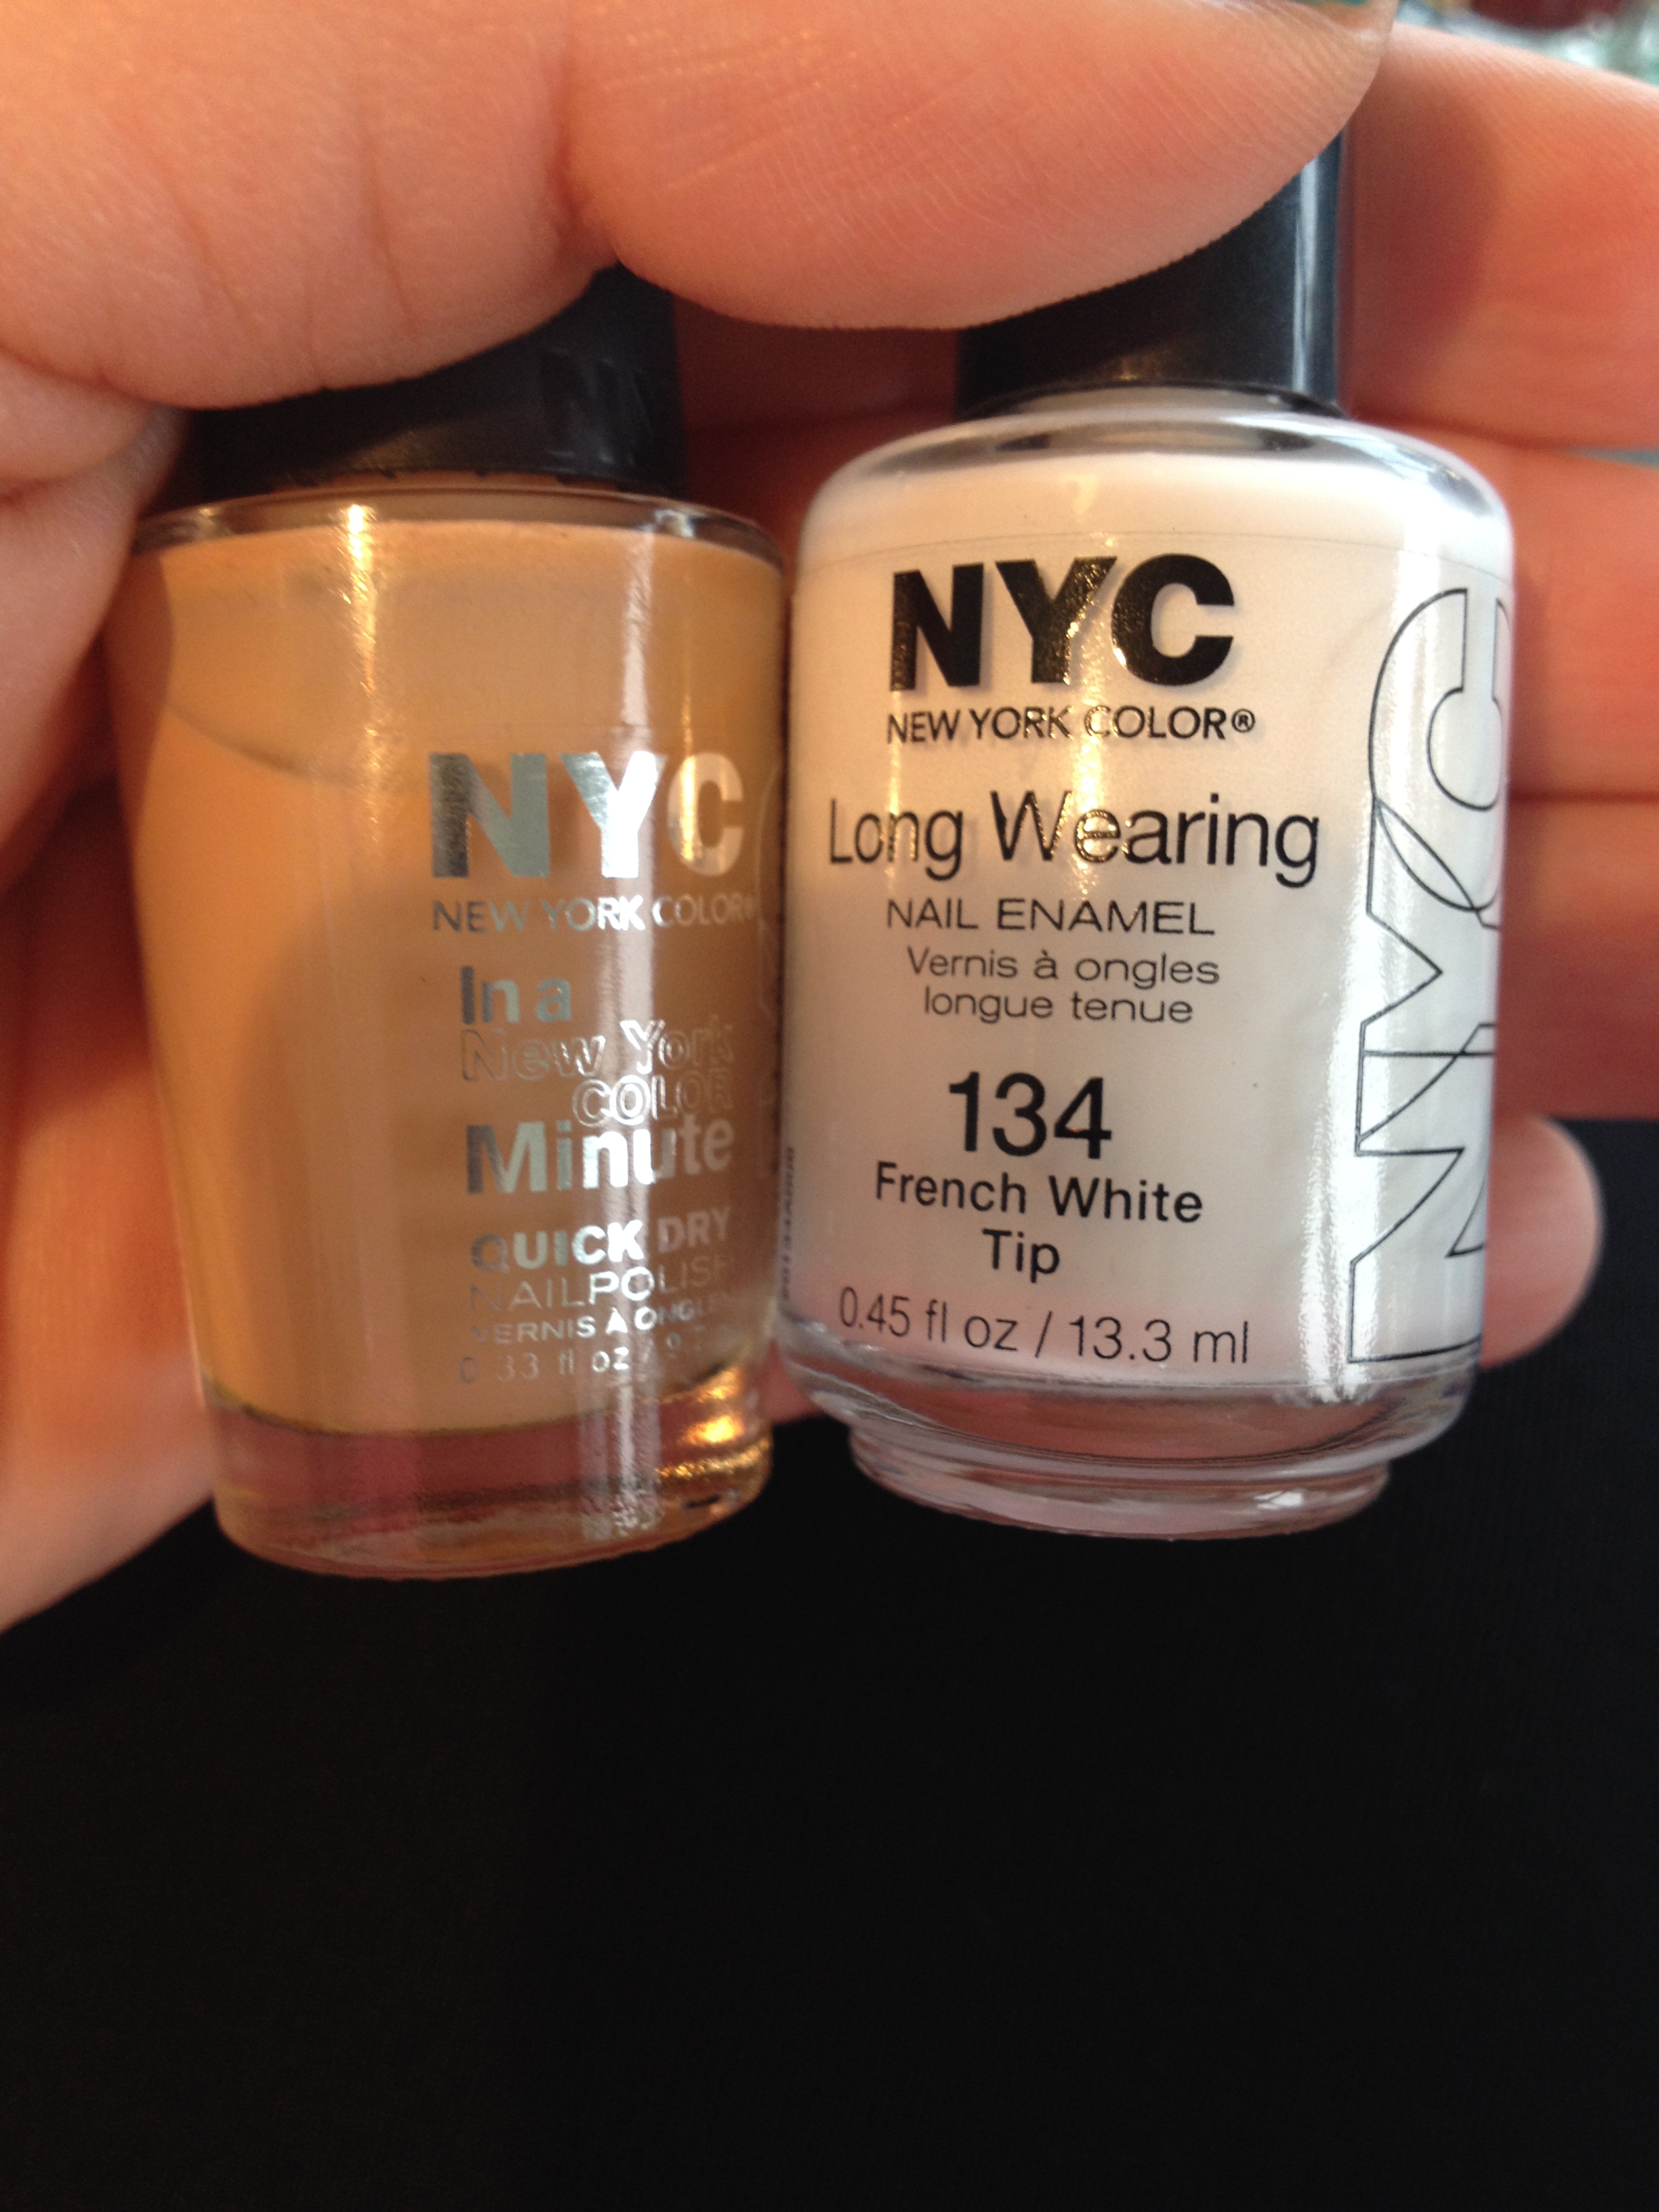
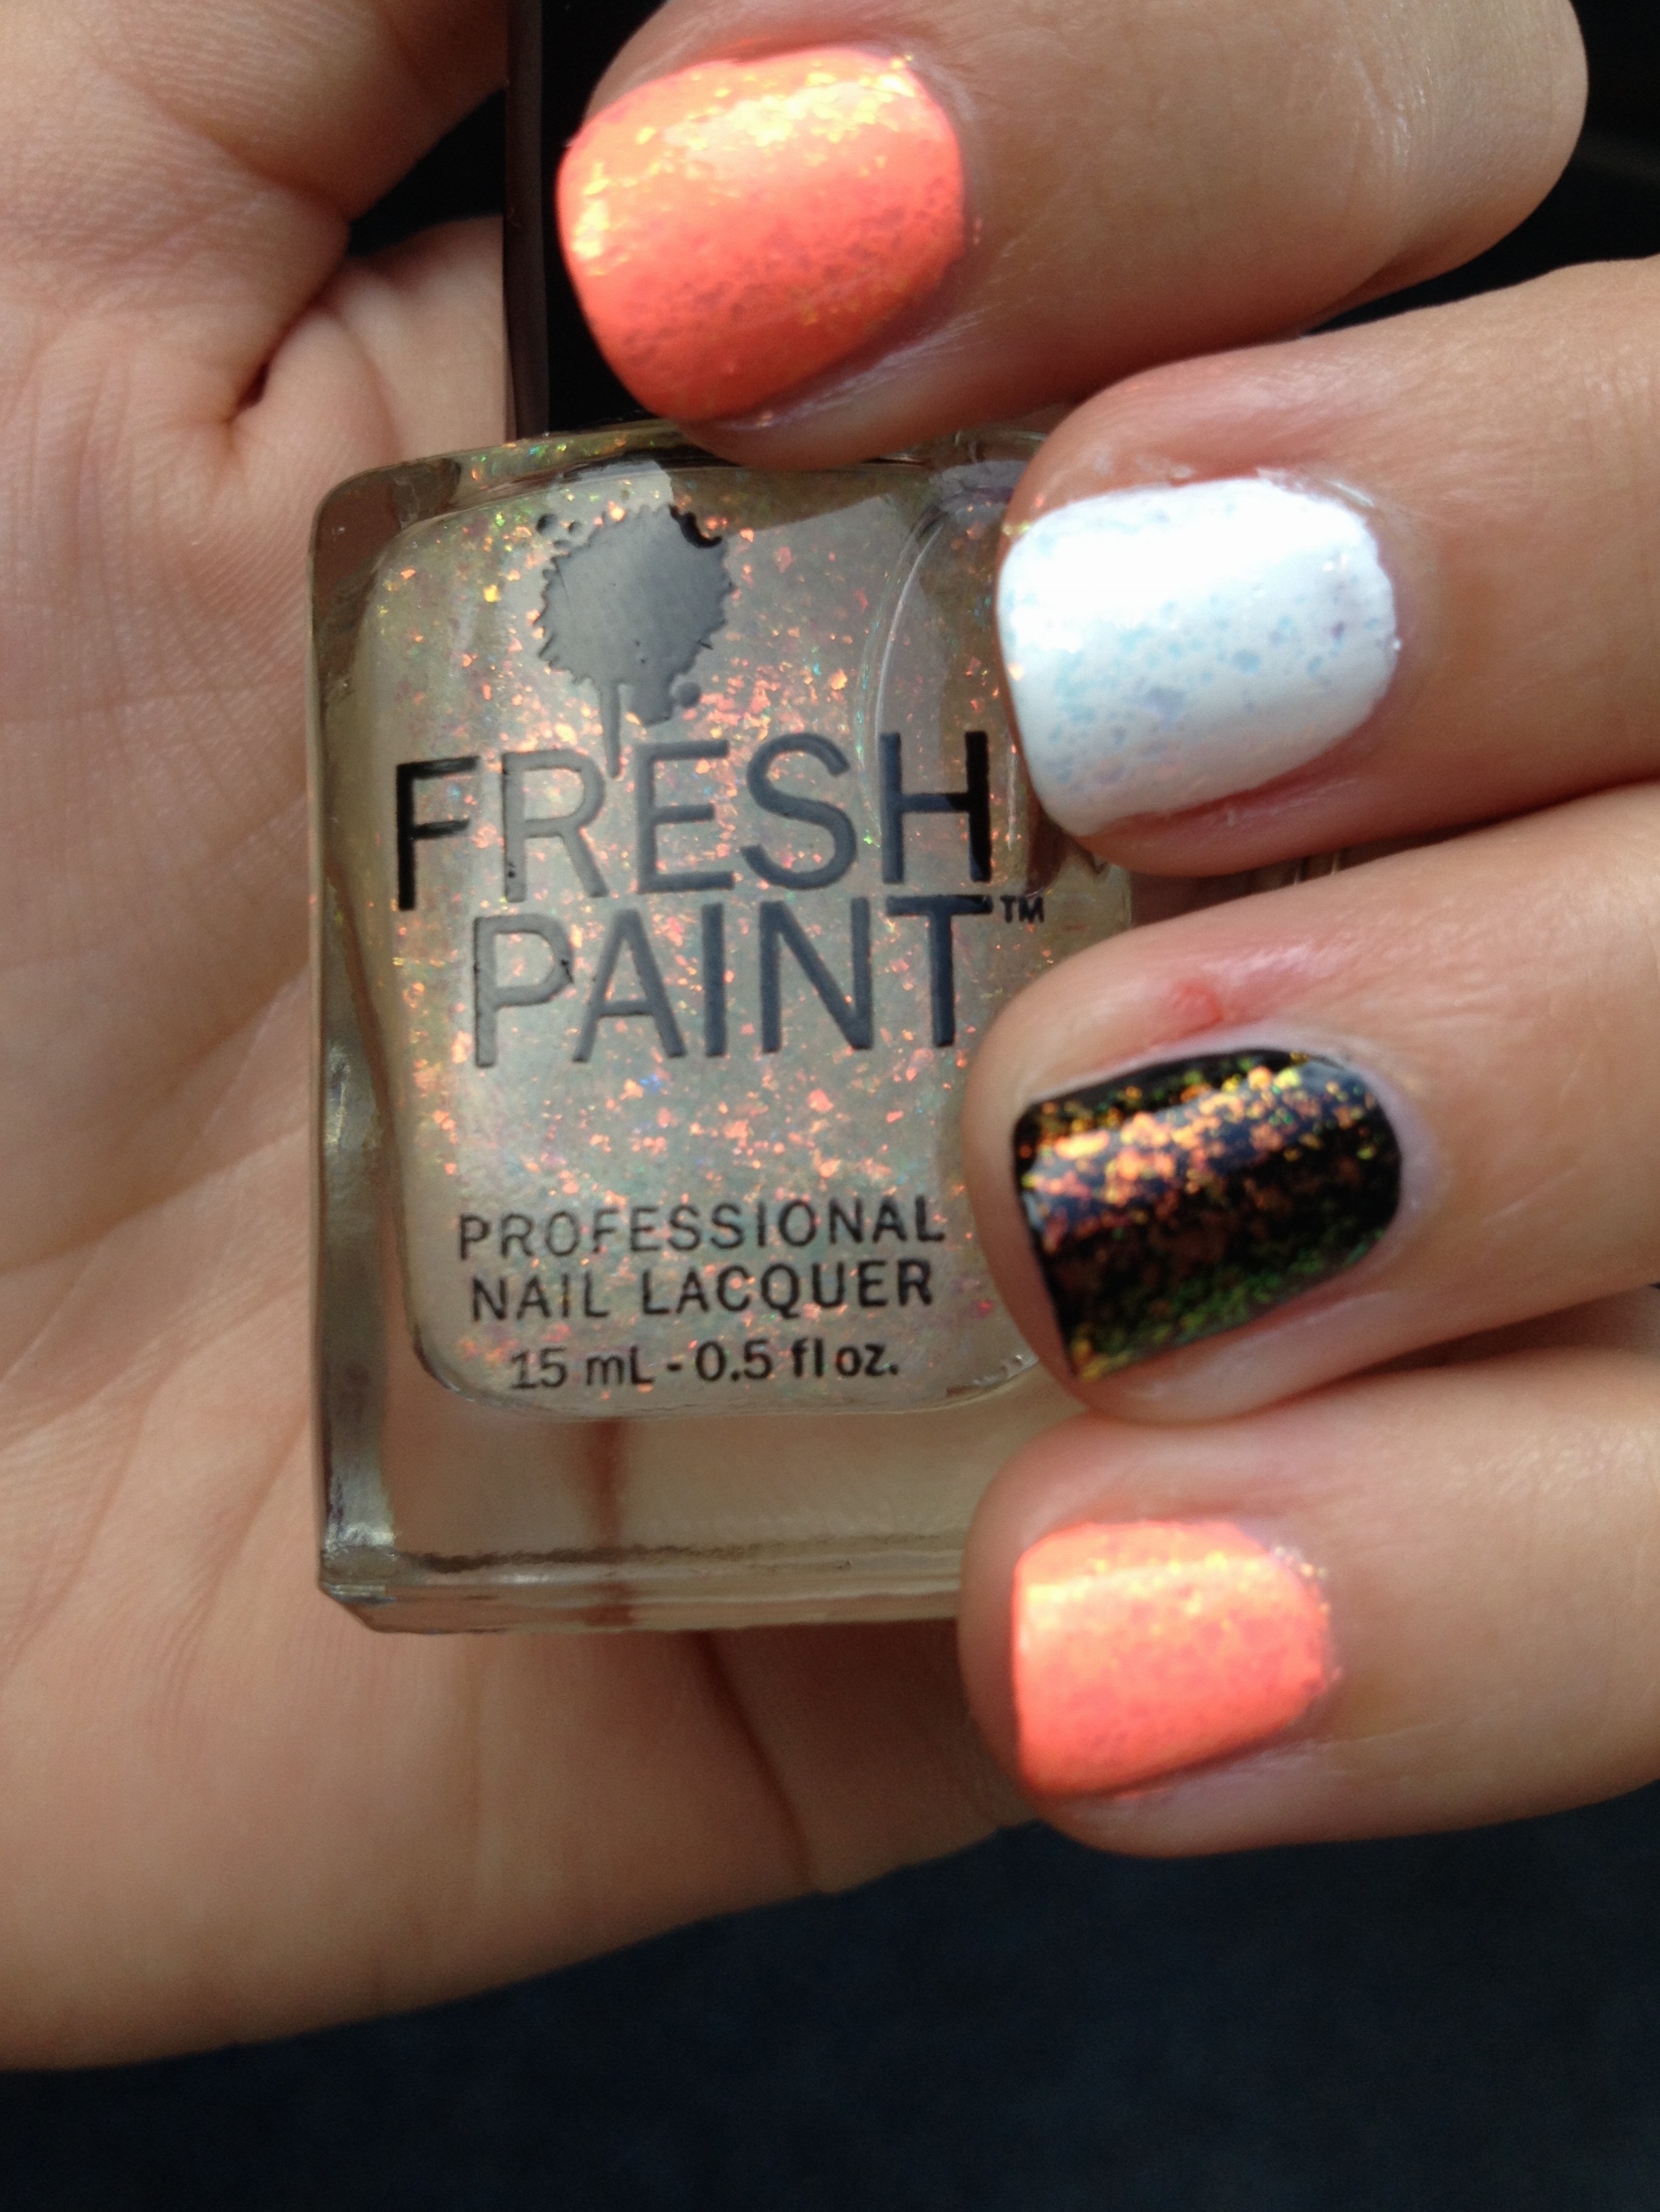
For this look, you will need polishes in these colors: White, light blue, darker blue, coral, nude, gold glitter.

IMG_2795

Specifically, I used (left to right):  Wet N Wild -French White Creme, Wet n Wild Megalast – I Need a Refresh-Mint, Jordana – Boy Oh Boy, Wet n Wild – Blazed, NYC – Fashion Safari, La Colors – Dizzy.  (Yeah, my bottle of Blazed got into a fight with a bottle of grey polish inside my suitcase on a flight.  The grey bottle lost.)

You will also need a disposable plastic container like a yogurt cup, Q-tips, a dotting tool, a makeup sponge, acetone or nail polish remover, and a pitcher.   The first thing you want to do is fill the pitcher with a quart of water and let it come to room temperature.   Seriously, that’s a real step in this process, but more about that later.

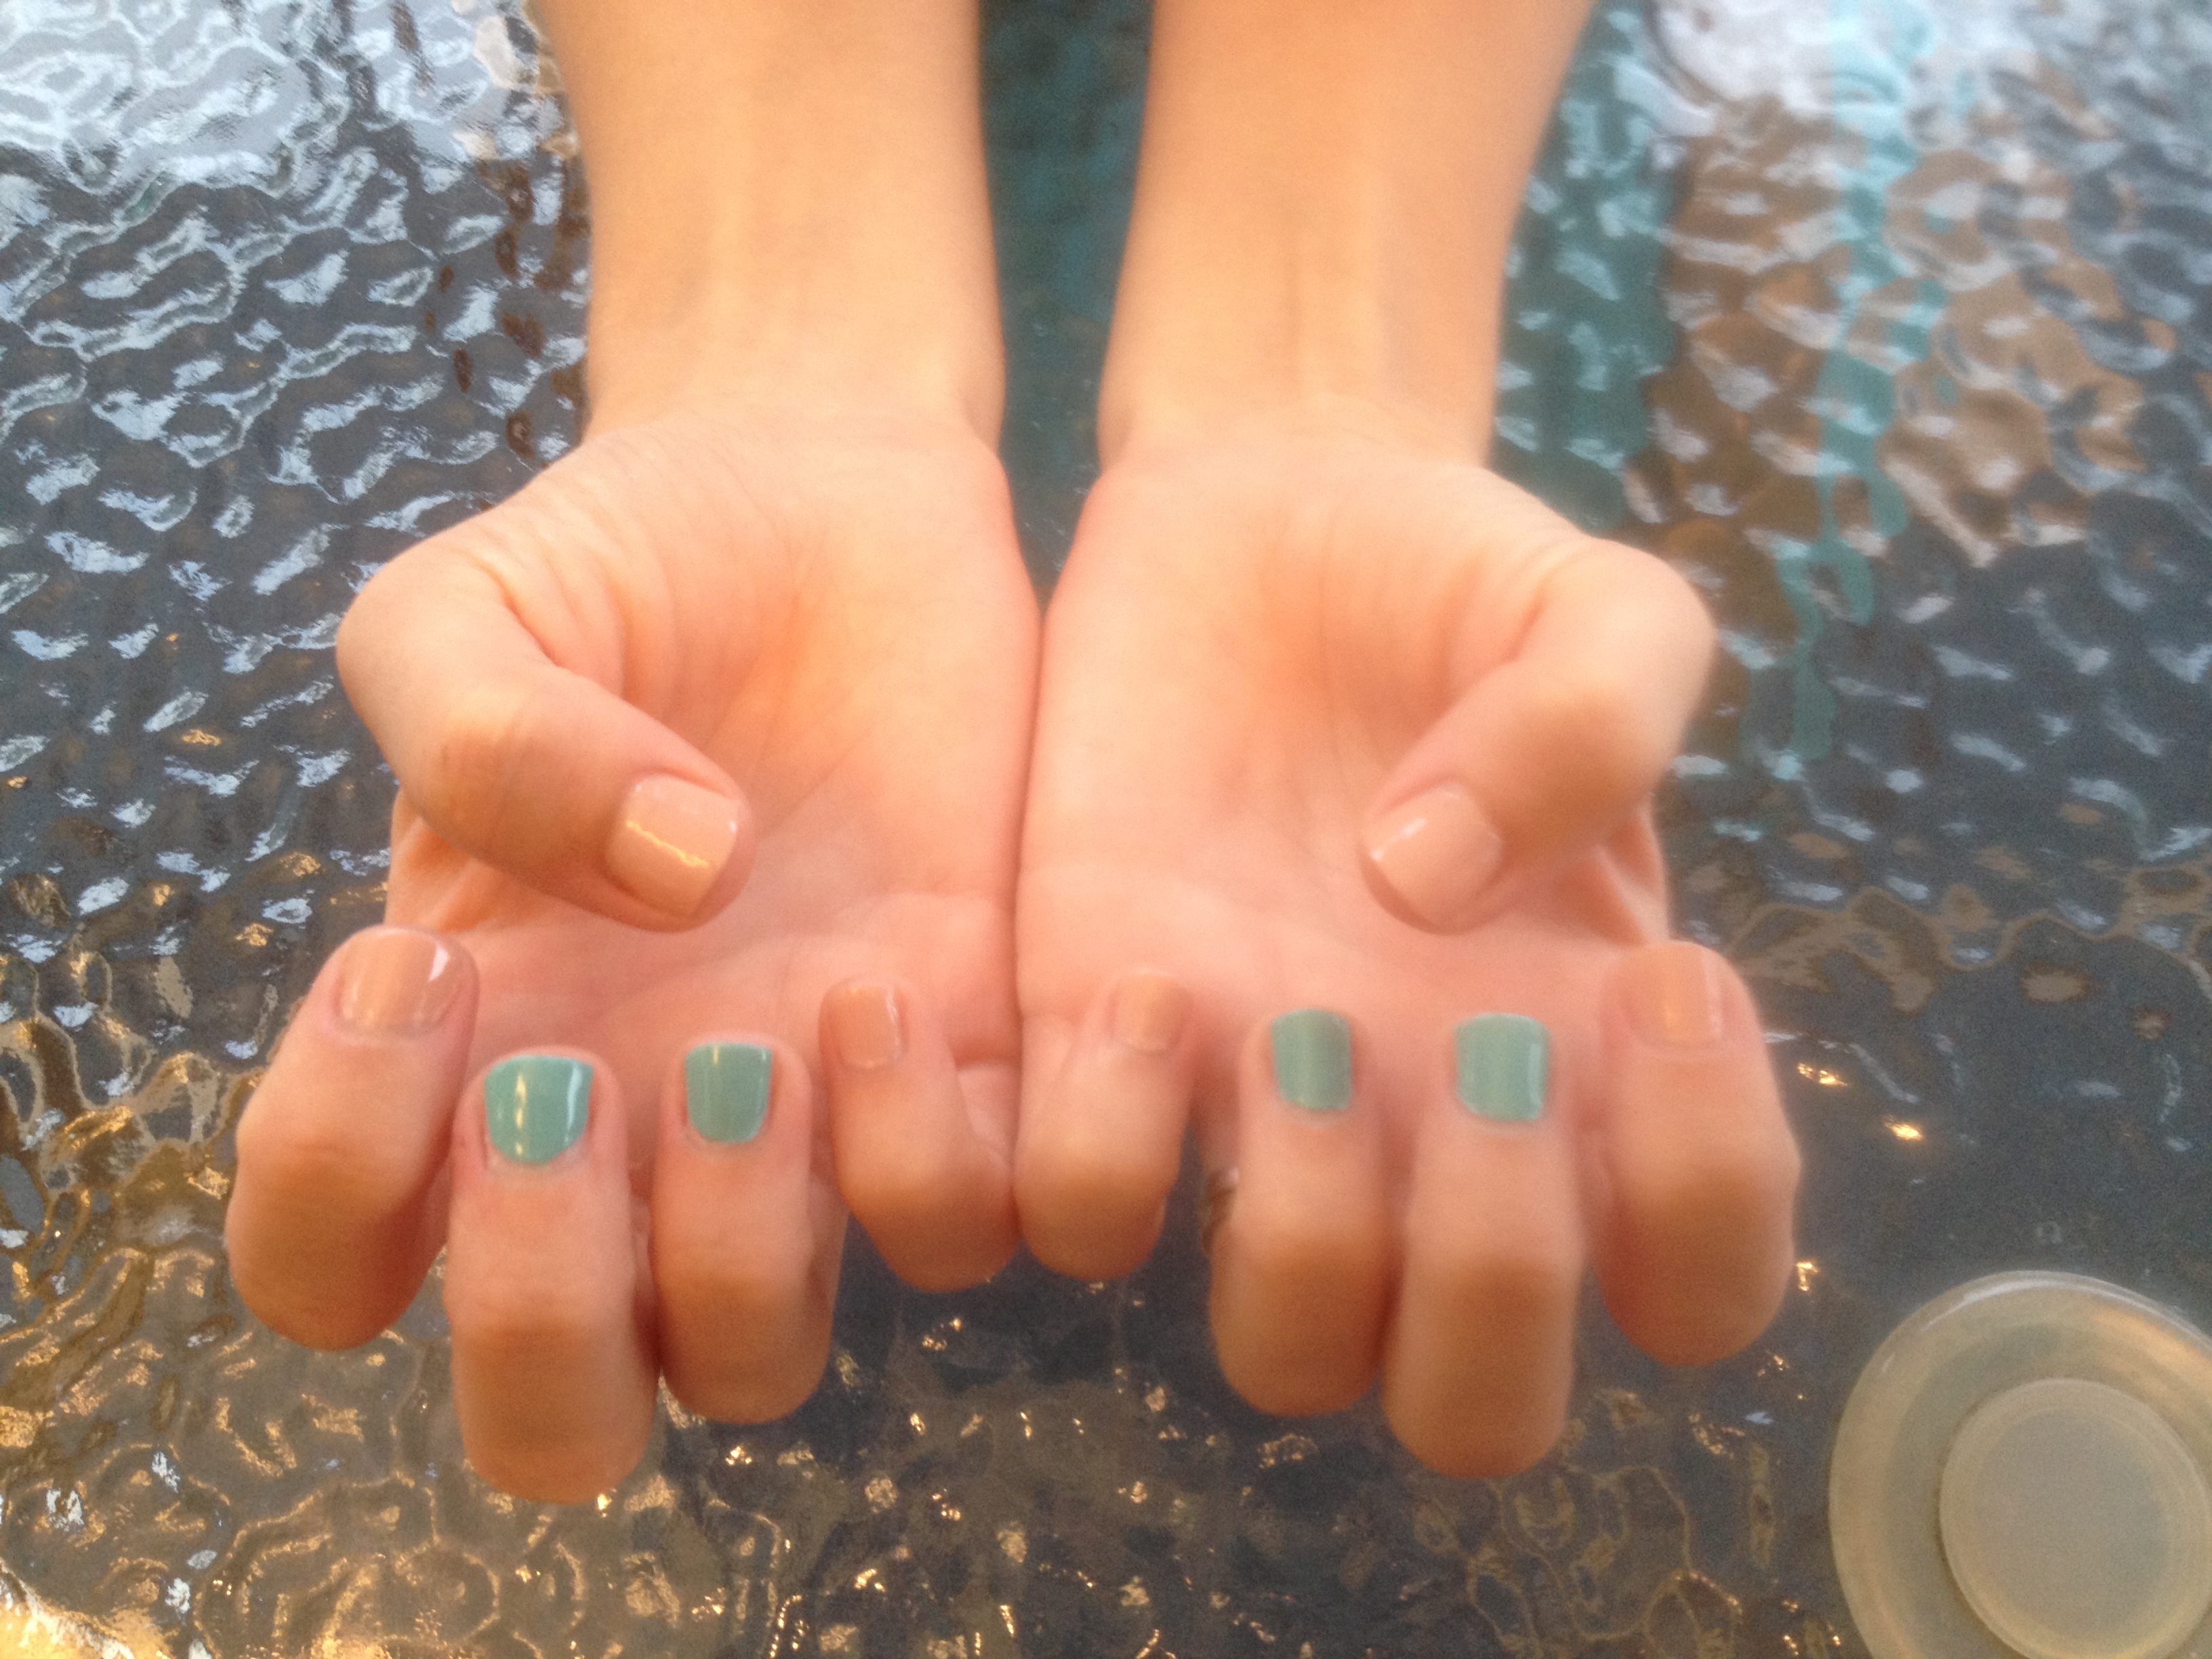
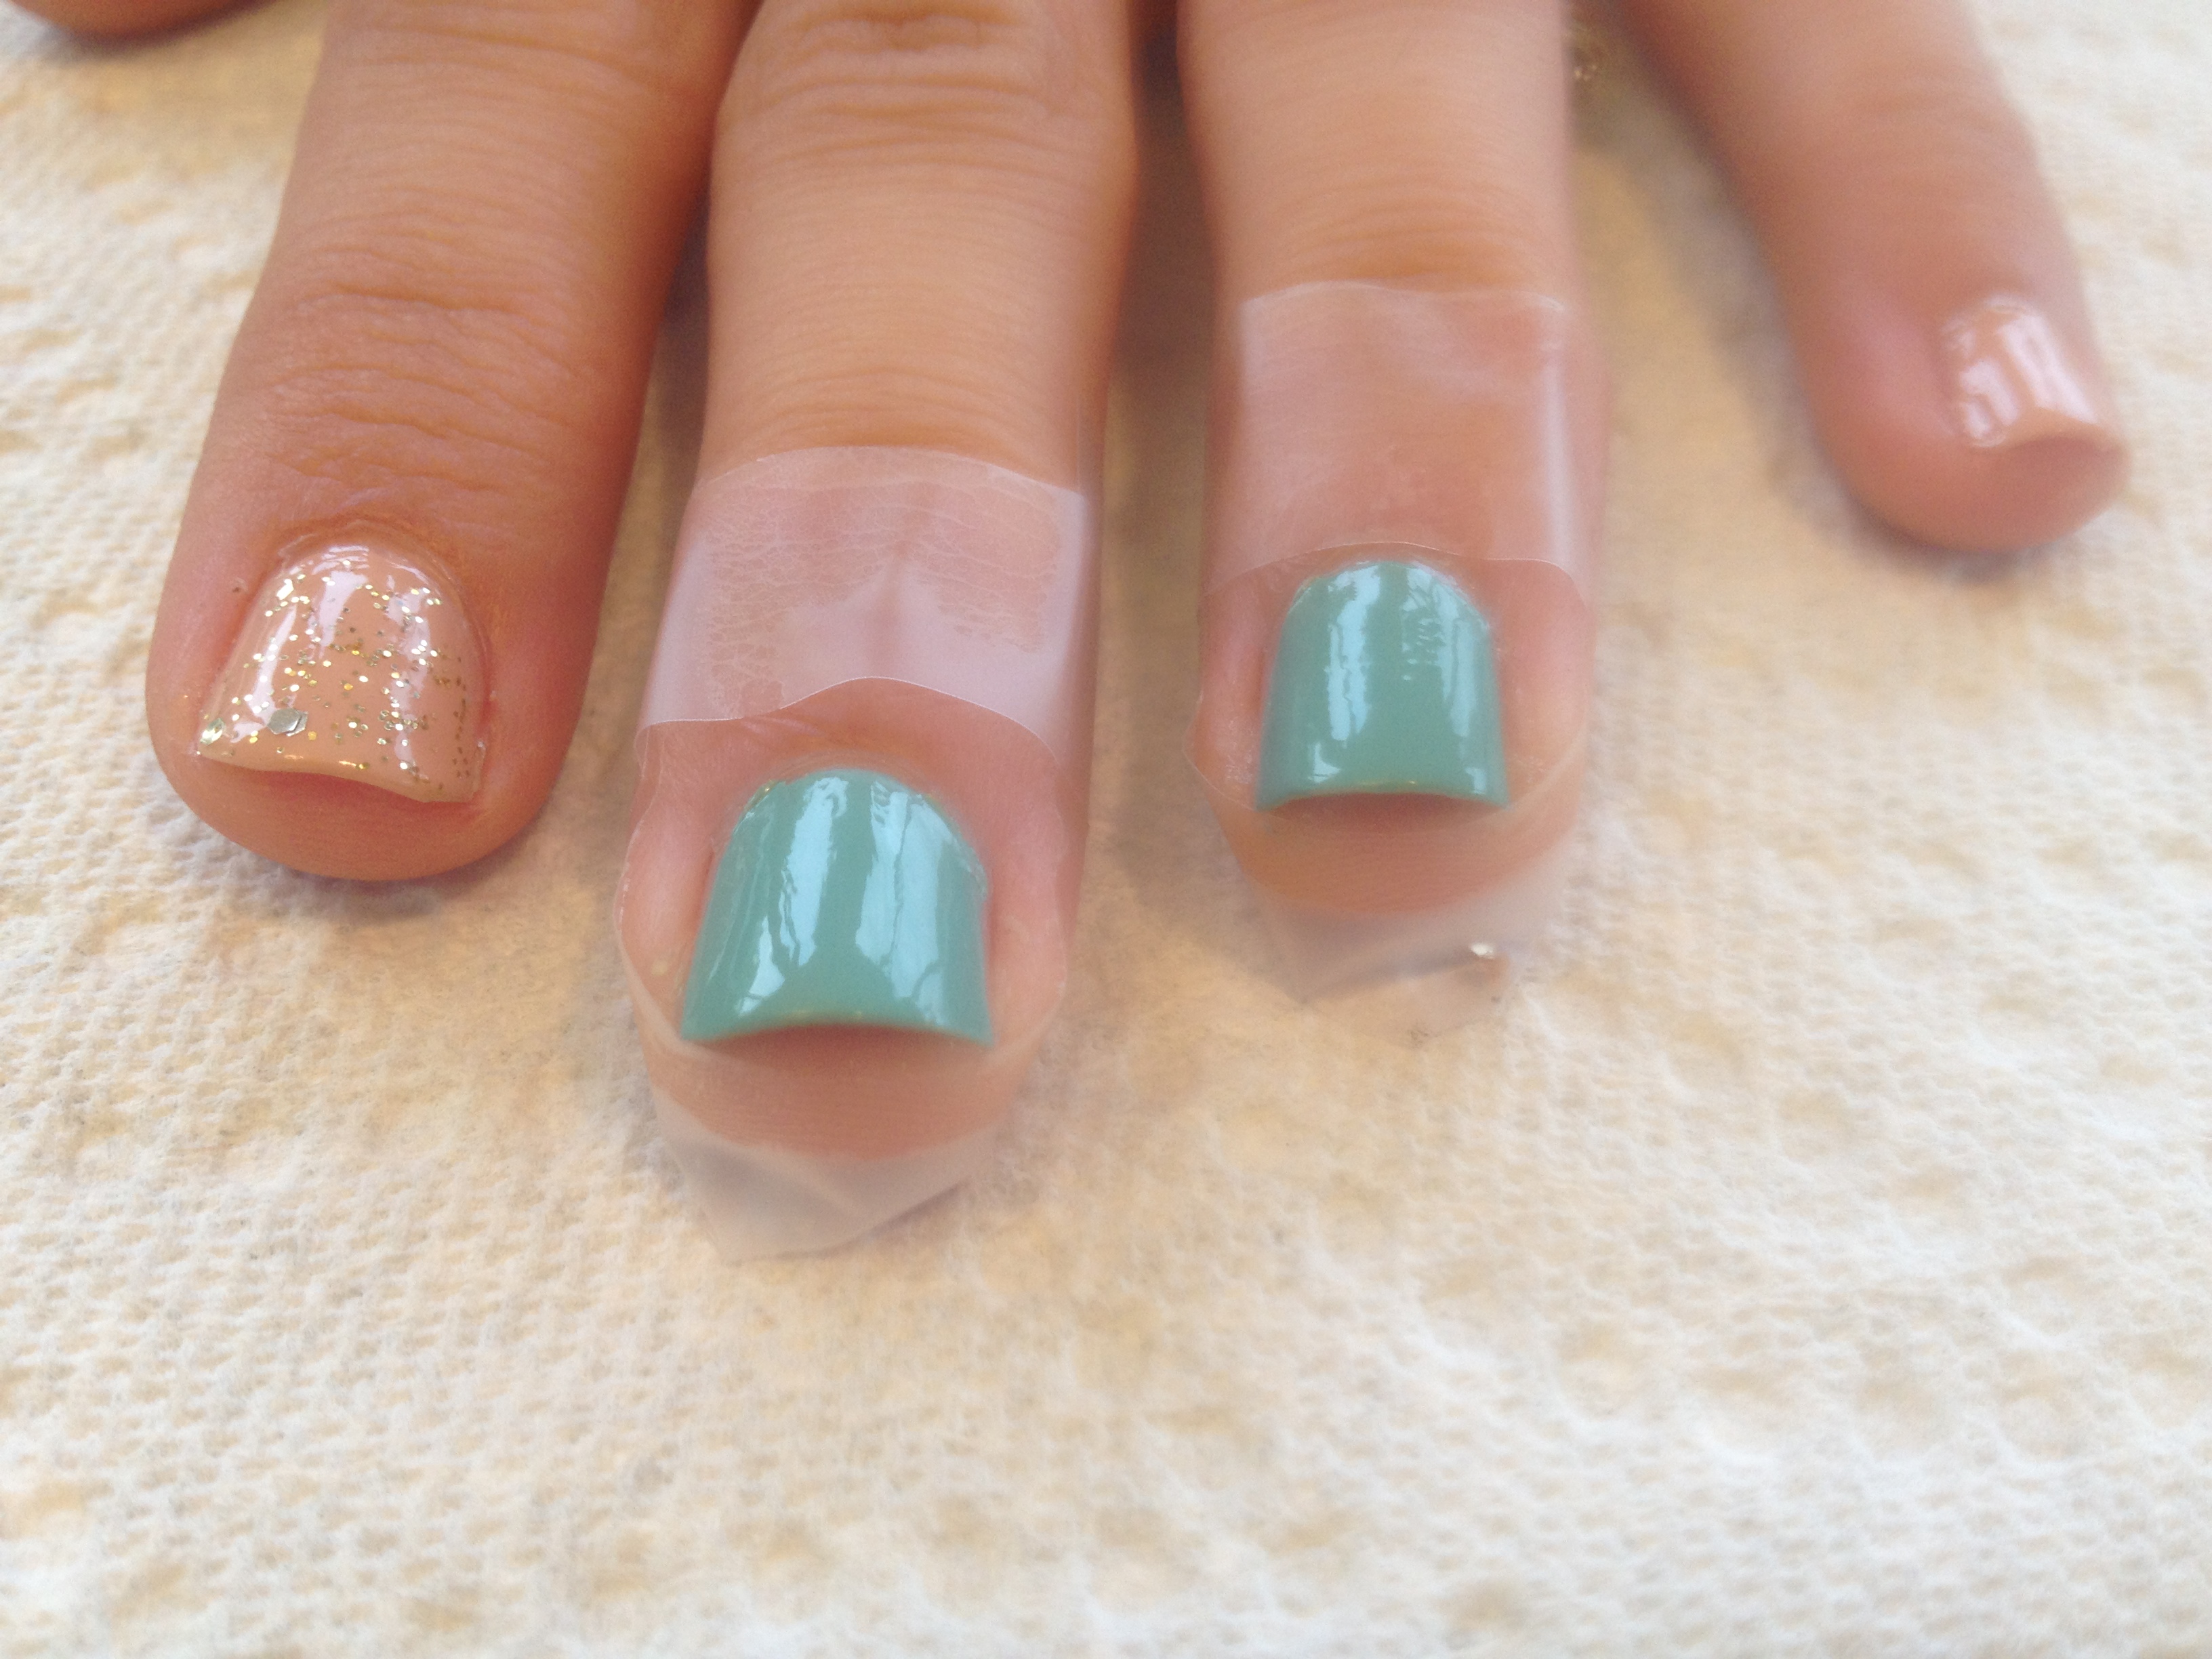
To begin, paint the thumb, index, and pinky fingers with the nude color to look like sand.  Then paint the middle and ring fingers light blue:

IMG_2760

Let them dry for 5 or 10 minutes.  Then, in order to make clean up easy in the end, tape around the fingers with the blue polish.  You’ll need two pieces of tape per finger: one about 2 inches long, the other about one inch long.  Take the longer piece of tape and place the center of it across the tip of your finger (behind your nail) and then press it down along the sides of your finger.  Then take the shorter piece and wrap it around your finger just below your cuticle.

IMG_2761

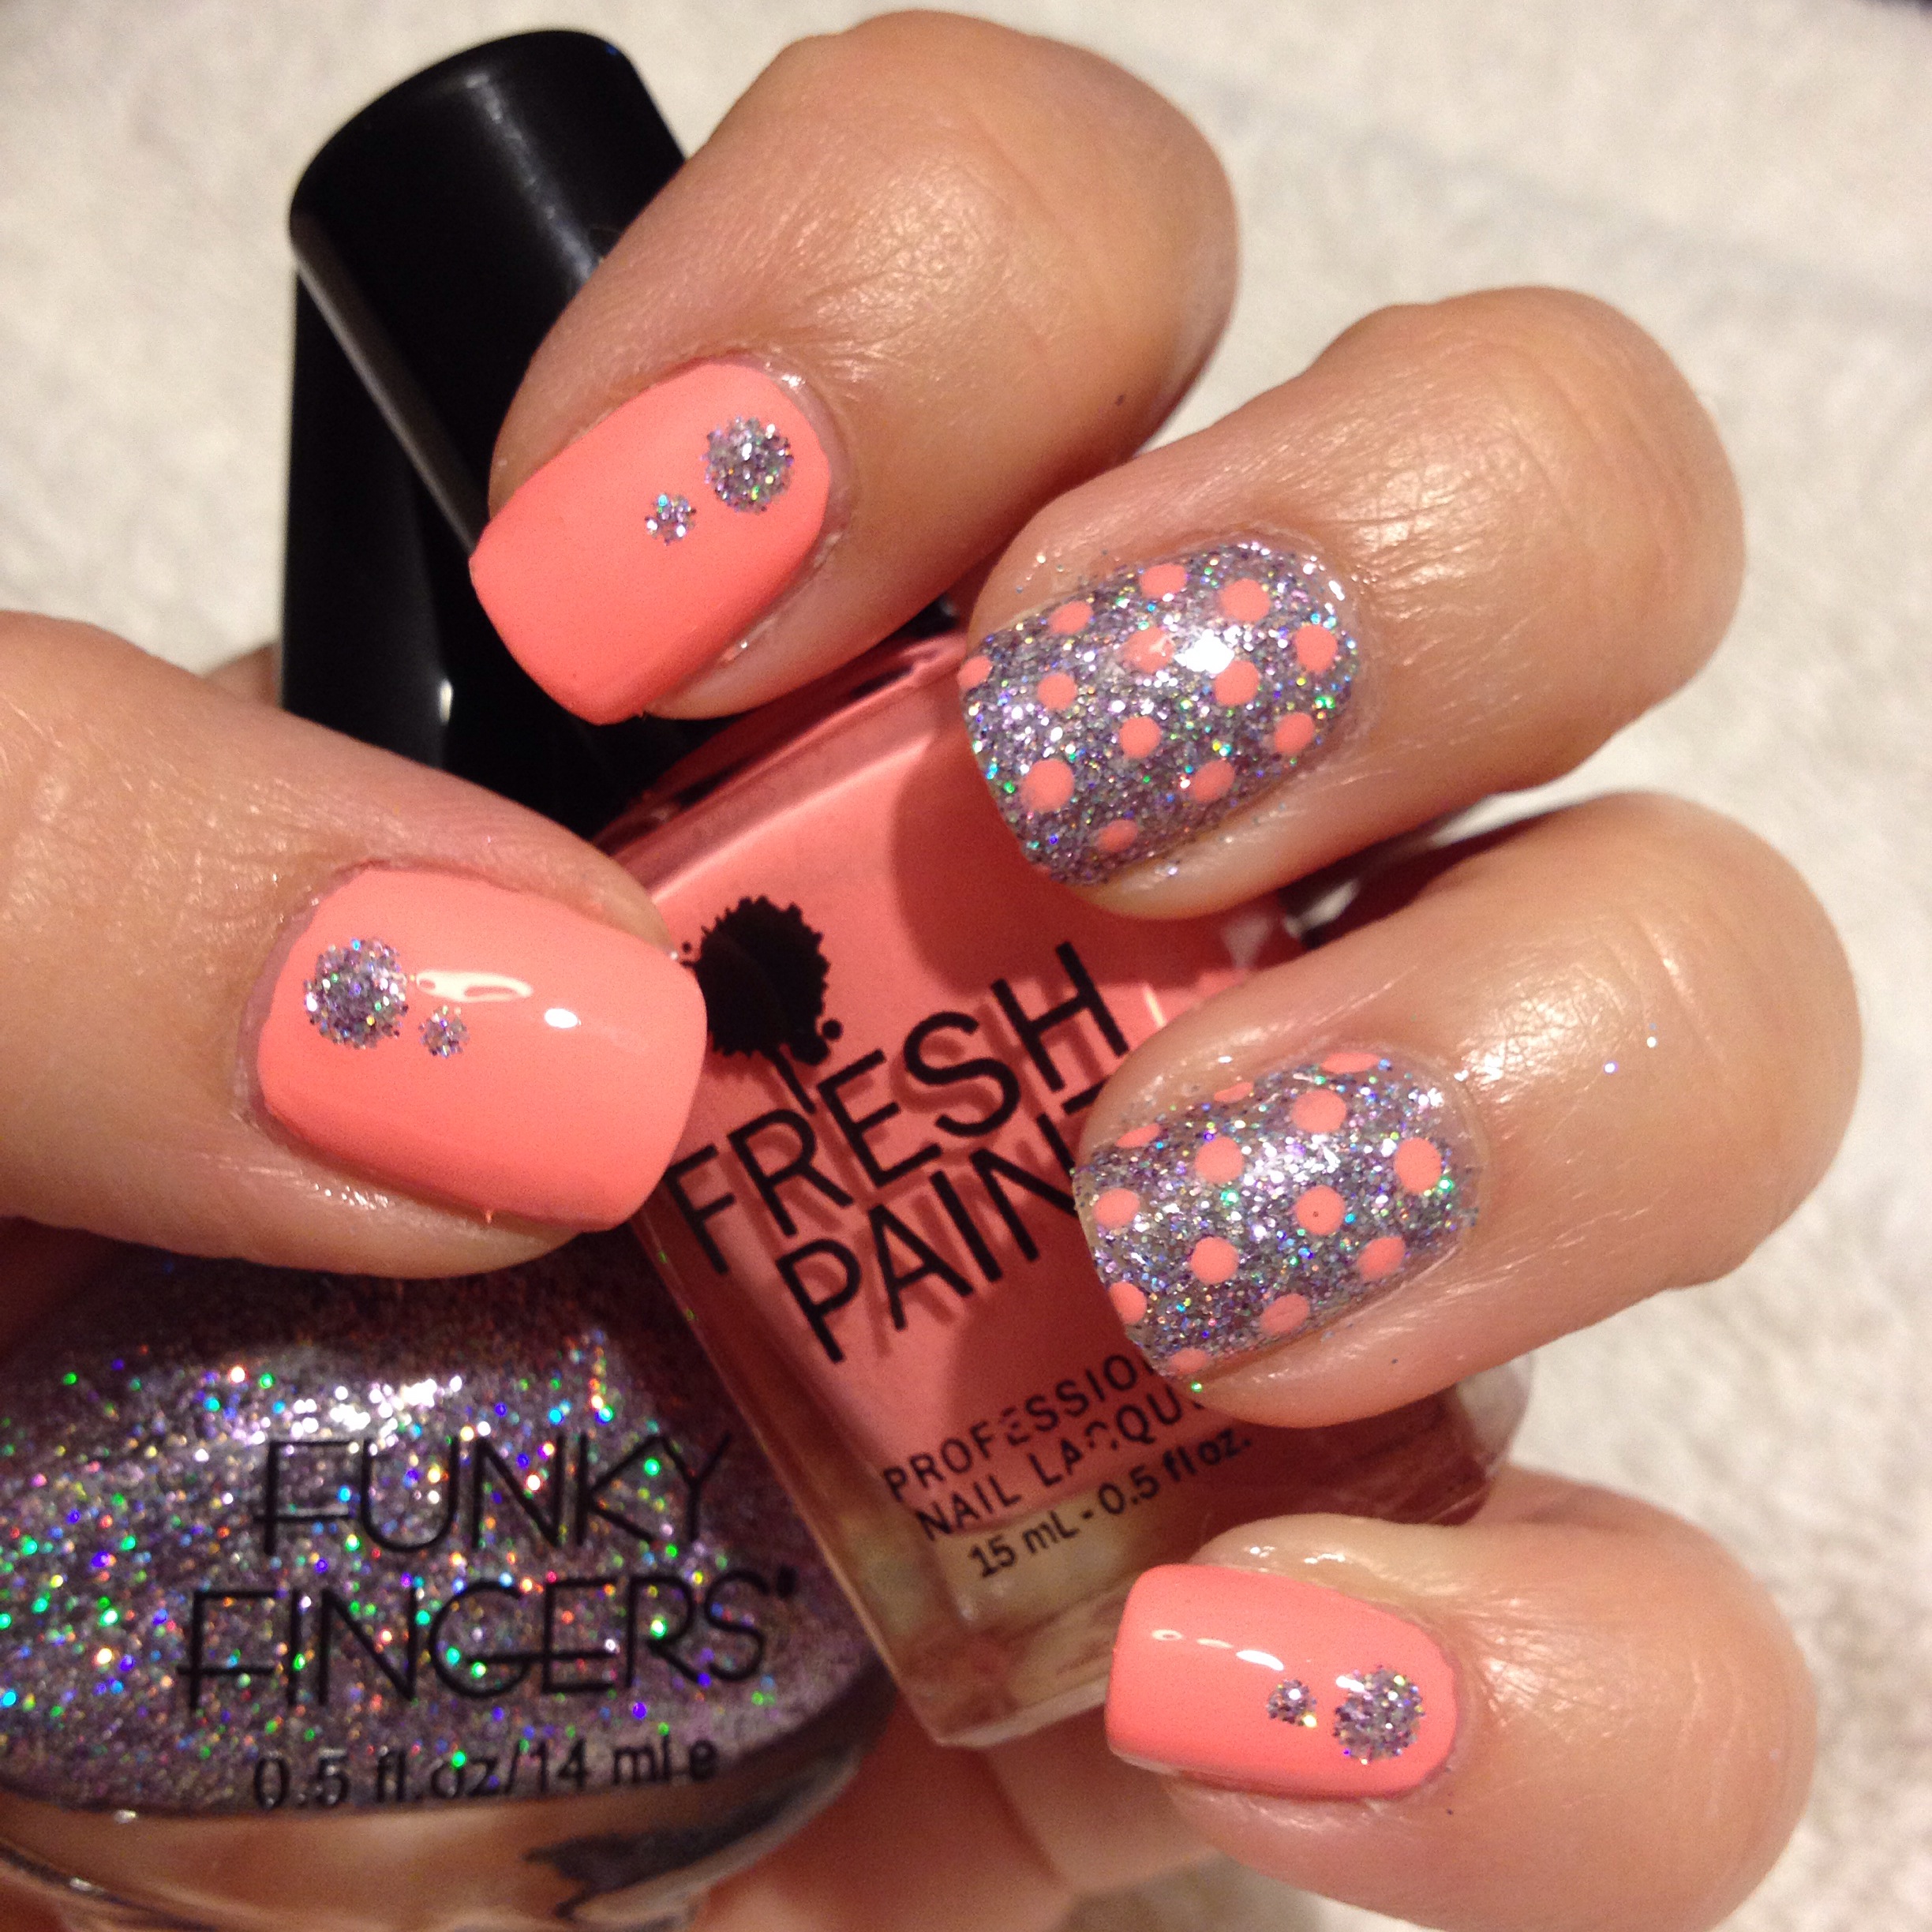
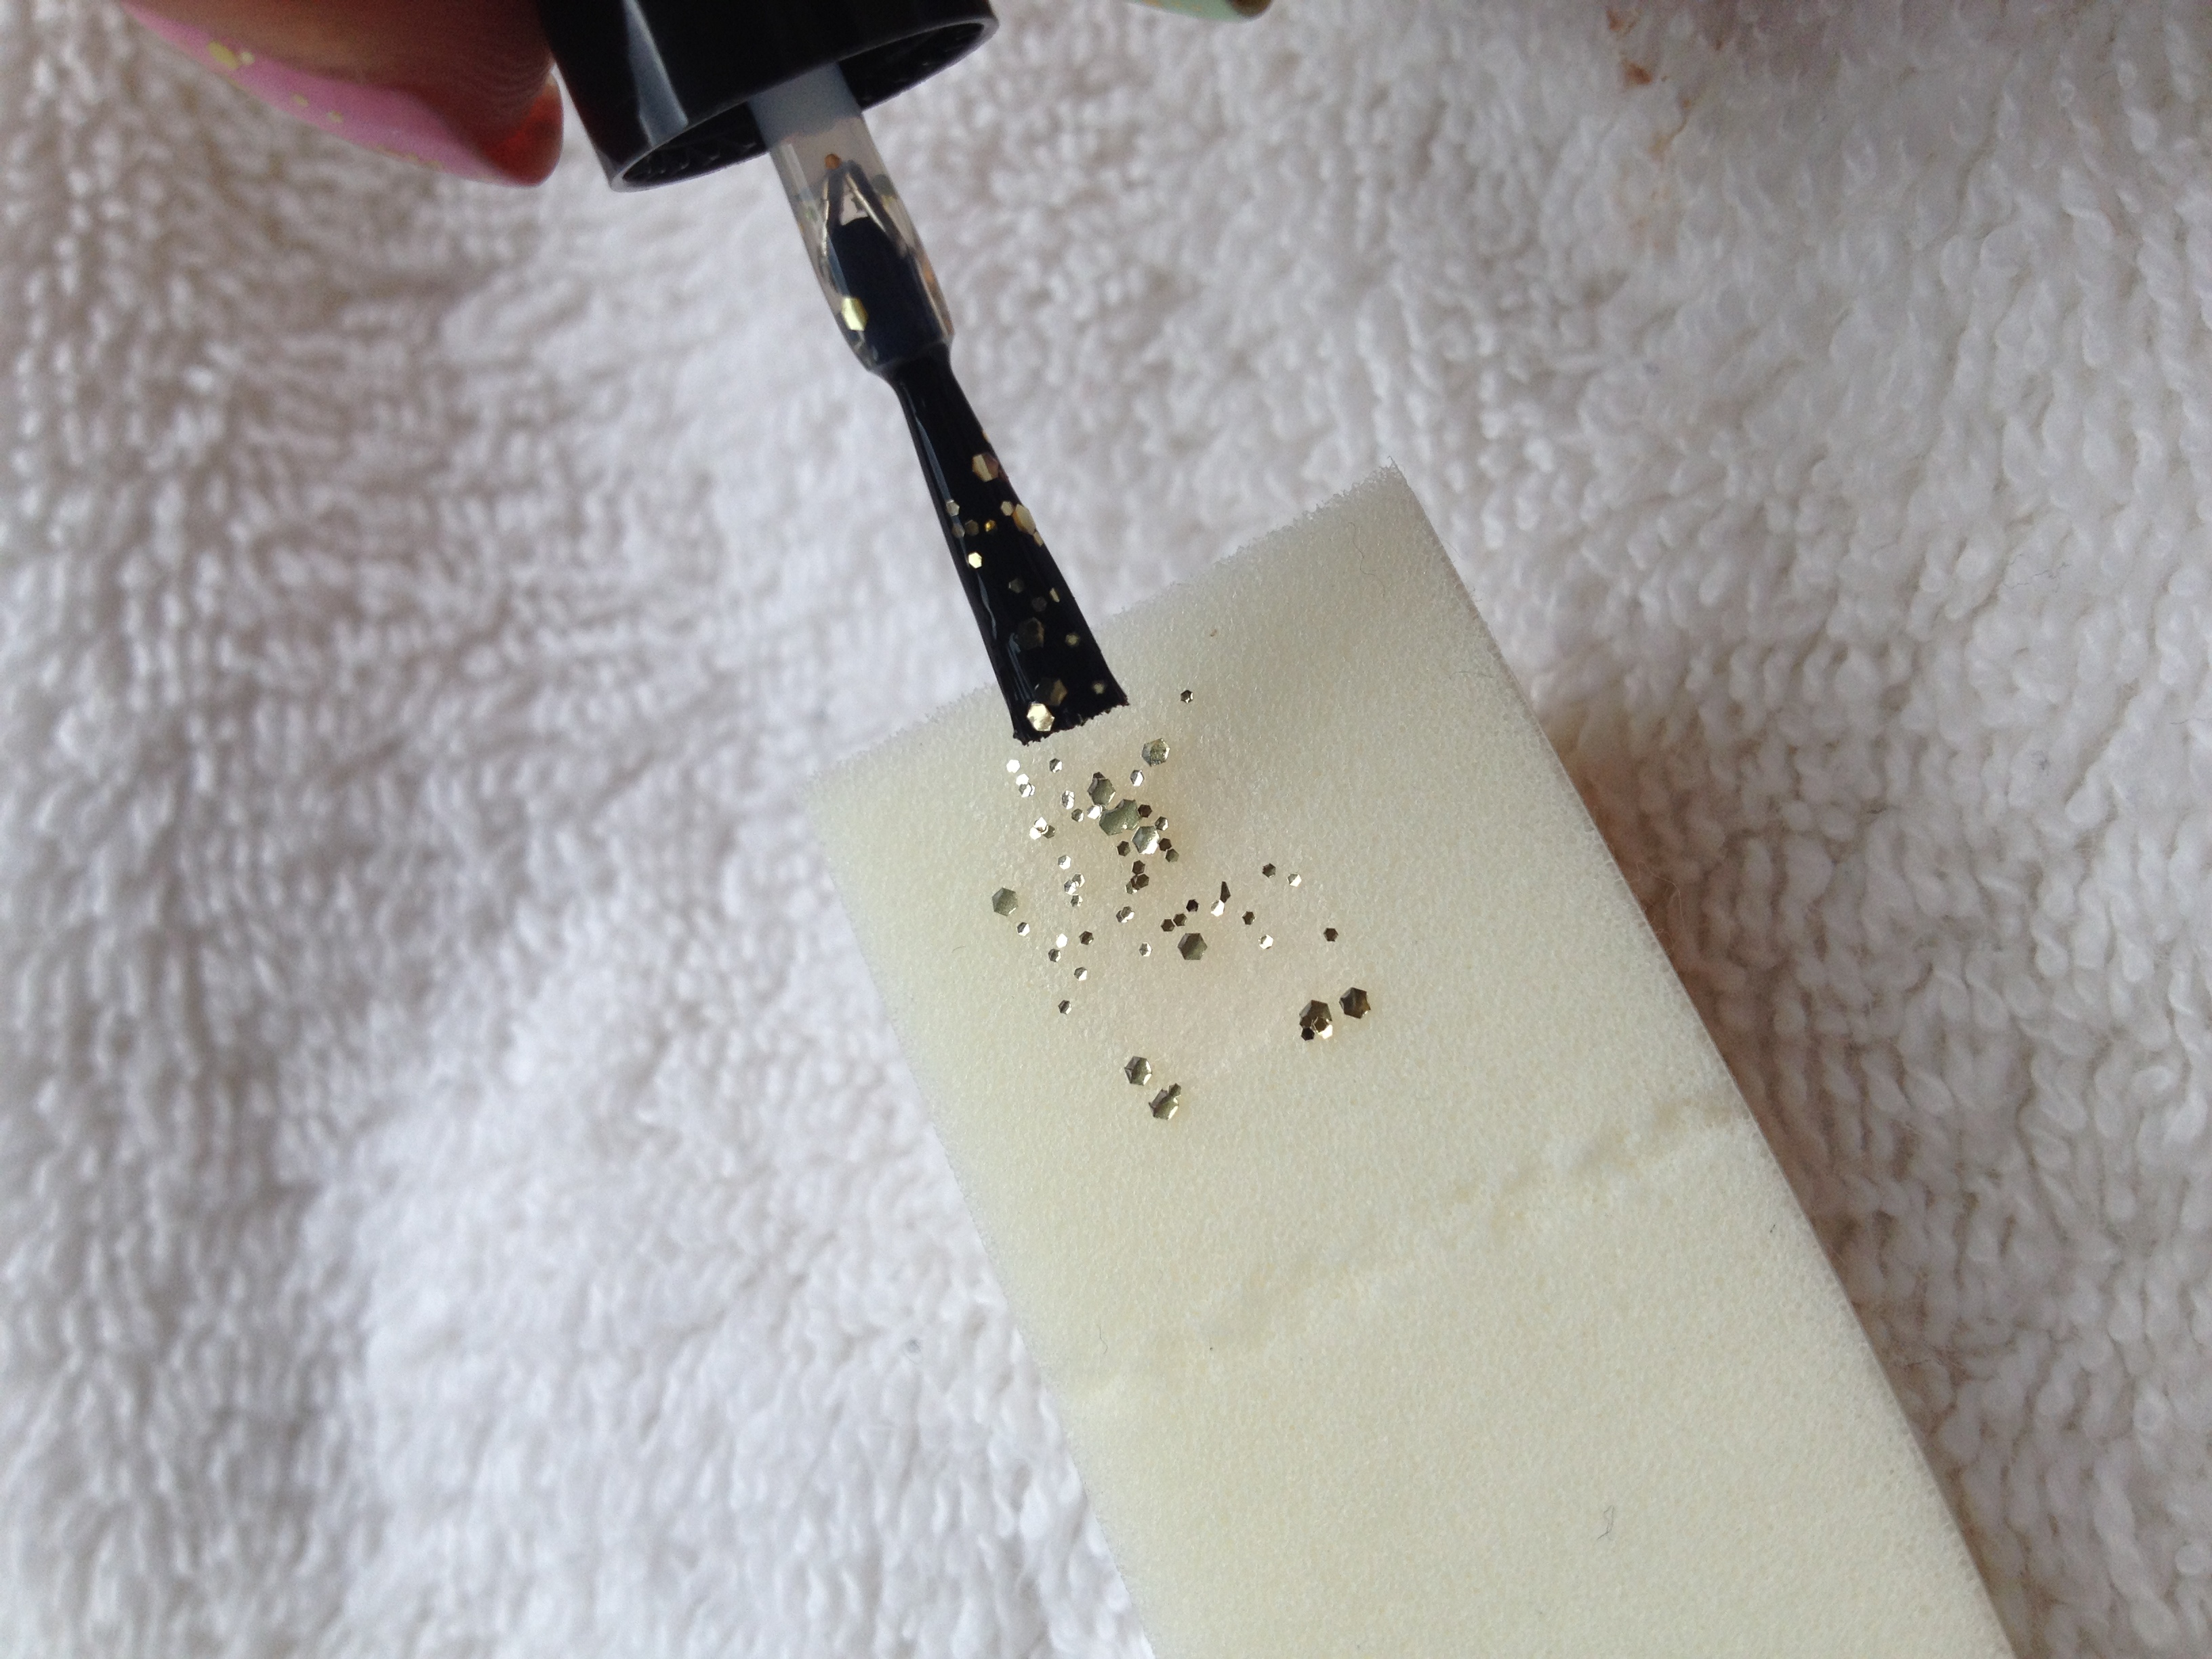
Then apply a coat of the glitter polish to your sand-colored nails.

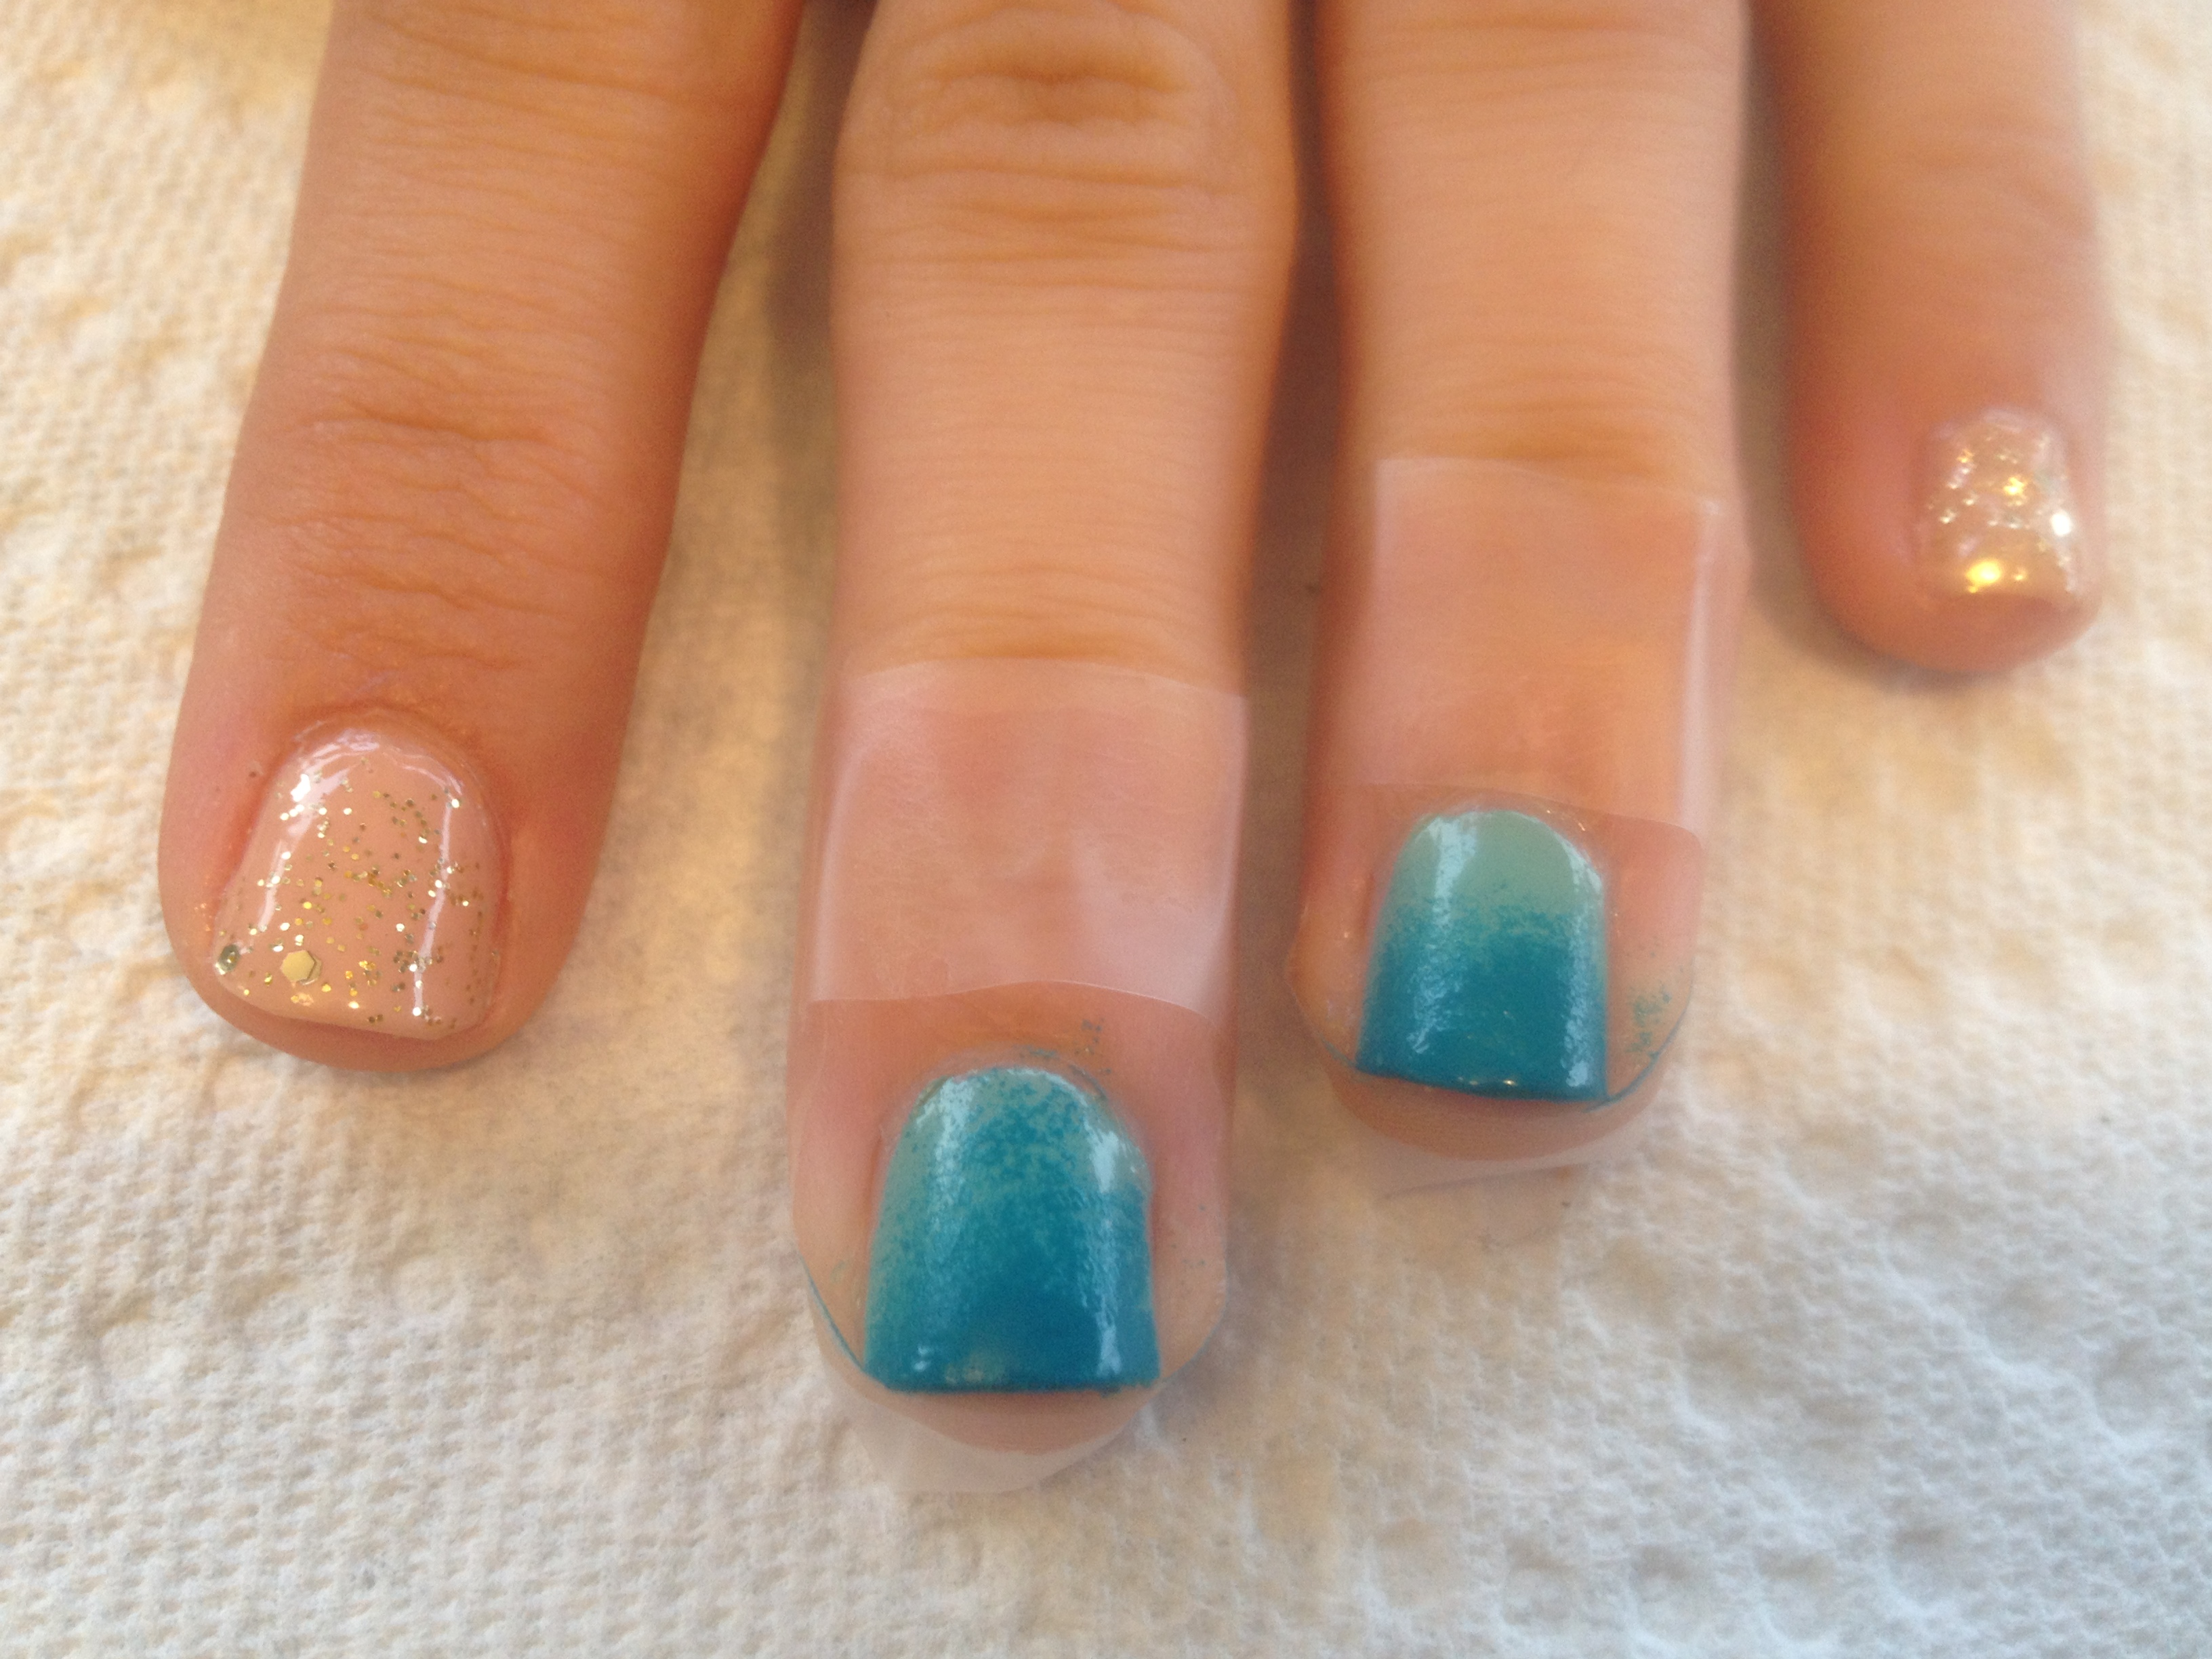
The next thing you’re going to do is give your blue nails an ombre/gradient effect.  Take a makeup sponge and apply some of the darker blue polish to it.

IMG_2762

Then start dabbing the sponge lightly at the very tip of the light blue nails.  As the polish begins to dry on the sponge, continue dabbing about halfway up the nail.  Work carefully and don’t get too crazy here.  It’s easy to add more dark blue polish to the nail if you need to, but if you sponge too vigorously and get too much dark blue polish on the nail, there’s not much you can do to fix it.  Here’s what it should look like after this step:

IMG_2763

Pretty, right?

Next, take your small disposable container and fill it with your room temperature water.  I just pulled a yogurt container out of my recycling bin.   (What you do not want to use is a Styrofoam cup.   Nail polish will eat through Styrofoam and  leave you with a big mess.)

Then, take your white polish and drop a drop of polish onto the surface of the water.  It should spread out like this:

IMG_2766

If your drop of polish falls to the bottom of the container, you are holding your brush too far above the surface of the water.  If your polish doesn’t spread out like this, the problem is either the water or the polish.  If your water is too warm or too cool, the polish won’t spread.  Also, I just used tap water, but I know that some people claim that bottled water works better for this technique because it doesn’t have that extra stuff that can be in tap water.  There’s also a possibility that your polish just doesn’t want to spread.  Different formulas do spread on the water differently.  Any sort of quick dry polish is going to dry on the surface of the water too quickly for you to be able to work with it.  My $1 Wet n Wild worked well, so get yourself a bottle of that.

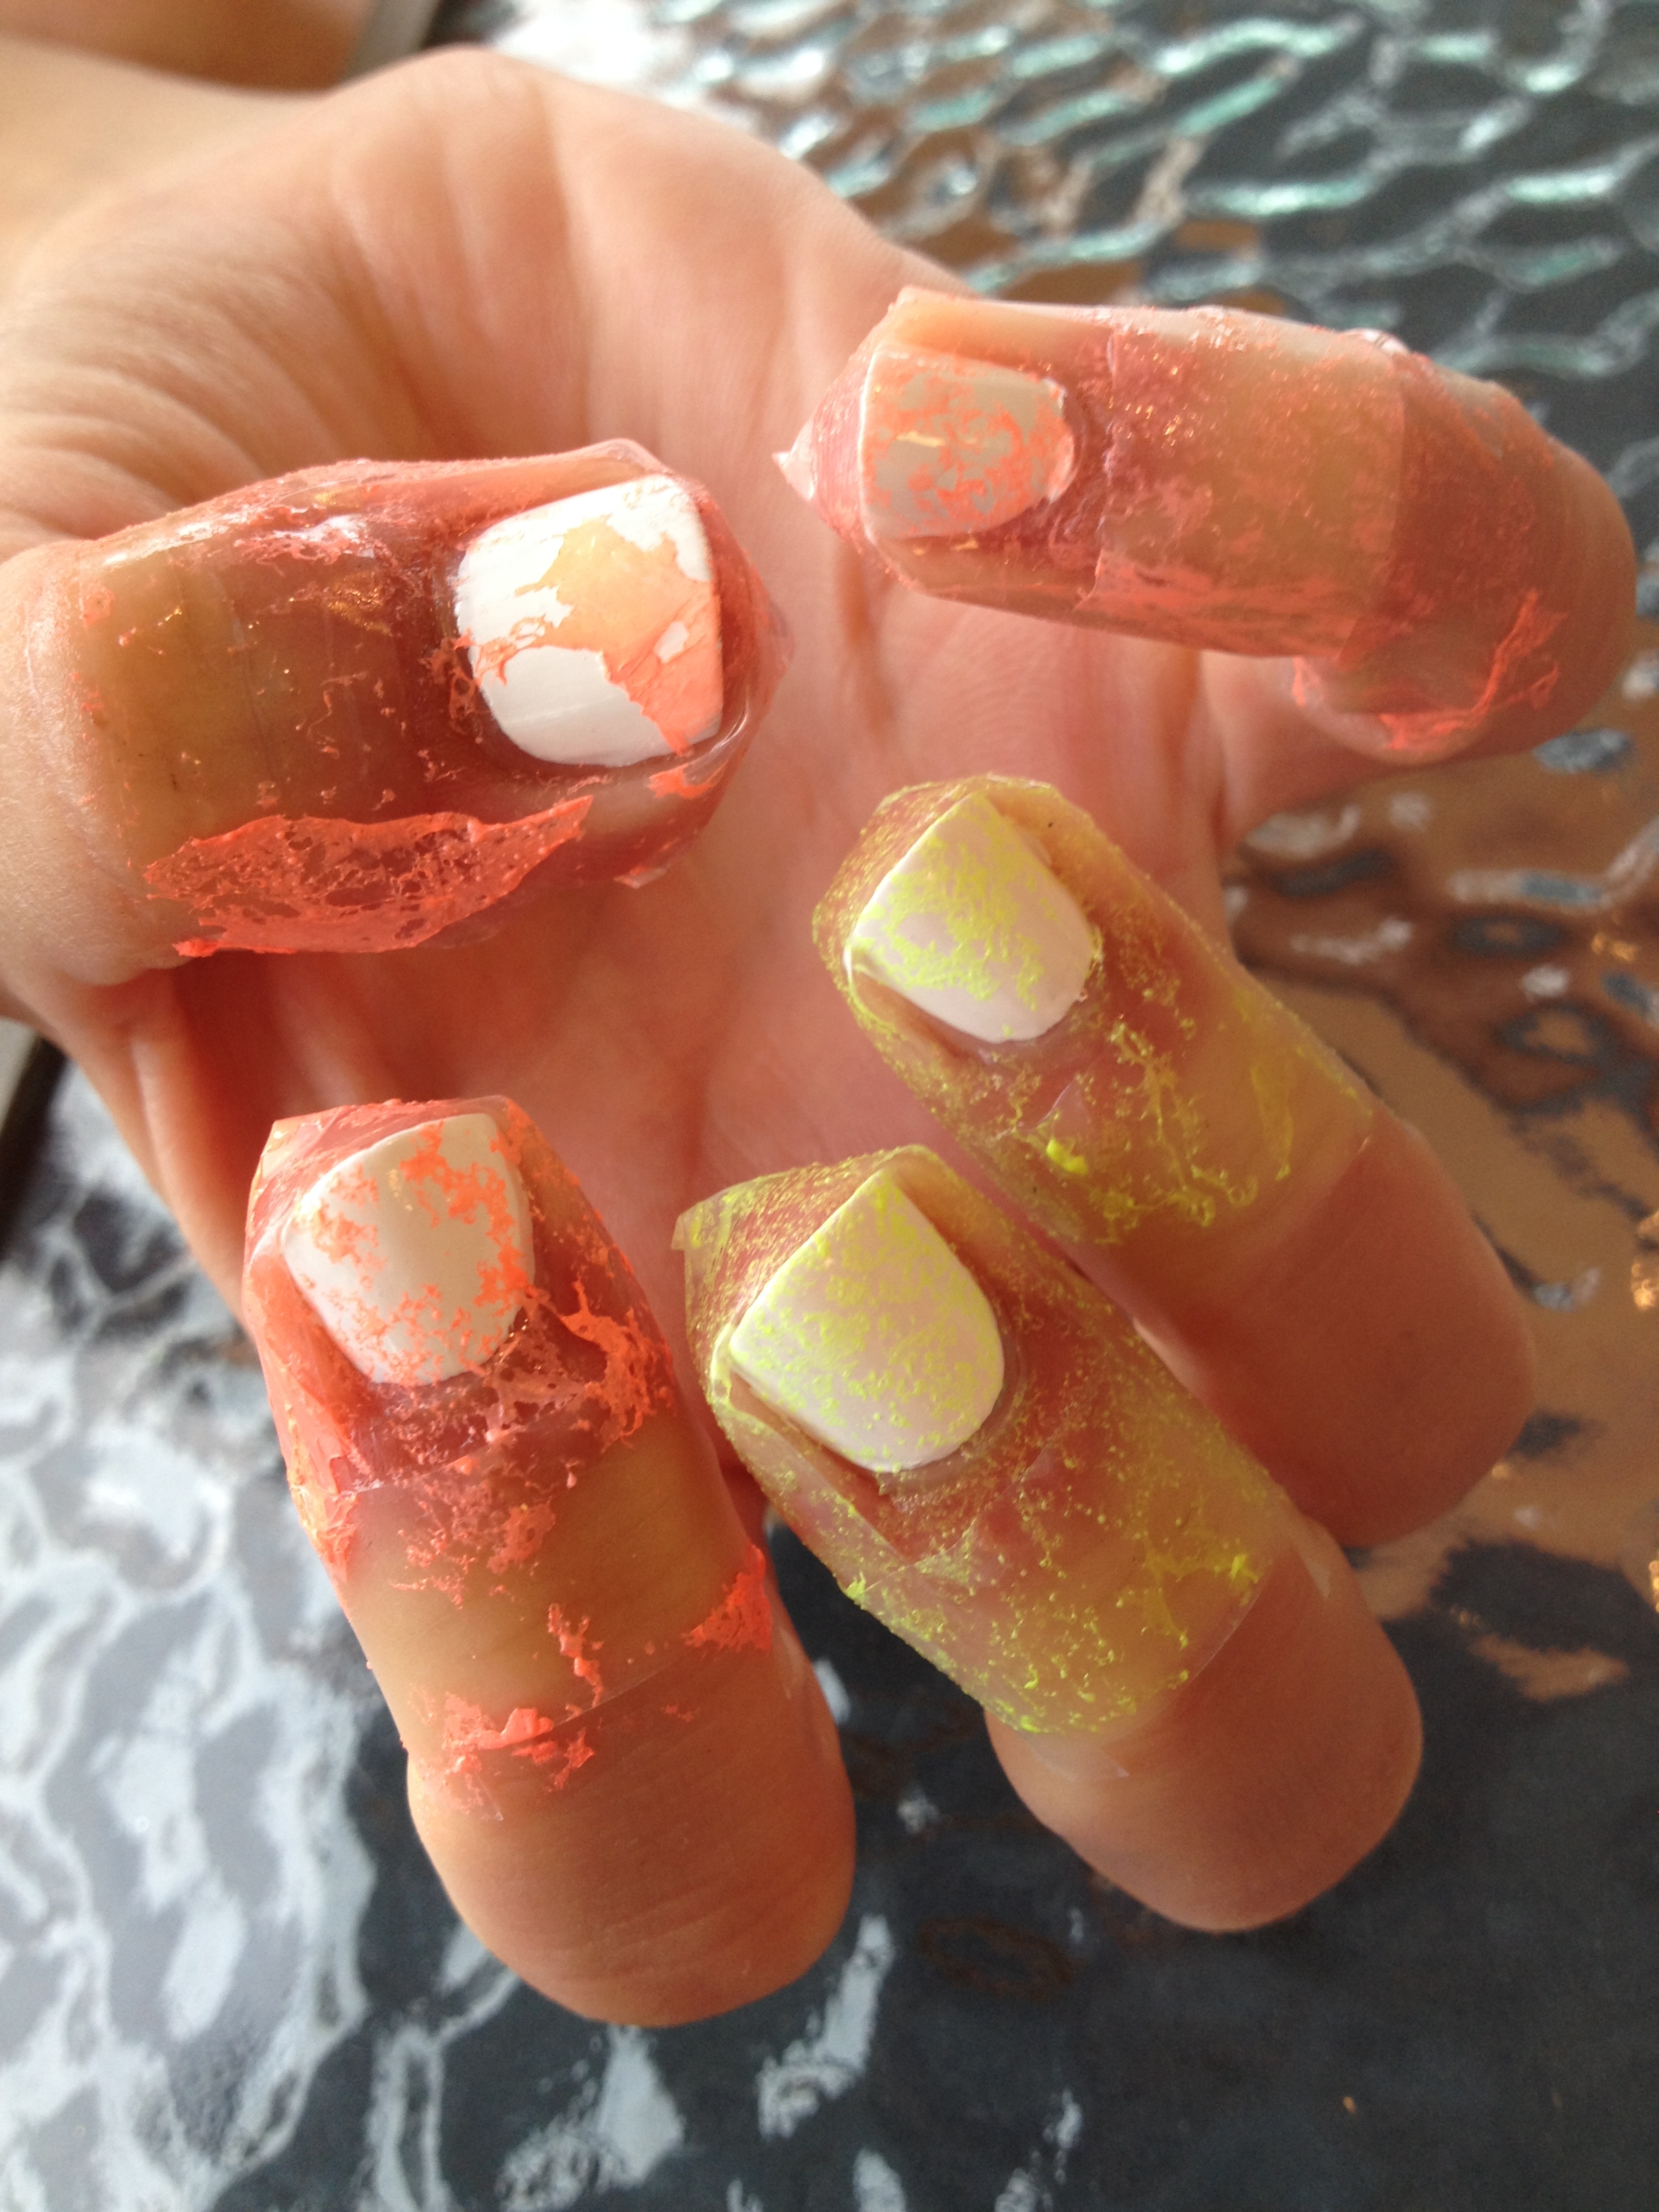
Now, spritz the polish that is floating on the water with an alcohol based spray from a distance of about 8 inches.  I used some old Bath & Body works stuff.  As you can (hopefully) see (in my crappy picture), this will cause the polish to break up.

IMG_2770

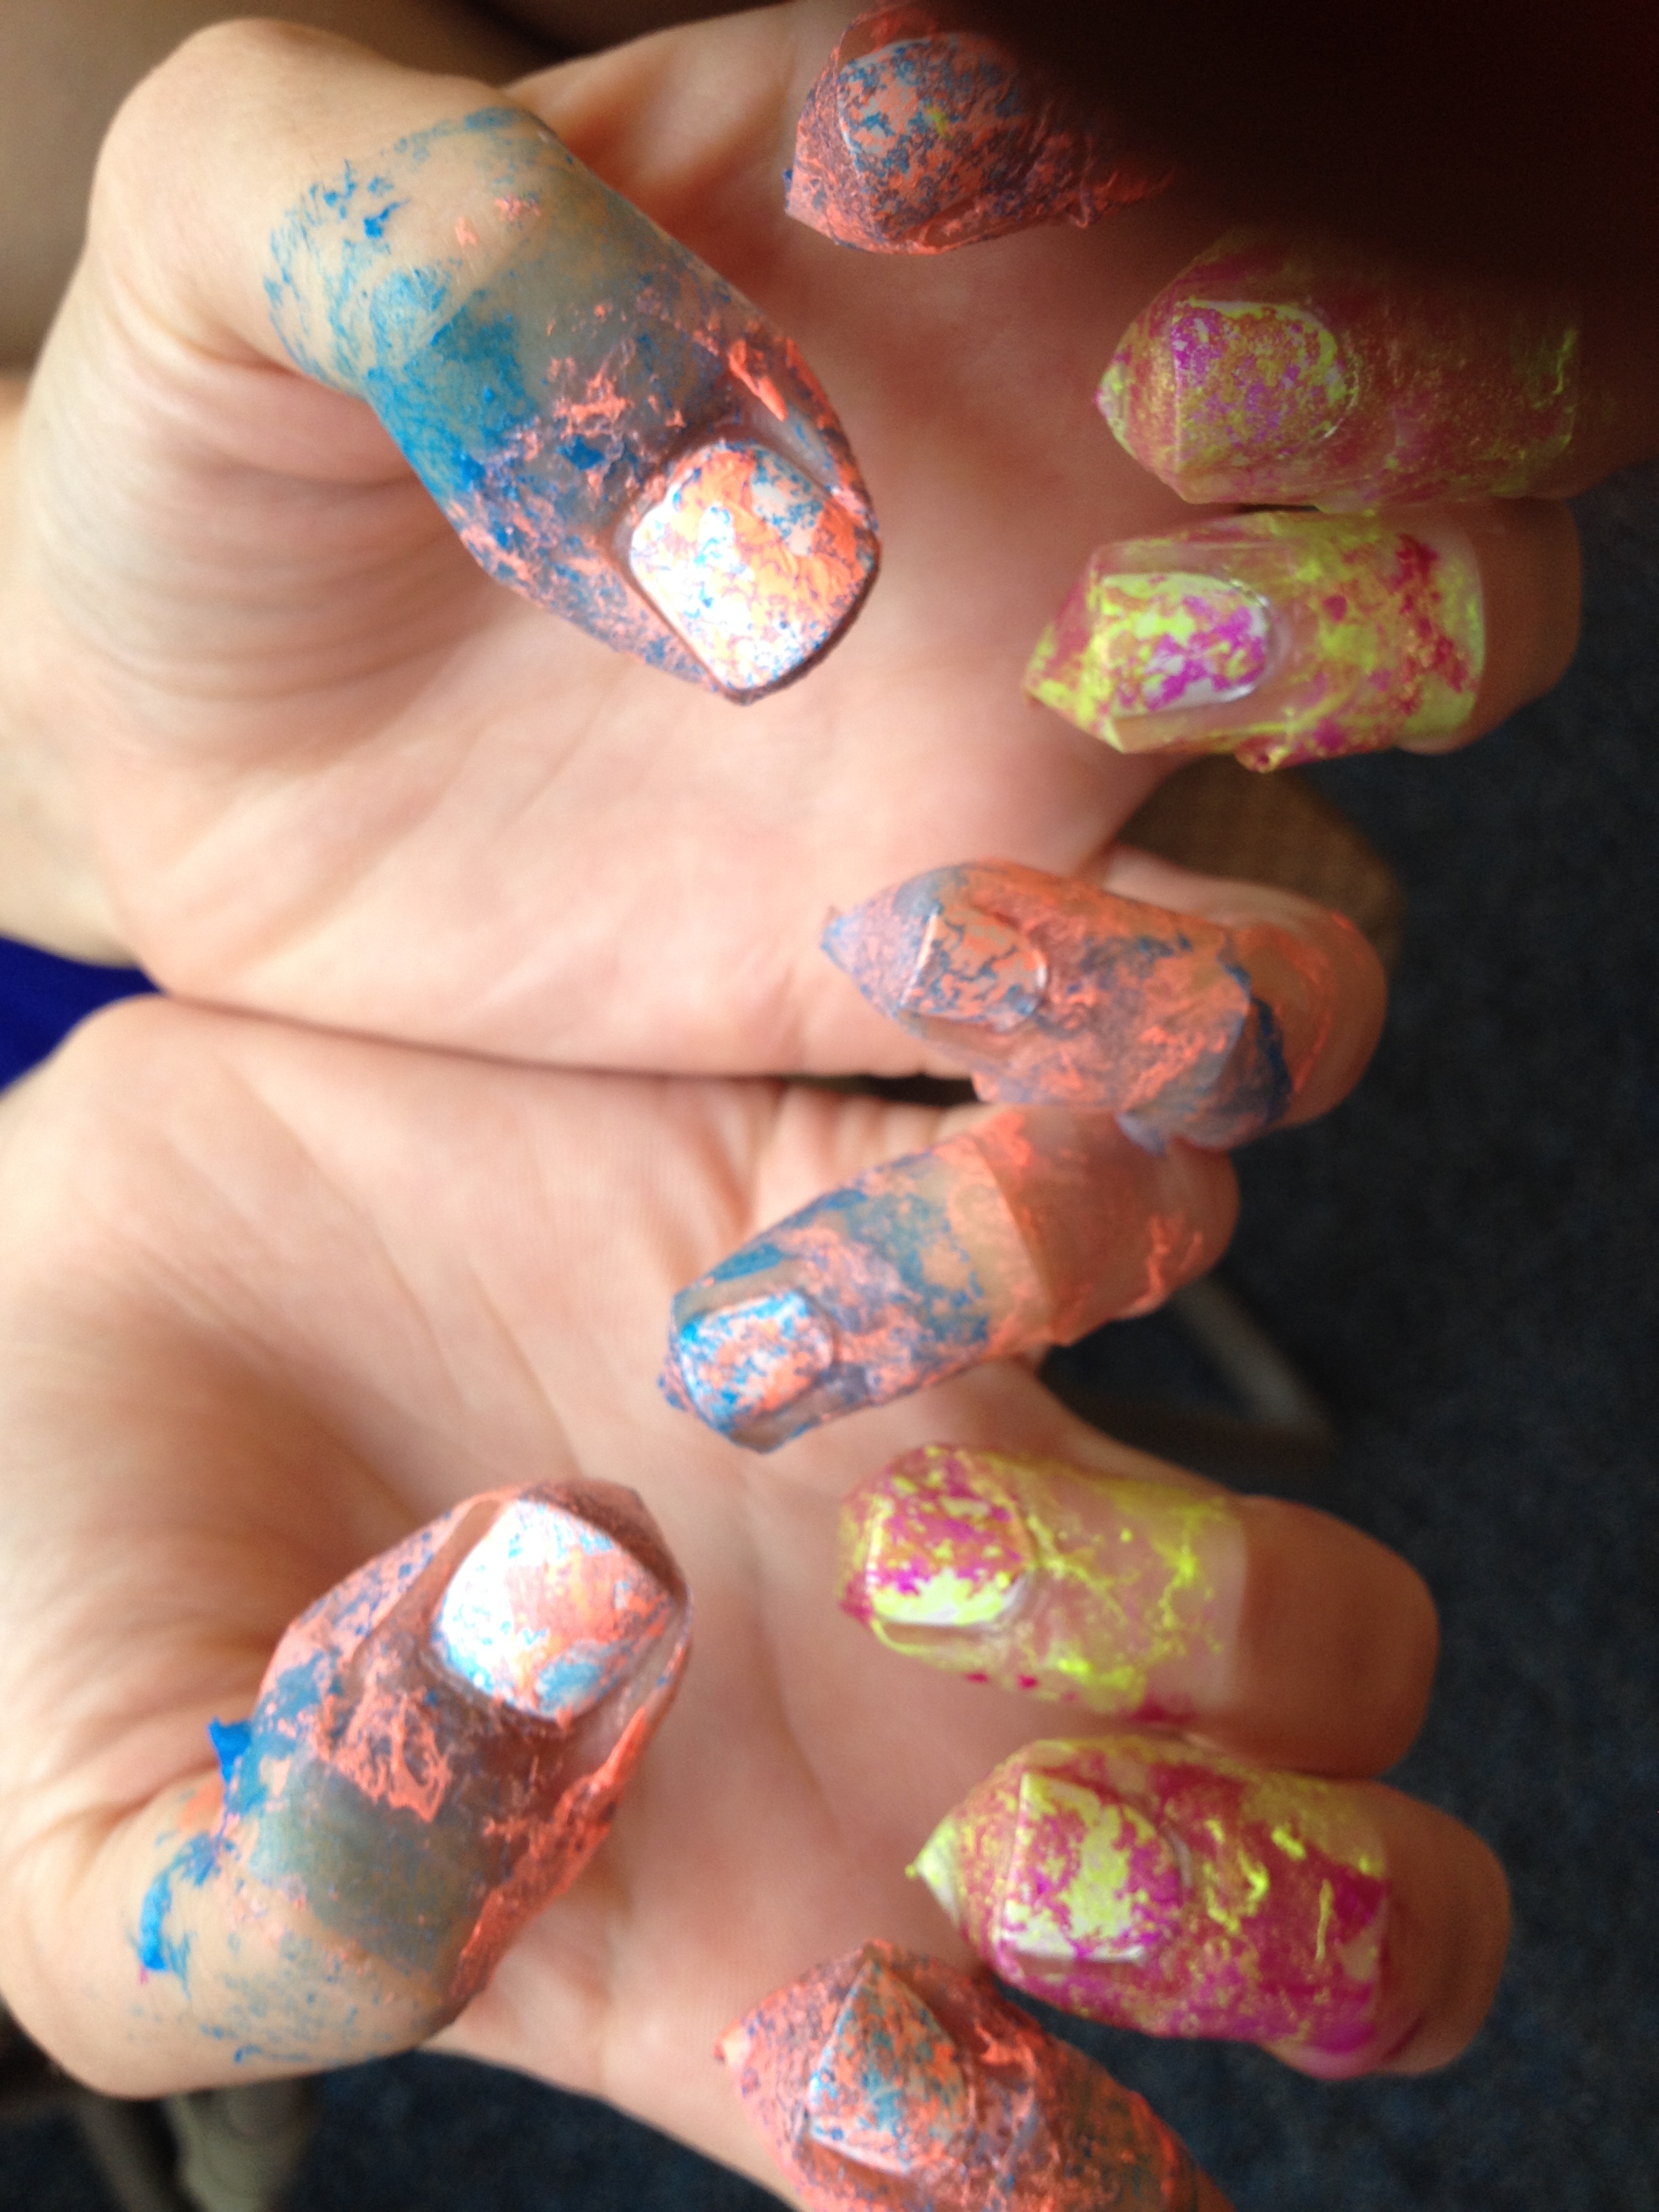
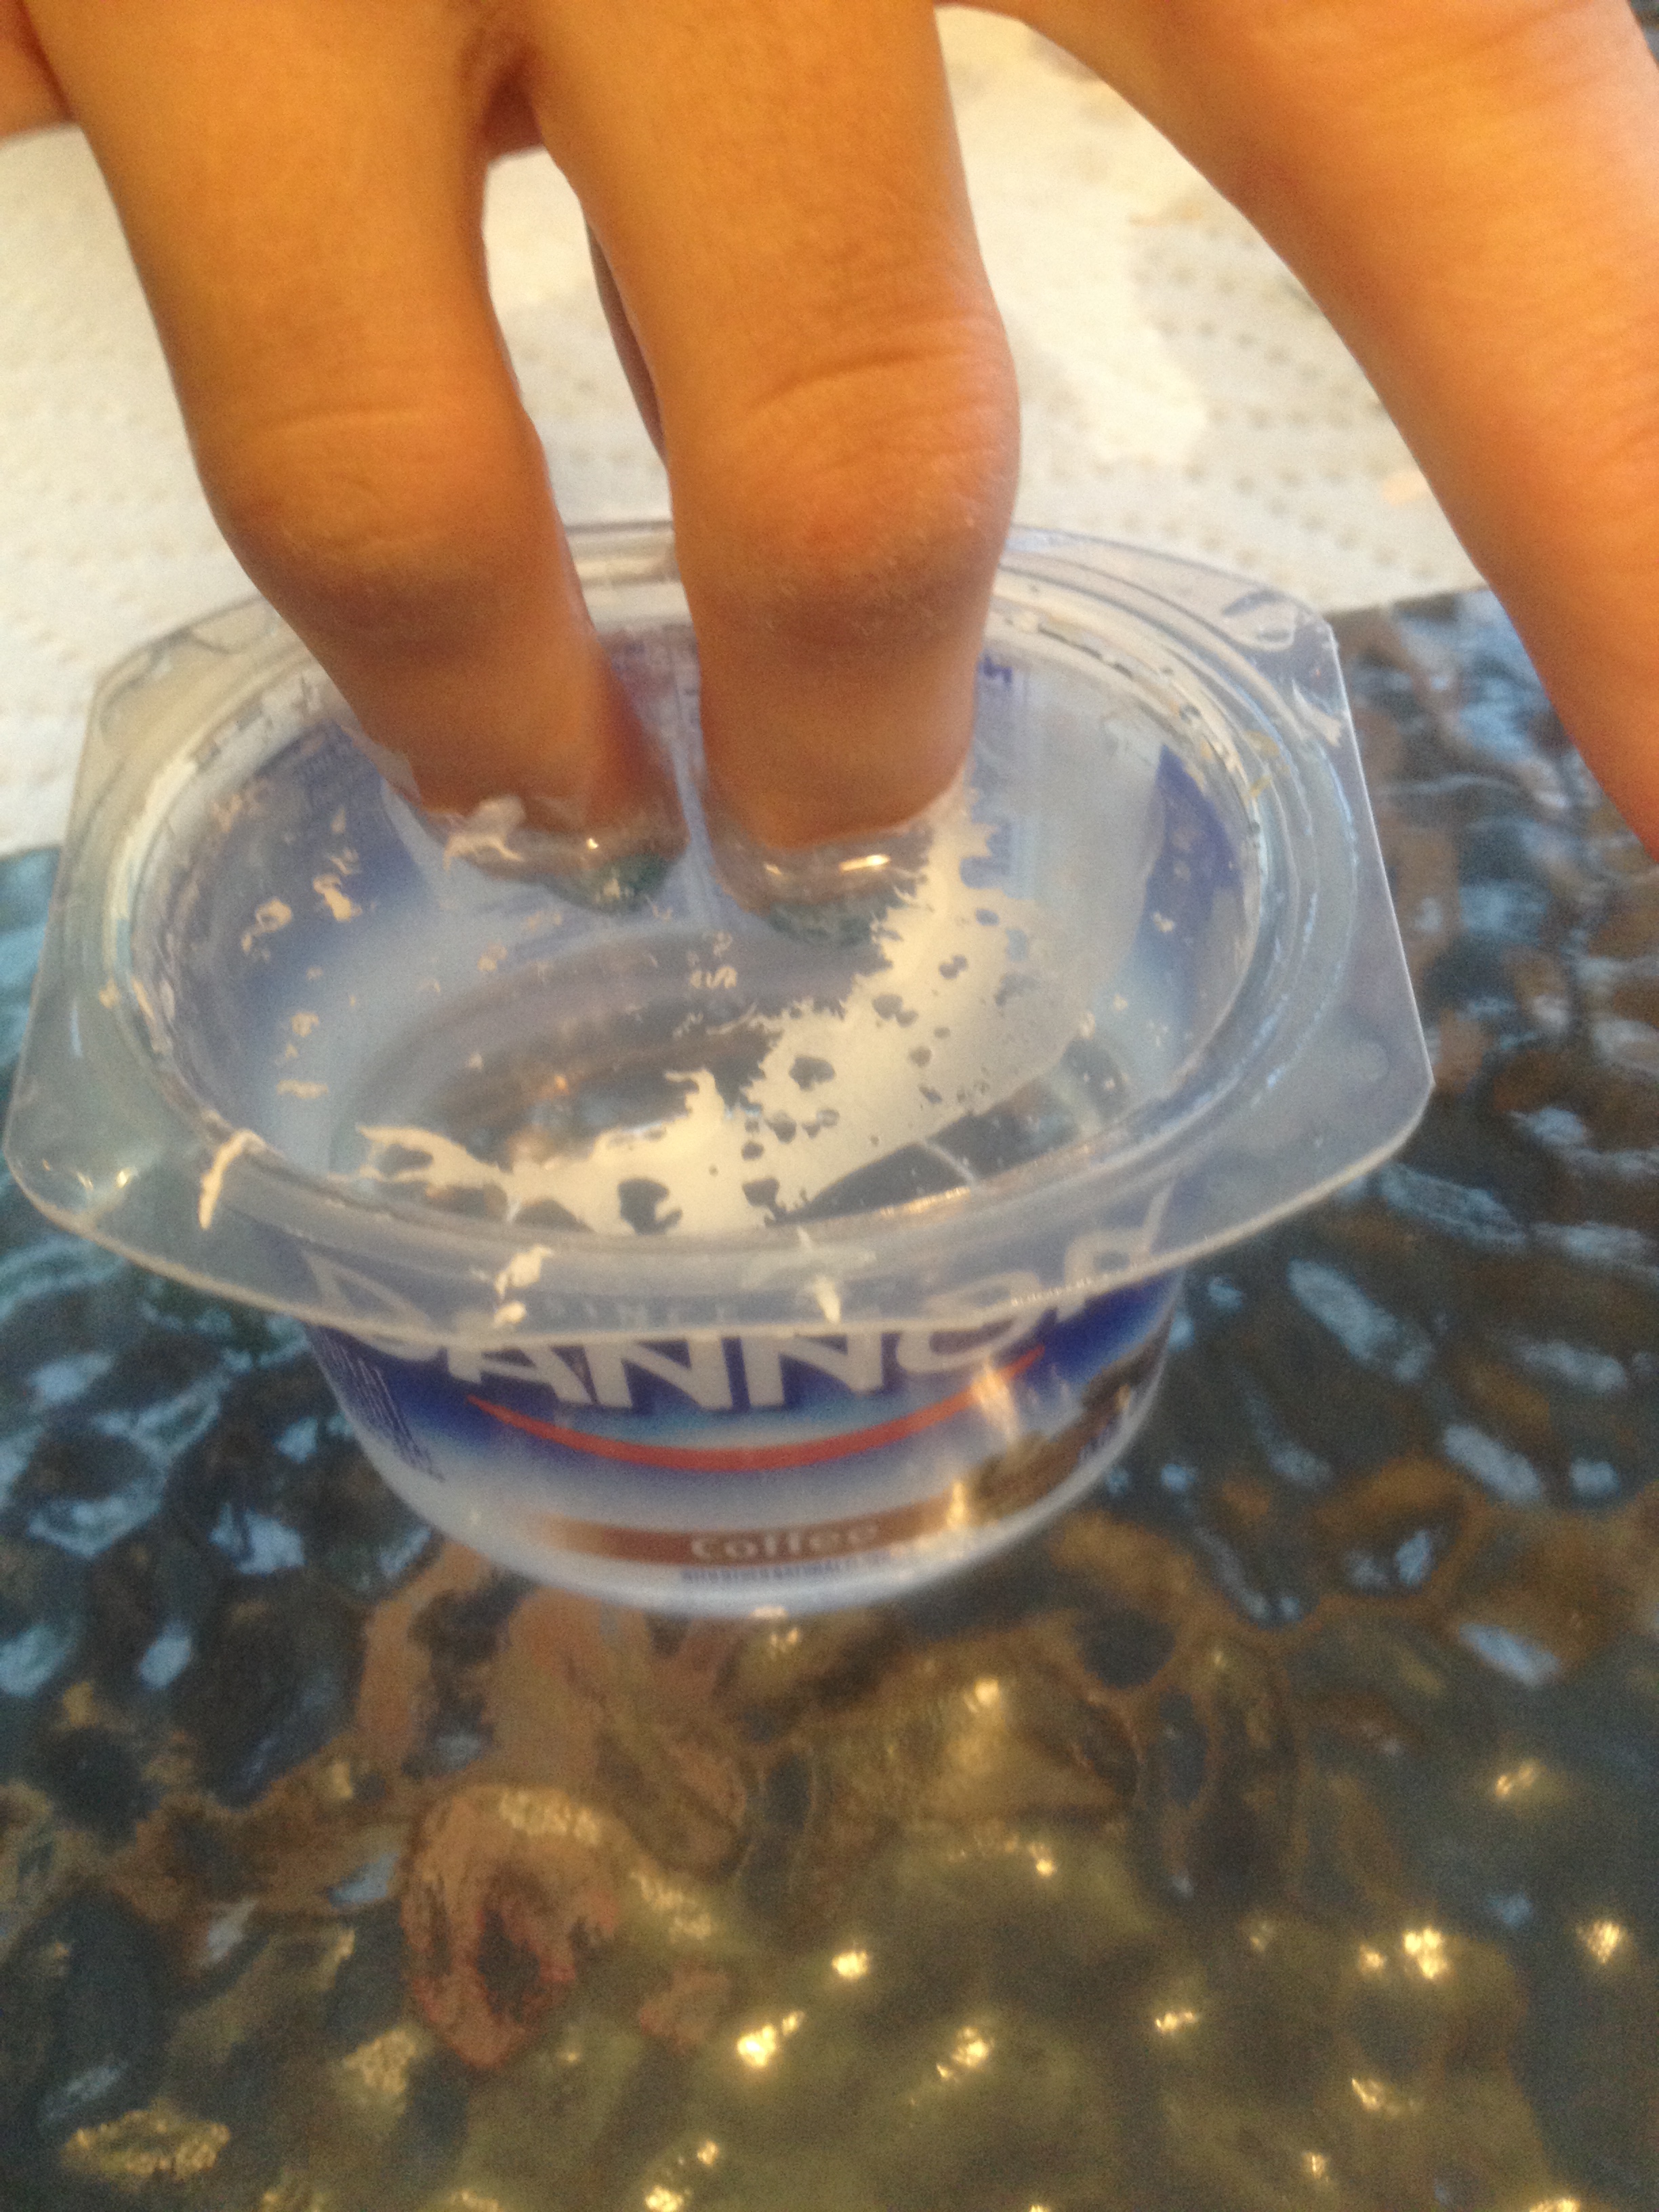
Next, dip your two blue fingers into the container and just hold them there.   I need to mention that this all needs to be done quickly.  The polish will begin to dry really quickly as soon as it spreads out on the water, so as soon as it spreads out, spray it, and within a few seconds of spraying the polish, dip your fingers in there.

IMG_2767

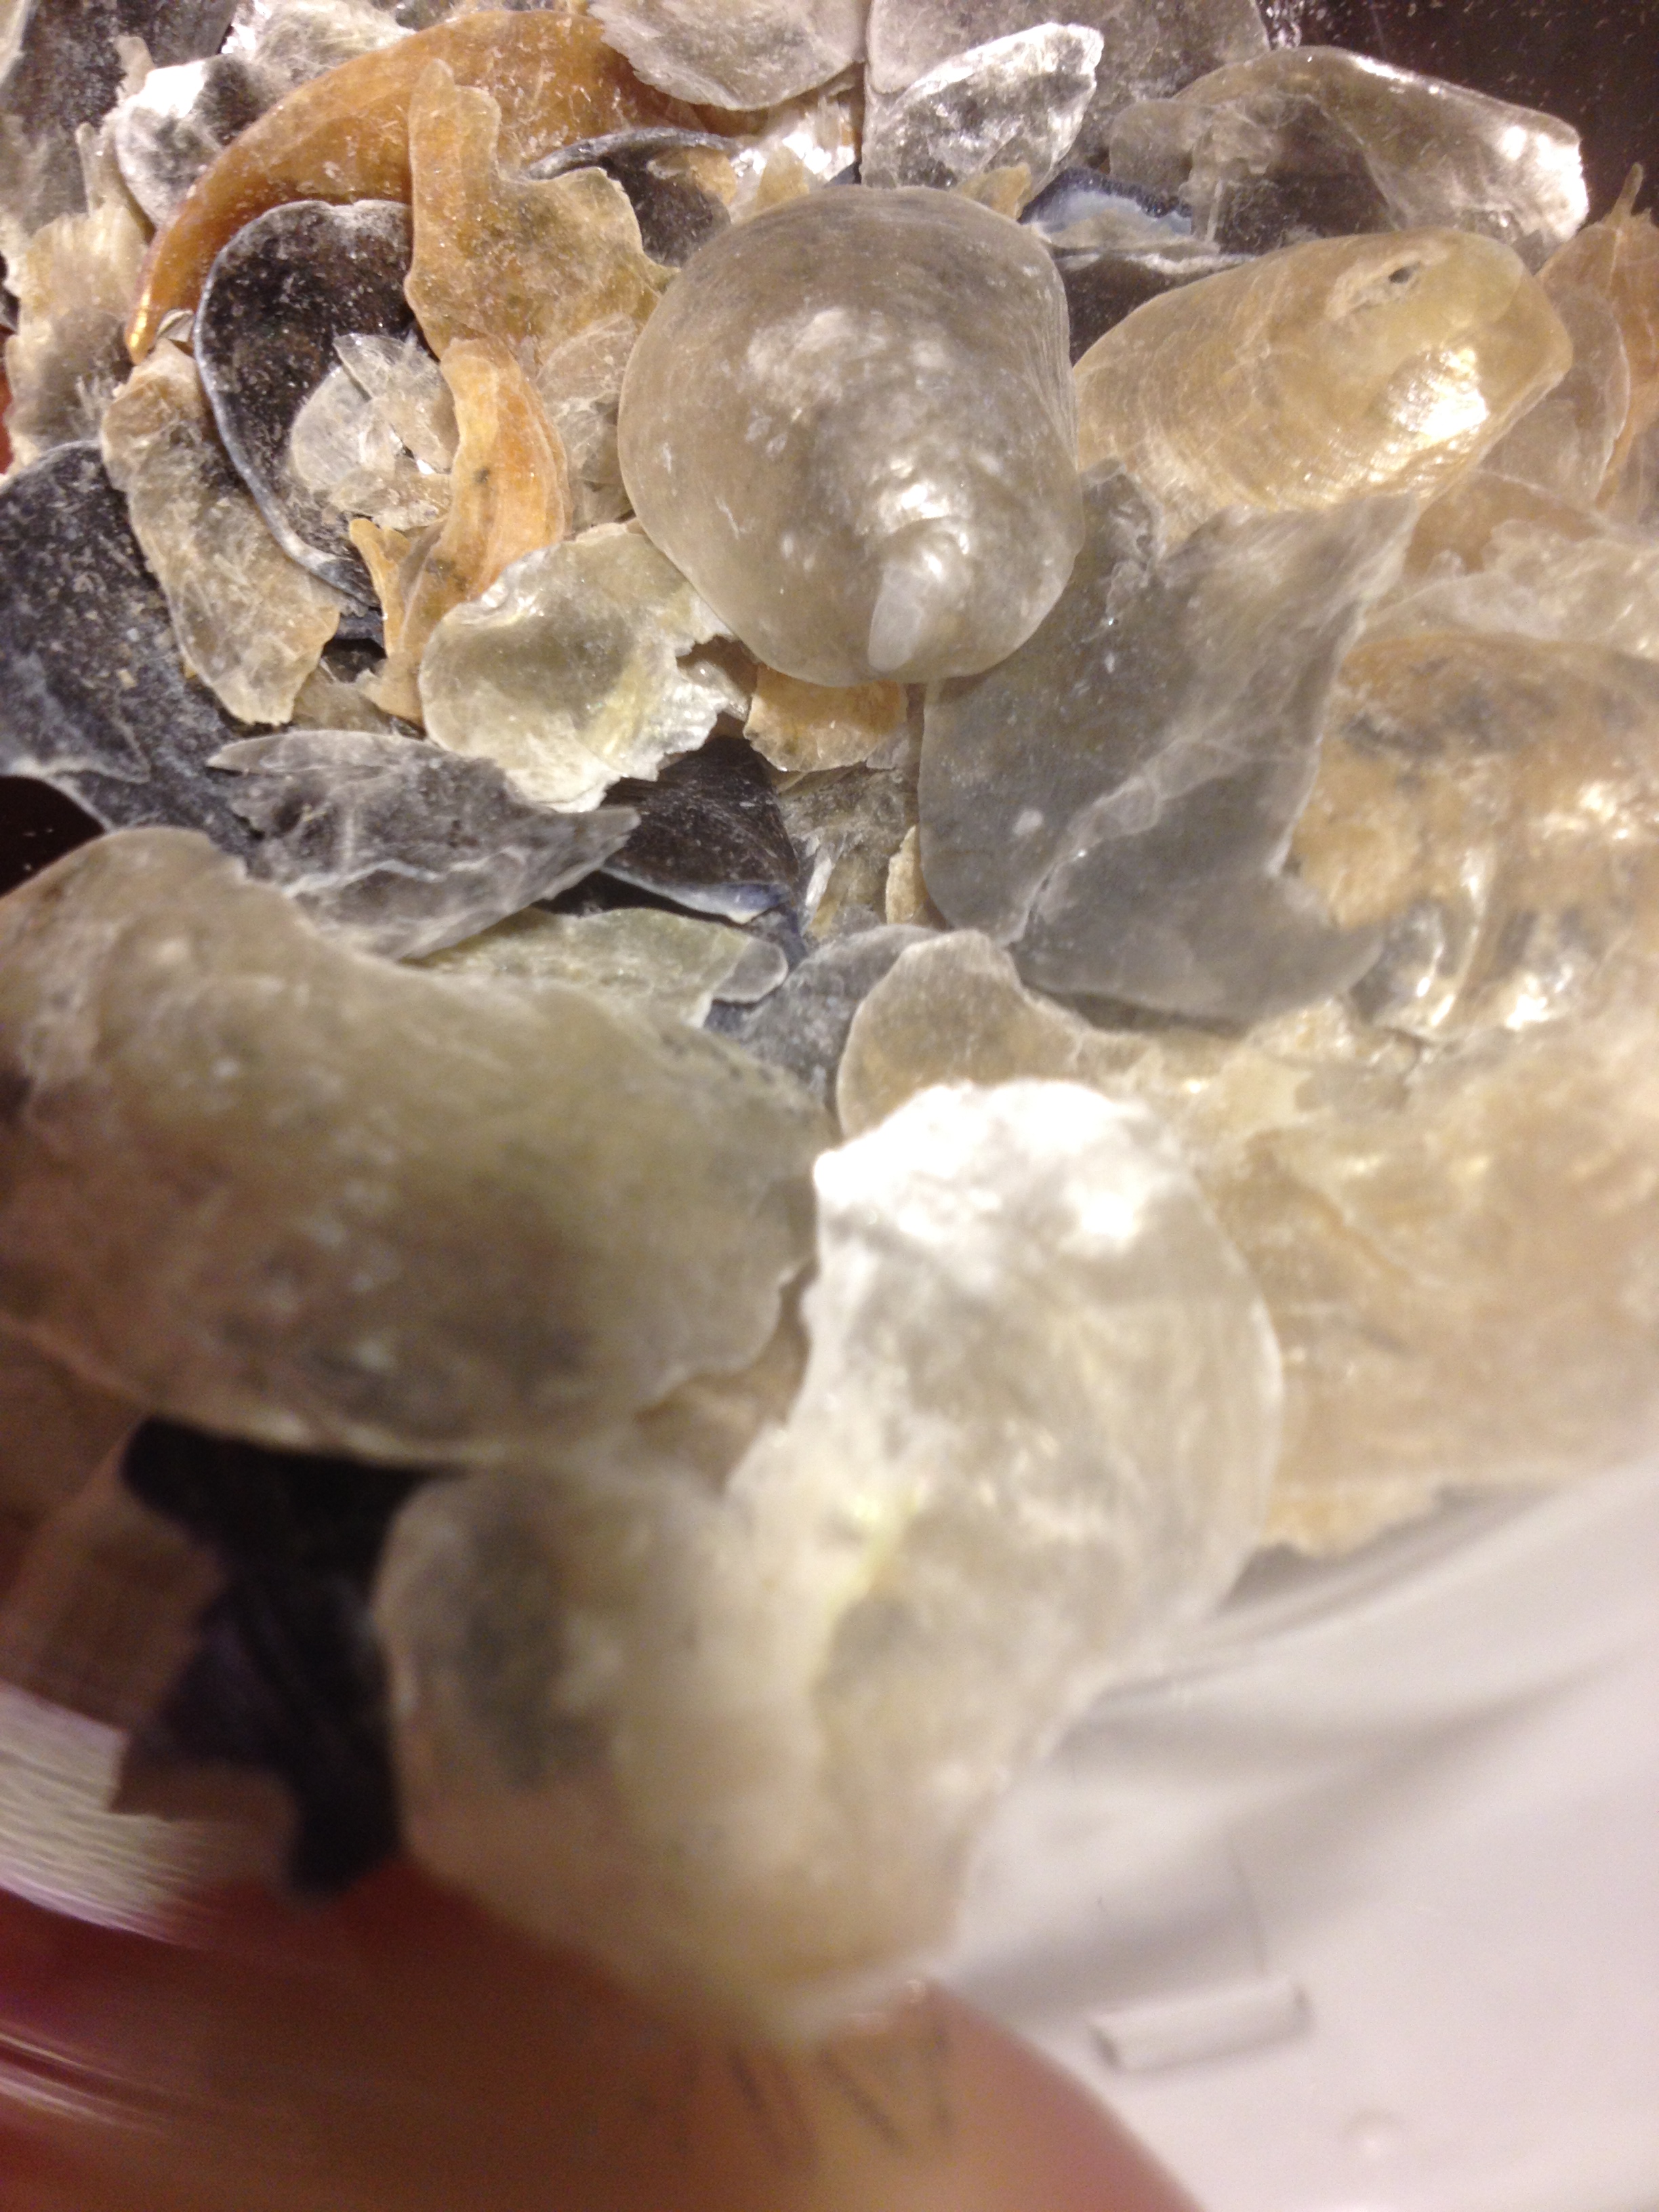
While your fingers are still underwater, blow on the surface of the water to dry the remaining nail polish.  Then while your fingers are still underwater, take a Q-tip and gather up all of the polish that’s still floating on the surface of the water.  You will be able to just sort of spin your Q-tip in the water and it will collect the polish.  Now it’s safe to pull your fingers out.

IMG_2776

Now you can see the reason for the tape.  It’s to keep all of that extra polish for sticking to your fingers, which will make cleanup a lot easier.

Just a little side note: If this whole messing with water thing just seems a little overwhelming, the middle and ring fingers would also look great with some blue, white, or sliver glitter polish instead.

Now it’s time to deal with our sand colored nails.  Take a dotting tool or toothpick dipped in your coral polish and make some starfish.  Use a stippling motion as you make each of the five starfish legs.   Starfish are sort of lumpy and irregular looking, so don’t worry if they don’t look perfect.  When the coral polish dries, go back and add some tiny white dots down each of the legs.

IMG_2771

Now that you’ve given your fingers a little time to dry, carefully take the tape off of your  Tweezers may help here.

Top everything off with a good, shiny quick dry top coat like Seche Vite.  After your nails have had a minute or so to dry, it’s time to clean up the extra white polish around your middle and ring fingers.  I like to use a little brush dipped in acetone.  Pure acetone is strong stuff, and it’s really drying to your hands and nails, but it gets the job done.

IMG_2780

The little brush I use is the e.l.f. concealer brush.  It works really well and it only costs $1.  In a pinch you can use a Q-tip, but it’s harder to get in really close to the edge of the nail.

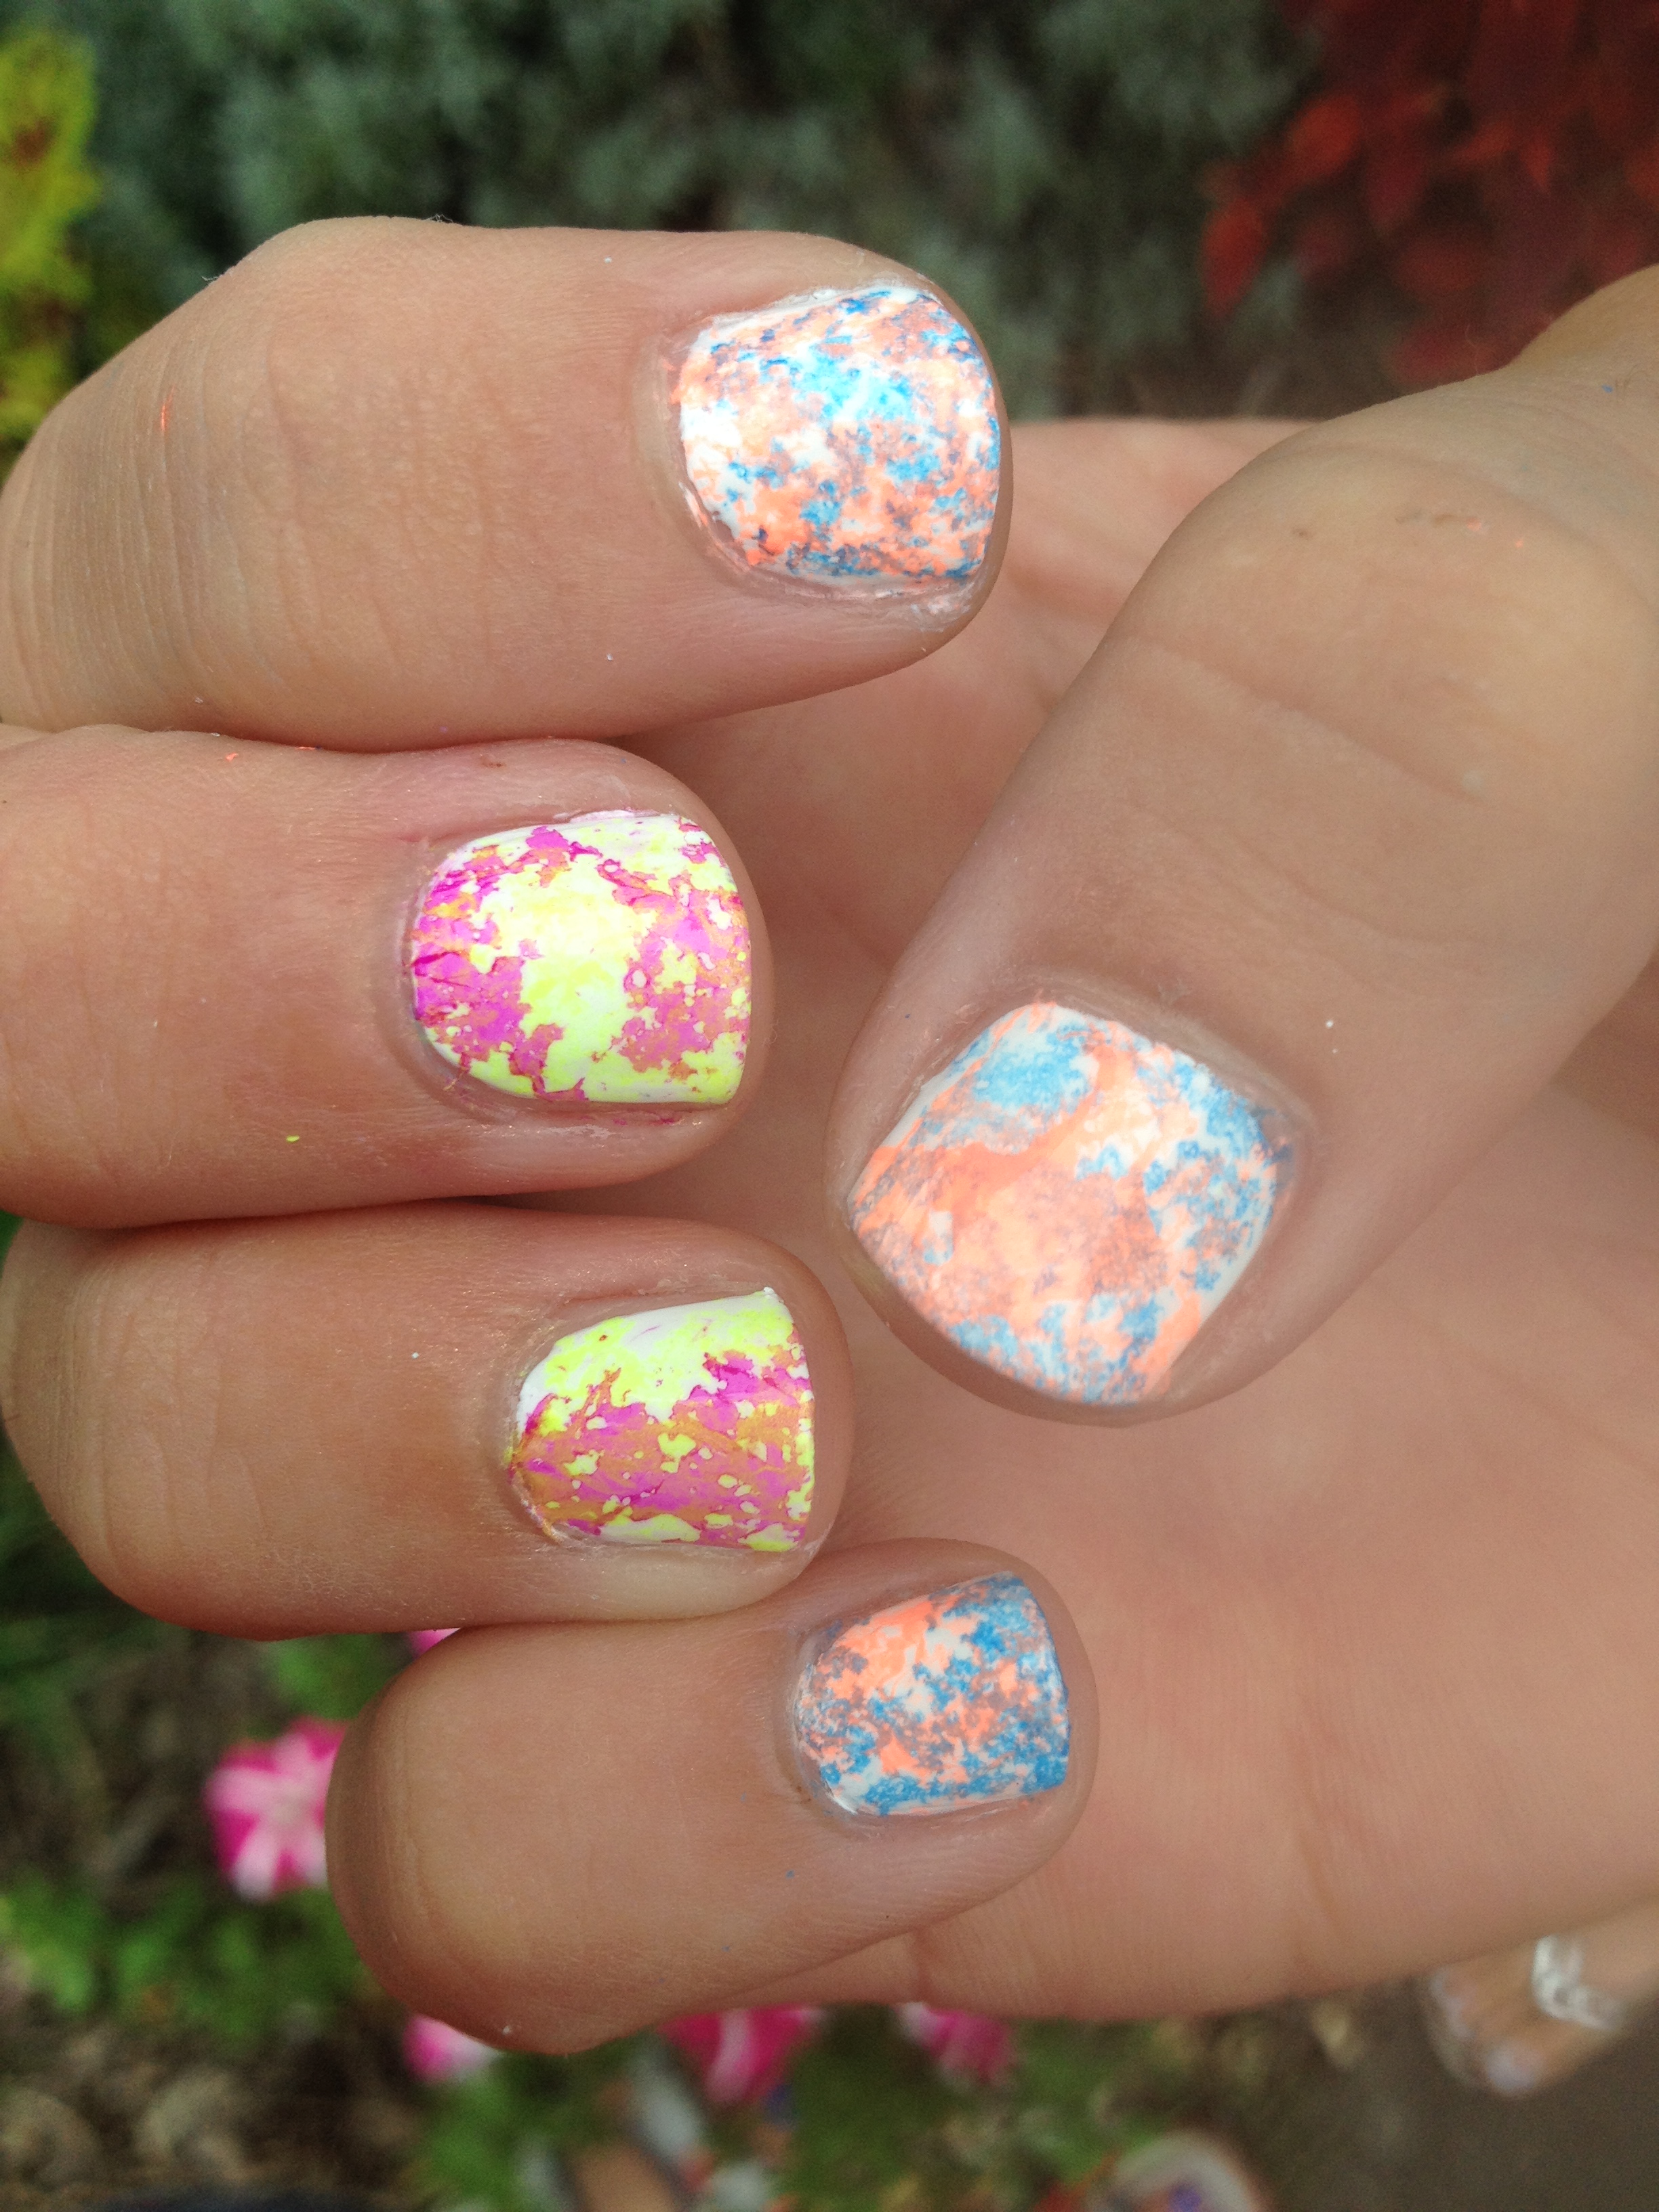
And here’s the finished look!

IMG_2793

If you give this a try, I’d LOVE to see your recreations!  You can post a picture on our Polish Me Snazzy facebook page, or use the hashtag #polishmesnazzy on instagram so I can see your work!  Thanks for reading!


Five Below Haul

I went into a Five Below store.  That’s a rarity, because well, I’m a solid 20 years older than their target demographic.   I had been in a Five Below a year or so ago, and I had a vague recollection of seeing nail polish there, so when my path crossed a Five Below a few weeks ago, I figured that it might be worth checking out. Was it ever!

Five Below is a chain of stores that specialize in trendy gadgets and accessories and whatnot  that appeal to the teen and tween crowd, so not surprisingly, the nail polish they carry is all very young and trendy.  They carry two lines of nail polish: Funky Fingers and Fresh Paint.  They were all $2 each or 3 for $5, which you could mix and match between the two lines.  I ended up with 6 polishes.  My little sis was kind enough to let me use her nails for swatching.  Here they are:

Fresh Paint: Guava

IMG_2681

This is a beautiful neon peach.  Although the middle and pinky fingers have a white base underneath, you don’t need it for it to be amazingly bright.  The formula is really great and it’s also a dupe for China Glaze Flip Flop Fantasy!  I had been itching for Flip Flop Fantasy for a few months, but I didn’t want to spend $7.  I actually went into a Sally Beauty Supply right after I picked this up and did a little comparison, and yep, they’re identical.

Fresh Paint: Sugar Crush

IMG_2686

This is an iridescent topper that pulls primarily orange, but also green, blue and yellow. It’s not really a glitter, but little flakes.  We tried it over Guava, white and black.  It looked great over Guava!  It sort of took Guava from just neon to classy neon.  It was not that amazing over white, but it was really fun over black!  I’m definitely going to be wearing it over black in the cooler months.

Funky Fingers: Glowstick

IMG_2690

This is a neon yellow that leans a little toward the green side of things with a subtle iridescent sheen.  Again, the middle and pinky fingers have a white base, which did make this polish a little brighter.

Funky Fingers: Pep Rally

IMG_2691

This is a really fun neon glitter with matte blue and pink hexes in different sizes, big green iridescent hexes, small metallic purple hexes, and small orange and purple bar glitter.  We swatched this glitter over Glowstick, white and black.  It really looked cool over all of those colors!  There are a few drawbacks with this polish.  The clear base is really thick and a little hard to work with.  I think I will end up using the makeup sponge method to apply this glitter.  Also, the glitters themselves were pretty thick, so it may take 2 or three layers of a thick top coat like Seche Vite to make the nails smooth.

Funky Fingers: Unicorn Farts

IMG_2694

This polish is all medium size metallic hex glitters in pretty much every color.  The glitter gives off light is a linear sort of way that gives the glitter the appearance of being curved, but it actually does lay flat on the nail.  The clear base is similar to that of Pep Rally, so I think I’m going to end up using the makeup sponge method with this one as well.  We tested it over white, black, nude, and green.  Actually, with the green I attempted a jelly sandwich, but it got a little thick and goopy   because of the thick clear base. This polish is just really fun and shiny and versatile, so I know I’ll get a lot of use out of it.

Funky Fingers: Sand & Stilettos

IMG_2695 IMG_2698

This polish should be called The Most Sparkly Polish In The World.  these pictures just aren’t doing it justice.  This is a light purple -almost gray- holographic micro glitter.  In the picture, I believe we have 3 coats on bare nail on the first, two coats over white on the middle finger, and two coats over black on the ring finger.  The glitter is so dense, that it’s opaque in 3 coats, which is pretty amazing.  There are two kinds of holographic glitters: scattered and linear.  Scattered reflect all different colors all over the place.  Linear reflects a more defined rainbow so that you can actually see bands of color.  I really feel this polish is both scattered and linear.  You definitely get different colored sparkles all over the nail, but when sunlight hits the bottle of polish, I can see a rainbow, too.  I have this color on my toes now and I just feel like my toenails are covered in tiny diamonds.   Seriously, it’s the kind of polish that you just can’t stop staring at.

The polishes from this haul are so fun and I feel like they go together really well!  I think I could do a ton of different looks only using these 6 polishes.  If you follow me in instagram, you may have seen my current doticure using Guava and Sand & Stilettos.  They’re so fun together!

Thus concludeth my Five Below haul.  I highly recommend that you check out the polishes at Five Below, and if you do, please let me know what you think and what polishes you get!


Nails of the Day

Here’s what I’m currently sporting on my nails:

IMG_2722

The pink color is Wet n Wild Tickled Pink and the green color is my Frankenpolish that I made here.

The gold glitter I used is from Sally Girl, available at Sally Beauty Supply.  You know how sometimes glitter polish is in a really thick clear base and it seems like you can’t get the glitter coverage that you want on your nails without applying a bunch of really thick coats?  Well, there’s a way around that.

For this look, I first waited until my pink and green polish was mostly dry.  Then I brushed the gold glitter polish onto a makeup sponge like this:

IMG_2724

Then I waited just a few seconds so that the clear base was mostly absorbed into the sponge, but still wet.  Then I dabbed the sponge with the glitter directly onto my nail.  This technique works like a charm!  I learned this from jessface90 on youtube.  Check out her tutorial on this.

I then applied the NYC You Matte Me Crazy top coat.  I love how the glitter looks with the matte top coat!  The glitter is still shiny, but in more of a frosted glass sort of way.

If you found this information helpful, I’d be honored if you’d share this by using the little “share” buttons below!  If you try this technique, I’d love to see your results, so use the hashtag #polishmesnazzy on instagram or facebook so that I can find your posts.  Thanks for reading!

Nails of the Day

So, here are my nails of the day… My NOTD, as they say. 

IMG_2627

Whoa, I just learned how to add a boarder to my pictures.  I’m pretty stoked about that.

I was pretty happy to find this L.A. Colors Flash Pop in my local Dollar General / Family Dollar.  I’ve never seen these sets anywhere else, so my guess is that they may be exclusive to those stores.  It’s weird that there are polishes that are exclusive to Dollar General / Family Dollar, but there totally are.  More about that at a later time.

They thing that prompted me to buy this was the neon pink glitter.  Outside of the indie polish scene, neon glitter is pretty darn hard to find.  At $2.50, I couldn’t pass it up.

The pink glitter is mixed with some shredded black and silver glitter along with some silver micro glitter and tiny silver bar glitter.  The pink glitters are pretty thin transparent, so unfortunately, I don’t think they would show up well over a dark color, but I’ll have to test that out later to be sure.  Since the glitters are thin, they do lay nice and flat on the nail. The clear base is a bit gunky, so you sort of have to have a little patience to get it to apply how you want it, but it all smoothed out nicely after applying my Seche Vite top coat. 

I haven’t tried the purple shade that came on the other end, so I can’t give my 2 cents about that polish.  (It looks sort of blue in the picture, but it really is dark purple.)

This particular manicure is part of an experiment to compare 2 different base coats, so you’ll see these nails again later after the results are in. 


My Disney Nails

I’m a Disney fan.  I don’t consider myself to be an over-the-top crazy Disney lover, but I do have an affinity for the Mouse and I enjoy a trip to one of his parks every 5 years or so.

Earlier this year, my hubby and I enjoyed a week of magic down in Walt Disney World.  Leading up to, and during that trip, I made sure that I was always sporting nails that would be Mouse approved.  I thought I’d share those looks with you!

*I do want to put out a little disclaimer that I didn’t come up with these designs 100% on my own, but a number of months have passed, so I’m not exactly sure where I got some of these ideas. There are are some really creative nail artists out there, and I don’t want to get into a beef with anyone for stealing a design.  If one of these designs was originally yours, feel free to contact me so that I can give you proper credit.

Anyway, here are some of my Disney nail recreations:

2013-07-09 13.34.34

The base was a light neon pink.  I loved these nails!  Please forgive the sloppiness around the cuticles in this pic.  My technique has improved since then!

2013-12-25 12.38.41

These aren’t actually my nails, but nails I did on a friend.

2014-01-17 21.22.13

These were pretty tricky to do, but I loved them!  These  were my nails for the first half of our trip.

2014-01-16 14.01.13

These were the toes I sported for our trip.  Yes, those little faces took forever to get right!

2014-01-23 09.45.10

This is the look I sported for the second half of our trip.   These were super simple, and I got tons of compliments on them while we were in the parks!  Note the refillable Disney mug in the background.

Just looking at these pictures reminds me of our trip and gives me the warm Disney fuzzies.  Sporting special nails for a particular event (or vacation in this instance) really does add a little something extra.  Don’t be afraid to nails that are bold and bright, if the occasion is right!