You know how facebook likes to show you what you posted several years ago on this same day? Well, a few days ago, this atrocity popped up on my timeline:  I made the image nice and big so that you can see just how terrible it is. My black lines are terrible, apparently I’d never heard about clean up, and what’s with the grotesque hand pose? I felt like I needed to recreate this look, only better.
Here’s what I did:
 I started with a base coat, of course. I’ve been using Rejuvacote for…. I’m not really sure. Six month, maybe? This is still my first bottle and I still have about half of it left. It had really helped the condition of my nails. They are just so much stronger and rarely peel anymore. It’s about $10, but that’s not bad at all considering how long a bottle lasts.
 Next I applied a coat of a sheer nude colored polish. I think this is some old Mary Kay stuff that I’ve had for years and years. I don’t even remember buying it, so I’m not really sure how I ended up with it. I used this just to tone down the yellowness of my nails, but really, you can just skip this step if you feel like it.
I then applied some liquid latex around the sides of my nails. This is just to make clean up easier in the end. The stuff I use  is actually hair glue and I got it for super cheap ($2 maybe) at Sally Beauty Supply. You could also use school glue instead. Whatever you use, just make sure you let it dry before you move on. Oh, here’s something that nobody ever mentions about liquid latex: it sticks to itself. So, if you have the sides of your fingers covered with latex (like I do in this picture), you have to be really careful that your fingers don’t touch each other. If the latex on one finger touches the latex on its neighboring finger, it will just stick together an pull right off one finger.
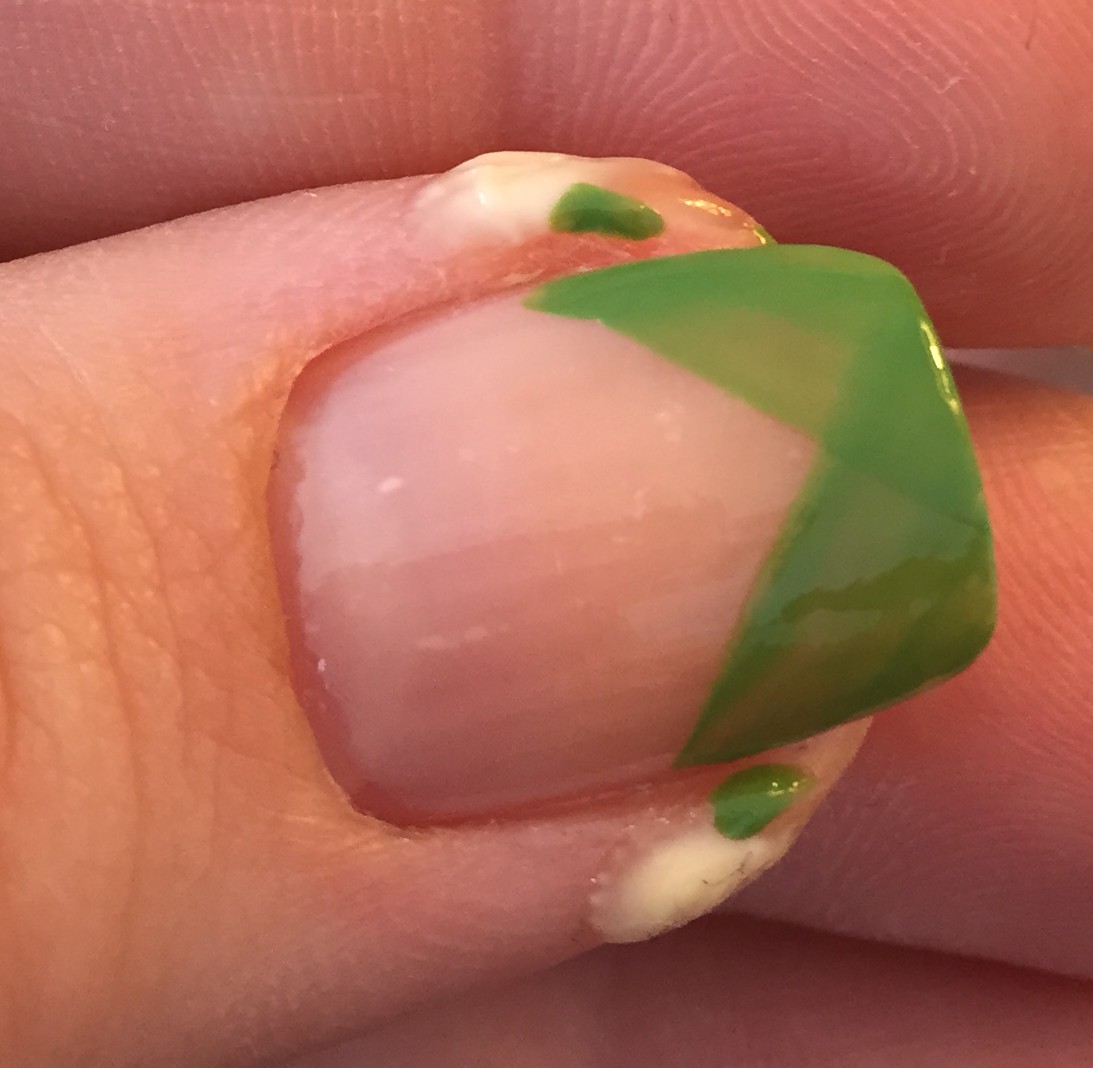 Next, I took orange, purple, and green polishes, and using the brushes in the bottles, I did two swipes on each nail to make a “V” shape. I started about halfway down the nail and just sort of dragged the brush, aiming for the opposing corner. If your lines aren’t perfectly straight, it’s not a big
  deal, because you’re going to go over them with black anyway.
I then went over each nail with a second coat to make sure that it was opaque. Oh, and I painted my ring finger solid green. It was at this point that I realized that I wouldn’t have had to put a coat of the nude polish on my ring finger or put latex on that finger either. Oh well. Stuff like that happens when you watch TV while you do your nails.
 I then peeled off the latex. Use tweezers or an orange stick or something to remove the latex. Obviously, if you use your nails, you’re just going to mess stuff up.
As you can see, most of the extra polish came off with the latex, leaving  just a little bit to clean up. I then used my little $1 elf concealer brush dipped in acetone to remove the little bit of remaining polish around my nails. Seriously, this is the best little brush. And it’s $1. Who doesn’t love good quality things that are also cheap? These little brushes last for a pretty long time, too, and when they finally do wear out, hey, they only cost $1 to replace. I usually get about 6 months use out of one of these brushes, and that’s doing my nails 2-3 times a week.
Okay, at this point, I got a little excited and sort of forgot to take pictures of each little step as I was doing it. I’ll talk you through it.
I used black acrylic (or craft) paint and a thin brush that I got at Michael’s to line the “Vs” on my nails. For my thumb, I  started on the left side of my nail and painted a thin line to the point of the “V”. Then I started on the right side of my thumbnail and painted a thin line that I extended the whole way to the corner of my nail.
I then did the same thing on each finger (except for my ring finger), mirroring the design on each finger, just to keep it interesting looking. lastly, I went back and added the “stitches”. As you can see, I sort of added the stitches in pairs.
On my ring finger, started by making two black circles with my largest dotting tool right in the middle of my finger for the eyes. Using my little brush, I added hair, a mouth (with stitches), and eyebrows. I then took white paint on the same large dotting tool and added the whites of the eyes, being careful not to cover the entire black circle underneath it. Then I used a little dotting tool with black paint to add the pupils of the eyes. I pretty much did that  immediately after I did the white dots, so the white paint was still wet. Then I let it dry for a while.
Because they eyes had so many layers of paint, they definitely sort of stuck out. After the eyes were dry to the touch, but not completely dried through (maybe 10 minutes), I carefully pressed the eyes down with my finger. Here’s a sideways shot of my finger after I smooshed the eyes down. Hopefully you can tell how I sort of flattened them.
 I let them dry for a while longer before I added the top coat. I’d made the mistake in the past of not letting the acrylic paint dry completely before applying top coat, and it really shortens the lifespan of your manicure.
So here’s the final look! Much better than two years ago!
In case you’re wondering, the polishes I used are NYC – High Line  Green, Sally Girl – Mango, and Ulta – Tinsel Town.
Well, that’s it! you’ve got one more day to paint your nails for Halloween, so get crackin’! Have a fun, safe, and smart holiday! Don’t do anything stupid!
Thanks for reading!