

Within the last week, I’ve seen at least four nail bloggers and/or youtubers talking about this fun new trend in nails art: shattered glass nails. They all say that this trend started in South Korea, and if everyone says it, it must be true. Like Wikipedia. If it’s on Wikipedia, it must be true. So I’m just going to say what everyone else is saying. This trend was stared in South Korea.
For the shattered glass effect, you pretty much take tiny triangles of iridescent tissue paper, and and apply them to your nails  sort of randomly. It looks really cool, but I wanted to try something a little bit different, since everyone has been doing the little triangles thing. I opted for stripes. Here’s how I got this look.
The first thing I needed to do was get me some iridescent tissue paper. I checked around my little town first, but I had no luck, so I needed to head down the road a few miles to either a craft store or a party supply store. Even thought I  had a coupon for Michael’s, I opted to go to Party City. In Party City, I can pretty much march right it, pick up the thing I need, pay for it, and get out. Michael’s will suck me in for two hours, and then I end up spending $150 on enough supplies to make a bar of soap and crochet a scarf for every single person I know. Plus maybe I want to take up beading and oil painting… Anyway, at Party City I got the smallest pack of iridescent tissue paper they had and it cost me $2.99. Make sure you actually get the iridescent stuff, and not just the clear stuff. It should shimmer pink and green. By the way, they call it iridescent tissue paper, but it’s not actually
  paper. It’s a really thin plastic type stuff. And I’m getting tired of typing out “iridescent tissue paper” so from now on, I’m just going to refer to it as ITP.
So, I got my ITP home and I cut off a little triangle that was about 2″ x 3″. In the end, I didn’t need nearly that much. I cut it into little thin strips, and then cut the strips into lengths that were about a half an inch, give or take. 
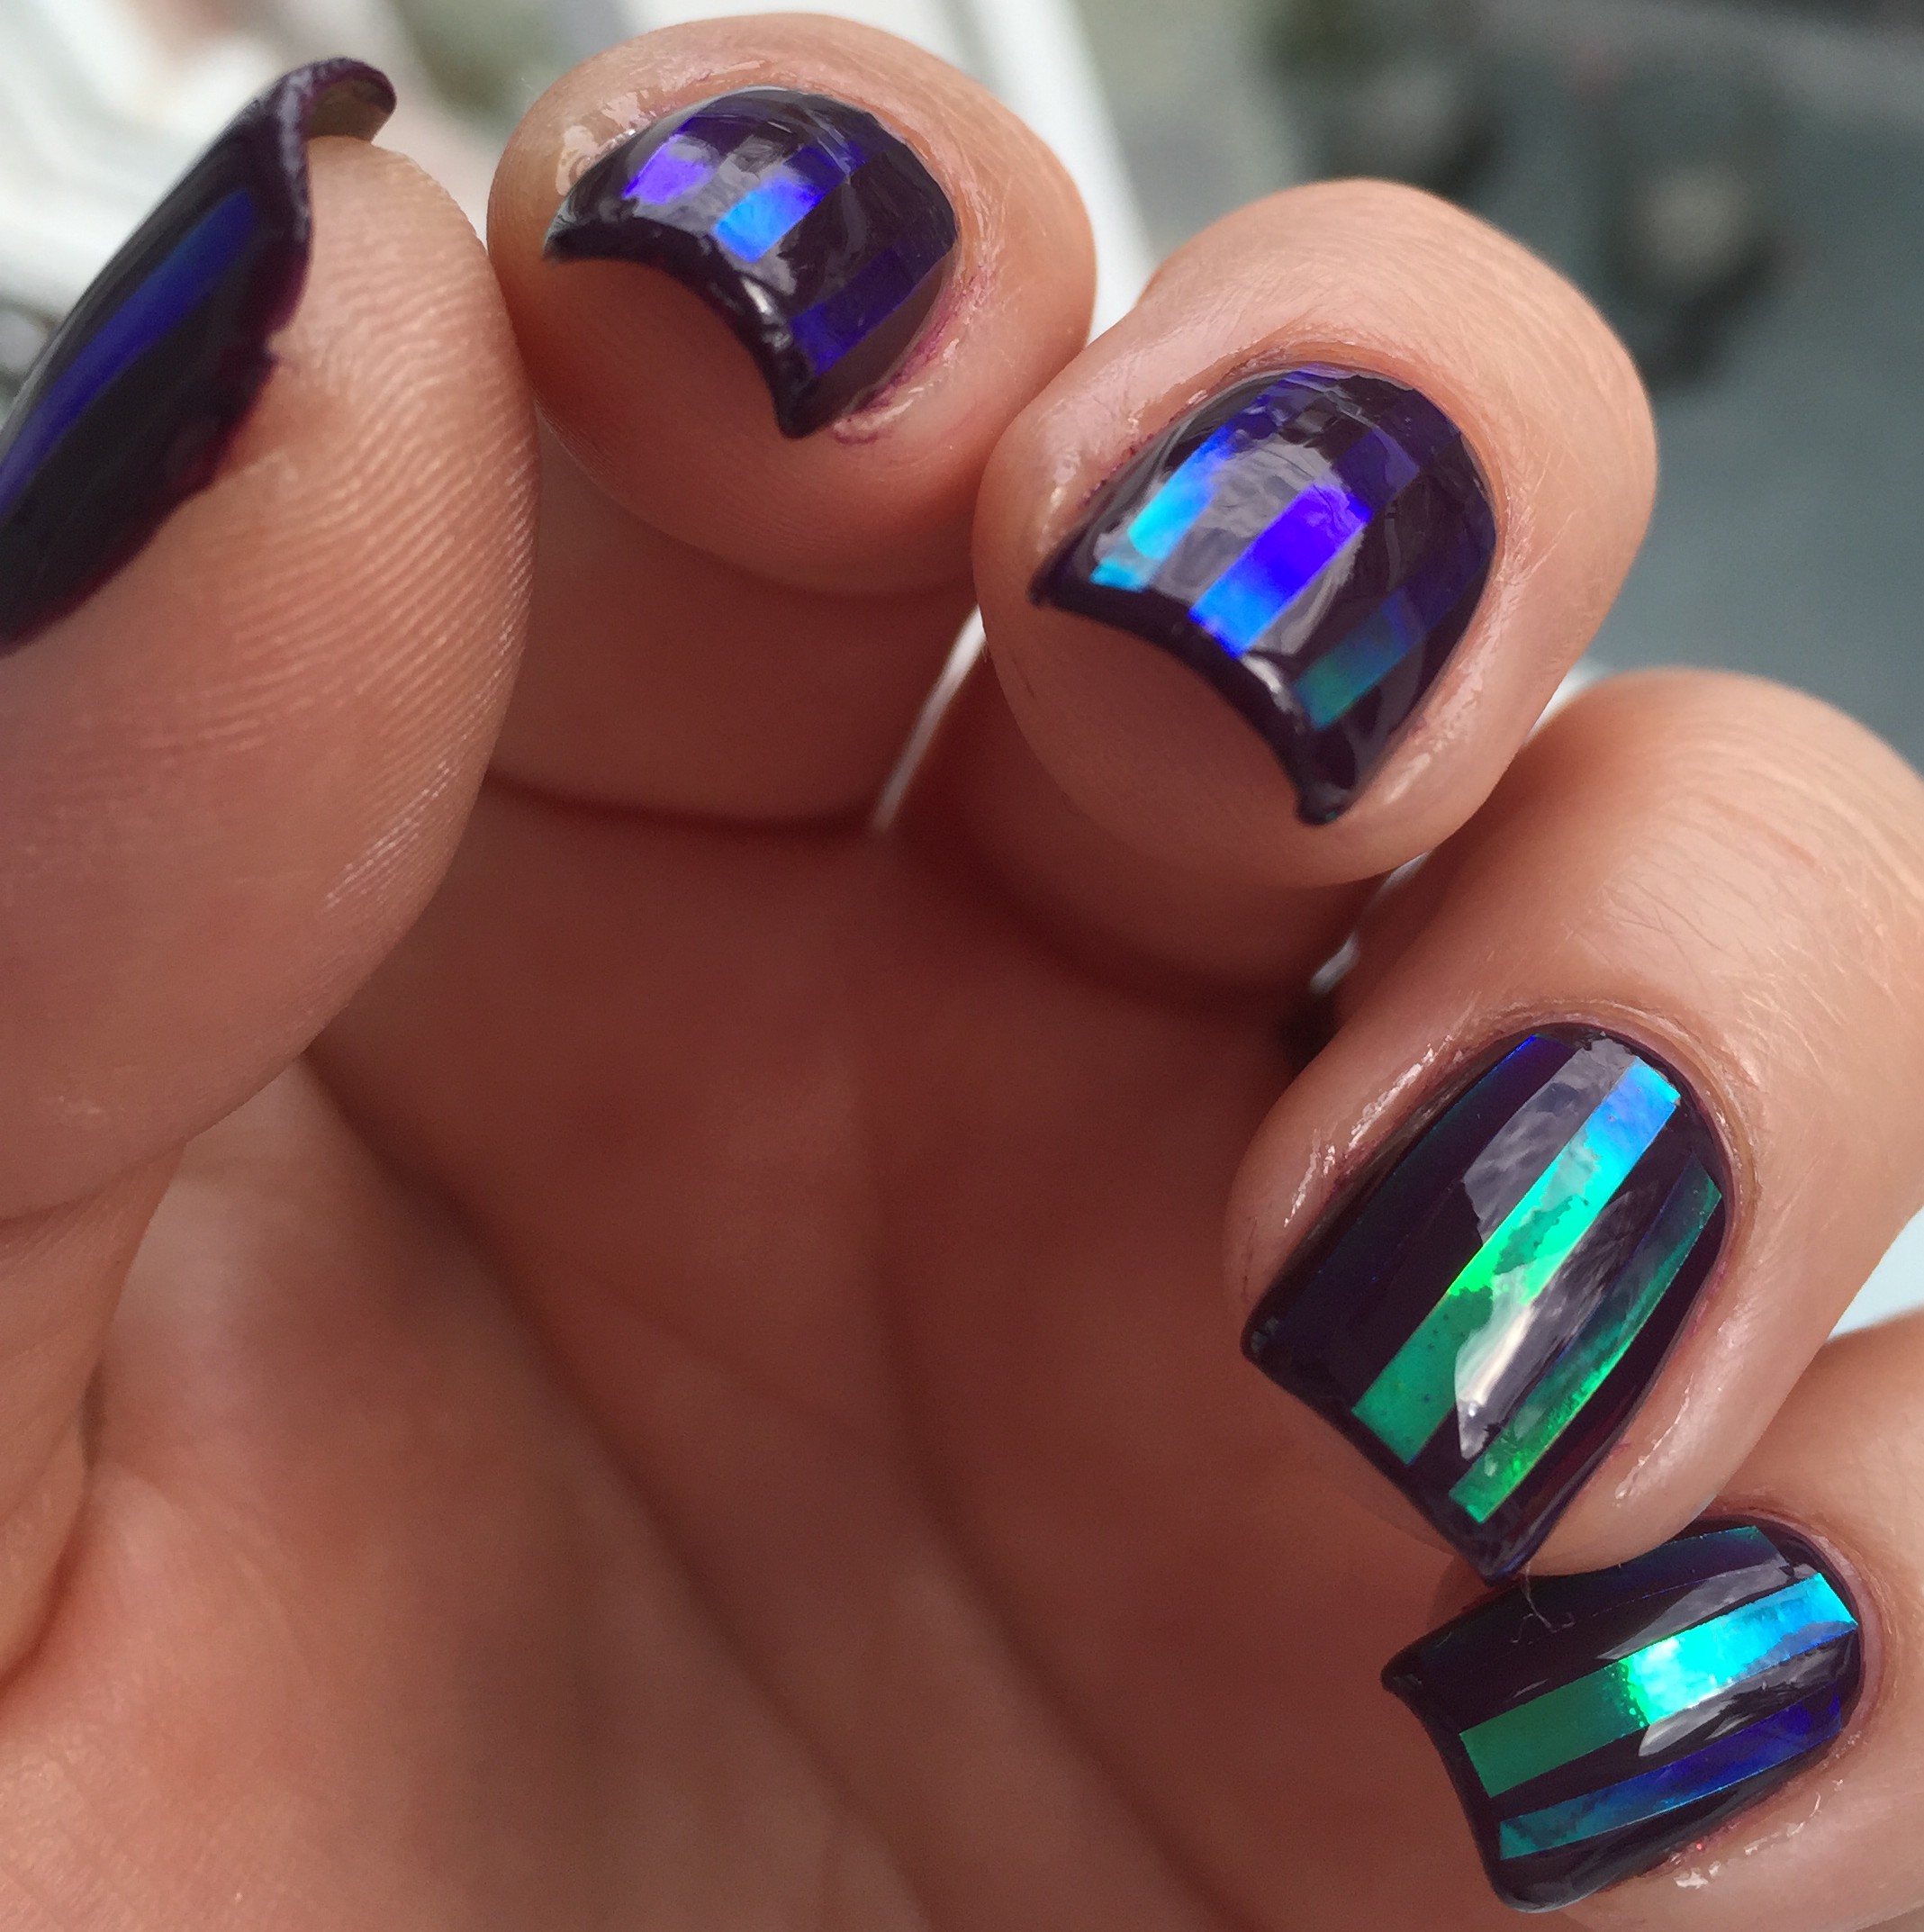
I then painted my nails this dark berry color, Jordana – Hypnotizing. This particular polish dries darker than it appears in the bottle. I sort of liked the color in the bottle a little better, but it’s still super pretty. Really, any dark color will work for this look. A dark blue or green would look great, and black would work just fine, too. If you use a lighter polish, you’ll get a more subtle effect. ITP tends to reflect gold/green/blue when it’s over dark colors. Over light colors it reflects pink/gold.
 While my purple polish was drying, I took one of my smallest dotting tools and dipped the end in wax from a candle I was burning. When the wax cools, it remains just tacky enough to pick up
  the pieces of ITP. This is actually a great little trick to pick up any little gems or glitter that you are trying to place on your nail. It gives you a lot of control, and in the end, the wax just wipes off the dotting tool. A toothpick dipped in wax would work just fine, too.
When my polish was pretty much dry, I applied a thick-ish coat of clear polish to one of my fingers. (I wouldn’t recommend using a quick dry top coat for this step. I think it would dry to quickly and you’d end up not really being able to get the strips of ITP to stick.) I then picked up a strip of ITP with my waxy dotting tool and placed it in the  center of my nail. I then added a strip on each side. I pressed each strip down kind of firmly, but not too firmly. I then moved on to the next finger. Polish, strip, strip, strip. Next finger: polish, strip, strip, strip… You get the pattern, right?
By the time I was done with my 10th finger, the first finger I did was pretty much dry. I realized that my waxy dotting was leaving little wax smudges on the strips of ITP. (See the picture on the left.) Because  the clear polish was pretty much dry at this point, I REALLY gently took a tissue and wiped down each nail. This took care of the wax smudges. Just be careful. You don’t want to mess up your work thus far! (See the picture on the right.)
 I let them dry for a while, since I had so many coats of polish on at this point, but I eventually applied two layers of quick dry top coat. Even after both layers of top coat dried completely, I can still feel the ridges of the ITP strips, so I think I might be adding a third layer of top coat.
I’ve been out and about a little bit, and I’ve gotten so many comments on these nails! Seriously, they are quite show stopping! I’ve got a few more ideas I’d like to try out using ITP, and I’ll make sure I write about it when I do. Thanks for reading! Let me know if you try this look!
